The HTML Handbook – Learn HTML for Beginners

Introduction
Welcome! I wrote this book to help you quickly learn HTML and get familiar with the advanced HTML topics.
HTML, a shorthand for Hyper Text Markup Language, is one of the most fundamental building blocks of the Web.
HTML was officially born in 1993 and since then it evolved into its current state, moving from simple text documents to powering rich Web Applications.
This handbook is aimed at a vast audience.
First, the beginner. I explain HTML from zero in a succinct but comprehensive way, so you can use this book to learn HTML from the basics.
Then, the professional. HTML is often considered like a secondary thing to learn. It might be given for granted.
Yet lots of things are obscure to many people. Me included. I wrote this handbook to help my understanding of the topic, because when I need to explain something, I better make sure I first know the thing inside out.
Even if you don't write HTML in your day to day work, knowing how HTML works can help save you some headaches when you need to understand it from time to time, for example while tweaking a web page.
You can reach me on Twitter @flaviocopes .
My website is flaviocopes.com .
Note: you can download a PDF / ePub / Mobi version of this book so you can read it offline.
- HTML Basics
- The document heading
- The document body
- Tags that interact with text
- Container tags and page structure HTML
- Multimedia tags: audio and video
- Accessibility
HTML is the foundation of the marvel called the Web.
There is an incredible power underneath this rather simple and limited set of rules, which lets us -- developers, makers, designers, writers, and tinkerers -- craft documents, apps, and experiences for people all around the globe.
My first HTML book came out in 1997 and was called "HTML Unleashed". A big, lots-of-pages, long tome.
20+ years have passed, and HTML is still the foundation of the Web, with minimal changes from back then.
Sure, we got more semantic tags, presentational HTML is no longer a thing, and CSS has taken care of the design of things.
HTML's success is based on one thing: simplicity .
It resisted being hijacked into an XML dialect via XHTML, when eventually people realized that thing was way, way too complex.
It did so because of another feature it provides us: forgiveness . There are some rules, right, but after you learn those, you have a lot of freedom.
Browsers learned to be resilient and to always try to do their best when parsing and presenting HTML to the users.
And the whole Web platform did one thing right: it never broke backward compatibility. Pretty incredibly, we can go back to HTML documents written in 1991, and they look pretty much as they looked back then.
We even know what the first web page was. It's this: http://info.cern.ch/hypertext/WWW/TheProject.html
And you can see the source of the page, thanks to another big feature of the Web and HTML: we can inspect the HTML of any web page .
Don't take this for granted. I don't know any other platform that gives us this ability.
The exceptional Developer Tools built into any browser let us inspect and take inspiration from HTML written by anyone in the world.
If you are new to HTML this book aims to help you get started. If you are a seasoned Web Developer this book will improve your knowledge.
I learned so much while writing it, even though I've been working with the Web for 20+ years, and I'm sure you'll find something new, too.
Or you'll re-learn something old you forgot.
In any case, the goal of the book is to be useful to you, and I hope it succeeds.
HTML BASICS
HTML is a standard defined by the WHATWG , an acronym for Web Hypertext Application Technology Working Group, an organization formed by people working on the most popular web browser. This means it's basically controlled by Google, Mozilla, Apple and Microsoft.
In the past the W3C (World Wide Web Consortium) was the organization in charge of creating the HTML standard.
The control informally moved from W3C to WHATWG when it became clear that the W3C push towards XHTML was not a good idea.
If you've never heard of XHTML, here's a short story. In the early 2000s, we all believed the future of the Web was XML (seriously). So HTML moved from being an SGML-based authoring language to an XML markup language.
It was a big change. We had to know, and respect, more rules. Stricter rules.
Eventually browser vendors realized this was not the right path for the Web, and they pushed back, creating what is now known as HTML5.
W3C did not really agree on giving up control of HTML, and for years we had 2 competing standards, each one aiming to be the official one. Eventually on 28 May 2019 it was made official by W3C that the "true" HTML version was the one published by WHATWG.
I mentioned HTML5. Let me explain this little story. I know, it's kind of confusing up to now, as with many things in life when many actors are involved, yet it's also fascinating.
We had HTML version 1 in 1993. Here's the original RFC .
HTML 2 followed in 1995.
We got HTML 3 in January 1997, and HTML 4 in December 1997.
Busy times!
20+ years went by, we had this entire XHTML thing, and eventually we got to this HTML5 "thing", which is not really just HTML any more.
HTML5 is a term that now defines a whole set of technologies, which includes HTML but adds a lot of APIs and standards like WebGL, SVG and more.
The key thing to understand here is this: there is no such thing (any more) as an HTML version now. It's a living standard. Like CSS, which is called "3", but in reality is a bunch of independent modules developed separately. Like JavaScript, where we have one new edition each year, but nowadays, the only thing that matters is which individual features are implemented by the engine.
Yes we call it HTML5, but HTML4 is from 1997. That's a long time for anything, let alone for the web.
This is where the standard now "lives": https://html.spec.whatwg.org/multipage .
HTML is the markup language we use to structure content that we consume on the Web.
HTML is served to the browser in different ways.
- It can be generated by a server-side application that builds it depending on the request or the session data, for example a Rails or Laravel or Django application.
- It can be generated by a JavaScript client-side application that generates HTML on the fly.
- In the simplest case, it can be stored in a file and served to the browser by a Web server.
Let's dive into this last case. Although in practice it's probably the least popular way to generate HTML, it's still essential to know the basic building blocks.
By convention, an HTML file is saved with a .html or .htm extension.
Inside this file, we organize the content using tags .
Tags wrap the content, and each tag gives a special meaning to the text it wraps.
Let's make a few examples.
This HTML snippet creates a paragraph using the p tag:
This HTML snippet creates a list of items using the ul tag, which means unordered list , and the li tags, which mean list item :
When an HTML page is served by the browser, the tags are interpreted, and the browser renders the elements according to the rules that define their visual appearance.
Some of those rules are built-in, such as how a list renders or how a link is underlined in blue.
Some other rules are set by you with CSS.
HTML is not presentational. It's not concerned with how things look . Instead, it's concerned with what things mean .
It's up to the browser to determine how things look, with the directives defined by who builds the page, with the CSS language.
Now, those two examples I made are HTML snippets taken outside of a page context.
HTML page structure
Let's make an example of a proper HTML page.
Things start with the Document Type Declaration (aka doctype ), a way to tell the browser this is an HTML page, and which version of HTML we are using.
Modern HTML uses this doctype:
Then we have the html element, which has an opening and closing tag:
Most tags come in pairs with an opening tag and a closing tag. The closing tag is written the same as the opening tag, but with a / :
There are a few self-closing tags, which means they don't need a separate closing tag as they don't contain anything in them .
The html starting tag is used at the beginning of the document, right after the document type declaration.
The html ending tag is the last thing present in an HTML document.
Inside the html element we have 2 elements: head and body :
Inside head we will have tags that are essential to creating a web page, like the title, the metadata, and internal or external CSS and JavaScript. Mostly things that do not directly appear on the page, but only help the browser (or bots like the Google search bot) display it properly.
Inside body we will have the content of the page. The visible stuff .
Tags vs elements
I mentioned tags and elements. What's the difference?
Elements have a starting tag and a closing tag. In this example, we use the p starting and closing tags to create a p element:
So, an element constitutes the whole package :
- starting tag
- text content (and possibly other elements)
- closing tag
If an element has doesn't have a closing tag, it is only written with the starting tag, and it cannot contain any text content.
That said, I might use the tag or element term in the book meaning the same thing, except if I explicitly mention starting tag or ending tag.
The starting tag of an element can have special snippets of information we can attach, called attributes .
Attributes have the key="value" syntax:
You can also use single quotes, but using double quotes in HTML is a nice convention.
We can have many of them:
and some attributes are boolean, meaning you only need the key:
The class and id attributes are two of the most common you will find used.
They have a special meaning, and they are useful both in CSS and JavaScript.
The difference between the two is that an id is unique in the context of a web page; it cannot be duplicated.
Classes, on the other hand, can appear multiple times on multiple elements.
Plus, an id is just one value. class can hold multiple values, separated by a space:
It's common to use the dash - to separate words in a class value, but it's just a convention.
Those are just two of the possible attributes you can have. Some attributes are only used for one tag. They are highly specialized.
Other attributes can be used in a more general way. You just saw id and class , but we have other ones too, like style which can be used to insert inline CSS rules on an element.
Case insensitive
HTML is case insensitive. Tags can be written in all caps, or lowercase. In the early days, caps were the norm. Today lowercase is the norm. It is a convention.
You usually write like this:
not like this:
White space
Pretty important. In HTML, even if you add multiple white spaces into a line, it's collapsed by the browser's CSS engine.
For example the rendering of this paragraph:
is the same as this:
and the same as this:
> Using the white-space CSS property you can change how things behave. You can find more information on how CSS processes white space in the CSS Spec
I typically favor
Nested tags should be indented with 2 or 4 characters, depending on your preference:
Note: this "white space is not relevant" feature means that if you want to add additional space, it can make you pretty mad. I suggest you use CSS to make more space when needed.
Note: in special cases, you can use the HTML entity (an acronym that means non-breaking space ) - more on HTML entities later on. I think this should not be abused. CSS is always preferred to alter the visual presentation.
THE DOCUMENT HEADING
The head tag contains special tags that define the document properties.
It's always written before the body tag, right after the opening html tag:
We never use attributes on this tag. And we don't write content in it.
It's just a container for other tags. Inside it we can have a wide variety of tags, depending on what you need to do:
The title tag
The title tag determines the page title. The title is displayed in the browser, and it's especially important as it's one of the key factors for Search Engine Optimization (SEO).
The script tag
This tag is used to add JavaScript into the page.
You can include it inline, using an opening tag, the JavaScript code and then the closing tag:
Or you can load an external JavaScript file by using the src attribute:
The type attribute by default is set to text/javascript , so it's completely optional.
There is something pretty important to know about this tag.
Sometimes this tag is used at the bottom of the page, just before the closing </body> tag. Why? For performance reasons.
Loading scripts by default blocks the rendering of the page until the script is parsed and loaded.
By putting it at the bottom of the page, the script is loaded and executed after the whole page is already parsed and loaded, giving a better experience to the user over keeping it in the head tag.
My opinion is that this is now bad practice. Let script live in the head tag.
In modern JavaScript we have an alternative this is more performant than keeping the script at the bottom of the page -- the defer attribute. This is an example that loads a file.js file, relative to the current URL:
This is the scenario that triggers the faster path to a fast-loading page, and fast-loading JavaScript.
Note: the async attribute is similar, but in my opinion a worse option than defer . I describe why, in more detail, on page https://flaviocopes.com/javascript-async-defer/
The noscript tag
This tag is used to detect when scripts are disabled in the browser.
Note: users can choose to disable JavaScript scripts in the browser settings. Or the browser might not support them by default.
It is used differently depending on whether it's put in the document head or in the document body.
We're talking about the document head now, so let's first introduce this usage.
In this case, the noscript tag can only contain other tags:
to alter the resources served by the page, or the meta information, if scripts are disabled.
In this example I set an element with the no-script-alert class to display if scripts are disabled, as it was display: none by default:
Let's solve the other case: if put in the body, it can contain content, like paragraphs and other tags, which are rendered in the UI.
The link tag
The link tag is used to set relationships between a document and other resources.
It's mainly used to link an external CSS file to be loaded.
This element has no closing tag.
The media attribute allows the loading of different stylesheets depending on the device capabilities:
We can also link to resources other than stylesheets.
For example we can associate an RSS feed using
Or we can associate a favicon using:
This tag was also used for multi-page content, to indicate the previous and next page using rel="prev" and rel="next" . Mostly for Google. As of 2019, Google announced it does not use this tag any more because it can find the correct page structure without it.
The style tag
This tag can be used to add styles into the document, rather than loading an external stylesheet.
As with the link tag, you can use the media attribute to use that CSS only on the specified medium:
The base tag
This tag is used to set a base URL for all relative URLs contained in the page.
The meta tag
Meta tags perform a variety of tasks and they are very, very important.
Especially for SEO.
meta elements only have the starting tag.
The most basic one is the description meta tag:
This might be used by Google to generate the page description in its result pages, if it finds it better describes the page than the on-page content (don't ask me how).
The charset meta tag is used to set the page character encoding. utf-8 in most cases:
The robots meta tag instructs the Search Engine bots whether to index a page or not:
Or if they should follow links or not:
You can set nofollow on individual links, too. This is how you can set nofollow globally.
You can combine them:
The default behavior is index, follow .
You can use other properties, including nosnippet , noarchive , noimageindex and more.
You can also just tell Google instead of targeting all search engines:
And other search engines might have their own meta tag, too.
Speaking of which, we can tell Google to disable some features. This prevents the translate functionality in the search engine results:
The viewport meta tag is used to tell the browser to set the page width based on the device width.
See more about this tag .
Another rather popular meta tag is the http-equiv="refresh" one. This line tells the browser to wait 3 seconds, then redirect to that other page:
Using 0 instead of 3 will redirect as soon as possible.
This is not a full reference; Other less-used meta tags exist.
After this document heading introduction, we can start diving into the document body.
THE DOCUMENT BODY
After the closing head tag, we can only have one thing in an HTML document: the body element.
Just like the head and html tags, we can only have one body tag in one page.
Inside the body tag we have all the tags that define the content of the page.
Technically, the start and ending tags are optional. But I consider it a good practice to add them. Just for clarity.
In the next chapters we'll define the variety of tags you can use inside the page body.
But before, we must introduce a difference between block elements and inline elements.
Block elements vs inline elements
Visual elements, the ones defined in the page body, can be generally classified in 2 categories:
- block elements ( p , div , heading elements, lists and list items, ...)
- inline elements ( a , span , img , ...)
What is the difference?
Block elements, when positioned in the page, do not allow other elements next to them. To the left, or to the right.
Inline elements instead can sit next to other inline elements.
The difference also lies in the visual properties we can edit using CSS. We can alter the width/height, margin, padding and border of block elements. We can't do that for inline elements.
Note that using CSS we can change the default for each element, setting a p tag to be inline, for example, or a span to be a block element.
Another difference is that inline elements can be contained in block elements. The reverse is not true.
Some block elements can contain other block elements, but it depends. The p tag for example does not allow such option.
TAGS THAT INTERACT WITH TEXT
This tag defines a paragraph of text.
It's a block element.
Inside it, we can add any inline element we like, like span or a .
We cannot add block elements.
We cannot nest a p element into another one.
By default browsers style a paragraph with a margin on top and at the bottom. 16px in Chrome, but the exact value might vary between browsers.
This causes two consecutive paragraphs to be spaced, replicating what we think of a "paragraph" in printed text.
The span tag
This is an inline tag that can be used to create a section in a paragraph that can be targeted using CSS:
This tag represents a line break. It's an inline element, and does not need a closing tag.
We use it to create a new line inside a p tag, without creating a new paragraph.
And compared to creating a new paragraph, it does not add additional spacing.
The heading tags
HTML provides us 6 heading tags. From most important to least important, we have h1 , h2 , h3 , h4 , h5 , h6 .
Typically a page will have one h1 element, which is the page title. Then you might have one or more h2 elements depending on the page content.
Headings, especially the heading organization, are also essential for SEO, and search engines use them in various ways.
The browser by default will render the h1 tag bigger, and will make the elements size smaller as the number near h increases:

All headings are block elements. They cannot contain other elements, just text.
The strong tag
This tag is used to mark the text inside it as strong . This is pretty important, it's not a visual hint, but a semantic hint. Depending on the medium used, its interpretation will vary.
Browsers by default make the text in this tag bold .
This tag is used to mark the text inside it as emphasized . Like with strong , it's not a visual hint but a semantic hint.
Browsers by default make the text in this italic .
The blockquote HTML tag is useful to insert citations in the text.
Browsers by default apply a margin to the blockquote element. Chrome applies a 40px left and right margin, and a 10px top and bottom margin.
The q HTML tag is used for inline quotes.
Horizontal line
Not really based on text, but the hr tag is often used inside a page. It means horizontal rule , and it adds a horizontal line in the page.
Useful to separate sections in the page.
Code blocks
The code tag is especially useful to show code, because browsers give it a monospaced font.
That's typically the only thing that browsers do. This is the CSS applied by Chrome:
This tag is typically wrapped in a pre tag, because the code element ignores whitespace and line breaks. Like the p tag.
Chrome gives pre this default styling:
which prevents white space collapsing and makes it a block element.
We have 3 types of lists:
- unordered lists
- ordered lists
- definition lists
Unordered lists are created using the ul tag. Each item in the list is created with the li tag:
Ordered lists are similar, just made with the ol tag:
The difference between the two is that ordered lists have a number before each item:

Definition lists are a bit different. You have a term, and its definition:
This is how browsers typically render them:

I must say you rarely see them in the wild, for sure not much as ul and ol , but sometimes they might be useful.
Other text tags
There is a number of tags with presentational purposes:
- the mark tag
- the ins tag
- the del tag
- the sup tag
- the sub tag
- the small tag
This is an example of the visual rendering of them which is applied by default by browsers:

You might wonder, how is b different than strong ? And how i is different than em ?
The difference lies in the semantic meaning. While b and i are a direct hint at the browser to make a piece of text bold or italic, strong and em give the text a special meaning, and it's up to the browser to give the styling. Which happens to be exactly the same as b and i , by default. Although you can change that using CSS.
There are a number of other, less used tags related to text. I just mentioned the ones that I see used the most.
Links are defined using the a tag. The link destination is set via its href attribute.
Between the starting and closing tag we have the link text.
The above example is an absolute URL. Links also work with relative URLs:
In this case, when clicking the link the user is moved to the /test URL on the current origin.
Be careful with the / character. If omitted, instead of starting from the origin, the browser will just add the test string to the current URL.
Example, I'm on the page https://flaviocopes.com/axios/ and I have these links:
- /test once clicked brings me to https://flaviocopes.com/test
- test once clicked brings me to https://flaviocopes.com/axios/test
Link tags can include other things inside them, not just text. For example, images:
or any other elements, except other <a> tags.
If you want to open the link in a new tab, you can use the target attribute:
CONTAINER TAGS AND PAGE STRUCTURE HTML
Container tags.
HTML provides a set of container tags. Those tags can contain an unspecified set of other tags.
and it can be confusing to understand the difference between them.
Let's see when to use each one of them.
The article tag identifies a thing that can be independent from other things in a page.
For example a list of blog posts in the homepage.
Or a list of links.
We're not limited to lists: an article can be the main element in a page.
Inside an article tag we should have a title ( h1 - h6 ) and
Represents a section of a document. Each section has a heading tag ( h1 - h6 ), then the section body .
It's useful to break a long article into different sections .
Shouldn't be used as a generic container element. div is made for this.
div is the generic container element:
You often add a class or id attribute to this element, to allow it to be styled using CSS.
We use div in any place where we need a container but the existing tags are not suited.
Tags related to page
This tag is used to create the markup that defines the page navigation. Into this we typically add an ul or ol list:
The aside tag is used to add a piece of content that is related to the main content.
A box where to add a quote, for example. Or a sidebar.
Using aside is a signal that the things it contains are not part of the regular flow of the section it lives into.
The header tag represents a part of the page that is the introduction. It can for example contain one or more heading tag ( h1 - h6 ), the tagline for the article, an image.
The main tag represents the main part of a page:
The footer tag is used to determine the footer of an article, or the footer of the page:
Forms are the way you can interact with a page, or an app, built with Web technologies.
You have a set of controls, and when you submit the form, either with a click to a "submit" button or programmatically, the browser will send the data to the server.
By default this data sending causes the page to reload after the data is sent, but using JavaScript you can alter this behavior (not going to explain how in this book).
A form is created using the form tag:
By default forms are submitted using the GET HTTP method. Which has its drawbacks, and usually you want to use POST.
You can set the form to use POST when submitted by using the method attribute:
The form is submitted, either using GET or POST, to the same URL where it resides.
So if the form is in the https://flaviocopes.com/contacts page, pressing the "submit" button will make a request to that same URL.
Which might result in nothing happening.
You need something server-side to handle the request, and typically you "listen" for those form submit events on a dedicated URL.
You can specify the URL via the action parameter:
This will cause the browser to submit the form data using POST to the /new-contact URL on the same origin.
If the origin (protocol + domain + port) is https://flaviocopes.com (port 80 is the default), this means the form data will be sent to https://flaviocopes.com/new-contact .
I talked about data. Which data?
Data is provided by users via the set of controls that are available on the Web platform:
- input boxes (single line text)
- text areas (multiline text)
- select boxes (choose one option from a drop-down menu)
- radio buttons (choose one option from a list always visible)
- checkboxes (choose zero, one or more option)
- file uploads
Let's introduce each one of them in the following form fields overview.
The input tag
The input field is one of the most widely used form elements. It's also a very versatile element, and it can completely change behavior based on the type attribute.
The default behavior is to be a single-line text input control:
Equivalent to using:
As with all the other fields that follow, you need to give the field a name in order for its content to be sent to the server when the form is submitted:
The placeholder attribute is used to have some text showing up, in light gray, when the field is empty. Useful to add a hint to the user for what to type in:
Using type="email" will validate client-side (in the browser) an email for correctness (semantic correctness, not ensuring the email address is existing) before submitting.
Using type="password" will make every key entered appear as an asterisk (*) or dot, useful for fields that host a password.
You can have an input element accept only numbers:
You can specify a minimum and maximum value accepted:
The step attribute helps identify the steps between different values. For example this accepts a value between 10 and 50, at steps of 5:
Hidden field
Fields can be hidden from the user. They will still be sent to the server upon the form submit:
This is commonly used to store values like a CSRF token, used for security and user identification, or even to detect robots sending spam, using special techniques.
It can also just be used to identify a form and its action.
Setting a default value
All those fields accept a predefined value. If the user does not change it, this will be the value sent to the server:
If you set a placeholder, that value will appear if the user clears the input field value:
Form submit
The type="submit" field is a button that, once pressed by the user, submits the form:
The value attribute sets the text on the button, which if missing shows the "Submit" text:
Form validation
Browsers provide client-side validation functionality to forms.
You can set fields as required, ensuring they are filled, and enforce a specific format for the input of each field.
Let's see both options.
Set fields as required
The required attribute helps you with validation. If the field is not set, client-side validation fails and the browser does not submit the form:
Enforce a specific format
I described the type="email" field above. It automatically validates the email address according to a format set in the specification.
In the type="number" field, I mentioned the min and max attribute to limit values entered to an interval.
You can do more.
You can enforce a specific format on any field.
The pattern attribute gives you the ability to set a regular expression to validate the value against.
I recommend reading my Regular Expressions Guide at flaviocopes.com/javascript-regular-expressions/ .
pattern=" https://.* "
Other fields
File uploads.
You can load files from your local computer and send them to the server using a type="file" input element:
You can attach multiple files:
You can specify one or more file types allowed using the accept attribute. This accepts images:
You can use a specific MIME type, like application/json or set a file extension like .pdf . Or set multiple file extensions, like this:
The type="button" input fields can be used to add additional buttons to the form, that are not submit buttons:
They are used to programmatically do something, using JavaScript.
There is a special field rendered as a button, whose special action is to clear the entire form and bring back the state of the fields to the initial one:
Radio buttons
Radio buttons are used to create a set of choices, of which one is pressed and all the others are disabled.
The name comes from old car radios that had this kind of interface.
You define a set of type="radio" inputs, all with the same name attribute, and different value attribute:
Once the form is submitted, the color data property will have one single value.
There's always one element checked. The first item is the one checked by default.
You can set the value that's pre-selected using the checked attribute. You can use it only once per radio inputs group.
Similar to radio boxes, but they allow multiple values to be chosen, or none at all.
You define a set of type="checkbox" inputs, all with the same name attribute, and different value attribute:
All those checkboxes will be unchecked by default. Use the checked attribute to enable them on page load.
Since this input field allows multiple values, upon form submit the value(s) will be sent to the server as an array.
Date and time
We have a few input types to accept date values.
The type="date" input field allows the user to enter a date, and shows a date picker if needed:
The type="time" input field allows the user to enter a time, and shows a time picker if needed:
The type="month" input field allows the user to enter a month and a year:
The type="week" input field allows the user to enter a week and a year:
All those fields allow to limit the range and the step between each value. I recommend checking MDN for the little details on their usage.
The type="datetime-local" field lets you choose a date and a time.
Here is a page to test them all: https://codepen.io/flaviocopes/pen/ZdWQPm
Color picker
You can let users pick a color using the type="color" element:
You set a default value using the value attribute:
The browser will take care of showing a color picker to the user.
This input element shows a slider element. People can use it to move from a starting value to an ending value:
You can provide an optional step:
The type="tel" input field is used to enter a phone number:
The main selling point for using tel over text is on mobile, where the device can choose to show a numeric keyboard.
Specify a pattern attribute for additional validation:
The type="url" field is used to enter a URL.
You can validate it using the pattern attribute:
The textarea tag
The textarea element allows users to enter multi-line text. Compared to input , it requires an ending tag:
You can set the dimensions using CSS, but also using the rows and cols attributes:
As with the other form tags, the name attribute determines the name in the data sent to the server:
The select tag
This tag is used to create a drop-down menu.
The user can choose one of the options available.
Each option is created using the option tag. You add a name to the select, and a value to each option:
You can set an option disabled:
You can have one empty option:
Options can be grouped using the optgroup tag. Each option group has a label attribute:
In the early days of the web tables were a very important part of building layouts.
Later on they were replaced by CSS and its layout capabilities, and today we have powerful tools like CSS Flexbox and CSS Grid to build layouts. Tables are now used just for, guess what, building tables!
The table tag
You define a table using the table tag:
Inside the table we'll define the data. We reason in terms of rows, which means we add rows into a table (not columns). We'll define columns inside a row.
A row is added using the tr tag, and that's the only thing we can add into a table element:
This is a table with 3 rows.
The first row can take the role of the header.
Column headers
The table header contains the name of a column, typically in a bold font.
Think about an Excel / Google Sheets document. The top A-B-C-D... header.

We define the header using the th tag:
The table content
The content of the table is defined using td tags, inside the other tr elements:
This is how browsers render it, if you don't add any CSS styling:

Adding this CSS:
makes the table look more like a proper table:

Span columns and rows
A row can decide to span over 2 or more columns, using the colspan attribute:

Or it can span over 2 or more rows, using the rowspan attribute:

Row headings
Before I explained how you can have column headings, using the th tag inside the first tr tag of the table.
You can add a th tag as the first element inside a tr that's not the first tr of the table, to have row headings:

More tags to organize the table
You can add 3 more tags into a table, to have it more organized.
This is best when using big tables. And to properly define a header and a footer, too.
Those tags are
They wrap the tr tags to clearly define the different sections of the table. Here's an example:

Table caption
A table should have a caption tag that describes its content. That tag should be put immediately after the opening table tag:
MULTIMEDIA TAGS: AUDIO AND VIDEO
In this section I want to show you the audio and video tags.
The audio tag
This tag allows you to embed audio content in your HTML pages.
This element can stream audio, maybe using a microphone via getUserMedia() , or it can play an audio source which you reference using the src attribute:
By default the browser does not show any controls for this element. Which means the audio will play only if set to autoplay (more on this later) and the user can't see how to stop it or control the volume or move through the track.
To show the built-in controls, you can add the controls attribute:
Controls can have a custom skin.
You can specify the MIME type of the audio file using the type attribute. If not set, the browser will try to automatically determine it:
An audio file by default does not play automatically. Add the autoplay attribute to play the audio automatically:
Note: mobile browsers don't allow autoplay
The loop attribute restarts the audio playing at 0:00 if set; otherwise, if not present, the audio stops at the end of the file:
You can also play an audio file muted using the muted attribute (not really sure what's the usefulness of this):
Using JavaScript you can listen for various events happening on an audio element, the most basic of which are:
- play when the file starts playing
- pause when the audio playing was paused
- playing when the audio is resumed from a pause
- ended when the end of the audio file was reached
The video tag
This tag allows you to embed video content in your HTML pages.
This element can stream video, using a webcam via getUserMedia() or WebRTC , or it can play a video source which you reference using the src attribute:
By default the browser does not show any controls for this element, just the video.
Which means the video will play only if set to autoplay (more on this later) and the user can't see how to stop it, pause it, control the volume or skip to a specific position in the video.
You can specify the MIME type of the video file using the type attribute. If not set, the browser will try to automatically determine it:
A video file by default does not play automatically. Add the autoplay attribute to play the video automatically:
Some browsers also require the muted attribute to autoplay. The video autoplays only if muted:
The loop attribute restarts the video playing at 0:00 if set; otherwise, if not present, the video stops at the end of the file:
You can set an image to be the poster image:
If not present, the browser will display the first frame of the video as soon as it's available.
You can set the width and height attributes to set the space that the element will take so that the browser can account for it and it does not change the layout when it's finally loaded. It takes a numeric value, expressed in pixels.
Using JavaScript you can listen for various events happening on an video element, the most basic of which are:
- pause when the video was paused
- playing when the video is resumed from a pause
- ended when the end of the video file was reached
The iframe tag allows us to embed content coming from other origins (other sites) into our web page.
Technically, an iframe creates a new nested browsing context. This means that anything in the iframe does not interfere with the parent page, and vice versa. JavaScript and CSS do not "leak" to/from iframes.
Many sites use iframes to perform various things. You might be familiar with Codepen, Glitch or other sites that allow you to code in one part of the page, and you see the result in a box. That's an iframe.
You create one this way:
You can load an absolute URL, too:
You can set a set of width and height parameters (or set them using CSS) otherwise the iframe will use the defaults, a 300x150 pixels box:
The srcdoc attribute lets you specify some inline HTML to show. It's an alternative to src , but recent and not supported in Edge 18 and lower, and in IE:
The sandbox attribute allows us to limit the operations allowed in the iframes.
If we omit it, everything is allowed:
If we set it to "", nothing is allowed:
We can select what to allow by adding options in the sandbox attribute. You can allow multiple ones by adding a space in between. Here's an incomplete list of the options you can use:
- allow-forms : allow to submit forms
- allow-modals allow to open modals windows, including calling alert() in JavaScript
- allow-orientation-lock allow to lock the screen orientation
- allow-popups allow popups, using window.open() and target="_blank" links
- allow-same-origin treat the resource being loaded as same origin
- allow-scripts lets the loaded iframe run scripts (but not create popups).
- allow-top-navigation gives access to the iframe to the top level browsing context
Currently experimental and only supported by Chromium-based browsers, this is the future of resource sharing between the parent window and the iframe.
It's similar to the sandbox attribute, but lets us allow specific features, including:
- accelerometer gives access to the Sensors API Accelerometer interface
- ambient-light-sensor gives access to the Sensors API AmbientLightSensor interface
- autoplay allows to autoplay video and audio files
- camera allows to access the camera from the getUserMedia API
- display-capture allows to access the screen content using the getDisplayMedia API
- fullscreen allows to access fullscreen mode
- geolocation allows to access the Geolocation API
- gyroscope gives access to the Sensors API Gyroscope interface
- magnetometer gives access to the Sensors API Magnetometer interface
- microphone gives access to the device microphone using the getUserMedia API
- midi allows access to the Web MIDI API
- payment gives access to the Payment Request API
- speaker allows access to playing audio through the device speakers
- usb gives access to the WebUSB API.
- vibrate gives access to the Vibration API
- vr gives access to the WebVR API
When loading an iframe, the browser sends it important information about who is loading it in the Referer header (notice the single r , a typo we must live with).
The misspelling of referrer originated in the original proposal by computer scientist Phillip Hallam-Baker to incorporate the field into the HTTP specification. The misspelling was set in stone by the time of its incorporation into the Request for Comments standards document RFC 1945
The referrerpolicy attribute lets us set the referrer to send to the iframe when loading it. The referrer is an HTTP header that lets the page know who is loading it. These are the allowed values:
- no-referrer-when-downgrade it's the default, and does not send the referrer when the current page is loaded over HTTPS and the iframe loads on the HTTP protocol
- no-referrer does not send the referrer header
- origin the referrer is sent, and only contains the origin (port, protocol, domain), not the origin + path which is the default
- origin-when-cross-origin when loading from the same origin (port, protocol, domain) in the iframe, the referrer is sent in its complete form (origin + path). Otherwise only the origin is sent
- same-origin the referrer is sent only when loading from the same origin (port, protocol, domain) in the iframe
- strict-origin sends the origin as the referrer if the current page is loaded over HTTPS and the iframe also loads on the HTTPS protocol. Sends nothing if the iframe is loaded over HTTP
- strict-origin-when-cross-origin sends the origin + path as the referrer when working on the same origin. Sends the origin as the referrer if the current page is loaded over HTTPS and the iframe also loads on the HTTPS protocol. Sends nothing if the iframe is loaded over HTTP
- unsafe-url : sends the origin + path as the referrer even when loading resources from HTTP and the current page is loaded over HTTPS
Images can be displayed using the img tag.
This tag accepts a src attribute, which we use to set the image source:
We can use a wide set of images. The most common ones are PNG, JPEG, GIF, SVG and more recently WebP.
The HTML standard requires an alt attribute to be present, to describe the image. This is used by screen readers and also by search engine bots:
You can set the width and height attributes to set the space that the element will take, so that the browser can account for it and it does not change the layout when it's fully loaded. It takes a numeric value, expressed in pixels.
The figure tag
The figure tag is often used along with the img tag.
figure is a semantic tag often used when you want to display an image with a caption. You use it like this:
The figcaption tag wraps the caption text.
Responsive images using srcset
The srcset attribute allows you to set responsive images that the browser can use depending on the pixel density or window width, according to your preferences. This way, it can only download the resources it needs to render the page, without downloading a bigger image if it's on a mobile device, for example.
Here's an example, where we give 4 additional images for 4 different screen sizes:
In the srcset we use the w measure to indicate the window width.
Since we do so, we also need to use the sizes attribute:
In this example the (max-width: 500px) 100vw, (max-width: 900px) 50vw, 800px string in the sizes attribute describes the size of the image in relation to the viewport, with multiple conditions separated by a semicolon.
The media condition max-width: 500px sets the size of the image in correlation to the viewport width. In short, if the window size is < 500px, it renders the image at 100% of the window size.
If the window size is bigger but < 900px , it renders the image at 50% of the window size.
And if even bigger, it renders the image at 800px.
The vw unit of measure can be new to you, and in short we can say that 1 vw is 1% of the window width, so 100vw is 100% of the window width.
A useful website to generate the srcset and progressively smaller images is https://responsivebreakpoints.com/ .
The picture tag
HTML also gives us the picture tag, which does a very similar job to srcset , and the differences are very subtle.
You use picture when instead of just serving a smaller version of a file, you completely want to change it. Or serve a different image format.
The best use case I found is when serving a WebP image, which is a format still not widely supported. In the picture tag you specify a list of images, and they will be used in order, so in the next example, browsers that support WebP will use the first image, and fallback to JPG if not:
The source tag defines one (or more) formats for the images. The img tag is the fallback in case the browser is very old and does not support the picture tag.
In the source tag inside picture you can add a media attribute to set media queries.
The example that follows kind of works like the above example with srcset :
But that's not its use case, because as you can see it's much more verbose.
The picture tag is recent but is now supported by all the major browsers except Opera Mini and IE (all versions).
ACCESSIBILITY
It's important we design our HTML with accessibility in mind.
Having accessible HTML means that people with disabilities can use the Web. There are totally blind or visually impaired users, people with hearing loss issues and a multitude of other different disabilities.
Unfortunately this topic does not take the importance it needs, and it doesn't seem as cool as others.
What if a person can't see your page, but still wants to consume its content? First, how do they do that? They can't use the mouse, they use something called a screen reader . You don't have to imagine that. You can try one now: Google provides the free ChromeVox Chrome Extension . Accessibility must also take care of allowing tools to easily select elements or navigate through the pages.
Web pages and Web apps are not always built with accessibility as one of their first goals, and maybe version 1 is released not accessible but it's possible to make a web page accessible after the fact. Sooner is better, but it's never too late.
It's important and in my country, websites built by the government or other public organizations must be accessible.
What does this mean to make an HTML accessible? Let me illustrate the main things you need to think about.
Note: there are several other things to take care about, which might go in the CSS topic, like colors, contrast and fonts. Or how to make SVG images accessible . I don't talk about them here.
Use semantic HTML
Semantic HTML is very important and it's one of the main things you need to take care of. Let me illustrate a few common scenarios.
It's important to use the correct structure for heading tags. The most important is h1 , and you use higher numbers for less important ones, but all the same-level headings should have the same meaning (think about it like a tree structure)
Use strong and em instead of b and i . Visually they look the same, but the first 2 have more meaning associated with them. b and i are more visual elements.
Lists are important. A screen reader can detect a list and provide an overview, then let the user choose to get into the list or not.
A table should have a caption tag that describes its content:
Use alt attributes for images
All images must have an alt tag describing the image content. It's not just a good practice, it's required by the HTML standard and your HTML without it is not validated.
It's also good for search engines, if that's an incentive for you to add it.
Use the role attribute
The role attribute lets you assign specific roles to the various elements in your page.
You can assign lots of different roles: complementary, list, listitem, main, navigation, region, tab, alert, application, article, banner, button, cell, checkbox, contentinfo, dialog, document, feed, figure, form, grid, gridcell, heading, img, listbox, row, rowgroup, search, switch, table, tabpanel, textbox, timer.
It's a lot and for the full reference of each of them I give you this MDN link . But you don't need to assign a role to every element in the page. Screen readers can infer from the HTML tag in most cases. For example you don't need to add a role tag to semantic tags like nav , button , form .
Let's take the nav tag example. You can use it to define the page navigation like this:
If you were forced to use a div tag instead of nav , you'd use the navigation role:
So here you got a practical example: role is used to assign a meaningful value when the tag does not convey the meaning already.
Use the tabindex attribute
The tabindex attribute allows you to change the order of how pressing the Tab key selects "selectable" elements. By defaults only links and form elements are "selectable" by navigation using the Tab key (and you don't need to set tabindex on them).
Adding tabindex="0" makes an element selectable:
Using tabindex="-1" instead removes an element from this tab-based navigation, and it can be pretty useful.
Use the aria attributes
ARIA is an acronym that means Accessible Rich Internet Applications and defines semantics that can be applied to elements.
This attribute is used to add a string to describe an element.
I use this attribute on my blog sidebar, where I have an input box for search without an explicit label, as it has a placeholder attribute.
aria-labelledby
This attribute sets a correlation between the current element and the one that labels it.
If you know how an input element can be associated to a label element, that's similar.
We pass the item id that describes the current element.
aria-describedby
This attribute lets us associate an element with another element that serves as description.
Use aria-hidden to hide content
I like a minimalistic design in my sites. My blog for example is mostly just content, with some links in the sidebar. But some things in the sidebar are just visual elements that don't add up to the experience of a person that can't see the page. Like my logo picture, or the dark/bright theme selector.
Adding the aria-hidden="true" attribute will tell screen readers to ignore that element.
Where to learn more
This is just an introduction to the topic. To learn more, I recommend these resources:
- https://www.w3.org/TR/WCAG20/
- https://webaim.org
- https://developers.google.com/web/fundamentals/accessibility/
You reached the end of the HTML Handbook.

Click here to get a PDF / ePub / Mobi version of this book to read offline !
Read more posts .
If this article was helpful, share it .
Learn to code for free. freeCodeCamp's open source curriculum has helped more than 40,000 people get jobs as developers. Get started
If you're seeing this message, it means we're having trouble loading external resources on our website.
If you're behind a web filter, please make sure that the domains *.kastatic.org and *.kasandbox.org are unblocked.
To log in and use all the features of Khan Academy, please enable JavaScript in your browser.
Unit 2: Intro to HTML/CSS: Making webpages
About this unit.
Learn how to use HTML and CSS to make webpages. HTML is the markup language that you surround content with, to tell browsers about headings, lists, tables, and more. CSS is the stylesheet language that you style the page with, to tell browsers to change the color, font, layout, and more.
Intro to HTML
- Welcome to the web! (Opens a modal)
- HTML basics (Opens a modal)
- Quick tip: HTML tags (Opens a modal)
- Challenge: Write a Poem (Opens a modal)
- HTML: Text emphasis (Opens a modal)
- Challenge: You can learn text tags (Opens a modal)
- HTML: Lists (Opens a modal)
- Challenge: Wishlist (Opens a modal)
- HTML: Images (Opens a modal)
- Challenge: A picture-perfect trip (Opens a modal)
Intro to CSS
- CSS Basics (Opens a modal)
- Quick tip: Selecting by tag name (Opens a modal)
- Challenge: Colorful creature (Opens a modal)
- CSS: Selecting by id (Opens a modal)
- Challenge: Seasonal ids (Opens a modal)
- CSS: Selecting by class (Opens a modal)
- Challenge: Apples and bananas classes (Opens a modal)
- Project: Travel webpage (Opens a modal)
- Using simple CSS selectors 4 questions Practice
More HTML tags
- HTML links (Opens a modal)
- Challenge: Links for learning (Opens a modal)
- HTML internal links (Opens a modal)
- Challenge: Jump around (Opens a modal)
- HTML tables (Opens a modal)
- Challenge: The dinner table (Opens a modal)
- HTML comments (Opens a modal)
- Project: Recipe book (Opens a modal)
CSS text properties
- CSS Zen Garden (Opens a modal)
- CSS font-family property (Opens a modal)
- Challenge: Fancy font families (Opens a modal)
- CSS font-size property (Opens a modal)
- Challenge: Great big font sizes (Opens a modal)
- CSS font styles and shorthand (Opens a modal)
- Challenge: Famous font formats (Opens a modal)
- More CSS text properties (Opens a modal)
- CSS inheritance (Opens a modal)
- Project: Blog (Opens a modal)
- Using CSS text properties 4 questions Practice
Web development tools
- Using the browser developer tools (Opens a modal)
- Developing webpages outside of Khan Academy (Opens a modal)
- Hosting your website on a server (Opens a modal)
- Hosting your website on Github (Opens a modal)
- CSS grouping elements (Opens a modal)
- Challenge: Group the groupers (Opens a modal)
- CSS width, height, and overflow (Opens a modal)
- Challenge: The overflowing ocean (Opens a modal)
- CSS box model (Opens a modal)
- Challenge: The boxer model (Opens a modal)
- CSS position (Opens a modal)
- Challenge: Position planet (Opens a modal)
- CSS in the wild: Google Maps (Opens a modal)
- CSS floating elements (Opens a modal)
- Challenge: Floating clouds (Opens a modal)
- Planning your webpage (Opens a modal)
- Project: Event invite (Opens a modal)
- Using CSS layout properties 5 questions Practice
More CSS selectors
- Using multiple CSS classes (Opens a modal)
- Challenge: A classy gallery (Opens a modal)
- Combining CSS class and element selectors (Opens a modal)
- Challenge: Classes of elements (Opens a modal)
- CSS descendant selectors (Opens a modal)
- Challenge: Descendants of Khan (Opens a modal)
- Grouping CSS selectors (Opens a modal)
- CSS dynamic pseudo-classes (Opens a modal)
- Challenge: Grouped animals (Opens a modal)
- CSS specificity (Opens a modal)
- CSS specificity rules 4 questions Practice
Other ways to embed CSS
- Using inline CSS styles (Opens a modal)
- Using external stylesheets (Opens a modal)
Further learning
- Webpage design (Opens a modal)
- HTML validation (Opens a modal)
- What to learn next (Opens a modal)
- Validating HTML 4 questions Practice
HTML beginner's tutorial: Build a webpage from scratch with HTML
Become a Software Engineer in Months, Not Years
From your first line of code, to your first day on the job — Educative has you covered. Join 2M+ developers learning in-demand programming skills.
If you are a web dev novice and want to get started with the exciting world of web design, you’ve probably heard of HTML , which is the foundation of every web page online. Any successful web developer or designer must have a strong understanding of HTML.
Today, we will go through a beginner’s tutorial on HTML and build a web page step-by-step. Most web development tutorials talk about CSS and JavaScript right away, but we want to make sure you have a solid understanding of HTML before moving onto the next steps.
We will discuss the basics of HTML that you’ll use throughout your web dev career. No prerequisite knowledge of programming is required, but to be most successful with this article, a basic understanding of programming is helpful. For a quick introduction or refresher, check out The Absolute Beginner’s Guide to Programming.
Today we will cover:
- What is HTML?
Key HTML terms and formatting
- How to build your own web page with HTML
What to learn next
Hyper Text Markup Language (HTML) is the markup language we use to make webpages. It is the basis of every website that you encounter on the internet. Think of HTML as the bricks that you need to build anything for the web. Once we write our HTML code, we can add other languages to the page, such as CSS and JavaScript, to add interactivity, style, and more.

Imagine a document that you would create in a word processor. That document will usually use different font sizes to indicate sections of the text, such as headers, main content, footers, table of contents, etc. HTML is the process of building that document and setting the sizes of our text.
HTML provides a website’s structure and layout. We define that structure using various elements. But in order for a browser to appear how we want it, it must be explicitly told what each piece of content is. HTML is how we communicate and tell a computer how to render. The computer can interpret our HTML elements and translate them onto the screen.
Explore HTML on your own. You can view the HTML source code of any website by right clicking on a rendered page and selecting “View Source”. This will open a page that details the HTML foundations of that site. Try it out with this article!
Now that we know what HTML is, let’s briefly introduce a few key terms before moving onto a step-by-step guide. You will use these basics throughout your entire web dev career!
Tags and elements
An element is an individual component of an HTML document that represents the semantics of that page. For example, the title element translates to the title of a page.
Semantics refers to the meaning of a particular element. Syntax refers to the structure of a programming language.
To create an element, we use tags . Think of these as descriptors for each piece of content you want on your page. Most tags are quite self-explanatory.
- <p> : used to describe a paragraph
- <img> : add an image
- <h1> : set the text to the largest size heading
- <a> : an anchor will create a hyperlink to other HTML files
To use tags, we wrap the content between an opening and closing tag. The closing tag uses the forward slash / , while the opening tag does not. HTML tags are case not sensitive so <P> is the same as <p> .
You can nest HTML elements when you want to apply multiple tags. Say you wanted to make a paragraph that is also bold. You could write the following HTML code:
Attributes and hyperlinks
HTML attributes provide additional information about our elements. Think of these like properties of an element. Attributes are placed in the opening tag, use the = sign, and wrap the attribute value in quotation marks " " .
Attributes can do all sorts of things to our elements such as embed images, add color, declare the language of a page, or add a title. For example, we can add color to our text using the following format.
Note: You can add color using Hex color codes (for specific colors) or one of the 140 text color names built-into HTML.
One of the most common uses of attribute is hyperlinking . We can connect any HTML page to another HTML page using an anchor tag. The href attribute will create a connection between the two sites.
Headings and lists
Headings are how we specify the difference between the main header and sub-headers. The HTML standard has six text heading elements, appropriately named h1 (the largest) through h6 (the smallest).
Note: Headers are used to represent text semantically. This is different than specifying font size. We use CSS to change font size.
If we want to list items, either as a bulleted of numbered list, we use the <li> tag. We can either create an unordered list (bulleted) or an ordered list (numbered).
- Unordered lists begins with the <ul> tag and the nested <li> tags for teach item.
- Ordered lists begins with the <ol> tag and the nested <li> tags for teach item.
Add images: <img> tag
We can add images to our webpage using the <img> tag. We need to add a src attribute that contains a file path to that image. You will also include an alt attribute, which provides an alternative text description in case the image does not load.
In the example below, we also defined two class attributes. The class attribute is used to identify specific elements with an identifier. This makes it possible to use an elements in a later part of our code. An element can have multiple class values, such as a title and a caption, as we use below.
Note: The image tag does not use a closing tag.
HTML tables
We can add tables to a webpage by translating a table’s data into row and columns. Each row/column pair will have a piece of data associated with it called a table cell . So, how do we build a table in HTML?
First, we declare an HTML table using the <table> tag. Then, we add rows to our table with the <tr> tag. From there, we specify the cells with the <td> tag.
Take a look at this example below, but note that the table is not stylized at all. It will only list the data as it is provided. If we want to add style to the table (background color, padding, borders, etc.), we must use the language CSS.
Formatting an HTML document
Now that we know the terms of HTML, let’s discuss the basics of formatting. We will look at a basic HTML file before discussing each part below.
The first line, <DOCTYPE! html> , is called the doctype declaration. This indicates to browser what HTML version the file is written in. This file indicates that it is written in HTML5.
On the second line, we write the opening <html> tag to indicate the root element. From there, we branch off into other elements in a tree-like structure. To properly define an HTML file, we must place <head> and <body> elements within that root.
- The <head> element contains supporting information about the file. We call this metadata. There must be a <title> to providing a title to the page directly underneath the <head> element.
- The <body> element contains the main content of our file that will be rendered by a browser. There can be only one <body> element. Most of the HTML code you write will exist here.
- Within the body element, we then branch off to our highest-level heading <h1> and a paragraph <p> .
As you can see from this example, some elements are inline while others are block-level . Block-level HTML elements take the full width of a webpage and start on a new line. Some of these elements include headings, lists, and paragraphs. Inline elements do not take the full width and are in-line with text content. Some examples include anchors, images, and bolded text.
Become a frontend developer for free.
This is the ideal place to start your journey as a front-end developer with 6 curated modules. With no prior knowledge needed, you will gain a mastery of HTML, CSS, and JavaScript, allowing you to put together beautiful, functional websites and web apps yourself.
Become a Front End Developer
How to build your own webpage with HTML
Alright, now we know the basic terms of HTML and how to format an HTML file properly. But how do you actually make a webpage? Let’s go through a step-by-step guide to learn how it’s done. We will be making a simple “About Me” webpage that includes the following:
- Title with your name
- Description of yourself in a paragraph
- List of your skills
- Hyperlink to a website you like (or a personal website)
- Table of your work experience
1. Download and open an HTML editor
Webpages are created using HTML editors. Think of this like a word processor but specifically for creating HTML files. There are many options for text editors that vary in complexity and robustness. If you’re just getting started, I recommend using simple text editor like TextEdit (Mac), Notepad (PC), or Atom. Most text editors are free to download.
Here, we will use Educative’s build-in text editor widget where you can explore HTML without downloading anything. You can also follow along with your own editor of choice.
2. Write a basic HTML file
Once you open your editor, start a new file and write the basics structure of an HTML page. Try writing the basic structure yourself in the code widget below using what we learned above. The answer can be found below if you get stuck. You should include:
- Document type declaration
- A page title called “My HTML Webpage: (Your name)”
- A header ( h1 ) called “About Me: (Your name)”
- Paragraph with 1-2 sentences about you
- Proper closing tags
3. Hyperlink to a website you like (or personal website)
Now, let’s add a link to your personal website or a website of your choosing. Copy the code you wrote from above and continue adding to it below. Try it yourself before checking the solution. We will add this just below your personal description. It should include:
- The title of the page you are linking to
- The URL to link to that site
4. Add a list of your skills
Now, let’s add an unordered list of your skills. Copy what code you have from above and continue adding this next step of HTML code. Try writing the code yourself in the code widget below using what we learned above. The answer can be found below if you get stuck. You should include:
- A header ( h3 ) called “My Skills”
- A bulleted list of 5 skills
- Proper closing tags for the list
5. Add a table of your work experience
Now, let’s add a table of your work experience. Copy what code you have from above and continue adding this next step of HTML code. Try writing the code yourself in the code widget below using what we learned above. The answer can be found below if you get stuck. You should include:
- Column headers: Employer, Job Title, Years
- 3 former jobs with each of the above columns filled in
6. Finish and save your webpage
Once you complete all these steps, you’ll want to save the HTML file on your computer. Select File > Save as in the Notepad or other text editor menu. Name the file your_name.html and set the encoding to UTF-8 (preferred for HTML files).
Once you save the file you can open it in your browser by right clicking on the file, clicking Open with , and selecting your browser. You will see your basic HTML page!

Congrats! You’ve officially made a simply webpage on your own. You’re well on your way to becoming a frontend web developer. There’s still a ton to learn, but HTML is a really important stepping stone. The next steps in your web dev journey are:
- Advanced HTML
- CSS (for adding style)
- JavaScript (for interactivity)
- Libraries and frameworks (prewritten code)
- Advanced web dev concepts
To get you started with these concepts, Educative has created a learning path to walk you through all the skills necessary to become a professional web developer. Our Become a Front End Developer Learning Path offer 6 curated modules. You’ll learn how to add style to a webpage, the basics of JavaScript, and even how to deploy your own website!
Happy learning!
Continue reading about web development
- A Beginner’s Guide to Web Development
- JavaScript Snake Game Tutorial: build a simple, interactive game
- Animate CSS code: create a panda animation with HTML & CSS

Learn in-demand tech skills in half the time
Mock Interview
Skill Paths
Assessments
Learn to Code
Tech Interview Prep
Generative AI
Data Science
Machine Learning
GitHub Students Scholarship
Early Access Courses
For Individuals
Try for Free
Gift a Subscription
Become an Author
Become an Affiliate
Earn Referral Credits
Cheatsheets
Frequently Asked Questions
Privacy Policy
Cookie Policy
Terms of Service
Business Terms of Service
Data Processing Agreement
Copyright © 2024 Educative, Inc. All rights reserved.
- Skip to main content
- Skip to search
- Skip to select language
- Sign up for free
- Português (do Brasil)
HTML basics
- Overview: Getting started with the web
HTML ( H yper T ext M arkup L anguage) is the code that is used to structure a web page and its content. For example, content could be structured within a set of paragraphs, a list of bulleted points, or using images and data tables. As the title suggests, this article will give you a basic understanding of HTML and its functions.
So what is HTML?
HTML is a markup language that defines the structure of your content. HTML consists of a series of elements , which you use to enclose, or wrap, different parts of the content to make it appear a certain way, or act a certain way. The enclosing tags can make a word or image hyperlink to somewhere else, can italicize words, can make the font bigger or smaller, and so on. For example, take the following line of content:
If we wanted the line to stand by itself, we could specify that it is a paragraph by enclosing it in paragraph tags:
Anatomy of an HTML element
Let's explore this paragraph element a bit further.

The main parts of our element are as follows:
- The opening tag: This consists of the name of the element (in this case, p), wrapped in opening and closing angle brackets . This states where the element begins or starts to take effect — in this case where the paragraph begins.
- The closing tag: This is the same as the opening tag, except that it includes a forward slash before the element name. This states where the element ends — in this case where the paragraph ends. Failing to add a closing tag is one of the standard beginner errors and can lead to strange results.
- The content: This is the content of the element, which in this case, is just text.
- The element: The opening tag, the closing tag, and the content together comprise the element.
Elements can also have attributes that look like the following:

Attributes contain extra information about the element that you don't want to appear in the actual content. Here, class is the attribute name and editor-note is the attribute value . The class attribute allows you to give the element a non-unique identifier that can be used to target it (and any other elements with the same class value) with style information and other things. Some attributes have no value, such as required .
Attributes that set a value always have:
- A space between it and the element name (or the previous attribute, if the element already has one or more attributes).
- The attribute name followed by an equal sign.
- The attribute value wrapped by opening and closing quotation marks.
Note: Simple attribute values that don't contain ASCII whitespace (or any of the characters " ' ` = < > ) can remain unquoted, but it is recommended that you quote all attribute values, as it makes the code more consistent and understandable.
Nesting elements
You can put elements inside other elements too — this is called nesting . If we wanted to state that our cat is very grumpy, we could wrap the word "very" in a <strong> element, which means that the word is to be strongly emphasized:
You do however need to make sure that your elements are properly nested. In the example above, we opened the <p> element first, then the <strong> element; therefore, we have to close the <strong> element first, then the <p> element. The following is incorrect:
The elements have to open and close correctly so that they are clearly inside or outside one another. If they overlap as shown above, then your web browser will try to make the best guess at what you were trying to say, which can lead to unexpected results. So don't do it!
Void elements
Some elements have no content and are called void elements . Take the <img> element that we already have in our HTML page:
This contains two attributes, but there is no closing </img> tag and no inner content. This is because an image element doesn't wrap content to affect it. Its purpose is to embed an image in the HTML page in the place it appears.
Anatomy of an HTML document
That wraps up the basics of individual HTML elements, but they aren't handy on their own. Now we'll look at how individual elements are combined to form an entire HTML page. Let's revisit the code we put into our index.html example (which we first met in the Dealing with files article):
Here, we have the following:
- <!DOCTYPE html> — doctype . It is a required preamble. In the mists of time, when HTML was young (around 1991/92), doctypes were meant to act as links to a set of rules that the HTML page had to follow to be considered good HTML, which could mean automatic error checking and other useful things. However, these days, they don't do much and are basically just needed to make sure your document behaves correctly. That's all you need to know for now.
- <html></html> — the <html> element. This element wraps all the content on the entire page and is sometimes known as the root element. It also includes the lang attribute, setting the primary language of the document.
- <head></head> — the <head> element. This element acts as a container for all the stuff you want to include on the HTML page that isn't the content you are showing to your page's viewers. This includes things like keywords and a page description that you want to appear in search results, CSS to style our content, character set declarations, and more.
- <meta charset="utf-8"> — This element sets the character set your document should use to UTF-8 which includes most characters from the vast majority of written languages. Essentially, it can now handle any textual content you might put on it. There is no reason not to set this, and it can help avoid some problems later on.
- <meta name="viewport" content="width=device-width"> — This viewport element ensures the page renders at the width of viewport, preventing mobile browsers from rendering pages wider than the viewport and then shrinking them down.
- <title></title> — the <title> element. This sets the title of your page, which is the title that appears in the browser tab the page is loaded in. It is also used to describe the page when you bookmark/favorite it.
- <body></body> — the <body> element. This contains all the content that you want to show to web users when they visit your page, whether that's text, images, videos, games, playable audio tracks, or whatever else.
Let's turn our attention to the <img> element again:
As we said before, it embeds an image into our page in the position it appears. It does this via the src (source) attribute, which contains the path to our image file.
We have also included an alt (alternative) attribute. In the alt attribute , you specify descriptive text for users who cannot see the image, possibly because of the following reasons:
- They are visually impaired. Users with significant visual impairments often use tools called screen readers to read out the alt text to them.
- Something has gone wrong causing the image not to display. For example, try deliberately changing the path inside your src attribute to make it incorrect. If you save and reload the page, you should see something like this in place of the image:
The keywords for alt text are "descriptive text". The alt text you write should provide the reader with enough information to have a good idea of what the image conveys. In this example, our current text of "My test image" is no good at all. A much better alternative for our Firefox logo would be "The Firefox logo: a flaming fox surrounding the Earth."
Try coming up with some better alt text for your image now.
Note: Find out more about accessibility in our accessibility learning module .
Marking up text
This section will cover some essential HTML elements you'll use for marking up the text.
Heading elements allow you to specify that certain parts of your content are headings — or subheadings. In the same way that a book has the main title, chapter titles, and subtitles, an HTML document can too. HTML contains 6 heading levels, <h1> - <h6> , although you'll commonly only use 3 to 4 at most:
Note: Anything in HTML between <!-- and --> is an HTML comment . The browser ignores comments as it renders the code. In other words, they are not visible on the page - just in the code. HTML comments are a way for you to write helpful notes about your code or logic.
Now try adding a suitable title to your HTML page just above your <img> element.
Note: You'll see that your heading level 1 has an implicit style. Don't use heading elements to make text bigger or bold, because they are used for accessibility and other reasons such as SEO . Try to create a meaningful sequence of headings on your pages, without skipping levels.
As explained above, <p> elements are for containing paragraphs of text; you'll use these frequently when marking up regular text content:
Add your sample text (you should have it from What will your website look like? ) into one or a few paragraphs, placed directly below your <img> element.
A lot of the web's content is lists and HTML has special elements for these. Marking up lists always consists of at least 2 elements. The most common list types are ordered and unordered lists:
- Unordered lists are for lists where the order of the items doesn't matter, such as a shopping list. These are wrapped in a <ul> element.
- Ordered lists are for lists where the order of the items does matter, such as a recipe. These are wrapped in an <ol> element.
Each item inside the lists is put inside an <li> (list item) element.
For example, if we wanted to turn the part of the following paragraph fragment into a list
We could modify the markup to this
Try adding an ordered or unordered list to your example page.
Links are very important — they are what makes the web a web! To add a link, we need to use a simple element — <a> — "a" being the short form for "anchor". To make text within your paragraph into a link, follow these steps:
- Choose some text. We chose the text "Mozilla Manifesto".
- Wrap the text in an <a> element, as shown below: html < a > Mozilla Manifesto </ a >
- Give the <a> element an href attribute, as shown below: html < a href = " " > Mozilla Manifesto </ a >
- Fill in the value of this attribute with the web address that you want the link to point to: html < a href = " https://www.mozilla.org/en-US/about/manifesto/ " > Mozilla Manifesto </ a >
You might get unexpected results if you omit the https:// or http:// part, called the protocol , at the beginning of the web address. After making a link, click it to make sure it is sending you where you wanted it to.
Note: href might appear like a rather obscure choice for an attribute name at first. If you are having trouble remembering it, remember that it stands for h ypertext ref erence .
Add a link to your page now, if you haven't already done so.
If you have followed all the instructions in this article, you should end up with a page that looks like the one below (you can also view it here ):

If you get stuck, you can always compare your work with our finished example code on GitHub.
Here, we have only really scratched the surface of HTML. To find out more, go to our Learning HTML topic.
- HTML Tutorial
- HTML Exercises
- HTML Attributes
- Global Attributes
- Event Attributes
- HTML Interview Questions
- DOM Audio/Video
- HTML Examples
- Color Picker
- A to Z Guide
- HTML Formatter
- 10 HTML Project Ideas & Topics For Beginners [2024]
Top 10 Projects For Beginners To Practice HTML and CSS Skills
- Top 10 Coding Projects For Beginners
- Top 10 Front-End Web Development Projects For Beginners
- JavaScript Project Ideas with Source Code
- 10 Best JavaScript Project Ideas For Beginners in 2024
- Top 5 JavaScript Projects For Beginners on GFG
- 90+ React Projects with Source Code [2024]
- 7 Best React Project Ideas For Beginners in 2024
- 12 Best Full Stack Project Ideas in 2024
- 10 Best Web Development Projects For Your Resume
- 30+ Web Development Projects with Source Code [2024]
- 10 Best Angular Projects Ideas For Beginners
- Top 7 Node.js Project Ideas For Beginners
- 5 Best MERN Projects To Add In Resume
- 10 Best Web Development Project Ideas For Beginners in 2024
- 5 Amazing React Native Project Ideas for Beginners
Learning to code is always exciting and fun for everyone and when it comes to stepping into the programming world most of the people start with the easiest thing HTML and CSS . Every beginner’s coding journey in frontend starts with these two basic building blocks and you need to be creative when it comes to designing a beautiful application.

Initially, beginners enjoy making buttons, adding the links, adding images, working with layout and a lot of cool stuff in web designing but when it comes to making a project using only HTML and CSS they get stuck and confuse about what they should make to practice all these stuff. Afterall their knowledge is just limited to HTML and CSS. No matter what after learning everything at some point you will realize that making a project is important to practice HTML and CSS skills. You need to check how HTML and CSS work together to design a beautiful frontend application. So the question is what are some beginner-friendly projects you can build to practice everything you have learned…Let’s discuss that.
1. A Tribute Page
The simplest website you can make as a beginner is a tribute page of someone you admire in your life. It requires only basic knowledge of HTML and CSS. Make a webpage writing about that person adding his/her image. On the top of the webpage, add the image and name of the person and below that give layout for the rest of the details. You can use paragraphs, lists, links, images with CSS to give it a descent look. Add a suitable background color and font style on your webpage. Most of the parts you can make using HTML but to give it a better look using a bit of CSS. Take help from the link given below.
- My Tribute Page
2. Webpage Including Form
Forms are always an essential part of any project and you will be working with a lot of forms in most of the applications so why not practice it earlier and test your knowledge. Once you get familiar with the input field or basic tags in HTML to create a form make a project using all those tags. How to use a text field, checkbox, radio button, date, and other important elements in a single form. You will be learning how to give a proper structure to a webpage while creating a form. Knowledge of HTML / HTML5 is good enough but you can use a bit of CSS to make the project look better. Take help from the links given below.
- Survey Form
3. Parallax Website
A parallax website includes fixed images in the background that you can keep in place and you can scroll down the page to see different parts of the image. With basic knowledge of HTML and CSS, you can give a parallax effect to a website. Using the parallax effect in web designing is really popular and it gives beautiful look and feels to the webpage. Give it a try and divide the whole page into three to four different sections. Set 3-4 background images, align the text for different sections, set margin and padding, add background-position and other CSS elements and properties to create a parallax effect. You can take help from the link given below.
- Parallax Website
4. Landing Page
A landing page is another good project you can make using HTML and CSS but it requires a solid knowledge of these two building blocks. You will be using lots of creativity while making a landing page. You will practice how to add footer and header, create columns, align-items, divide the sections and a lot of things. You will have to use CSS carefully keeping in mind that different elements do not overlap with each other. You will also take care of color combinations, padding, margin, space between sections, paragraphs, and boxes. Color combinations should go well with each other for different sections or backgrounds.
5. Restaurant Website
Showcase your solid knowledge of HTML and CSS creating a beautiful webpage for a restaurant. Making a layout for a restaurant will be a bit complicated than previous project examples. You will be aligning the different food items and drinks using a CSS layout grid. You will be adding prices, images and you need to give it a beautiful look and feel as well using the proper combination of colors, font-style and images. You can add pictures gallery for different food items, you can also add sliding images for a better look. Add links for redirection to internal pages. Make it responsive setting a viewport, using media queries and grid. You can take help from the link given below.
- Restaurant Website
6. An Event or Conference Webpage
You can make a static page holding an event or conference. People who are interested in attending the conference create a register button for them. Mention different links for speaker, venue and schedule at the top in the header section. Describe the purpose of the conference or the category of people who can get benefit from this conference. Add an introduction and images of the speaker, venue detail and the main purpose of the conference on your webpage. Divide the page into sections, add header and footer showcasing the menu. Use proper background color that can go well with each other for various sections. Choose a descent font style and font color that matches the theme of your web page. It requires HTML/HTML5 and CSS knowledge in depth. You can take help from the link given below.
- Event webpage
7. Music Store Page
If you are a music lover you can make a webpage for it. It requires HTML5 CSS3 knowledge. Add a suitable background image describing the purpose or what the page is all about. In the header section add different menus. Add buttons, links, images and some description about the collection of songs available. At the bottom mention the links for shopping, store, career or contact details. You can also add other features on your webpages such as a trial option, gift cards or subscription. Make it responsive setting viewport or using media queries and grid. You can take help from the link given below.
8. Photography Site
If you have in-depth knowledge of HTML5 and CSS3, you can make a one-page responsive photography site. Use flexbox and media queries for responsiveness. Add the company name with an image (related to photography) on the top (landing page). Below that showcase your work adding multiple images. Mention the contact detail of the photographer at the bottom (footer). Add a button to view your work. This button will directly bring you down to the images section. You need to take care of the margin, padding, color combination, font-size, font-style, image size and styling of a button. You can take help from the link given below.
- Image gallery
9. Personal Portfolio
With knowledge of HTML5 and CSS3, you can also create your portfolio. Showcase your work samples and skills in your portfolio with your name and pictures. You can also add your CV there and host your complete portfolio on GitHub account. In your header section mention some menus like about, contact, work or services. At the top add one of your images and introduce yourself there. Below that add some work samples and at last (footer) add contact information or social media account. You can take help from the links given below.
- Simple portfolio
- Portfolio gallery
10. Technical Documentation
If you have a little bit of knowledge of Javascript then you can create a webpage of technical documentation. It requires knowledge of HTML, CSS and basic javascript. Divide the whole webpage into two sections. The left side creates a menu with all the topics listed from top to bottom. Right side you need to mention the documentation or description for the topics. The idea is once you click on one of the topics in the left section it should load the content on the right. For click, you can use either javascript or CSS bookmark option. You don’t need to make it too fancy, just give it a simple and descent look, that looks good for technical documentation. You can take help from the links given below.
- Technical Documentation
HTML is the foundation of webpages, is used for webpage development by structuring websites and web apps.You can learn HTML from the ground up by following this HTML Tutorial and HTML Examples .
CSS is the foundation of webpages, is used for webpage development by styling websites and web apps.You can learn CSS from the ground up by following this CSS Tutorial and CSS Examples .
Please Login to comment...
Similar reads.

- Web-Projects
- Web Technologies
Improve your Coding Skills with Practice
What kind of Experience do you want to share?
32 HTML And CSS Projects For Beginners (With Source Code)

updated Apr 17, 2024
If you want to feel confident in your front-end web developer skills, the easiest solution is to start building your own HTML and CSS projects from scratch.
As with any other skill, practicing on simple, realistic projects helps you build your skills and confidence step-by-step.
But if you are new to HTML and CSS, you may be wondering:
Where can I find ideas for beginner-level HTML and CSS projects?
Even if you are just starting out with HTML and CSS, there are some fun and easy projects you can create.
Whether you are new to learning web development or have some experience under your belt, this guide is the perfect place to start improving your skills.
In this article, I’ll walk you through 32 fun HTML and CSS coding projects that are easy to follow. We will start with beginner-level projects and then move on to more demanding ones.
If you want to become a professional front-end developer, the projects below will help you expand your portfolio.
When it’s time to apply for your first entry-level job, you can showcase your skills to potential employers with a portfolio packed with real-life project examples.
Let’s get started!
Please note: This post contains affiliate links to products I use and recommend. I may receive a small commission if you purchase through one of my links, at no additional cost to you. Thank you for your support!
What are HTML and CSS?
HTML and CSS are the most fundamental languages for front-end web development.
Learning them will allow you to:
- Build stunning websites
- Start a coding blog
- Make money freelancing
Let’s take a quick look at both of them next:
What is HTML?
HTML or HyperText Markup Language is the standard markup language for all web pages worldwide.
It’s not a “typical” programming language – like Python or Java – since it doesn’t contain any programming logic. HTML can’t perform data manipulations or calculations, for example.
Instead, HTML allows you to create and format the fundamental structure and content of a web page.
You will use HTML to create:
- Page layouts (header, body, footer, sidebar)
- Paragraphs and headings
- Input fields
- Checkboxes and radio buttons
- Embedded media
Thus, HTML only allows you to determine the structure of a web page and place individual content elements within it.
For more details, check out my post on what HTML is and how it works .
You can’t format the look and feel of your web page with HTML, though.
Your HTML web page will look dull and boring. Sort of like this:

The example above is the first web page every built for the WWW , by the way.
This is how websites used to look in the ’90s. But we’ve come a long way since then – luckily.
To make your HTML content visually appealing and professional-looking, you need another language: CSS. Let’s look at that next.
What is CSS?
CSS or Cascading Style Sheets is a style sheet language that allows you to adjust the design and feel of your HTML content.
Thus, you can turn your pure-HTML pages into stunning, modern websites with CSS. And it’s super easy to learn, too!
Here’s how it works:
CSS allows you to target individual HTML elements and apply different styling rules to them.
For example, here’s a CSS rule that targets H2 headings, their font-size property, and sets it to a value of 24px:
You can use CSS to adjust:
- Backgrounds
- Fonts and text styling
- Spacings (paddings, margins)
- CSS animations
- Responsiveness (media queries)
If you want to create stunning websites and become a front-end web developer, CSS is one of the first tools you must learn and master.
For more details, check out my post on what CSS is and how it works .

Why build HTML and CSS projects?
Practicing on realistic, hands-on projects is the best way to learn how to create something useful and meaningful with HTML and CSS.
The more projects you build, the more confident you will feel in your skills.
To build a web page from scratch , you need a basic understanding of how HTML works. You should be comfortable with writing the necessary HTML code to create a page without copying a boilerplate or following a tutorial.
Thus, if you want to become a front-end web developer , building HTML and CSS projects will teach you how to use these two languages in real life.
Therefore, practising your skills with the projects in this article will give you a competitive edge against anyone who’s simply following tutorials and copy-pasting other people’s code.
Finally, building HTML and CSS projects helps you build a professional portfolio of real-world projects.
When it’s time to start applying for your first job, you will have 10 to 20 cool projects to showcase your skills to potential employers. Not bad!
32 HTML and CSS projects: Table of contents
Here’s an overview of the HTML and CSS projects we’ll go through:
Beginner project: CSS radio buttons
Beginner project: css toggle buttons, beginner project: hamburger menu, beginner project: pure css sidebar toggle menu, beginner project: animated css menu, beginner project: custom checkboxes, beginner project: pure css select dropdown, beginner project: modal/popup without javascript, beginner project: animated gradient ghost button, beginner project: css image slider, basic html & css website layout, tribute page, survey page with html forms, sign-up page / log-in page, job application form page, landing page, product landing page, interactive navigation bar, responsive website header, restaurant menu, restaurant website, parallax website, custom 404 error page, personal portfolio website, blog post layout.
- Photography website
Music store website
Discussion forum website.
- Event or conference website
Technical documentation website
Online recipe book, website clone.
Share this post with others!

This quick project is a great example of what you can do with pure CSS to style radio buttons or checkboxes:
See the Pen CSS radio buttons by Angela Velasquez ( @AngelaVelasquez ) on CodePen .
☝️ back to top ☝️
This HTML and CSS project teaches you how to create custom CSS toggle buttons from scratch:
See the Pen Pure CSS Toggle Buttons | ON-OFF Switches by Himalaya Singh ( @himalayasingh ) on CodePen .
Every website needs a menu, right?
This hamburger menu is beautiful and clean, and you can build it with just HTML and CSS:
See the Pen Pure CSS Hamburger fold-out menu by Erik Terwan ( @erikterwan ) on CodePen .
Placing your website navigation inside a sidebar toggle is an easy way to clean up the overall look and feel of your design.
Here’s a modern-looking solution to a pure-CSS sidebar toggle menu:
See the Pen PURE CSS SIDEBAR TOGGLE MENU by Jelena Jovanovic ( @plavookac ) on CodePen .
If you want to build a more dynamic, interactive website navigation, try this animated CSS menu:
See the Pen Animate menu CSS by Joël Lesenne ( @joellesenne ) on CodePen .
Styling your checkboxes to match the overall design is an easy way to elevate the look and feel of your website.
Here’s an easy HTML and CSS practice project to achieve that:
See the Pen Pure CSS custom checkboxes by Glen Cheney ( @Vestride ) on CodePen .
Standard select dropdowns often look dull and boring. Here’s a quick CSS project to learn how to create beautiful select dropdowns easily:
See the Pen Pure CSS Select by Raúl Barrera ( @raubaca ) on CodePen .
Modals and popups often use JavaScript, but here’s a pure HTML and CSS solution to creating dynamic, interactive modals and popups:
See the Pen Pure css popup box by Prakash ( @imprakash ) on CodePen .
Ghost buttons can look great if they fit the overall look and feel of your website.
Here’s an easy project to practice creating stunning, dynamic ghost buttons for your next website project:
See the Pen Animated Gradient Ghost Button Concept by Arsen Zbidniakov ( @ARS ) on CodePen .
This image slider with navigation buttons and dots is a fantastic HTML and CSS project to practice your front-end web development skills:
See the Pen CSS image slider w/ next/prev btns & nav dots by Avi Kohn ( @AMKohn ) on CodePen .
Now, before you start building full-scale web pages with HTML and CSS, you want to set up your basic HTML and CSS website layout first.
The idea is to divide your page into logical HTML sections. That way, you can start filling those sections with the right elements and content faster.
For example, you can break up the body of your page into multiple parts:
- Header: <header>
- Navigation: <nav>
- Content: <article>
- Sidebar: <aside>
- Footer: <footer>

Depending on your project, you can fill the article area with a blog post, photos, or other content you need to present.
This layout project will serve as a starting point for all your future HTML and CSS projects, so don’t skip it.
Having a template like this will speed up your next projects, because you won’t have to start from scratch.
Here are two tutorials that will walk you through the steps of creating a basic website layout using HTML and CSS:
- https://www.w3schools.com/html/html_layout.asp
- https://www.w3schools.com/css/css_website_layout.asp
Building a tribute page is fantastic HTML and CSS practice for beginners.
What should your tribute page be about?
Anything you like!
Build a tribute page about something you love spending time with.
Here are a few examples:
- a person you like
- your favorite food
- a travel destination
- your home town
My first HTML-only tribute page was for beetroots. Yes, beetroots. I mean, why not?

HTML and CSS concepts you will practice:
- HTML page structure
- basic HTML elements: headings, paragraphs, lists
- embedding images with HTML
- CSS fundamentals: fonts and colors
- CSS paddings, margins, and borders
Here’s a helpful tutorial for building a HTML and CSS tribute page .
Whether you want to become a full-time web developer or a freelance web designer, you will use HTML forms in almost every project.
Forms allow you to build:
- Contact forms
- Login forms
- Sign up forms
- Survey forms
Building a survey page allows you to practice HTML input tags, form layouts, radio buttons, checkboxes, and more.
Pick any topic you like and come up with 10 pieces of information you want to collect from respondents.
Perhaps an employee evaluation form? Or a customer satisfaction form?
- form elements: input fields, dropdowns, radio buttons, labels
- styling for forms and buttons
Here’s an example survey form project for inspiration:
See the Pen Good Vibes Form by Laurence ( @laurencenairne ) on CodePen .
Let’s practice those HTML forms a bit more, shall we?
For this project, you will build a sign-up or log-in page with the necessary input fields for a username and a password.
Because we can create a user profile on almost every website, forms are absolutely essential for allowing people to set their usernames and passwords.
Your forms will collect inputs from users and a separate back-end program will know how to store and process that data.
Creating a clean and clear sign-up page can be surprisingly difficult. The more you learn about HTML and CSS, the more content you want to create to showcase your skills. But the thing is: a sign-up page needs to be as clean and easy-to-use as possible.
Thus, the biggest challenge with this project is to keep it simple, clear, and light.
Here’s an example project to get started with:
See the Pen Learn HTML Forms by Building a Registration Form by Noel ( @WaterNic10 ) on CodePen .
For more inspiration, check out these 50+ sign-up forms built with HTML and CSS .
Using a HTML form is the best way to collect information from job applicants.
You can also generate and format a job description at the top of the page.
Then, create a simple job application form below to collect at least 10 pieces of information.
Use these HTML elements, for example:
- Text fields
- Email fields
- Radio buttons
Here’s an example job application page you can build with HTML and CSS:
See the Pen Simple Job Application Form Example by Getform ( @getform ) on CodePen .
One of your first HTML and CSS projects should be a simple landing page.
Your landing page can focus on a local business, an event, or a product launch, for example.
Landing pages play an important role for new businesses, marketing campaigns, and product launches. As a front-end developer, you will be asked to create them for clients.
For this project, create a simple HTML file and style it with CSS. Be sure to include a headline, some text about the company or its services, and a call-to-action (CTA) button.
Make sure that your landing page is clean and clear and that it’s easy to read.
If you build a landing page for a new product, highlight the product’s key benefits and features.
To get started, follow this freeCodeCamp tutorial to build a simple landing page . You will need JavaScript for a few features. If you are not familiar with JavaScript, leave those features out for now and come back to them later.
For more inspiration, check out these HTML landing page templates .

A product landing page is a page that you build to promote a specific product or service.
For example, if you want to sell your ebook about how to use CSS to build an animated website, then you would create a product landing page for it.
Your product landing page can be very simple to start with. When your skills improve, add some complexity depending on what kind of information you need to present.
One of the most iconic product landing pages is the iPhone product page by Apple, for example:

Of course, the iPhone landing page is technically complex, so you won’t build it as your first project. But still, it’s a good place to find inspiration and new ideas.
The best way to design your first product landing page is to create a simple wireframe first. Sketch your page layout on paper before you start building it.
Wireframes help you maintain a clear overview of your HTML sections and elements.
To get started, browse through these product landing page examples for some inspiration .
Building an interactive navigation bar will teach you how to create an animated menu with dropdowns using HTML and CSS.
This is another great project for beginners, because it will teach you how to create menus using HTML and CSS. You’ll also learn how to style them with different colors, fonts, and effects.
You’ll also learn how to use anchors and pseudo-classes to create the menu navigation, as well as how to create the dropdown menus from scratch.
If you aren’t familiar with CSS media queries yet, building a responsive navigation bar is a smart way to learn and practice them.
CSS media queries allow you to create a responsive navigation menu that changes its size and layout depending on screen width.
To get started, check out this tutorial on how to build an interactive navigation bar with HTML and CSS .
One of the best ways to practice your HTML and CSS skills is to create custom website headers. This is a great project to add to your portfolio website, as it will show off your skills and help you attract new clients.
There are a number of different ways that you can create a stylish and responsive website header. One option is to use a premade CSS framework such as Bootstrap or Foundation. Alternatively, you can create your own custom styles by hand.
No matter which option you choose, be sure to make your header mobile-friendly by using media queries. This will ensure that your header looks great on all devices, regardless of their screen size or resolution.
To get started, check out this simple example for a responsive HTML and CSS header .
If you’re looking to get into web development, one of the best HTML and CSS projects you can build is a simple restaurant menu.
Align the different foods and drinks using a CSS layout grid.
Add prices, images, and other elements you need to give it a professional, clean look and feel.
Choose a suitable color palette, fonts, and stock photos.
You can also add photos or a gallery for individual dishes. If you want to add an image slider, you can create one with HTML and CSS, too.
Here’s an example of a very simple restaurant menu project:
See the Pen Simple CSS restaurant menu by Viszked Tamas Andras ( @ViszkY ) on CodePen .
Once you’ve built your restaurant menu with, it’s time to tackle a more complex HTML and CSS project.
Building a real-life restaurant website is a fun way to practice a ton of HTML and CSS topics.
Not only will you learn the basics of creating a beautiful, professional web page, but you also get a chance to practice responsive web design, too.
And if you’re looking to land your first front-end web developer job, having a well-designed business website in your portfolio will help you stand out from the crowd.

Make sure your website matches the restaurant’s menu and target clientele. A fine-dining place on Manhattan will have a different website than a simple (but delicious!) diner in rural Wisconsin.
Here are a few key details to include on your restaurant website:
- Clear navigation bar
- Restaurant details
- Menu for food and drinks
- Location and directions
- Contact details
- Upcoming events
To get started, check out this free tutorial on how to build a restaurant website with HTML and CSS .
To build a parallax website, you will include fixed background images that stay in place when you scroll down the page.
Although the parallax look isn’t as popular or modern as it was a few years back, web designers still use the effect a lot.
The easiest way to build a parallax HTML and CSS project is to start with a fixed background image for the entire page.
After that, you can experiment with parallax effects for individual sections.
Create 3-5 sections for your page, fill them with content, and set a fixed background image for 1-2 sections of your choice.
Word of warning: Don’t overdo it. Parallax effects can be distracting, so only use them as a subtle accent where suitable.
Here’s an example project with HTML and CSS source code:
See the Pen CSS-Only Parallax Effect by Yago Estévez ( @yagoestevez ) on CodePen .
404 error pages are usually boring and generic, right?
But when a visitor can’t find what they’re searching for, you don’t want them to leave your website.
Instead, you should build a custom 404 error page that’s helpful and valuable, and even fun and entertaining.
A great 404 page can make users smile and – more importantly – help them find what they are looking for. Your visitors will appreciate your effort, trust me.
For some inspiration, check out these custom 404 page examples .
Any web developer will tell you that having a strong portfolio is essential to landing your first job.
Your portfolio is a chance to show off your skills and demonstrate your expertise in front-end web development.
And while there are many ways to create a portfolio website, building one from scratch using HTML and CSS will give you tons of valuable practice.
Your first version can be a single-page portfolio. As your skills improve, continue adding new pages, content, and features. Make this your pet project!
Remember to let your personality shine through, too. It will help you stand out from the crowd of other developers who are vying for the same jobs.
Introduce yourself and share a few details about your experience and future plans.
Employers and clients want to see how you can help them solve problems. Thus, present your services and emphasize the solutions you can deliver with your skills.
Add your CV and share a link to your GitHub account to showcase your most relevant work samples.
Make sure to embed a few key projects directly on your portfolio website, too.
Finally, let your visitors know how to get in touch with you easily. If you want, you can add links to your social media accounts, too.
In this project, you’ll create a simple blog post page using HTML and CSS.
You’ll need to design the layout of the page, add a title, a featured image, and of course add some content to your dummy blog post.
You can also add a sidebar with a few helpful links and widgets, like:
- An author bio with a photo
- Links to social media profiles
- List of most recent blog posts
- List of blog post categories
Once your HTML structure and content are in place, it’s time to style everything with CSS.
Photography website with a gallery
If you’re a photographer or just enjoy taking pictures, then this project is for you.
Build a simple photo gallery website using HTML and CSS to practice your web design skills.
Start with the basic HTML structure of the page, and figure out a cool layout grid for the photos. You will need to embed the photos and style everything beautiful with CSS.
My tip: Use CSS Flexbox and media queries to create a responsive galleries that look great on all devices.
Here’s a full tutorial for building a gallery website with HTML and CSS:
If you love music, why not practice your HTML and CSS skills by building a music store web page?
Before you start, make a thorough plan about your website structure. What’s the purpose of your music store? What genres will you cover?
Pick a suitable color palette, choose your fonts, and any background images you want to use.
My tip: If you feature album cover images, keep your colors and fonts as clean and simple as possible. You don’t want to overpower the album covers with a busy web page with tons of different colors and mismatching fonts.
Create a user-friendly menu and navigation inside the header. Fill the footer with helpful links for your store, career page, contact details, and newsletter form, for example.
Building a music store website with HTML and CSS is a great opportunity to practice your skills while you are still learning.
Start with very basic features, and add new ones as your skills improve. For example, you can add media queries to make your website responsive.
A forum is a great way to create a community around a topic or interest, and it’s also a great way to practice your coding skills.
In this project, you’ll create a simple forum website using HTML and CSS.
You’ll need to design the layout of the site, add categories and forums, and set up some initial content.
Of course, you should start with creating the basic layout and structure with HTML first. You will need a navigation bar, at least one sidebar, and an area for the main content.
To make your discussion forum website more interesting, add new content and remember to interlink related threads to make the site feel more realistic.
Event or conference web page
Creating a web page for an event is a fun HTML and CSS project for beginners.
You can either pick a real event and build a better landing page than the real one, or come up with an imaginary conference, for example.
Make sure to include these elements:
- Register button
- Venue details
- Dates and schedule
- Speakers and key people
- Directions (how to get there)
- Accommodation details
Divide the landing page into sections, and create a header and a footer with menus and quick links.
Come up with a suitable color palette, pick your fonts, and keep your design clean and clear.
Every programming language, software, device and gadget has a technical documentation for helpful information and support.
Creating a technical documentation website with just HTML and CSS allows you to build a multi-page site with hierarchies, links, and breadcrumbs.
The main idea is to create a multi-page website where you have a sidebar menu on the left, and the content on the right.
The left-hand side contains a vertical menu with all the topics your documentation covers.
The right-hand side presents the description and all the details for each individual topic.
For simplicity, start with the homepage and 2–3 subpages first. Come up with a clean layout and make sure your links are working properly.
Then, start expanding the website with additional sub-pages, content, and elements.
- HTML hyperlinks and buttons
Creating an online recipe book as an HTML and CSS project requires a similar setup than the previous project example.
You will need to create a homepage that serves as a directory for all your recipes. Then, create a separate subpage for each recipe.
If you want to challenge yourself, add recipe categories and create separate directory pages for each of them.
- embedding recipe photos
One of the best ways to practice HTML and CSS is to clone an existing web page from scratch.
Use your browser’s inspecting tools to get an idea of how the page is built.
As with any HTML and CSS project, start by creating the basic page template with:
Then, divide your page into sections, rows, and columns.
Finally, fill your page with individual elements like headings, paragraphs, and images.
Once the HTML content is in place, use CSS to style your page.
Start with something simple, like the PayPal login page.
Then move on to more demanding cloning projects, such as a news website. Try the BBC homepage, for example.
Where to learn HTML and CSS?
There are no prerequisites required for you to learn HTML and CSS.
Both languages are easy to learn for beginners, and you can start building real-life projects almost right away.
Here are a few courses to check out if you want to learn HTML and CSS online at your own pace:
1: Build Responsive Real World Websites with HTML5 and CSS3

Build Responsive Real World Websites with HTML5 and CSS3 was my first online web development course focused 100% on HTML and CSS.
You don’t need any coding or web development experience for this course. But if you have watched some online tutorials but you’re not sure how to create a full-scale website by yourself, you are going to love it.
2: The Complete Web Developer Course 2.0

The Complete Web Developer Course 2.0 changed my life back when I started learning web development.
This course takes you from zero to knowing the basics of all fundamental, popular web development tools. You’ll learn:
- HTML and CSS
- JavaScript and jQuery
- and much more
3: Modern HTML & CSS From The Beginning (Including Sass)

I’m a big fan of Brad Traversy, and I really can’t recommend his Modern HTML & CSS From The Beginning course enough.
Even if you have never built a website with HTML and CSS before, this course will teach you all the basics you need to know.
4: The Complete 2023 Web Development Bootcamp

One of my most recent favorites, The Complete 2023 Web Development Bootcamp by Dr. Angela Yu is one of the best web development courses for beginners I’ve come across.
If you’re not quite sure what area or language to specialize in, this course is the perfect place to try a handful of tools and programming languages on a budget.
5: Learn HTML (Codecademy)

Learn HTML is a free beginner-level course that walks you through the fundamentals with interactive online lessons.
Codecademy also offers a plethora of other web development courses. Check out their full course catalog here .
6: Responsive Web Design (freeCodeCamp)

The Responsive Web Design certification on FreeCodeCamp is great for learning all the basics of web development from scratch for free.
You start with HTML and CSS to get the hang of front-end web dev fundamentals. Then, you start learning new tools and technologies to add to your toolkit, one by one.
Also, check out these roundups with helpful web development courses:
- 27 Best Web Development Courses (Free and Paid)
- 20+ Web Development Books for Beginners
- 120+ Free Places to Learn to Code (With No Experience)
- 100+ Web Development Tools and Resources
Final thoughts: HTML and CSS project ideas for beginners
There you go!
When it comes to learning HTML and CSS, practice really makes perfect. I hope you found a few inspirational ideas here to start building your next project right away.
Learning HTML and CSS may seem intimidating at first, but when you break it down into small, less-intimidating projects, it’s really not as hard as you might think.
HTML and CSS are easy to learn. You can use them to create really cool, fun projects – even if you are new to coding.
Try these beginner-level HTML and CSS project ideas to improve your front-end web development skills starting now. Do your best to build them without following tutorials.
Remember to add your projects to your portfolio website, too.
It’s possible to learn how to code on your own, and it’s possible to land your first developer job without any formal education or traditional CS degree.
It all boils down to knowing how to apply your skills by building an awesome portfolio of projects like the ones above.
So, which project will you build first? Let me know in the comments below!
Once you feel comfortable with HTML and CSS, it’s time to start learning and practising JavaScript .
To get started, check out my guide with 20+ fun JavaScript projects ideas for beginners . I’ll see you there!
Share this post with others:
About mikke.
Hi, I’m Mikke! I’m a blogger, freelance web developer, and online business nerd. Join me here on MikkeGoes.com to learn how to code for free , build a professional portfolio website , launch a tech side hustle , and make money coding . When I’m not blogging, you will find me sipping strong coffee and biking around town in Berlin. Learn how I taught myself tech skills and became a web dev entrepreneur here . And come say hi on Twitter !
Leave a reply:
Download 15 tips for learning how to code:.
GET THE TIPS NOW
Sign up now to get my free guide to teach yourself how to code from scratch. If you are interested in learning tech skills, these tips are perfect for getting started faster.


- Get started with computers
- Learn Microsoft Office
- Apply for a job
- Improve my work skills
- Design nice-looking docs
- Getting Started
- Smartphones & Tablets
- Typing Tutorial
- Online Learning
- Basic Internet Skills
- Online Safety
- Social Media
- Zoom Basics
- Google Docs
- Google Sheets
- Career Planning
- Resume Writing
- Cover Letters
- Job Search and Networking
- Business Communication
- Entrepreneurship 101
- Careers without College
- Job Hunt for Today
- 3D Printing
- Freelancing 101
- Personal Finance
- Sharing Economy
- Decision-Making
- Graphic Design
- Photography
- Image Editing
- Learning WordPress
- Language Learning
- Critical Thinking
- For Educators
- Translations
- Staff Picks
- English expand_more expand_less
Basic HTML - Create A Webpage
Basic html -, create a webpage, basic html create a webpage.

Basic HTML: Create A Webpage
Lesson 2: create a webpage.
/en/basic-html/about-html/content/
Create a webpage
This lesson is part of a series on computer programming . You can go to Intro to Programming if you'd like to start at the beginning.
Once you have a basic grasp on what HTML actually is, you need to be able to see it work. A great way to do that is to write and run your own HTML on your computer. This lesson assumes that you've set up your workspace and are comfortable with the general skills that all of these tutorials require, so be sure to read lessons if not.
Keep in mind that the HTML document you'll be creating in this lesson will only be available on your computer; it will not be accessible by anybody else online . However, you will still be able to load it in your browser just like the webpages you regularly visit.
Create the file
Follow these steps to create your first HTML file.
- Open Sublime Text .

- You should see a new tab open in Sublime Text labeled untitled .

- Name your file index.html and press the Save button.
You have now created an empty HTML file where you'll write your first code in the following steps. There isn't anything fundamentally different about the file you just created and a text file, for example, which you could have named index.txt. The difference is that the file extension (.html, as opposed to .txt) will let any program trying to open the file know what kinds of contents it will find inside.

The name you gave it, index.html , is a common name for the home page of a website. You could name it mywebsite.html, or xxlovin2codexx.html, or whatever you want, and it will work the same. The filename index.html is just a convention that has become popular over time and lets any other programmer (or even you, if you forget) know which file is the main file of your website.
Write your first HTML
Now that you have your empty index.html file open in your text editor, you can write your first HTML. Type or copy the following into your empty index.html file:
There are a few basic pieces to look at here:
- <html> : The html element is the base container for everything else on your webpage. Every other element you add will go inside of this one.
- <body> : The body element is where you will put all of the actual content of your website. If you were to leave it blank, you could still load the page, but you'd see nothing but a white screen. To start, all we'll put inside is a paragraph element , which you saw in the last lesson.
- <p> : The paragraph element is just like the paragraph elements you've seen before. This one is just nested inside other elements.
Only the <p> element will actually show up as something you can see on the page. The others are what is often referred to as boilerplate code , meaning that they appear unchanged in just about every HTML document because your browser requires them.
There are other pieces of boilerplate code that your browser requires before it will consider this a valid webpage, but we'll get to those later.
You might have noticed a few things about how that code was formatted , too. For example, some of the elements are inside other elements. This is another example of the concept of nested elements that we covered before.
Remember that you can think of most HTML elements as containers . For example, in the code above:
- The <html> and </html> tags contain the <body> element
- The <body> and </body> tags contain the <p> element
- The <p> and </p> tags contain some text

Indentations
There are also indentations before some of the tags. They're there to make the code more readable to the programmer working on it. Some people prefer to use the tab key to make these indentations, while others prefer a few presses of the space bar , but in either case, the goal is to have an increasing amount of space for each layer of nested elements , which makes it clearer which elements are inside of which.
As far as your browser goes, the amount you indent each element makes no difference . Your browser could read that code formatted this way just as easily:
That kind of formatting would make things much more difficult for you, though, and would make it much easier to make a mistake if you wanted to change something.
View your webpage
Once you've filled in your HTML file and saved it, you can view it as a webpage in your browser. Just follow these steps:
- Open your File Explorer or Finder .
- Navigate to your GCF Programming Tutorials project and click inside.
- Double-click your index.html file.
The file should open in your default web browser. You should see something like this:

Congratulations! You just created your first webpage!
If you want to keep playing with these basic pieces, you can.
- Go back to your text editor and change the text inside the paragraph element in index.html to say whatever you want.
- Save the file and refresh the page in your browser.
- You should see your new text on the page.
/en/basic-html/text-elements-in-html/content/
- HTML Basics
Basic HTML Exercises about HTML Links, Paragraphs, Layouts, Tags, & Text Formatting
Steps to Create a Webpage in HTML using Notepad
A website is simply a collection of web-pages. A web page or web documents written in HTML (HyperText Markup Language) . These Web pages can be viewed using any web browser and Internet.
Html Language is used to write code and programs to create a webpage. It is easy to create a webpage and you can learn it with few basic steps mentioned below:
HTML Program or page can be created by many HTML or Text Editors. These editors are software that help us writing our code with easy user interface. Today, we will see how to create a html or webpage using Notepad Editor.
Notepad editor is built-in text editor in Windows Computers. You can find similar editors in Mac and Linux Operating system as well.
There are many advanced HTML editor or software are also available. However, we will recommend using default and simple editor like notepad for the beginners. That is always a good way to start learning HTML.
Creating a Simple HTML Page using Notepad Editor
Follow the four steps below to create your first web page with Notepad.
Step 1: Open Notepad (Windows)
Windows 8 or later: Open the Start Screen and Search (Type Notepad)
Windows 7 or previous Windows: Open Start > Programs > Accessories > Notepad
Step 2: Create a New Document
Go to Notepad Menu: File > New
A New blank document will be opened and you can start writing your first HTML Program here.
Step 3: Write Some HTML code or Program
Write some HTML code. If you do not know about HTML Yet, read few chapters in HTML Tutorials Section .
Write your own HTML code or simply copy the following HTML Simple Program into notepad document.
Step 4: Save the HTML Page
Go to Notepad Menu: File > Save (or use short-key CTRL + S)
It will ask you to Save the file on your computer. Give it a name with .html extension and Save it (for example program.html)
Note: HTML page should be saved with .html extension carefully.
Step 5: View the HTML Page using Browser
Web browsers are programs or software that are used to view Webpages/Websites. You can find Internet Explored by default if using Windows Computer machine. You can also download other popular web browsers such as Google Chrome or Firefox. Use any of them.
Now Simply, open the saved HTML file in any browser: Double click on the file or right-click on the file and choose “Open with” option to select other browser.
You HTML File will be opened in web browser and it will show output based on your html program.
Congratulations if you are able to run your first HTML Program.
You can now learn more about HTML Tags and create more HTML web pages. Using these HTML Pages, you can easily create your own website as well.
Program to see difference between paragraphs & normal text with line break
We can write some text in body and it will be displayed in browser. All text will be displayed in single line until it reach browser window border. If you want to add some line break, you can use <br/> tag.
Another option is to use text between paragraph tag. You can use multiple paragraph tags to display multiple text paragraphs.
Different between HTML Paragraph & Regular line break:
Using <br/> tag, it only add a single line break. While using <p> tag it creates a paragraph with extra spacing before and after the paragraph.
Write an HTML program to display hello world.
Description: You need to write an HTML program to display hello world on screen.
Hint : You need to type Hello World inside the body tag.
Write a program to create a webpage to print values 1 to 5
Description: Write a program to create a webpage to print values 1 to 5 on the screen.
Hint: Put values inside the body tag.
Write a program to create a webpage to print your city name in red color.
Description: Write a program to create a webpage to print your city name in red color.
Hint: You need to put the city name inside the body tag and use color attribute to provide the color.
Write a program to print a paragraph with different font and color.
Description: Create a webpage to print a paragraph with 4 – 5 sentences. Each sentence should be in a different font and color.
Hint: Put the paragraph content inside the body tag and paragraph should be enclosed in <p> tag.
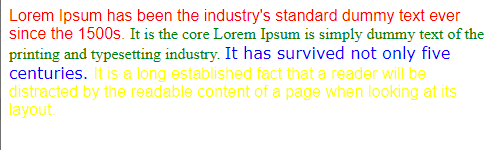
- HTML Exercises Categories
- HTML All Exercises & Assignments
- HTML Top Exercises
- HTML Paragraphs
HTML Projects for Beginners: 10 Easy Starter Ideas
Published: December 11, 2023
Are you eager to level up your HTML skills? Embarking on HTML projects for beginners is an excellent way to start. As someone who once stood where you are now, I can confidently say that the journey from HTML novice to proficiency is both thrilling and immensely rewarding. It's not just about learning a language; it’s about creating and bringing your ideas to life.

In my early days of exploring web development, HTML was the cornerstone that laid the foundation for my career. Now, with several years of experience in web development and a passion for being a resource for beginners, I understand the importance of starting with practical, easy-to-follow projects.
In this blog, I'm excited to share with you a curated list of HTML projects that are perfect for beginners. These projects are designed not only to increase your understanding of HTML but also to spark your creativity and enthusiasm for web development.
![Streamline Your Coding: 25 HTML & CSS Hacks [Free Guide]](https://no-cache.hubspot.com/cta/default/53/848be230-f06a-420e-9a24-82b45fe61632.png "html webpage assignment")
Table of Contents
- Understanding the Basics
- Project 1: Personal Portfolio Page
- Project 2: Simple Blog Layout
- Project 3: Landing Page
- Project 4: eCommerce Page
- Project 5: Recipe Page
- Project 6: Technical Documentation
- Project 7: Small Business Homepage
- Project 8: Simple Survey Form
- Project 9: Event Invitation Page
- Project 10: Parallax Website
The Road Ahead in Web Development
Understanding the basics: what is html.
Before I dive into the exciting world of HTML projects, I want to share why grasping the basics of HTML is crucial. HTML , which stands for HyperText Markup Language, is the foundational building block of the web. It’s not a programming language, but a markup language that I use to define the structure and layout of a web page through various elements and tags.
To me, HTML is like creating a framework for web content, similar to how an architect designs a building's blueprint. You would use tags to mark up text, insert images, create links, and lay out web pages in a format that browsers can understand and display. These tags , the basic units of HTML, help differentiate between headings, paragraphs, lists, and other content types, giving the web its versatile and user-friendly nature.

Every web developer starts somewhere, and for many, including myself, that starting point is HTML. It's a language that empowers me to create, experiment, and develop various digital experiences . So, as we embark on these beginner projects, remember that you're not just learning a new skill. You are stepping into a world full of endless possibilities and opportunities.
10 HTML Projects for Beginners: Your Journey Starts Here
As a web developer passionate about teaching, I‘m thrilled to guide you through this series. This section is crafted to progressively enhance your skills, offering a blend of creativity and learning. I’ve seen firsthand how these projects can transform beginners into confident creators, and I‘m excited to see the unique and innovative web experiences you’ll bring to life. Let's embark on this adventure together, turning code into compelling digital stories!
Project 1: Creating a Personal Portfolio Page
One of the best ways to start your HTML journey is by creating a personal portfolio page. This project allows you to introduce yourself to the world of web development while learning the basics of HTML. It’s not just about coding; it’s about telling your story through the web.
The objective here is to craft a web page that effectively portrays your personal and professional persona. This includes detailing your biography, showcasing your skills, and possibly even including a portfolio of work or projects you've completed. This page will be a cornerstone in establishing your online presence and can evolve as you progress in your career.
See the Pen HTML Project 1 by HubSpot ( @hubspot ) on CodePen .
- Showcase and Evolve : I'm selecting projects that best represent my abilities, and I plan to continually update my portfolio as I develop new skills.
- Simplicity and Clarity : My focus is on creating a clear, user-friendly layout that makes navigating my story and achievements effortless for visitors.
Project 2: Building a Simple Blog Layout
After creating a personal portfolio, the next step in your HTML journey is to build a simple blog layout. This project will introduce you to more complex structures and how to organize content effectively on a webpage.
The goal of this project is to create a basic blog layout that includes a header, a main content area for blog posts, and a footer. This layout serves as the foundation for any blog, providing a clear structure for presenting articles or posts.
See the Pen HTML Project 2 by HubSpot ( @hubspot ) on CodePen .
- Consistency is Key : In designing the blog, I'm focusing on maintaining a consistent style throughout the page to ensure a cohesive look.
- Content First : My layout will prioritize readability and easy navigation, making the content the star of the show.
Project 3: Designing a Landing Page
For the third project, let's shift gears and focus on creating a landing page. A landing page is a pivotal element in web design, often serving as the first point of contact between a business or individual and their audience. This project will help you learn how to design an effective and visually appealing landing page.
The objective is to create a single-page layout that introduces a product, service, or individual, with a focus on encouraging visitor engagement, such as signing up for a newsletter, downloading a guide, or learning more about a service.
See the Pen HTML Project 3 by HubSpot ( @hubspot ) on CodePen .
- Clear Call to Action : I'm ensuring that my landing page has a clear and compelling call to action (CTA) that stands out and guides visitors towards the desired engagement.
- Visual Appeal and Simplicity : My focus is on combining visual appeal with simplicity, making sure the design is not only attractive but also easy to navigate and understand.
Project 4: Crafting an eCommerce Page
Creating an eCommerce page is an excellent project for web developers looking to dive into the world of online retail. This project focuses on designing a web page that showcases products, includes product descriptions, prices, and a shopping cart.
The aim is to build a user-friendly and visually appealing eCommerce page that displays products effectively, providing customers with essential information and a seamless shopping experience. The page should include product images, descriptions, prices, and add-to-cart buttons.
See the Pen HTML Project 4 by HubSpot ( @hubspot ) on CodePen .
- Clarity and Accessibility : In designing the eCommerce page, my priority is to ensure that information is clear and accessible, making the shopping process straightforward for customers.
- Engaging Product Presentation : I'll focus on presenting each product attractively, with high-quality images and concise, informative descriptions that entice and inform.

Project 5: Developing a Recipe Page
One of the best ways to enhance your HTML and CSS skills is by creating a recipe page. This project is not only about structuring content but also about making it visually appealing. A recipe page is a delightful way to combine your love for cooking with web development, allowing you to share your favorite recipes in a creative and engaging format.
The aim of this project is to design a web page that effectively displays a recipe, making it easy and enjoyable to read. This includes organizing the recipe into clear sections such as ingredients and instructions, and styling the page to make it visually appealing. The recipe page you create can serve as a template for future culinary postings or a personal collection of your favorite recipes.
See the Pen HTML Project 5 by HubSpot ( @hubspot ) on CodePen .
- Clarity and Simplicity : My focus is on presenting the recipe in an organized manner, ensuring that the ingredients and instructions are easy to distinguish and follow.
- Engaging Visuals : I plan to use appealing images and a thoughtful layout, making the page not just informative but also a delight to the eyes.
Project 6: Creating a Technical Documentation
Implementing a responsive navigation menu is a crucial skill in web development, enhancing user experience on various devices. This project focuses on creating a navigation menu that adjusts to different screen sizes, ensuring your website is accessible and user-friendly across all devices.
The goal is to create a navigation menu that adapts to different screen sizes. This includes a traditional horizontal menu for larger screens and a collapsible " hamburger " menu for smaller screens. Understanding responsive design principles and how to apply them using HTML and CSS is key in this project.
See the Pen HTML Project 6 by HubSpot ( @hubspot ) on CodePen .
- Flexibility is Key : I'm focusing on building a navigation menu that's flexible and adapts smoothly across various devices.
- Simplicity in Design : Keeping the design simple and intuitive is crucial, especially for the mobile version, to ensure ease of navigation.
Project 7: Building a Small Business Homepage
Creating a homepage for a small business is a fantastic project for applying web development skills in a real-world context. This project involves designing a welcoming and informative landing page for a small business, focusing on user engagement and business promotion.
The aim is to create a homepage that effectively represents a small business, providing key information such as services offered, business hours, location, and contact details. The design should be professional, inviting, and aligned with the business's branding.
See the Pen HTML Project 7 by HubSpot ( @hubspot ) on CodePen .
- Clarity and Accessibility : My priority is ensuring that key information is presented clearly and is easily accessible to visitors.
- Brand Consistency : I plan to incorporate design elements that are in line with the business's branding, creating a cohesive and professional online presence.
Project 8: Setting Up a Simple Survey Form
Creating a simple survey form is a valuable project for practicing form handling in HTML and CSS. It's a fundamental skill in web development, essential for gathering user feedback, conducting research, or learning more about your audience.
The objective of this project is to create a user-friendly survey form that collects various types of information from users. The form will include different types of input fields, such as text boxes, radio buttons, checkboxes, and a submit button. The focus is on creating a clear, accessible, and easy-to-use form layout.
See the Pen HTML Project 8 by HubSpot ( @hubspot ) on CodePen .
- Simplicity in Design : I'm aiming for a design that's straightforward and intuitive, ensuring that filling out the form is hassle-free for users.
- Responsive Layout : Ensuring the form is responsive and accessible on different devices is a key consideration in its design.
Project 9: Creating an Event Invitation Page
Designing an event invitation page is a fantastic way to combine creativity with technical skills. This project involves creating a web page that serves as an online invitation for an event, such as a conference, workshop, or party.
The aim is to create a visually appealing and informative event invitation page. This page should include details about the event like the date, time, venue, and a brief description. The focus is on using HTML and CSS to present this information in an engaging and organized manner.
See the Pen HTML Project 9 by HubSpot ( @hubspot ) on CodePen .
- Visual Impact : I'm aiming for a design that captures the essence of the event, making the page immediately engaging.
- Clear Information Hierarchy : Organizing the event details in a clear and logical manner is crucial for effective communication.
Project 10: Building a Parallax Website
Creating a parallax website involves implementing a visual effect where background images move slower than foreground images, creating an illusion of depth and immersion. It's a popular technique for modern, interactive web design.
The objective of this project is to create a website with a parallax scrolling effect. This will be achieved using HTML and CSS, specifically focusing on background image positioning and scroll behavior. The key is to create a visually engaging and dynamic user experience.
See the Pen HTML Project 10 by HubSpot ( @hubspot ) on CodePen .
- Balance in Motion : While implementing parallax effects, I'll ensure the motion is smooth and not overwhelming, to maintain a pleasant user experience.
- Optimized Performance : I'll be mindful of optimizing images and code to ensure the parallax effect doesn't hinder the site's performance.
As we reach the end of our journey through various web development projects, it's clear that the field of web development is constantly evolving, presenting both challenges and opportunities. From creating basic HTML pages to designing dynamic, interactive websites, the skills acquired are just the beginning of a much broader and exciting landscape.
Embracing New Technologies: The future of web development is tied to the ongoing advancements in technologies. Frameworks like React, Angular, and Vue.js are changing how we build interactive user interfaces. Meanwhile, advancements in CSS, like Flexbox and Grid, have revolutionized layout design, making it more efficient and responsive.
Focus on User Experience: As technology progresses, the emphasis on user experience (UX) will become even more crucial. The success of a website increasingly depends on how well it engages users, provides value, and creates meaningful interactions. Web developers must continuously learn about the latest UX trends and apply them to their work.
The Rise of Mobile-First Development: With the increasing use of smartphones for internet access, mobile-first design is no longer an option but a necessity. This approach involves designing websites for smaller screens first and then scaling up to larger screens, ensuring a seamless experience across all devices.
Web Accessibility and Inclusivity: Making the web accessible to everyone, including people with disabilities, is a growing focus. This includes following best practices and guidelines for web accessibility, ensuring that websites are usable by everyone, regardless of their abilities or disabilities.
Performance and Optimization: As users become more demanding about performance, optimizing websites for speed and efficiency will continue to be a priority. This includes minimizing load times, optimizing images and assets, and writing efficient code.
Emerging Trends: The integration of artificial intelligence and machine learning in web development is on the rise, offering new ways to personalize user experiences and automate tasks. Additionally, the development of Progressive Web Apps (PWAs) is blurring the lines between web and mobile apps, offering offline capabilities and improved performance.
Continuous Learning: The only constant in web development is change. Continuous learning and adaptation are key to staying relevant in this field. Whether it's learning new programming languages, frameworks, or design principles, the ability to evolve with the industry is critical for any web developer.
As you continue on your path in web development, remember that each project is a step towards mastering this ever-changing discipline. Embrace the challenges, stay curious, and keep building, for the road ahead in web development is as exciting as it is limitless.

Don't forget to share this post!
Related articles.
![Onchange Event in HTML: How to Use It [+Examples]](https://blog.hubspot.com/hubfs/onchange.webp "html webpage assignment")
Onchange Event in HTML: How to Use It [+Examples]

HTML Dialog: How to Create a Dialog Box in HTML
![How to Create a Landing Page in HTML & CSS [+ 15 Templates]](https://lh7-us.googleusercontent.com/gmIHbJpUHbZTRtyrKrl3gPKd1vx-42KDD7q3zNsm-KeCrF2YypEaYW7J0lQXsog9CXD4UYxUJ-A7VAvPJTjKclV-Rd-bZrAFHvKLE4JFP5UKk84v8M8R5rtubdotpFQxOCZataRdWf_KE0hKe4N06qw "html webpage assignment")
How to Create a Landing Page in HTML & CSS [+ 15 Templates]

HTML Audio Tag: How to Add Audio to Your Website

How to Add an Image & Background Image in HTML

How to Call a JavaScript Function in HTML
![How to Embed Google Map in HTML [Step-By-Step Guide]](https://blog.hubspot.com/hubfs/Google%20Drive%20Integration/How%20to%20Embed%20Google%20Map%20in%20HTML%20%5BStep-By-Step%20Guide%5D-2.jpeg "html webpage assignment")
How to Embed Google Map in HTML [Step-By-Step Guide]

How to Create a Range Slider in HTML + CSS
![How to Create an HTML Tooltip [+ Code Templates]](https://blog.hubspot.com/hubfs/Google%20Drive%20Integration/How%20to%20Create%20an%20HTML%20Tooltip%20%5B+%20Code%20Templates%5D.jpeg "html webpage assignment")
How to Create an HTML Tooltip [+ Code Templates]
![How to Make an HTML Text Box [Examples]](https://blog.hubspot.com/hubfs/html%20text%20box.jpg "html webpage assignment")
How to Make an HTML Text Box [Examples]
Tangible tips and coding templates from experts to help you code better and faster.
CMS Hub is flexible for marketers, powerful for developers, and gives customers a personalized, secure experience
- HTML Lab Assignments
HTML Assignment and HTML Examples for Practice
Text formatting, working with image, working with link.
Purdue Online Writing Lab Purdue OWL® College of Liberal Arts
Welcome to the Purdue Online Writing Lab

Welcome to the Purdue OWL
This page is brought to you by the OWL at Purdue University. When printing this page, you must include the entire legal notice.
Copyright ©1995-2018 by The Writing Lab & The OWL at Purdue and Purdue University. All rights reserved. This material may not be published, reproduced, broadcast, rewritten, or redistributed without permission. Use of this site constitutes acceptance of our terms and conditions of fair use.
The Online Writing Lab at Purdue University houses writing resources and instructional material, and we provide these as a free service of the Writing Lab at Purdue. Students, members of the community, and users worldwide will find information to assist with many writing projects. Teachers and trainers may use this material for in-class and out-of-class instruction.
The Purdue On-Campus Writing Lab and Purdue Online Writing Lab assist clients in their development as writers—no matter what their skill level—with on-campus consultations, online participation, and community engagement. The Purdue Writing Lab serves the Purdue, West Lafayette, campus and coordinates with local literacy initiatives. The Purdue OWL offers global support through online reference materials and services.
A Message From the Assistant Director of Content Development
The Purdue OWL® is committed to supporting students, instructors, and writers by offering a wide range of resources that are developed and revised with them in mind. To do this, the OWL team is always exploring possibilties for a better design, allowing accessibility and user experience to guide our process. As the OWL undergoes some changes, we welcome your feedback and suggestions by email at any time.
Please don't hesitate to contact us via our contact page if you have any questions or comments.
All the best,
Social Media
Facebook twitter.
- For Users »
- Download QGIS
3.36.2 3.34.6 LTR
- Discover QGIS
- Get Involved
- Documentation
Download QGIS for your platform
Binary packages (installers) are available from this page.
The current version is QGIS 3.36.2 'Maidenhead' and was released on 19.04.2024.
The long-term repositories currently offer QGIS 3.34.6 'Prizren'.
QGIS is available on Windows, macOS, Linux, Android and iOS.
- Installation Downloads
- All Releases
Download for Windows
The OSGeo4W installer is recommended for regular users or organization deployments. It allows to have several QGIS versions in one place, and to keep each component up-to-date individually without having to download the whole package. QGIS 3.36.2 and 3.34.5 in OSGeo4W and the standalone installers include many dependency updates compared to the previous versions (see posting ). The updates affect Windows 7 support , which currently does not work . It is unclear yet whether it can be restored.
Download for macOS
After installing QGIS, the first launch attempt may fail due to security protections. To enable QGIS, control-click on its icon in your Applications folder and select Open in the context menu. A confirmation dialog will display where you need to click the Open button again. This only has to be done once.
Alternatively, for native support of both Intel x86 and Apple ARM architectures, together with the latest versions of key components (e.g. GDAL, PDAL, GRASS GIS) see:
MacPorts Installing Instructions
Download for Linux
For many flavors of GNU/Linux binary packages (rpm and deb) or software repositories (to add to your installation manager) are available. Please select your choice of distro below:
- Debian/Ubuntu
Linux Installation Instructions
Download for BSD
BSD Installation Instructions
Apps for mobile and tablet
The QGIS experience does not stop on the desktop. Various touch optimized apps allow you to take QGIS into the field
Third-party touch optimized apps
Qfield (android, ios, windows, macos, linux).

Mergin Maps Input app (available for Android, iOS and Windows devices)
Intramaps roam, qgis for android.
An old and deprecated not touch optimised release of QGIS for Android can be found in All downloads
All downloads
More specific instructions about downloading QGIS stable vs QGIS development can be found in All downloads .
For testing and learning purposes, a sample dataset is available , which contains collections of data from different sources and in different formats.
Previous releases of QGIS are still available here - including older releases for OS X here .
More older releases are available here and for OS X here .
Plugins for QGIS are also available here .
QGIS is open source software available under the terms of the GNU General Public License meaning that its source code can be downloaded through tarballs or the git repository.
QGIS Source Code is available here (latest release) and here (long term release)
Refer to the INSTALL guide on how to compile QGIS from source for the different platforms: here

USDLA Webinar May 10 - Improving Online Community: Discussion is NOT an assignment
Event details.
This session is designed to empower participants with the skills and insights needed to elevate interaction in online discussions through the refinement of three key elements: crafting better questions, enhancing faculty involvement, and fostering inclusive expectations. Participants will explore effective question design strategies that stimulate critical thinking and encourage diverse perspectives. The workshop will delve into the role of faculty in facilitating meaningful discussions, offering practical tips for increased engagement and fostering a supportive online community. Additionally, the session will address the importance of setting inclusive expectations to create a welcoming space for all participants. By the end of the session, attendees will possess a comprehensive toolkit to enhance the vibrancy and inclusivity of online discussions, ultimately fostering a more enriching and collaborative learning environment. Sheila Fry, MBA, and COO is an experienced educator with over 20 years of experience in teaching and curriculum development. She has facilitated a vast number of online classes in several disciplines ranging from math to business administration for both community colleges and universities. This diverse background, coupled with her connections to leaders at many institutions, informs her work as the COO of The Babb Group. At The Babb Group, Fry combines her corporate and education experiences to help institutions create engaging online learning programs that meet the needs of both learners and the organization. Fry manages course development, creating engaging learner experiences, managing instructional design projects, learning management system guidance, and curriculum analysis. Online Webinar
Event Audience
Learn to Code
With the world's largest web developer site., not sure where to begin.
The language for building web pages
HTML Example:
The language for styling web pages
CSS Example:
The language for programming web pages
JavaScript Example:
A popular programming language
Python Example:
A language for accessing databases
SQL Example:
A web server programming language, a js library for developing web pages, a programming language, a css framework for faster and better responsive web pages, a css framework for designing better web pages, raspberry pi, cyber security, data science, typing speed, dsa - d ata s tructures and a lgorithms, machine learning, artificial intelligence, code editor, with our online code editor, you can edit code and view the result in your browser, w3schools spaces, if you want to create your own website, check out w3schools spaces ., it is free to use, and does not require any setup:.

My Learning
Track your progress with our free "my learning" program., log in to your account, and start earning points.

Note: This is an optional feature. You can study W3Schools without using My Learning.
Become a plus user, and unlock powerful features:, color picker, w3schools' famous color picker:.

Help the Lynx collect pine cones!

Exercises and Quizzes
Test your skills, web templates, browse our selection of free responsive html templates.

Browse Templates
Kickstart your career
Get certified by completing a course
How To Section
Code snippets for html, css and javascript, for example, how to create a slideshow:, contact sales.
If you want to use W3Schools services as an educational institution, team or enterprise, send us an e-mail: [email protected]
Report Error
If you want to report an error, or if you want to make a suggestion, send us an e-mail: [email protected]
Top Tutorials
Top references, top examples, get certified.
IMAGES
VIDEO
COMMENTS
Learn the basics of HTML in a fun and engaging video tutorial. Templates. We have created a bunch of responsive website templates you can use - for free! Web Hosting. Host your own website, and share it to the world with W3Schools Spaces. Create a Server. Create your own server using Python, PHP, React.js, Node.js, Java, C#, etc. ...
Embark on your HTML learning journey by accessing our online practice portal. Choose exercises suited to your skill level, dive into coding challenges, and receive immediate feedback to reinforce your understanding. Our user-friendly platform makes learning HTML engaging and personalized, allowing you to develop your skills effectively.
Description: Create a webpage to print a paragraph with 4 - 5 sentences. Each sentence should be in a different font and color. Each sentence should be in a different font and color. Hint: Put the paragraph content inside the body tag and paragraph should be enclosed in <p> tag.
HTML, a shorthand for Hyper Text Markup Language, is one of the most fundamental building blocks of the Web. HTML was officially born in 1993 and since then it evolved into its current state, moving from simple text documents to powering rich Web Applications. This handbook is aimed at a vast audience. First, the beginner.
Practice. Learn how to use HTML and CSS to make webpages. HTML is the markup language that you surround content with, to tell browsers about headings, lists, tables, and more. CSS is the stylesheet language that you style the page with, to tell browsers to change the color, font, layout, and more.
Challenge Project: Build a Website Design System. HTML & CSS • Web Development • Web Design Build a style guide for your web projects, including custom fonts, colors, text styles, and more. Less guidance, 180 min. Practice Project.
Select File > Save as in the Notepad or other text editor menu. Name the file your_name.html and set the encoding to UTF-8 (preferred for HTML files). Once you save the file you can open it in your browser by right clicking on the file, clicking Open with, and selecting your browser. You will see your basic HTML page!
HTML (HyperText Markup Language) is a markup language that tells web browsers how to structure the web pages you visit. It can be as complicated or as simple as the web developer wants it to be. HTML consists of a series of elements, which you use to enclose, wrap, or mark up different parts of content to make it appear or act in a certain way. The enclosing tags can make content into a ...
HTML (HyperText Markup Language) is a language used for creating webpages which is the fundamental building block of the Web. One thing to remember about HTML is that it is a markup language with no programming constructs. Instead, the language provides us with a structure to build web pages. Using HTML, we can define web page elements such as ...
Here are 10 HTML and CSS code challenges that'll help you take your skills to the next level. To get started, just pick a challenge, open up a workspace, and start coding. Note that while these challenges are designed for beginners, you'll still need to have a basic understanding of HTML and CSS. If you need a refresher, use the courses below:
HTML consists of a series of elements, which you use to enclose, or wrap, different parts of the content to make it appear a certain way, or act a certain way. The enclosing tags can make a word or image hyperlink to somewhere else, can italicize words, can make the font bigger or smaller, and so on. For example, take the following line of ...
There are 4 modules in this course. Web content is accessed by millions across the globe every day. Attractive web pages help businesses grow and provide an omnipresent experience to the viewers. In this course you will get an understanding on how HTML5 is used to structure simple web pages from scratch and how CSS3 enhances their appearance.
Learn how to create and style web pages with HTML, the standard markup language for the web. W3Schools HTML Tutorial offers easy and interactive examples, exercises, quizzes, and references to help you master HTML. Whether you are a beginner or a professional, you will find something useful in this tutorial.
5. Restaurant Website. Showcase your solid knowledge of HTML and CSS creating a beautiful webpage for a restaurant. Making a layout for a restaurant will be a bit complicated than previous project examples. You will be aligning the different food items and drinks using a CSS layout grid.
In this project, you'll create a simple blog post page using HTML and CSS. You'll need to design the layout of the page, add a title, a featured image, and of course add some content to your dummy blog post. You can also add a sidebar with a few helpful links and widgets, like: An author bio with a photo.
Once you've filled in your HTML file and saved it, you can view it as a webpage in your browser. Just follow these steps: Open your File Explorer or Finder. Navigate to your GCF Programming Tutorials project and click inside. Double-click your index.html file. The file should open in your default web browser.
A website is simply a collection of web-pages. A web page or web documents written in HTML (HyperText Markup Language). These Web pages can be viewed using any web browser and Internet. Html Language is used to write code and programs to create a webpage. It is easy to create a webpage and you can learn it with few basic steps mentioned below:
Project 4: Crafting an eCommerce Page. Creating an eCommerce page is an excellent project for web developers looking to dive into the world of online retail. This project focuses on designing a web page that showcases products, includes product descriptions, prices, and a shopping cart.
Assignment 1. Assignment 2. Assignment 3. Assignment 4 (Web Infomax Invoice) Assignment 5 (Web Layout) Assignment 6 (Periodic Table) UNIT - 6.
The Online Writing Lab at Purdue University houses writing resources and instructional material, and we provide these as a free service of the Writing Lab at Purdue.
Download QGIS for your platform. Binary packages (installers) are available from this page. The current version is QGIS 3.36.2 'Maidenhead' and was released on 19.04.2024.
Here is an example of a web page without the viewport meta tag, and the same web page with the viewport meta tag: Without the viewport meta tag: With the viewport meta tag: Tip: If you are browsing this page on a phone or a tablet, you can click on the two links above to see the difference.
Learn more about the USDLA Webinar May 10 - Improving Online Community: Discussion is NOT an assignment web page at South Dakota State University in Brookings, South Dakota. Skip to main content ... USDLA Webinar May 10 - Improving Online Community: Discussion is NOT an assignment Friday, May. 10, 2024 12:00 pm - 1:00 pm ...
First Step - Basic HTML Page. HTML is the standard markup language for creating websites and CSS is the language that describes the style of an HTML document. We will combine HTML and CSS to create a basic web page. Note: If you don't know HTML and CSS, we suggest that you start by reading our HTML Tutorial.
W3schools Pathfinder. Track your progress - it's free! Well organized and easy to understand Web building tutorials with lots of examples of how to use HTML, CSS, JavaScript, SQL, Python, PHP, Bootstrap, Java, XML and more.