
Microsoft 365 Life Hacks > Privacy & Safety > How to password protect your Excel workbooks

How to password protect your Excel workbooks
Microsoft Excel is a versatile spreadsheet application that you can use to manage data in your work, business, and personal lives. However, without proper protection, your Excel workbooks can be vulnerable to unauthorized access and edits. Learn why it’s important to password protect your Excel workbooks and how you can do so on your device.

The importance of password protecting your workbooks in Excel
In addition to using Excel for organizing data and completing calculations, your workbooks can hold personal information that can be detrimental if accessed by malicious parties. Some of the reasons why you should password protect your Excel workbooks are to:
Protect private information
Protect your private and sensitive information and the personal details of your clients, peers, and customers. By protecting your Excel workbook, you’re not only taking a step to make sure personal and business-related data are used properly, but you’re also limiting who has access to this information.

Microsoft Defender
Stay safer online with one easy-to-use app 1 1 Microsoft 365 Personal or Family subscription required; app available as separate download
Prohibit unauthorized edits
You can use passwords to limit modifications in your workbook. Protecting your Excel workbooks will also prevent unauthorized people from changing or deleting data and information. This will help ensure your file’s integrity and the accuracy of its contents.
Maintain the trust of your investors and customers
If you’re using Excel while at work or when running your business, you might have laws and regulations you need to follow when handling consumer data. Protecting your Excel workbooks can help you meet these compliance requirements. By taking this extra security step, you’ll maintain the trust of your investors and customers who support and work with your business.
Protect your business’s financial details
Excel is a great tool to use when managing budgets, recording financial history, and calculating profits and losses. You can implement valuable formulas, macros, and other unique processes to easily record and manage this data. Adding a password to your Excel workbooks will protect your business’s financial details so unknown parties won’t be able to view or share them.
How to add a password to your Excel workbooks
Microsoft Excel has a password protection feature that you can use to safeguard your workbooks. Here’s how you add a password to your Excel workbooks:
- Select File > Info .
- Choose Protect Workbook .
- Select Encrypt with Password .
- Create a strong password to protect your Excel workbook. The password is case-sensitive, but the length and character mix are up to your discretion.
- Confirm the password by entering it again.
- Select OK to save these changes.
How to protect a single worksheet in Excel
You may come across instances where you only need to password protect some of the worksheet tabs in your Excel file. To add a password to a single worksheet, you’ll first need to specify any cells that you want to make editable. You can do so with these steps:
- Open the Excel file that contains the worksheet you want to password protect.
- Select the cells that you want others to be able to edit.
- Right-click on the worksheet and select Format Cells .
- Open the Protection tab .
- Clear the Locked checkbox to unlock these cells.
Next, you’ll be able to password protect the Excel worksheet while customizing access and modification levels. To finish the worksheet protection process:
- Open the Review tab, and select Protect Sheet .
- Select the elements you want people to be able to change in the Allow all users of this worksheet to section.
- Enter a strong password that allows users to unlock the worksheet.
- Reenter the password to confirm it.
- Select OK to save the changes.
Add digital signatures
If you or your business have a digital certificate, you can implement a digital signature or ID to help you manage who makes changes to your Excel workbook. The unique, cryptographic signature is embedded into your Excel file and ensures that your file hasn’t had any edits completed by unauthorized parties. When you share the workbook with others, they can verify the digital signature to make sure that the file is from you and has only been touched by you and other authorized people. To add a digital signature in Excel:
- Expand the Tools menu, and select Options .
- Open the Security tab, and choose Digital Signatures .
- Select Add , and choose Yes to save the changes.
- Then, choose OK when the Select Certificate box is displayed.
- Select OK again to sign the Excel workbook.
Prioritizing the security of your Excel workbooks will help you protect personal and private information and data. By password protecting your workbooks, you can confidently reduce security risks and maintain the integrity of your files. Leverage this built-in feature and other powerful tools in Microsoft Excel so you can manage and share data in a safe manner. Explore other privacy and safety tips that you can use across different online and computer programs.
Get started with Microsoft 365
It’s the Office you know, plus the tools to help you work better together, so you can get more done—anytime, anywhere.
Topics in this article
More articles like this one.

Student loan forgiveness scams: What they are and how to avoid them
Prevent scammers from taking advantage of your student loan debt. Learn about student loan forgiveness scams and how to avoid them.

What is bluesnarfing?
Employ best digital safety and security devices to prevent cyberattacks on your devices. Learn what bluesnarfing is and how your Bluetooth devices can become susceptible to cyberattacks.

What is bluejacking?
Learn how to prevent bluejacking and other Bluetooth attacks with these safety tips.

Are digital wallets safe?
Learn about the pros and cons of using a digital wallet and how to prioritize your safety.
Everything you need to achieve more in less time
Get powerful productivity and security apps with Microsoft 365

Explore Other Categories
- Ablebits blog
- Excel macro
How to protect and unprotect Excel sheet with or without password

The tutorial shows how to protect Excel sheet with or without passwords. It also explains how to unlock Excel spreadsheet without password if you forgot or misplaced it.
When sharing your worksheets with other people or sending your Excel files outside of your organization, you may want to prevent other users from changing cells that shouldn't be changed, and also from moving or deleting important data in your worksheet or workbook.
Luckily, Excel provides a quick and easy way to lock a sheet or password protect an entire workbook to prevent accidental or deliberate changes in their contents.
What you need to know about Excel worksheet protection
Worksheet protection in Excel is not a security feature. It's is not actually intended to prevent people from accessing data in a password-protected worksheet. Why? Because Microsoft Excel uses a very simple encryption algorithm for worksheet protection. Even when you protect your Excel worksheet with a password, that password is very easy to break.
In older versions (below Microsoft Excel 2010), it doesn't even matter how long and complex your password is. Anyone who has at least some basic knowledge of VBA can crack it in minutes (here's an example of the VBA code that easily cracks passwords in Excel 2010 and lower).
The recent versions of Excel use more sophisticated methods of sheet protection, but they are also vulnerable and can be unlocked without knowing a password. In other words, if someone really wants to get access to a protected sheet, they will.
So, does this mean that Excel worksheet protection is absolutely pointless? Not at all! It makes sense to lock Excel sheets to avoid accidental changes in the sheet contents. A common example is Locking formula cells to prevent inadvertent erasure or modification of formulas.
The bottom line is - lock an Excel spreadsheet to prevent other users from accidentally tampering with your data, but never store sensitive information in your Excel sheets.
If you strive to ensure the maximum security protection for your Excel files, be sure to do all of the following:
- Use the modern versions of Excel with enhanced data encryption mechanisms.
- Protect your sheets with strong passwords that include different types of alpha numeric characters and special symbols. At that, try to make passwords as random as possible, for example by using our password generating tool .
- Protect the workbook structure to prevent other people from adding, moving, renaming, deleting or unhiding your sheets.
- For workbook-level security, encrypt the workbook with different passwords from opening and modifying .
- If possible, store your Excel files with sensitive information in a secure location, e.g. on an encrypted hard drive.
How to protect Excel sheet
To protect a sheet in Excel, perform the following steps.

- To password protect your Excel sheet , type a password in the corresponding field. Be sure to remember the password or store it in a safe location because you will need it later to unprotect the sheet.
- If the worksheet protection is nothing more than a precaution against accidental modification of the sheet contents by yourself or by the members of your local team, you may not want to bother about memorizing the password and leave the password field empty . In this case, unprotecting the sheet takes just a single click on the Unprotect Sheet button on the ribbon or in the sheet tab's right-click menu.
- By default, the following 2 options are selected: Select locked cells and Select unlocked cells . If you leave only these two options selected, the users of your sheet, including yourself, will be able only to select cells (both locked and unlocked).
- To allow some other actions such as sorting, filtering, formatting cells, deleting or inserting rows and columns, check the corresponding boxes.
- If you don't check any action, users will only be able to view the contents of your Excel sheet.
- Click the OK button.
 and choose the actions you want to allow your users to perform.")
- The Confirm Password dialog box will pop-up prompting you to retype the password so that an accidental misprint won't lock your Excel sheet forever. Retype the password and click OK. Done!
How to unprotect Excel sheet
As you have just seen, it's very easy to password protect a sheet in Excel. Unprotecting a spreadsheet is even easier, provided that you know the password. Though, unlocking an Excel spreadsheet without password is no big deal either :)
How to unprotect Excel sheet with password
If you know the password for the protected sheet, removing protection is a matter of seconds. Just do any of the following:

If you are dealing with a password-protected worksheet , Excel will ask you to enter the password. Type the password and click OK.
How to unprotect Excel sheet without password
As mentioned in the beginning of this tutorial, Excel worksheet protection is quite weak even in the recent versions of Excel. If you need to edit a password protected sheet but you cannot remember the password, try to unlock that Excel spreadsheet by using one of the following methods.
Unlock Excel spreadsheet with VBA code (for Excel 2010 and lower)
If you are using Excel 2010 or older, you can unlock a password-protected sheet with the following macro.
- Open your Excel document and switch to the password-protected sheet (it should be active when you run the macro).
- Press Alt + F11 to open the Visual Basic Editor.
- Right-click the workbook name on the left pane ( Project-VBAProject pane) and select Insert > Module from the context menu.
- Press F5 or click the Run button on the toolbar and wait a couple of minutes.
- The macro will report a cracked password, which is not the original one (always some combination of A's and B's), but nevertheless it works. You do not need to remember this fake password or enter it anywhere. Simply click OK and the sheet is unprotected!
Tips and notes:
- If your Excel file contains more than one protected sheet, run the macro for each sheet individually to unprotect it.
- To unprotect a sheet without password in Excel 365 - 2013 , you can save the document as Excel 97-2003 workbook (*.xls) first. Then, close Excel and reopen the workbook - it will be opened in compatibility mode. Run the macro to unprotect the worksheet, and then save the workbook back as an .xlsx file. Alternatively, you can use one of free tools, for example Password Protection Remover add-in for Excel . Or you can upload the protected Excel worksheet to your Google Drive, and then open it with Google Sheets.
- In case you are not very comfortable with VBA, you can find the detailed guidance in the following tutorial: How to insert and run VBA code in Excel .
Copy the protected sheet contents to another worksheet
Another way (or rather a workaround) to unlock an Excel sheet that was protected with password is to copy its entire contents to a new sheet. Here's how:
- Open the password-protected sheet.
- With the cursor positioned in cell A1, press Shift + Ctrl + End to select all used cells in the worksheet.
- Press Ctrl + C to copy the selected cells.
- Create a new sheet in the current workbook or in a different workbook (to create a new Excel file, simply press Ctrl + N ).
- In the new blank worksheet, place the cursor in A1 and press Ctrl + V to paste the contents of the password-protected sheet.
- This method works only if the Select locked cells and Select unlocked cells actions are allowed in the protected spreadsheet.
- If the password-protected worksheet has external links to other sheets or workbooks, you may need to re-create those links manually.
- You can use Paste Special to copy / paste the column widths so you won't need to adjust them in the new sheet manually.
How to protect a workbook in Excel
Apart from protecting the sheet contents, you may also want lock the entire workbook to prevent users from adding, moving, renaming or deleting worksheets, and viewing hidden sheets.
To protect the workbook, perform the following steps:

- Viewing hidden worksheets.
- Renaming, moving, hiding or deleting sheets.
- Inserting new sheets and chart sheets. However, users will be able to insert a chart in an existing worksheet.
- Moving or copying sheets to another workbook.

Note. The Windows option is not available (greyed out) in Excel 2013 and higher, as shown in the screenshot above. It is because Microsoft introduced the Single Document Interface in Excel 2013, where each workbook has its own top-level window that can be minimized, restored, and closed.
- In the Password box, type a password, and click the OK button. As indicated on the dialog window, a password is optional. However, if you do not enter a password, then anybody will be able to unlock your workbook with a button click.
- Retype the password in the Confirm Password window and click OK . That's it!
How to unlock a protected workbook in Excel
To remove the workbook protection, do the following:

- Type the password if prompted.
- Save the workbook.
Important note! Protecting the workbook structure should not be confused with workbook-level password encryption that can prevent other users from opening or/and modifying your workbook. If you are interested in this level of workbook protection, check out the next sections of this tutorial.
Password protect Excel workbook from opening
If you store your workbooks in a shared location such as a company local network, and you want to prevent other users from viewing your Excel files, you can encrypt your workbook with password that won't even let other people open it.

- Retype the password in the Reenter password box, and click OK .
- Save your workbook.
To remove the workbook encryption , repeat the above steps, delete the password from the Password box, click OK, and then save your workbook.
Tip. In addition to password-protection, you can secure your Excel files further by using the BitLocker Drive Encryption , which is available in the Ultimate and Enterprise editions of Windows Vista and Windows.
Password protect Excel workbook from modifying
If you don't mind other users opening your Excel file but you want to prevent them from making any changes to your workbook, perform the following steps.
- In your Excel workbook, click the Save As button, and then click the Tools button at the bottom of the window.

Tip. If you want to protect your Excel file both from modifying and opening, type the passwords in the Password to open and Password to modify boxes. It can be the same password of two different ones.
- Retype the password in the Confirm Password dialog, and click OK . If you've entered 2 passwords in the previous step, you will be asked to confirm both.
- Finally, click the Save button in the Save As dialog.
To remove the password protection , repeat the above steps, and delete the password(s) from the Password to open and Password to modify boxes. Then click the Save button to save your workbook.
I thank you for reading and hope to see you on our blog next week.
You may also be interested in
- How to hide and lock formulas in Excel
- Show and hide Excel gridlines
- How to insert comments in Excel
- How to access a corrupt .xls file in Excel 2010 - 365
Table of contents
389 comments
Thank you for the corrected (non-syntax error) code. It worked. You saved me a lot of time.
it tooked a bit of time but it worked thankyou
i tried the VBa code - My excel is not responding after I ran the below code : Sub PasswordBreaker() 'Breaks worksheet password protection.
Dim i As Integer, j As Integer, k As Integer Dim l As Integer, m As Integer, n As Integer Dim i1 As Integer, i2 As Integer, i3 As Integer Dim i4 As Integer, i5 As Integer, i6 As Integer
On Error Resume Next
For i = 65 To 66: For j = 65 To 66: For k = 65 To 66 For l = 65 To 66: For m = 65 To 66: For i1 = 65 To 66 For i2 = 65 To 66: For i3 = 65 To 66: For i4 = 65 To 66 For i5 = 65 To 66: For i6 = 65 To 66: For n = 32 To 126
ActiveSheet.Unprotect Chr(i) & Chr(j) & Chr(k) & _ Chr(l) & Chr(m) & Chr(i1) & Chr(i2) & Chr(i3) & _ Chr(i4) & Chr(i5) & Chr(i6) & Chr(n)
If ActiveSheet.ProtectContents = False Then MsgBox "Password is " & Chr(i) & Chr(j) & _ Chr(k) & Chr(l) & Chr(m) & Chr(i1) & Chr(i2) & _ Chr(i3) & Chr(i4) & Chr(i5) & Chr(i6) & Chr(n)
Next: Next: Next: Next: Next: Next Next: Next: Next: Next: Next: Next End Sub
Please help !!!!
Hi! You're asking beyond the advice this blog can provide. We don't help with creating VBA code.
please help me my excel sheet product not working my forget password
Hello, I need to make a cell for filterizing with protect and unprotect with password please help
wow that is great! I had a workbook from 2023 office 365, converted it to a 97-2004 .xls, then copy the code in the macro and the file was UNLOCKED!! Great job guys! Really WELL DONE! BIG THANK YOU
I have an Excel worksheet where I'm using the Group function to compress rows of data so that only the summary row are visible to the reviewer unless they click the "+" to see the details. I want to protect (lock) the summary rows so the data and formulas cannot be accidentally modified. However, I have tried to lock only these rows but when I do so, the Group option is also locked and the viewer (including myself) cannot access the compressed rows. Is there a way to lock only the desired rows but allow the Group option to still function?
Yesss, it worked for me with removing the "&" and replace with "&"
Thank you very much, I have been relieved of a big burden,once again, thank you so much
I forgot the password put on entire workbook for opening and modifying. Please help me how can I open my file.
my excel not responding when vba code running, please help
have tried torun the code and I get the error: compile error invalid outside procedure
I must be doing something wrong but can't figure out what
please guide, how can we prevent accidental deletion of a sheet/
You always see a warning before deleting a sheet.
Why is the compile error appearing in the VBA code
replace the "&" with "&" in the code
With newer versions of excel, is it possible to save them as older and still break the password with vba using the program shown? If not, what version/s does this become impossible?
Helo my problem is .. I use a password in excel file before 6 months.. but now not remember password... It's very important file .. plz help me... How I can Brock the lock this file...
using excel 2010 unable to unlock the file because the protected workbook option are hiding
Hi , thanks for your useful information , i script part : ActiveSheet.Unprotect it said Syntax Error ?!
Same problem, syntax error in both the downgraded version and the 2013 version.
Replace & with & and it works
Butchering this. Haven't played with html. Ok, replace & with &
you mean replace all "&" with just "&" ??
replace "&" with just "&"
& with just & no need (;)
did this: replaced & with just & no need (;)
still get error
Yes & with &
Sub PasswordBreaker() 'Breaks worksheet password protection.
Thank you so much!
It was amazing.
This was exactly was I was going to post until I saw someone notice that for web, the & is really "and" operator... Good call, good work, it worked like a charm!
It worked. thank you very much.
Thank you so much, it worked.
HI I have office 365 and I wanted to remove protection from xlsx file. I converted it to xls (97-2003 file format) and run the macro. Macro run successfully and it generated a password however the protection was still not removed and i am still unable to copy the data. Appreciate if you can help.
Just to add I am using Microsoft® Excel® for Microsoft 365 MSO (Version 2206 Build 16.0.15330.20246) 64-bit
Initially the process froze Excel and was non responsive. I read further and followed the instruction to save the document as 97-2003 (*.xls). Closed and re-openned the document and then restarted the process. It worked instantly! thank you!
Wow, it's works. Initially wasn't respond. After your comment. We need to close the file and re-open it again in order to work. A genius!
The macro froze my excel for 20 minutes, at 8gig ram i5 CPU. I have terminated the application, because I cant sit and wait so long.
Your unlock of excel sheet worked, thanks.
You're a genius! Thank you for sharing. It is a great help.
My excel workbook and sheets are protected and I can't unlock or unprotect what can I do? Please help
Post a comment
- PRO Courses Guides New Tech Help Pro Expert Videos About wikiHow Pro Upgrade Sign In
- EDIT Edit this Article
- EXPLORE Tech Help Pro About Us Random Article Quizzes Request a New Article Community Dashboard This Or That Game Popular Categories Arts and Entertainment Artwork Books Movies Computers and Electronics Computers Phone Skills Technology Hacks Health Men's Health Mental Health Women's Health Relationships Dating Love Relationship Issues Hobbies and Crafts Crafts Drawing Games Education & Communication Communication Skills Personal Development Studying Personal Care and Style Fashion Hair Care Personal Hygiene Youth Personal Care School Stuff Dating All Categories Arts and Entertainment Finance and Business Home and Garden Relationship Quizzes Cars & Other Vehicles Food and Entertaining Personal Care and Style Sports and Fitness Computers and Electronics Health Pets and Animals Travel Education & Communication Hobbies and Crafts Philosophy and Religion Work World Family Life Holidays and Traditions Relationships Youth
- Browse Articles
- Learn Something New
- Quizzes Hot
- This Or That Game
- Train Your Brain
- Explore More
- Support wikiHow
- About wikiHow
- Log in / Sign up
- Computers and Electronics
- Spreadsheets
- Microsoft Excel
How to Unprotect an Excel Sheet
Last Updated: August 9, 2023 Fact Checked
This article was co-authored by wikiHow staff writer, Nicole Levine, MFA . Nicole Levine is a Technology Writer and Editor for wikiHow. She has more than 20 years of experience creating technical documentation and leading support teams at major web hosting and software companies. Nicole also holds an MFA in Creative Writing from Portland State University and teaches composition, fiction-writing, and zine-making at various institutions. This article has been fact-checked, ensuring the accuracy of any cited facts and confirming the authority of its sources. This article has been viewed 785,971 times. Learn more...
Do you need to view or edit a protected Excel worksheet? If the sheet is locked with a password and you're not sure what it is, you can easily use Google Sheets or a VBA script (in earlier versions of Excel) to remove the password. This wikiHow article will show you how to unlock a protected Excel spreadsheet with or without the password. If your entire Excel workbook is password-protected and you can't open it, you'll need to unlock the file first.
Using Microsoft Excel

- If multiple sheets are protected, you'll need to remove protection on each sheet separately.

- If you don't know the password, see the Using Google Sheets method. This method lets you upload the file to Google Sheets, which removes all protections added in Excel.
- If you're using Excel 2010 or earlier and prefer not to upload to Google Sheets, see the Using VBA Code in Excel 2010 and Earlier method.
Uploading to Google Sheets

- If you're not already signed into your Google account, follow the on-screen instructions to sign in now.
- If you don't have a Google account, see How to Make a Google Account.

- Click the File menu at the top-left corner of your sheet.
- Click Download As.
- Click Microsoft Excel (.xlsx) .
- Select a folder to save the file. If you want to keep the original version of the file (the one with a protected sheet) intact, type a new name for the file as well.
- Click Save to download the file.
Using an Online Service

Using VBA Code in Excel 2010 and Earlier

- Use this method if you have already tried unlocking a sheet but found that it's password-protected (and you don't know the password).
- This method will not work in Excel 2013 or later.

- Click the File menu at the top-right corner.
- Click Save As.
- Go to the folder in which you want to save the file.
- Select Excel 97-2003 (.xls) from the "Save as type" or "File Format" menu.
- Click Save.

- 7 Copy the code. Highlight the code that follows this text, then press Ctrl + C (PC) or ⌘ Command + C to copy it: [5] X Research source Sub PasswordBreaker () 'Breaks worksheet password protection. Dim i As Integer , j As Integer , k As Integer Dim l As Integer , m As Integer , n As Integer Dim i1 As Integer , i2 As Integer , i3 As Integer Dim i4 As Integer , i5 As Integer , i6 As Integer On Error Resume Next For i = 65 To 66 : For j = 65 To 66 : For k = 65 To 66 For l = 65 To 66 : For m = 65 To 66 : For i1 = 65 To 66 For i2 = 65 To 66 : For i3 = 65 To 66 : For i4 = 65 To 66 For i5 = 65 To 66 : For i6 = 65 To 66 : For n = 32 To 126 ActiveSheet . Unprotect Chr ( i ) & Chr ( j ) & Chr ( k ) & _ Chr ( l ) & Chr ( m ) & Chr ( i1 ) & Chr ( i2 ) & Chr ( i3 ) & _ Chr ( i4 ) & Chr ( i5 ) & Chr ( i6 ) & Chr ( n ) If ActiveSheet . ProtectContents = False Then MsgBox "Password is " & Chr ( i ) & Chr ( j ) & _ Chr ( k ) & Chr ( l ) & Chr ( m ) & Chr ( i1 ) & Chr ( i2 ) & _ Chr ( i3 ) & Chr ( i4 ) & Chr ( i5 ) & Chr ( i6 ) & Chr ( n ) Exit Sub End If Next : Next : Next : Next : Next : Next Next : Next : Next : Next : Next : Next End Sub

- The new password will be a random number of "As" rather than the original password.

- If you had to convert the file to an earlier format, you can now save the workbook again as an .xlsx file.
Community Q&A
You Might Also Like

- ↑ https://support.microsoft.com/en-gb/office/lock-or-unlock-specific-areas-of-a-protected-worksheet-75481b72-db8a-4267-8c43-042a5f2cd93a
- ↑ https://support.microsoft.com/en-gb/office/change-or-remove-workbook-passwords-1c17af87-25e2-4dc6-94f0-19ce21ad0b68
- ↑ https://support.microsoft.com/en-au/office/protect-a-worksheet-3179efdb-1285-4d49-a9c3-f4ca36276de6
- ↑ https://support.google.com/drive/answer/2424368?hl=en&co=GENIE.Platform%3DDesktop
- ↑ https://www.gonzalesisd.net/cms/lib/TX02217206/Centricity/Domain/94/Windows%20-%20Unlock%20A%20Locked%20Excel%20Sheet.pdf
About This Article

To unlock a sheet in an Excel workbook, right-click the sheet's tab and click Unprotect sheet . Enter the password, if prompted. If you don't know the password, upload the sheet to your Google Drive, open it in Google Sheets, then re-download it to your computer. Did this summary help you? Yes No
- Send fan mail to authors
Is this article up to date?

Featured Articles

Trending Articles

Watch Articles

- Terms of Use
- Privacy Policy
- Do Not Sell or Share My Info
- Not Selling Info
wikiHow Tech Help Pro:
Level up your tech skills and stay ahead of the curve
How to Unprotect an Excel Worksheet or Workbook (With or Without Password)
Plus the difference between a Worksheet and Workbook
Do you want to make changes to your Excel workbook or worksheet, but find that they’re locked or protected? If so, you might need to unprotect them first. This will allow you to edit the content, structure, and formatting of your spreadsheet.
But how do you unprotect an Excel worksheet or workbook? And what happens if you don’t know the password? If you’re unsure how to proceed with unlocking your data in a protected Excel file, follow the steps below.

Unprotecting a Workbook vs. Unprotecting a Worksheet in Excel
Before we start, let’s clarify the difference between unprotecting a workbook and unprotecting a worksheet. A workbook is used to describe an entire Excel file. A worksheet , however, is used to describe the individual sheets in your Excel spreadsheet—the tabs of data you’ll see at the bottom of the window.
Unprotecting a workbook means that you can make structural changes to the workbook as a whole, such as adding, deleting, hiding, or renaming worksheets. You can also change the workbook properties and settings in your Excel spreadsheet by removing the protection from it.
In contrast, unprotecting a worksheet means that you can modify the data and formatting of the worksheet, such as changing the content of a cell, inserting or deleting rows and columns, applying or removing filters, and so on. Other worksheets might remain protected.
There are differences in the type of protection available. Encrypting an Excel file prevents anyone from viewing it without knowing the password. If you simply protect the workbook or worksheets, you’ll still be able to read the data and open the file, but you may need additional passwords to make changes or remove that protection.
How to Remove Excel File Encryption
The first barrier to unprotecting an Excel worksheet or workbook is to remove encryption from the file. Encryption prevents you from opening modern Excel files without first knowing the encryption password.
To do this, you’ll need to have the password for the workbook that was used to encrypt the file. If you don’t have it, you’ll need to try a third-party Excel password removal tool to unlock your file. Make sure to back up your file before you try this.
To remove Excel file encryption, follow these steps.
- Open your encrypted Excel workbook. When prompted, insert the correct password.
- Next, press File > Info .
- Select the Protect Workbook icon.
- From the drop-down menu, select the Encrypt with password option.

- In the Encrypt Document pop-up box, remove the existing password and press OK .

- If the password was accepted, press Save to save the file without the password.
Once you’ve removed file encryption, you should be able to unlock the workbook or individual sheets from the Data menu.
How to Unprotect an Excel Workbook
An Excel workbook can be protected with or without password protection. If you want to unprotect an Excel workbook, follow these steps.
- Open the workbook that you want to unprotect with Microsoft Excel.
- In the Review tab, press Protect Workbook in the Protect section to change its status. If the workbook is currently protected, the icon will appear in an active state with a gray background and border.

- If the workbook doesn’t have a password, pressing the Protect Workbook button will change its status immediately—the icon’s status will change to match other icons on the ribbon bar.
- If the workbook is protected with a password, you’ll see a pop-up box asking you to enter the workbook password. Type it in and click OK to remove it, then type it in again to confirm. This will allow you to make structural changes to the workbook.

As with encrypted Excel files, if you don’t know the password, you’ll have to use a third-party password recovery tool to unlock a password-protected Excel spreadsheet file. If you plan on doing this, make sure you save a copy of your file first, just to protect yourself from potential data loss or corruption.
How to Unprotect an Excel Worksheet
You can also protect individual Excel worksheets from being created, edited, or deleted. This includes the ability to protect them with or without passwords.
It’s best to make these changes in an unprotected workbook. Otherwise, you may find it difficult to unlock certain functionality (such as the ability to add or delete worksheets). However, even in a locked workbook, you may still be able to remove sheet protection, but only if the XLSX file isn’t encrypted.
If you want to unprotect an Excel worksheet, follow these steps.
- Open the workbook that contains the worksheet that you want to unlock.
- From the Review tab, press the Unprotect Sheet button in the Protect section.

- If the worksheet doesn’t have a password, the Unprotect Sheet icon will immediately change its name to Protect Sheet . This confirms that the sheet is unprotected.

- If the worksheet is protected with a password, you’ll be prompted to insert the worksheet password. If you know the password, type it and press OK . If it’s accepted, the worksheet will be unprotected and you can begin to modify it.

As with other methods, unlocking the sheet without knowing the password is tricky. You’ll need to try and source the password from somebody else or use a third-party tool like Passware Excel key to remove it for you.
Protecting Your Excel Data
Unprotecting an Excel worksheet or workbook will allow you to make changes to your spreadsheet. As long as you have the password, the process is simple. Without it, you’ll need to try a third-party tool to remove the password instead, unless you can source it from the original file owner or creator.
Looking for easier ways to lock down some of your Excel worksheets? You can lock cells in Excel to make it harder for others to make changes to certain cell ranges. You could also try sharing an Excel file as read-only to limit unnecessary changes.

Ben Stockton is a freelance technology writer based in the United Kingdom. In a past life, Ben was a college lecturer in the UK, training teens and adults. Since leaving the classroom, Ben has taken his teaching experience and applied it to writing tech how-to guides and tutorials, specialising in Linux, Windows, and Android. He has a degree in History and a postgraduate qualification in Computing. Read Ben's Full Bio
Read More Posts:
Leave a Reply
Your email address will not be published. Required fields are marked *
- Editor's Choice: Tech Gifts for Mom
- Amazon Prime Tech Deals!
How to Unprotect Excel Workbooks
Unprotect as an owner under the Review tab or without a password using the Visual Basic code editor
:max_bytes(150000):strip_icc():format(webp)/LuisChavez-0d2ec73a2f994c4b81237c40fe44c473.jpg "how to worksheet protection in excel")
- New Jersey Institute of Technology
In This Article
Jump to a Section
How to Unlock an Excel Workbook as the Owner
How to unprotect an excel workbook without knowing the password.
- Frequently Asked Questions
What to Know
- Unprotect as owner: Select Review > Unprotect Sheet and enter the password.
- Unprotect without password: Open Visual Basic code editor by selecting Developer > View code .
- Then, enter the code supplied in this article and select Run . In a few minutes, a password is revealed. Choose OK .
This article explains how to unprotect Excel workbooks. The information applies to Excel workbooks in Microsoft Excel 365, Microsoft Excel 2019, 2016, and 2013.
Microsoft Excel is packed with features. One such feature is the ability to protect your Excel files at the cell , spreadsheet, or workbook level. Sometimes it's necessary to unprotect Excel workbooks to ensure data changes apply correctly.
This method assumes that as the owner of the file, you remember the password used to protect the spreadsheet.
Open the protected spreadsheet, and select Review > Unprotect Sheet . You could also right-click the protected spreadsheet, then select Unprotect Sheet .
You can identify a protected spreadsheet under the Changes section of the Review tab on the ribbon . If the spreadsheet is protected, you see the Unprotect Sheet option.
Enter the password used to protect the spreadsheet, then select OK .
Your spreadsheet will now be unprotected and it can be modified.
You may have protected your Excel workbook or spreadsheet and haven't had to modify it in some time, even years. Now that you need to make changes, you no longer remember the password you used to protect this spreadsheet.
Fortunately, these steps will allow you to unprotect your workbook using a Virtual Basic script as a macro to identify the password.
Open the protected spreadsheet.
Access the Visual Basic code editor by either pressing ALT+F11 or select Developer > View Code .
In the Code window of the protected sheet, enter the following code:
Select Run or press F5 to execute the code.
The code will take several minutes to run. Once finished, you'll receive a pop-up with a password. Select OK and your spreadsheet will be unprotected.
This is not the original password and you don't need to remember it.
To password-protect Excel workbooks , open the workbook and select File > Info > Protect Password > Protect Workbook > Encrypt with Password .
To lock cells in Excel to protect data , highlight the cells, go to the Home tab, and select Format > Lock Cell .
Get the Latest Tech News Delivered Every Day
- The 12 Best Tips for Using Excel for Android in 2024
- How to Use Comparison Operators I=in Excel
- How to Lock Cells in Excel Worksheets and Protect Data
- 6 Best Free Spreadsheet Programs
- The 5 Best Spreadsheet Apps for Android in 2024
- How to Limit Rows and Columns in Excel
- How to Password Protect an Excel File
- How to Transpose Excel Data
- How to Fix It When Arrow Keys Are Not Working in Excel
- How to Define and Edit a Named Range in Excel
- How to Create a Drop-Down List in Excel
- How to Use Track Changes in Excel
- How to Share an Excel File
- How to Make a Graph in Microsoft Word
- Worksheets and Workbooks in Excel
- What Is an XLW File?
7 Way to Unprotect a Sheet in Microsoft Excel
Want to learn how to unprotect Excel sheets? Read this Microsoft Excel tutorial until the end to master this must-have Excel skill.
You can protect an Excel worksheet using a password or without one. This feature enables you to restrict someone else from accessing confidential data other than the intended recipient. It works like a tool of accountability. You know whom to contact if a third party accessed your Excel worksheet using a password you only shared with a colleague or employee.
Now, you might want to unprotect such locked Excel worksheets to allow public access. Or, you want to change the password because you suspect it’s no longer a secret. If you know the old password, it’s a cakewalk. What if you’ve forgotten the current password?
Read this article and follow along with the methods to learn various methods to unlock Excel sheets.
⚠️ Warning : This article is only for educational purposes. Try the tricks only on workbooks and worksheets created by you. Don’t misuse the Excel knowledge shared to violate someone else’s intellectual property rights.
Unprotect Excel Sheet With a Password
Suppose, your supervisor has emailed you a confidential inventory database in an Excel workbook to review and make changes. The password to unlock the file is also in the email. But, you’ve never used this Excel functionality before. Find below all the methods you can follow:
📒 Read More : Lock a Sheet in Microsoft Excel
From the Info Menu

Open the Excel workbook on your PC or Mac.
Click on the File tab.
A left-side navigation panel shall open.
There, click on the Info menu.
On the right side, you should see a yellow button showing Protect Workbook .

Click the Unprotect hyperlink in the button and enter the password that you’ve received via email.
The yellow Protect Workbook button shall now turn grey or according to the color of the Excel backstage interface .
That’s it! You’ve successfully unlocked the spreadsheet.
Using a Right-Click
If you can’t follow the steps mentioned earlier, no worries.

Go to the worksheet you want to unlock.
Right-click on the sheet name tab at the bottom of the worksheet interface.
On the context menu that opens, click on the Unprotect Sheet option.

Enter the sheet protection password into the Unprotect Sheet dialog box and click OK .
From the Format Drop-Down
The Format tool of the Cells commands block in the Excel Home tab allows you to unlock a sheet with or without passwords. Saying without a password, I mean that the author didn’t enter any password when using the Protect Worksheet command.

Access the locked sheet in the workbook and press Alt + H + O + P to unprotect the sheet in a single click.
If the worksheet is password protected, you’ll see the Unprotect Sheet dialog.
Using the Review Tab

The primary location of the Unprotect Sheet command button is the Protect block in the Review tab.
You can press the keyboard shortcut Alt + R + ZH + PS to use the Unprotect Sheet command.
If there’s a password, you shall see the dialog box to enter the secret code. If there’s none, Excel shall unprotect the sheet instantly.
Unlock Excel Sheet at the Workbook Level
You can’t access a locked worksheet if the Excel workbook is password protected . If you’ve got the secret code to unlock the Excel file, follow any of the following methods to access the protected worksheets:
Using the Encrypt With Password Tool

When you try to open the workbook, you’ll see the Password dialog.
There, enter the secret code shared by the author.
Now, you can access all the sheets of the workbook.
Follow any of the sheet-unlocking methods explained above to unprotect the spreadsheet.

To remove the password protection, go to the Info menu from the File tab.
Click the Protect Workbook drop-down and click on the Encrypt with Password button.

On the Encrypt Document dialog, delete the masked password and click OK .
Then, click the Save button on the left-side navigation panel to remove the password protection.
Using the Save As Dialog
This method is useful for removing read and write protection of an Excel workbook.

Open the protected workbook by following the above method using a password.
Now, click on the File tab and select the Save As option from the left-side navigation panel .
You’ll see the Save As menu on the right side.
Click on the Browse button to bring up the Save As dialog.

Click the Tools drop-down located at the bottom of the Save As box and hit the General Options button.

On the General Options drop-down, you’ll see the following options:
- Password to open
- Password to modify
Delete the passwords in the above fields and click OK .

Now, click the Save button on the Save As dialog to remove the workbook protection.
Disable Access Restriction to Unprotect a Sheet
If you’re the author or Microsoft 365 domain administrator, you can disable the Access Restriction feature to unprotect a sheet. This feature lets you restrict selected people from your organization to open, read, or write workbooks and worksheets.

Click on the Protect Workbook menu in the Info tab of the Excel backstage view . You can arrive here by clicking the File tab from the worksheet view.
Hover the cursor over the Restrict Access option.
You’ll now see the Restricted Access option in the overflow menu. Click on that.

Click on the Sensitivity drop-down list on the next message box and switch it to Public .
Click Apply to unprotect the workbook as well as the worksheets in it.
So far, you’ve learned multiple techniques to unprotect a workbook or worksheet provided that you know the password.
Suppose, you’ve forgotten the password or you’d like to change a forgotten password for a worksheet or workbook.
In these events, you can try any of the methods explained below:
Unprotect Excel Sheet Using Google Drive

If you’ve got a Google Workspace free or paid account, go to Google Drive .
Now, go to My Drive from Home .
Drag and drop the workbook that contains a locked worksheet on My Drive .

Click on the file name when the upload is complete.

Google Sheets shall process the uploaded XLSX or XLS file and create a spreadsheet view for it.
You’ll see that you can now edit the worksheet.

Click File on Google Sheets and choose the Microsoft Excel option in the Download menu.
Once the downloading is done, you get an unprotected copy of the previously locked worksheet.
When you open this XLSX file on your Excel desktop app, you’ll see the Protected View warning message. It should be below the Excel ribbon menu.
Click Enable Editing to start modifying your locked worksheet.
Unlock Excel Sheet Using an Online Tool

Go to the LostMyPass Excel Password Recovery portal.
Drag and drop the Excel file containing the locked worksheet. The maximum file size for the worksheet shouldn’t be more than 100 MB .
Once uploaded, the tool shall process the workbook to unlock the worksheet.

If the process is over, you’ll see the Download Unlocked File button. Click on it to download the Excel file.
Open the workbook in your Excel desktop app. Click the Enable Editing button to start editing the locked worksheet.
The remote connectivity between your device and LostMyPass is encrypted with HTTPS protocol. Therefore, it’ll be tough to intercept the data you’re sending to and receiving from the server.
However, you shouldn’t use this method to unprotect Excel worksheets if the workbook contains highly sensitive business data.
Unlock Excel Sheet Using Its XML File
Close the workbook containing the locked worksheet and create a backup copy of it.

Now, rename the original Excel workbook to attach the ZIP extension to it.

Right-click on the newly created ZIP file and choose the Extract Here option from the context menu. You’ll see this option if you’ve got WinRAR or 7-Zip on your PC.

Now, you’ll find a few folders in the directory where you’ve extracted the ZIP file.
Go to the xl folder and then worksheets.
Inside the worksheets directory, you’ll find all the worksheets of the workbook. These are XML files.

Right-click on an XML file and open the file in Notepad .

Search the file for sheetProtection . Select the entire code line within the < > symbols. The code line should be similar to the one shown below:
Hit the Delete button.

Save the Notepad file.

Now, highlight all three folders and [Content_Types] XML file. Compress it into one ZIP file.

Rename the ZIP file to an XLSX file.

Now, open the Excel workbook and you should be able to edit the contents of the locked worksheet.
Unprotect Excel Sheet Using a VBA Script
If you know how to use VBA in Excel to automate tasks, you’ll also want to learn how to unlock Excel sheets using VBA.
Find below the script you can use:

Go through this Excel tutorial to learn the technique to use the above VBA script to develop a VBA macro :
📒 Read More : How To Use The VBA Code You Find Online

Once you’ve created the VBA macro, press Alt + F8 to bring up the Macro dialog. There, choose the unprotectsheet macro and hit the Run button.
The script might take hours to run to find the password of the protected worksheet.
Once done, you shall see a dialog box with a dummy password.
Simply click OK on the dialog box to complete the unlocking process of the locked spreadsheet.
If the script doesn’t work, change its extension to XLS from XLSX .
Now, run the VBA script again, and this time Excel should be able to look up the password.
Unlock Excel Sheet Using a Workaround
Create a new Excel workbook on your device.

Now, navigate to the locked worksheet opened on another workbook. Click on any blank cell in the worksheet and press Ctrl + A to select everything.
Press Ctrl + C to copy the content.

Go to your new workbook and paste the copied data into a sheet by pressing Ctrl + V .
This method only works if the workbook isn’t locked with a password and you’ve got read access to it.
Conclusions
These are all the tried and tested methods to unprotect an Excel sheet. It becomes easier to unlock and disable the protection of workbooks and worksheets if you know the password. For this, you should use the Unprotect Sheet feature.
However, if you can’t recall the password, you can use other methods like Google Drive , XML editing , VBA scripting , an online Excel file unlocker , etc.
Did you find the Excel tutorial helpful? Comment below. Also, if you know a better method that I might have missed, mention that in your comment.
About the Author

Subscribe for awesome Microsoft Excel videos 😃

John MacDougall
I’m John , and my goal is to help you Excel!
You’ll find a ton of awesome tips , tricks , tutorials , and templates here to help you save time and effort in your work.
- Pivot Table Tips and Tricks You Need to Know
- Everything You Need to Know About Excel Tables
- The Complete Guide to Power Query
- Introduction To Power Query M Code
- The Complete List of Keyboard Shortcuts in Microsoft Excel
- The Complete List of VBA Keyboard Shortcuts in Microsoft Excel
Related Posts

What is an Absolute Reference in Excel?
May 10, 2024
Wondering what is an absolute reference in Excel? Read this essential Excel...

What Does $ Mean in Excel?
May 9, 2024
What does $ mean in Excel? Read on to learn everything you need to know about...

8 Ways to Move a Row in Microsoft Excel
May 8, 2024
You're reorganizing data sets, restructuring tables, or simply adjusting the...
Submit a Comment Cancel reply
Your email address will not be published. Required fields are marked *
Save my name, email, and website in this browser for the next time I comment.
Submit Comment
This site uses Akismet to reduce spam. Learn how your comment data is processed .
Get the Latest Microsoft Excel Tips
Follow us to stay up to date with the latest in Microsoft Excel!
- Sunday, May 12, 2024
- UPDATED 12:22 pm PKT
- Download App
- Social Media
- Top Headlines
Entertainment
- Crime & Justice
Follow us on
- Saudi Arabia
Business & Finance
- The ViralWorld
- Shocking & Amazing
Life & Style
- Health & Fitness
- Prayer Timings
- Seafood Recipes
- Soups, Stews and Chili Recipes
- Forex Exchange Rates
- Conversion Calculators
- Fuel Prices
- Bol Weather
- Commodities In Pakistan
loading....
- Mutual Funds
- Industrywise News
- Commodities Rates
- How to file ITR
- Calculators
- Crypto Currencies
- Snooker/Billiards
- Live Scores
- ICC WorldCup
- County Championship
- Trendspotting
- Tech & Internet
- Newsletters
- Tech and Gadgets
- Food & Drinks
- BMI Calculators
- BMR Calculators
- Diabetes Risk Calculator
- Home & Garden
- Relationships
Viral & Shocking

Here’s how to Lock or Unlock a Microsoft Excel Spreadsheet
04th May, 2024. 07:52 pm

MacBook Air vs. MacBook Pro: Which one is Better?

Samsung Phones prices drop in Pakistan; Check new rates here

How to secure your Android from password-hacking apps?

Do you use Microsoft Excel to manage important data? Use passwords to secure your Excel spreadsheets to prevent unofficial access to important data. Find out how to protect your Excel files on any device, whether it is a Chromebook, Windows, or Mac.
How to Lock an Excel Sheet on Windows
-Open Microsoft Excel and select the sheet you want to lock.
-Make your required changes.
-Click on “File” at the top of the page.
-Choose “Info” from the sidebar.
-Select “Protect Workbook” and then “Encrypt with Password.”
-Enter and confirm your password.
-Click “OK” to complete the process.
Protect the Workbook Structure
-To secure the structure of your Excel workbook, go to File > Info > Protect Workbook.
-Enter your password and confirm.
-Click “OK” to secure your workbook structure.
Lock the Current Sheet
-Go to Excel File > Info > Protect Workbook > Protect Current Sheets.
-Create a password for the sheet and select access restrictions.
-rConfirm your password and click “OK.”
Since Microsoft is incapable to recover forgotten passwords, you must reserve them securely. To avoid security issues, be careful when sharing Excel sheets that are password protected.
Secure an Excel Spreadsheet on Mac
-Open Excel on your Mac and select the sheet to protect.
-Click on “File” and select “Password.”
-Enter your password to open and change the Excel sheet.
How to Unlock an Excel Spreadsheet
To remove a password from a workbook, follow the steps under Excel Info > Protect Workbook > Encrypt with Password. Enter your current password and click “OK” to unlock the file.
Take these steps to ensure that no one else can access your important Excel files. Look at additional options to make data security even better, such as the ability to set a date for when the shared links will expire. Automate tasks with macros and utilize Excel templates for effective worksheet supervision.
Read More News On
- how to Lock or Unlock a Microsoft Excel Spreadsheet
- Microsoft Excel Spreadsheet
Catch all the Sci-Tech News , Breaking News Event and Latest News Updates on The BOL News
Download The BOL News App to get the Daily News Update & Follow us on Google News .
End of Article
In the spotlight, talks with imf team will commence tomorrow: aurangzeb, ramiz raja doubts pakistan’s chances of winning t20 world cup 2024, ire vs pak: will mohammad amir participate in second t20i, usd to pkr – today’s dollar price in pakistan– 12 may 2024, omr to pkr and other currency rates in pakistan– 12 may 2024, popular from pakistan, punjab introduces satellite internet in schools, punjab’s cm bike scheme 2024: e-balloting completes, check winners list here, pakistan to launch another satellite mission after icube-qamar, punjab to provide glasses, hearing aids to 700,0000 students, quordle answer today: sunday 12th may 2024, nerdle answer today: sunday 12th may 2024, wordle answer today: check #1058 hints and clues for 12th may 2024, who is joe jonas’s girlfriend all about stormi bree, who is chris convy all about nikki glaser’s boyfriend, who is steve harvey’s wife all about marjorie harvey.
How to Protect Cells in Excel Without Protecting Sheet
When working on an Excel spreadsheet, it is essential to protect the integrity of your data. One way to do this is by protecting individual cells from being edited. However, protecting the entire sheet can be inconvenient, particularly if you need to change other areas of the spreadsheet. In this article, we will discuss how to protect cells in Excel without protecting the entire sheet.
Why protecting cells in Excel is important
Protecting cells in Excel is essential for ensuring data accuracy and preventing accidental changes. This is especially important when dealing with financial data, analysis, and reports. If cells are not protected, it is easy for someone to accidentally change or delete critical data, leading to errors in calculations and reports. By protecting cells, you can restrict access to certain parts of the spreadsheet while still allowing other areas to be edited as needed.
Another reason protecting cells in Excel is essential is to maintain the integrity of formulas and functions. When cells are protected, formulas and functions cannot be accidentally deleted or altered, which can cause errors in calculations. This is particularly crucial when working with complex spreadsheets that involve multiple calculations and dependencies.
Furthermore, protecting cells can also help to prevent unauthorized access to sensitive information. By setting up password protection, you can ensure that only authorized users can access certain spreadsheet parts. This is particularly important when dealing with confidential financial data or personal information.
Understanding cell protection in Excel
Cell protection in Excel refers to the ability to lock individual cells or ranges of cells to prevent them from being edited or modified. This can be done while allowing other cells on the sheet to be edited. When cells are locked, users can still view the data and perform calculations but cannot change the data contained within those cells.
It is important to note that cell protection in Excel is not foolproof and can be bypassed by users who know how to unlock cells. Therefore, it is recommended to use cell protection in conjunction with other security measures, such as password protection and restricted access to the file. Additionally, it is essential to regularly review and update the cell protection settings to ensure that they are still appropriate for the current use of the Excel sheet.
The difference between sheet protection and cell protection
Sheet protection and cell protection are two different concepts in Excel. When you protect a sheet, you prevent any changes to the entire sheet, including all cells, formulas, and formatting. This can be useful to ensure that a sheet is not accidentally modified. However, cell protection allows you to protect only specific cells from being changed while allowing users to edit other areas of the sheet.
It is important to note that sheet protection and cell protection can be used together to provide higher security for your Excel sheet. By protecting the entire sheet and then selectively allowing specific cells to be edited, you can ensure that only authorized users can make changes to specific areas of the sheet. This can be particularly useful when working with sensitive data or collaborating on a project with multiple users.
A step-by-step guide to protecting cells in Excel without protecting sheet
Here are the steps to protect cells in Excel without protecting the entire sheet:
- Select the entire sheet where you want to protect cells (shortcut: Control + A)
- Right-click on the selected cells and choose "Format Cells" from the menu
- In the Format Cells dialog box, select the "Protection" tab
- Uncheck the box next to "Locked" and click OK
- Select the cells you want to protect by clicking on them
- Check the box next to "Locked" to lock the selected cells
- Click OK to save your changes
- Next, go to the "Review" tab and click on "Protect Sheet"
- Enter a password if desired, then click OK
Only the selected cells will be protected with these steps, and other cells on the sheet can still be edited. If someone tries to edit the protected cells, they will receive an error message and cannot make changes unless the sheet is unprotected.
It is important to note that protecting cells in Excel without protecting the entire sheet can be helpful in situations where you want to restrict access to specific cells but still allow users to make changes to other parts of the sheet. This can be particularly helpful in collaborative environments where multiple users work on the same document.
Additionally, if you want to change the protected cells, you must unprotect the sheet first. To do this, go to the "Review" tab, click "Unprotect Sheet," and enter the password if one was set. Once the sheet is unprotected, you can change the protected cells as needed.
How to allow editing in specific cells while protecting others
Sometimes, you may want certain users to edit only specific cells while protecting the rest of the sheet. In this case, you can use the following steps:
- Select the entire sheet where you want to protect cells (shortcut: Control + A )
- Check the box next to "Locked" and click OK
- Select the cells you want to be editable by a particular user or users
- Uncheck the box next to "Locked" to unlock the selected cells
- Select the "Select unlocked cells" checkbox
With these steps, users can only edit the cells that you have specified while the rest of the sheet remains protected. This can be useful when dealing with sensitive data that only certain users should be allowed to edit.
It is important to note that while this method can effectively limit editing access, it is not foolproof. Users with advanced knowledge of Excel may still be able to access and edit protected cells. Therefore, using this method in conjunction with other security measures, such as password protection and restricted user access, is recommended.
Locking formulas and preventing accidental changes
Locking formulas in Excel can be helpful when you want to prevent accidental changes that could affect the accuracy of calculations. When you lock a formula, it cannot be deleted or modified. Here are the steps to lock formulas:
- Select the cells that contain the formulas you want to lock
- Check the box next to "Hidden" and "Locked" to lock and hide the formulas
The formulas are locked and hidden with these steps, preventing accidental changes or deletion. Users can still view the formulas but cannot modify or delete them.
It is important to note that locking formulas does not prevent users from copying and pasting the formulas into other cells. To prevent this, you can protect the worksheet by setting a password. This will ensure that only authorized users can make changes to the worksheet.
How to password-protect your protected cells
If you want to secure your protected cells further, you can password-protect them by following these steps:
- Select the cells you want to password-protect by clicking on them
- Enter a password in the "Password to unprotect sheet" field, then click OK
Only users who know the password can change the protected cells with these steps. This can be useful when dealing with sensitive data or limiting access to certain spreadsheet parts.
It is important to note that password-protecting your protected cells does not guarantee complete security. Someone who gains access to your password can change the protected cells. Therefore, using a solid and unique password and changing it regularly is recommended.
Additionally, to password-protect your entire spreadsheet, click the "Review" tab and "Protect Workbook." This will prevent anyone from changing the entire workbook without entering the password.
Troubleshooting common issues when protecting cells in Excel
Despite your best efforts, there may be times when you encounter issues when protecting cells in Excel. Here are some common problems and their solutions:
- If you have locked cells that are not being protected, ensure that you have protected the sheet and unchecked the "Protect worksheet and contents of locked cells" option. Also, check the "Locked" box in the "Format Cells" dialog box to ensure the cells are locked.
- If you cannot protect cells, ensure the sheet is not protected by going to the "Review" tab and selecting "Unprotect sheet." Then, try protecting the cells again.
- If you forget your password or cannot unprotect the sheet, you may need to use a third-party tool to recover the password or unlock the sheet.
Another common issue when protecting cells in Excel is that the protection may not work as expected when the sheet is shared with others. In such cases, ensure you have set the appropriate permissions for the users accessing the sheet. You can do this by going to the "Review" tab and selecting "Share Workbook."
Additionally, if you have many cells that need to be protected, it can be time-consuming to protect each cell individually. In such cases, you can use the "Protect Sheet" option to protect all cells in the sheet completely. This option can be found under the "Review" tab, allowing you to specify which actions are allowed on the protected cells, such as selecting, formatting, or editing.
Best practices for cell protection and sheet protection in Excel
Here are some best practices to follow when protecting cells in Excel:
- Use a mixture of sheet protection and cell protection depending on your needs and the sensitivity of your data.
- Lock and hide formulas to prevent them from being accidentally deleted or modified.
- Password-protect your protected cells to secure your data further.
- Regularly review and update your sheet and cell protection settings to ensure they are still appropriate and effective.
By following these best practices, you can ensure that your Excel data is secure and protected from accidental changes or unauthorized access.
Protecting cells in Excel is essential in safeguarding your data and ensuring data accuracy. Using these tips and techniques, you can protect your cells in Excel while allowing other areas of the sheet to be edited as needed. Regularly review and update your protection settings to ensure they are still appropriate and effective.
Related Resources
How to Insert Checkbox in Excel Without Developer Tab

How to Subtract Multiple Cells in Excel
How to Pull Information From Another Sheet in Excel
Balance sheet in Excel
Leave a comment cancel reply.
Want to join the discussion? Feel free to contribute!
Save my name, email, and website in this browser for the next time I comment.
Privacy Policy
Legal documentation
Try it in your Excel. For free.
Contribute to the Microsoft 365 and Office forum! Click here to learn more 💡
April 9, 2024
Contribute to the Microsoft 365 and Office forum!
Click here to learn more 💡
- Search the community and support articles
- Microsoft 365 and Office
- Search Community member
Ask a new question
Creating an copy of excel sheet within a workbook, password protect the new sheet, and send as outlook attachment
I am having trouble with my macro when trying to take a single worksheet within a workbook, make a password protected copy of that worksheet, and sending it as an outlook attachment. The macro I have creates the password protected worksheet, and creates the email in outlook with all the right inputs, but does not attach the worksheet. I'm not sure what I am dong wrong.
Sub copyandsend()
' Declare variables
Dim sourceWs As Worksheet
Dim newWb As Workbook
Dim wsName As String
' Set the source worksheet you want to copy
Set sourceWs = ThisWorkbook.Sheets("Advert")
' Set the name for the sheet after copying
wsName = "New form"
' Copy the source worksheet to a new workbook
sourceWs.Copy
' Get a reference to the new workbook
Set newWb = ActiveWorkbook
' Rename the copied sheet in the new workbook
newWb.Sheets(1).Name = wsName
' Protect the copied sheet with password
With ActiveSheet
For Each shp In .Shapes
.Protect Password:="Mypassword"
.EnableSelection = xlUnlockedCells
Set OutApp = CreateObject("Outlook.Application")
Set OutMail = OutApp.CreateItem(0)
On Error Resume Next
With OutMail
.To = "*** Email address is removed for privacy ***"
.CC = "*** Email address is removed for privacy ***"
.Subject = "Attached information per request"
.HTMLBody = "Please see attached requested information. Open with password" & "<br><br>" & Excel.Application.UserName
.Attachments.Add wb.Activeworkbook
'or use .Display
'or use .send
On Error GoTo 0
With Application
.EnableEvents = True
.ScreenUpdating = True
***moved from Microsoft 365 and Office / Excel / Unknown / Other***
- Subscribe to RSS feed
Report abuse
Reported content has been submitted
Replies (1)
- Microsoft Agent |
Dear Michael MOX,
Welcome to Microsoft Community.
I understand that you are currently having macro related issues.
First of all, it is very unfortunate that macro-related issues are beyond the scope of Microsoft forum support. The issue Microsoft learn (English only) has a dedicated section that is designed to support advanced users like yourself.
Here is a link to the forum where you can raise specific situations and share your ideas for solving the problem.
Excel Management - Microsoft Q&A
Finally, while I can't assist you further, I hope the information I've provided will help you find a better direction.
I will keep this issue on file in case our great volunteers come up with ideas for you.
Best regards
Zenobia-MSFT | Microsoft Community Support Specialist
Was this reply helpful? Yes No
Sorry this didn't help.
Great! Thanks for your feedback.
How satisfied are you with this reply?
Thanks for your feedback, it helps us improve the site.
Thanks for your feedback.
Question Info
- Out of scope
- Norsk Bokmål
- Ελληνικά
- Русский
- עברית
- العربية
- ไทย
- 한국어
- 中文(简体)
- 中文(繁體)
- 日本語
How to Recover Excel File Password (2 Easy Ways)
Users use passwords to protect their Excel files or worksheets. Unfortunately, there are numerous cases where users also forget their passwords. As a result, users need to recover Excel file password to be able to use their files from time to time. There are numerous tools or software online or offline to remove or recover Excel file passwords. However, we’ll not use any online or offline exclusive tool or software to retrieve Excel file passwords.

In this article, we demonstrate ways to recover or remove an Excel file password using VBA Macro and Zip Tool ( Winrar or 7 Zip ).
Excel File Encryption Types
There are two kinds of Excel file encryptions. They are:
🔄 Encrypt the Excel Workbook with Password . This encryption requires passwords to open or view the file.

🔺 If you open the encrypted file, excel will display a Password window to input the password to open or view it.

🔄 File encryption with Protect Sheet offers only the Excel worksheet protection. In that case, the user needs to enter his/her password to edit or modify the worksheet.
In this article, we focus on the file encryption with Protect Sheet and demonstrate VBA Macro to recover encrypted file passwords. If users open the password-protected sheet, Excel displays a disclaimer, stating the file is a protected file and the user needs to input a password to edit or modify as depicted in the below image.

Follow the latter section to retrieve or remove an Excel file password.
1. Applying VBA Macro to Recover Excel File Password
We can recover the forgotten Excel file password using a VBA Macro code. The code tries iterations of probable passwords and in the end, breaks file protection by generating a workable password to unprotect the worksheet.
🔺 Ensure the encrypted file is saved in the prior versions of 2010 Excel (i.e., Excel 97-2003 Workbook(*xls) ) as shown in the following picture.

Step 1: Use ALT+F11 or go to the Developer tab > Click on Visual Basic (in the Code section). The Microsoft Visual Basic window opens. Select Insert > Click on Module .

Step 2: Paste the following macro in the Module .

The macro generates iterations of probable passwords and uses them to break the protection.
Afterward, press the F5 key to run the macro. The macro takes quite some time to finish and returns an alternative password to unprotect the Worksheet.
⧭ Warning: Executing the macro may return freezing or hanging your device. So, if you are doing other work on your device you shouldn’t run the macro in that case.
2. Removing Excel File Password Using Zip Tool
By editing a zip xml file, we can remove the protection of a sheet in an Excel file. To do so, follow the steps below.
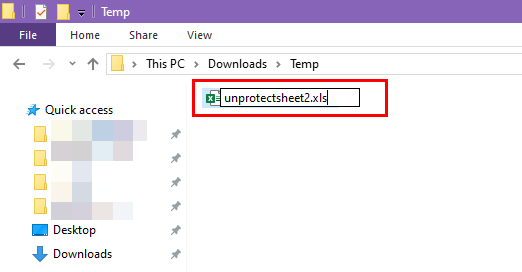
Step 1: In the device directory, Select the encrypted file, and go to View > Tick File name extensions . File Explorer will show the selected file types (i.e., xlsx ).

Step 2: Modify the File Extension to zip from xlsx .

Step 3: The device system will fetch a confirmation window, click on Yes .

Step 4: The file gets converted into a zip file. Double click on it.

Step 5: Inside the zip file, there is a file named xl . Double click on it.

Step 6: The xl file holds the protected sheet or sheets. In this case, sheet1.xml is the zipped version of the encrypted Excel file. Copy the file to Desktop or any location.

Step 7: Open the File using Notepad .

Step 8: Use CTRL+F to bring out the Find window. Type protect then Click on Find Next in the window. Notepad highlights the “protect” text within the file text.

Step 9: Delete the entire <sheetProtect…..SelectUnlockedCells=”1”/> portion from file text.

Step 10: Now, save the file Text using File > Save .

Step 11: Afterward Copy and Replace the newly saved sheet1.xml file with the zipped file’s version of it.

Step 12: Change the file types by changing the File Extension from zip to xlsx .

🔼 In the end, open the modified xlsx file and you see you can edit this version of the file.

After being able to access the file, you can execute password protection for the file or worksheets again.
Read More: How to Remove Password from Excel File
Download Excel Workbook
In this article, we demonstrate ways to recover or remove Excel file password. Hope these methods do their job in your case. Comment, if you have further inquiries or have anything to add.
Related Articles
- How to Unprotect Excel Workbook with Password
- How to Unprotect Excel Workbook without Password
- How to Remove Password from Excel File
<< Go Back to Unprotect Workbook in Excel | How to Unprotect in Excel | Learn Excel
What is ExcelDemy?
Tags: Unprotect Workbook in Excel

MARUF ISLAM is an excellent marine engineer who loves working with Excel and diving into VBA programming. For him, programming is like a superhero tool that saves time when dealing with data, files, and the internet. His skills go beyond the basics, including ABACUS, AutoCAD, Rhinoceros, Maxsurf, and Hydromax. He got his B.Sc in Naval Architecture & Marine Engineering from BUET, and now he's switched gears, working as a content developer. In this role, he creates techy content... Read Full Bio

Once I try to open the zipped file, I keep getting a Windows cannot open folder error

Hello BERNARD
Thanks for reaching out and posting your observation. The ZIP Tool method mentioned in the article can be applicable If you have a protected sheet within a workbook .
I have experienced the same error when the workbook is encrypted with a Password. But, if only a sheet is protected, the ZIP Tool works perfectly. When you preserve your workbook with an Encrypted Password, the ZIP Tool method will not work . So, use the VBA code to remove the password from the encrypted workbook. Good luck.
Regards Lutfor Rahman Shimanto ExcelDemy
the file open with box showing password. does not allow to open macros.
Hello JITHU
Thanks for reaching out. You are right about the file not allowing the opening of macros. The password is recovered using the Zip Tool , which will not let you open macros. In the article, the writer has demonstrated the file as a macro-free file when using the Zip tool. That’s why when changing back to the file type Zip to Excel, the .xlsx is used.
If you are working on a macro-enabled file when recovering a password using Zip Tool, change the file’s extension (when changing the file type Zip to Excel) to .xlsm instead of .xlsx.
Leave a reply Cancel reply
ExcelDemy is a place where you can learn Excel, and get solutions to your Excel & Excel VBA-related problems, Data Analysis with Excel, etc. We provide tips, how to guide, provide online training, and also provide Excel solutions to your business problems.
Contact | Privacy Policy | TOS
- User Reviews
- List of Services
- Service Pricing

- Create Basic Excel Pivot Tables
- Excel Formulas and Functions
- Excel Charts and SmartArt Graphics
- Advanced Excel Training
- Data Analysis Excel for Beginners

Advanced Excel Exercises with Solutions PDF
How to Unhide All Rows in Excel? Simple Guide
- Updated on May 9, 2024
People hide rows in their Excel sheets to narrow their analysis, to prevent third parties some specific rows, to remove unnecessary info, etc. But how to unhide them back? Here’s a simple guide for you show how to unhide all rows in Excel with examples, images and tips.
Table Of Content
1. Rows and Columns in Excel 2. How to Unhide All Rows in Excel? 3. What’s shortcut key to unhide all rows in Excel? 4. How to unhide specific rows? 5. Why can I not unhide my rows within my Excel sheet? 6. Why to unhide rows in Excel? 7. Conclusion
Let’s begin!
1. Rows and Columns in Excel
Let’s start with a very short intro to rows and columns in Excel worksheets.
Basically, Excel has rows and columns that work together to make a grid of cells . On the left side of the sheet is a number that corresponds to each row.
In a standard sheet, the columns, on the other hand, are labeled alphabetically across the top, from “A” to “XFD”. Together, these over 16,000 columns make up the sheet.

Rows and columns are the basic building blocks that are used to arrange and change data. You can change their sizes, formats, and, of course, whether they are hidden or not based on your needs.
2. How to Unhide All Rows in Excel?
It’s so easy to unhide rows in an Excel worksheet. You should only be careful about some details.
Let’s see the basic steps:
Step 1: Select All Visible cells
First, we will select all the cells in your worksheet.
If you press CTRL + A on your keyboard, you can do this quickly.
Another option is to click on the small triangle in the upper left corner of your worksheet, where the row numbers and column letters meet.

So, this action picks out every cell in your worksheet, even the ones that are hidden.
Step 2: Unhide Cells from the Ribbon
Under the Home tab, go to Cells > Format > Hide and Unhide > Unhide Rows .

So, at the Cell Formatting module of Home tab, you’ll find Unhide Rows button under the visibility section. The above image shows the exact path.
Also, you can use the right-click option. Once you right-click on the rows headings you’ll see unhide rows option under the menu.
Step 3: Save your work
Lastly, don’t forget to save your work with CTRL + S to keep your rows unhidden.
Basically, that’s all on how to unhide all rows in Excel. So, not let’s go more deeper.
3. What’s shortcut key to unhide all rows in Excel?
While working on any data analysis in Excel, keyboard shortcut keys are so important for a more efficient work.
So, after selecting all you visible data with CTRL + A, you can use CTRL+Shift+9 shortcut key to unhide all rows.

This will display all the rows in your dataset.
By the way, CTRL+9 shortcut key will hide the selected rows. This is an additional info!
4. How to unhide specific rows?
Sometimes, you may need to unhide specific rows rather than all rows in an Excel spreadsheet.
Here’s how to unhide specific rows in Excel:
1. Identify the Hidden Rows
First, you need to select the area where the rows are hidden. You can often tell where rows are hidden because the row numbers will skip (for example, if you see row numbers jumping from 5 to 10, rows 6 through 9 are hidden).

2. Select Hidden Rows:
Click on the row number above the hidden rows and drag to the row number below them. For instance, if rows 6 through 8 are hidden, you can click on row 5, hold, and drag down to row 9.

3. Right-click
Once you right-click on the selected rows, you’ll see the menu. Click on the Unhide to display selected rows.
This will reveal the hidden rows within the selected range.

5. Why can I not unhide my rows within my Excel sheet?
Sometimes, you might not be able to unhide rows in Excel. This can be annoying, especially if you need to see data that is hidden.
Here are some possible troubleshooting ides:
a. Rows are Minimized Rather than hidden
Check the heights of your rows. Maybe they are too small, but not hidden.
b. Frozen Panes
Also, the freeze panes can block your view and make it look like rows are hidden.
So, you can check your freeze pane selection on View > Freeze Panes on the ribbon.
c. Filtering
If you use filtering on your data, some rows may be hidden because they meet the criteria for the filter.

You can clear all the filters under Data > Filter and then unhide your rows.
d. Worksheet protection
If the worksheet is protected, you might not be able to do some things, like unhiding rows.
To unlock the worksheet, go to Review > Unprotect Sheet and enter the correct password, if one was set.

e. Possible Corruption
In rare cases, corruption within the Excel file can lead to unusual behavior like inability to unhide rows. Trying basic file recovery or opening the file on another device or Excel version can sometimes resolve this issue.
These are among the most common troubles preventing unhide feature in Excel. If you’re still having problem, feel free to reach us.

6. Why to unhide rows in Excel?
Lastly, let’s talk about why we need to unhide rows. Some of the most important reasons you might need to show hidden rows in Excel:
- Complete Data Review: Important data that changes calculations and results can be hidden in rows that aren’t visible. So, by showing these rows again, you can see all of the data at once, which is important for accurate analysis and decision-making.
- Data Cleaning and Preparation: Also, rows are often temporarily hidden during data preparation steps to make the view easier and help you focus on the right parts. To look over changes, make sure they are consistent, and get data sets ready for more processing or analysis, you need to unhide rows.
- Collaboration and Sharing: Make sure that all relevant data can be seen when you share worksheets with coworkers or other important people. Unhiding rows makes sure that everyone has access to the same information and avoids misunderstandings, which is very important for collaborative work environments.
- Troubleshooting and checking for errors: Hidden rows can sometimes cause formulas to give wrong results or make mistakes. By showing these rows, you can help fix problems, look for mistakes, or just make sure that all the data is taken into account in calculations.
There could be many more reasons, of course. But the general reason is to make all data visible to everyone.
7. Conclusion
We have tried to explain how to unhide all rows in Excel with images and examples. So you can easily unhide the rows in your worksheet.
Additionally, if you’re having trouble with enabling the unhide feature, then you can check out the possible troubles above. So, you’ll probably find your solution there.
Hope you enjoy our article. Stay tuned for more Excel tips!
Recommended Readings:
How to add bullet points in Excel? 5 Easy Ways with Examples
Can Excel Analyze Data?
How to use XLOOKUP Multiple Criteria in Excel?
Related Posts
Protection and security in Excel
Excel gives you the ability to protect your work, whether it’s to prevent someone from opening a workbook without a password, granting Read-Only access to a workbook, or even just protecting a worksheet so you don’t inadvertently delete any formulas. In this topic we’ll discuss the various ways you can utilize the primary options to protect and distribute your Excel files.
If you forget or lose your password, Microsoft can’t retrieve it for you.
You should not assume that just because you protect a workbook or worksheet with a password that it is secure - you should always think twice before distributing Excel workbooks that could contain sensitive personal information like credit card numbers, Social Security Number, employee identification, to name a few.
Worksheet level protection is not intended as a security feature. It simply prevents users from modifying locked cells within the worksheet.
Following are the different options available for protecting your Excel data:
File-level : This refers to the ability to lock down your Excel file by specifying a password so that users can’t open or modify it. You have two choices here:
File encryption : When you choose this option, you specify a password and lock the Excel file. This prevents other users from opening the file. For more information, see Protect an Excel file .
Setting a password to open or modify a file : You specify a password to open or modify a file. Use this option when you need to give Read-only or edit access to different users. For more information, see Protect an Excel file .
Mark as Final : Use this option if you want to mark your Excel file as the final version and want to prevent any further changes by other users. For more information, see Add or remove protection in your document, workbook, or presentation .
Restrict Access : If your organization has permissions set up using Information Rights Management (IRM), you can apply any of the available IRM permissions to your document. For more information, see Add or remove protection in your document, workbook, or presentation .
Digital signature : You can add digital signatures to your Excel file. For more information, see Add or remove a digital signature in Office files .
Note: To add a digital signature, you need a valid certificate from a certificate authority (CA).
Workbook-level : You can lock the structure of your workbook by specifying a password. Locking the workbook structure prevents other users from adding, moving, deleting, hiding, and renaming worksheets. For more information on protecting workbooks, see Protect a workbook .
Worksheet-level : With sheet protection, you can control how a user can work within worksheets. You can specify what exactly a user can do within a sheet, thereby making sure that none of the important data in your worksheet are affected. For example, you might want a user to only add rows and columns, or only sort and use AutoFilter. Once sheet protection is enabled, you can protect other elements such as cells, ranges, formulas, and ActiveX or Form controls. For more information on protecting worksheets, see Protect a worksheet .
Which level of protection should I use?
To control the level of access users should have to an Excel file, use file-level protection. Let’s say you have a weekly status report of your team members in an Excel file. You don’t want anyone outside your team to be even able to open the file. There are two options available:
If you don’t want others to open your file: You can encrypt the Excel file, which is the most common technique used. This basically means you lock it with a password and nobody except you can open it.
If you want to enable Read-only or editing access to different users: Maybe, you want the managers in your team to be able to edit the weekly status report, but team members should only have Read-only access. You can protect the Excel file by specifying two passwords: one to open, and the other to modify. You can later share the appropriate passwords with the team depending on the access they should be given.
To control how users should work with worksheets inside a your workbook’s structure, use workbook-level protection. Let’s say your status report workbook has multiple worksheets, and each worksheet is named after a team member. You want to make sure each team member can add data to their own worksheet, but not be able to modify any of the worksheets in the workbook, whether it be adding a new worksheet, or moving worksheets around within the workbook.
To control how users should work within an individual worksheet, use worksheet-level protection. Let’s say each worksheet in your status report workbook contains data that is common to all worksheets, like header rows or a specific report layout, and you really don’t want anyone to change it. By protecting your worksheet, you can specify that users can only perform specific functions in a sheet. For example, you can give users the ability to enter data, but keep them from deleting rows or columns, or only insert hyperlinks or sort data.
You can use one or more levels of protection for your Excel data depending on your/your organization’s needs. You can choose to use all of the available options or a combination of options—it’s completely up to the level of security you want for your Excel data. For example, you may choose to encrypt a shared Excel file, as well as enable workbook and worksheet protection, while only using worksheet protection on a personal workbook just so you don’t accidentally delete any formulas.
Need more help?
You can always ask an expert in the Excel Tech Community or get support in Communities .
Protect an Excel file
Protect a workbook
Protect a worksheet

Want more options?
Explore subscription benefits, browse training courses, learn how to secure your device, and more.

Microsoft 365 subscription benefits

Microsoft 365 training

Microsoft security

Accessibility center
Communities help you ask and answer questions, give feedback, and hear from experts with rich knowledge.

Ask the Microsoft Community

Microsoft Tech Community

Windows Insiders
Microsoft 365 Insiders
Was this information helpful?
Thank you for your feedback.
IMAGES
VIDEO
COMMENTS
Protect a worksheet. To prevent other users from accidentally or deliberately changing, moving, or deleting data in a worksheet, you can lock the cells on your Excel worksheet and then protect the sheet with a password. Say you own the team status report worksheet, where you want team members to add data in specific cells only and not be able ...
Example data entry sheet. Firstly, hide the unused columns and rows of the worksheet using the Hide command. For rows, click on the first unused row number, like 9 in this worksheet, and press Ctrl + Shift + Down Arrow. Now, right-click on any of the row numbers and select Hide. Hide columns in a worksheet.
If prompted, enter the password to unprotect the worksheet. Select the whole worksheet by selecting Select All. On the Home tab, select the Font Settings popup launcher. You can also press Ctrl+Shift+F or Ctrl+1. In the Format Cells dialog box, select the Protection tab and uncheck the Locked box and then select OK.
Here's how you add a password to your Excel workbooks: Select File > Info. Choose Protect Workbook. Select Encrypt with Password. Create a strong password to protect your Excel workbook. The password is case-sensitive, but the length and character mix are up to your discretion. Confirm the password by entering it again.
Protect a Worksheet from Editing You can also protect individual worksheets from editing. When you protect a worksheet, Excel locks all of the cells from editing. Protecting your worksheet means that no one can edit, reformat, or delete the content. Click on the "Review" tab on the main Excel ribbon.
To do so follow the below steps: First, go to File >> Info >> Protect Workbook >> Encrypt with Password. Now, insert a password in the Encrypt Document dialog box and click OK. Then, re-enter the password in the Confirm Password dialog box and click OK. Try opening your workbook again to see if the method worked.
To turn on this protection, go to the Review tab on Excel's ribbon and click on Protect Workbook. Find the Review tab, click on Protect Workbook, and set a password to protect the structure of your Excel workbook. Once this option is turned on, the following will go into effect: No new sheets can be added to the workbook.
Find below the steps you can follow: Click File. Launch Microsoft Excel and open the file you want to protect. Click on the File tab in the top-left corner of the Excel window. Encrypt with password. In the File menu, select Info from the left menu. In the Info menu, click on the Protect Workbook dropdown.
Step 1: Select Review - Protect Sheet or use the keyboard shortcut to Protect Sheet in Excel, Alt + T + P + P, which will open the Protect Sheet window. Step 2: Enter the password and choose the actions a user can perform in the protected sheet in the Protect Sheet window. And then click OK.
To protect a sheet in Excel, perform the following steps. Right click a worksheet tab at the bottom of your screen and select Protect Sheet… from the context menu. Or, click the Protect Sheet button on the Review tab, in the Changes group. In the Protect Sheet dialog window, do the following: To password protect your Excel sheet, type a ...
You can select individual cells or select a larger range of cells. Right-click the selected cells and select "Format Cells" from the pop-up menu to proceed. In the "Format Cells" menu, select the "Protection" tab. Uncheck the "Locked" checkbox to allow changes to those cells once you've protected your worksheet, then press "OK" to save your choice.
Click "File" → "Info" → "Protect Workbook" → "Encrypt with Password". Enter a password twice and click "OK". To set as Read-Only, click "File" → "Info" → "Protect Workbook" → "Always Open Read-Only". Be sure to use a password you can remember; you won't be able to reset it if you forget. Method 1.
Click the File menu at the top-left corner of your sheet. Click Download As. Click Microsoft Excel (.xlsx) . Select a folder to save the file. If you want to keep the original version of the file (the one with a protected sheet) intact, type a new name for the file as well. Click Save to download the file. Method 3.
Unlock or lock the desired cells in the worksheet. Click on the Home tab. Click Format on the ribbon to open the dropdown list. Click Protect Sheet at the bottom of the list to open the protect sheet dialog box . Check or uncheck the desired options. Click OK to close the dialog box and protect the worksheet.
Open your encrypted Excel workbook. When prompted, insert the correct password. Next, press File > Info . Select the Protect Workbook icon. From the drop-down menu, select the Encrypt with password option. In the Encrypt Document pop-up box, remove the existing password and press OK. If the password was accepted, press Save to save the file ...
In Excel's ribbon at the top, click the "Review" tab. On the "Review" tab, from the "Protect" section, choose "Protect Workbook." If you didn't use a password to protect your workbook, your workbook is now unprotected. In case you used a password for protection, then in the "Unprotect Workbook" box that opens, type that password and click "OK."
Open the protected spreadsheet, and select Review > Unprotect Sheet. You could also right-click the protected spreadsheet, then select Unprotect Sheet . You can identify a protected spreadsheet under the Changes section of the Review tab on the ribbon. If the spreadsheet is protected, you see the Unprotect Sheet option.
First, go to File >> Info >> Protect Workbook >> Encrypt with Password. A small dialog box titled Encrypt Document will appear where you will see a 5-digit password that was set before. Delete the password and click OK. Now, select the Save option to save the workbook and close the Excel file.
Go to the worksheet you want to unlock. Right-click on the sheet name tab at the bottom of the worksheet interface. On the context menu that opens, click on the Unprotect Sheet option. Unlock sheet using right-click. Enter the sheet protection password into the Unprotect Sheet dialog box and click OK.
To add a password to your investment portfolio workbook, follow the step-by-step instructions below: Step 1: Open your Excel workbook containing the investment portfolio data. Step 2: Go to the 'Review' tab in the Excel Ribbon. Then, select 'Protect Workbook'. Step 3: Enter a strong password and re-enter it below on 'Verify' to confirm.
Step 1: To begin with, open the Excel Protected Workbook. Step 2: Next, the message appears to enter the password to open the protected file, as shown in the below image. Step 3: Now, enter the password in the Password text box, and then, select the OK button. Step 4: Now, the Workbook Opens.
To remove a password from a workbook, follow the steps under Excel Info > Protect Workbook > Encrypt with Password. Enter your current password and click "OK" to unlock the file. Take these steps to ensure that no one else can access your important Excel files. Look at additional options to make data security even better, such as the ...
Select the entire sheet where you want to protect cells (shortcut: Control + A) Right-click on the selected cells and choose "Format Cells" from the menu. In the Format Cells dialog box, select the "Protection" tab. Uncheck the box next to "Locked" and click OK. Select the cells you want to protect by clicking on them.
Dim wsName As String. ' Set the source worksheet you want to copy. Set sourceWs = ThisWorkbook.Sheets ("Advert") ' Set the name for the sheet after copying. wsName = "New form". ' Copy the source worksheet to a new workbook. sourceWs.Copy. ' Get a reference to the new workbook. Set newWb = ActiveWorkbook.
Note. The method is not for you if the workbook is protected using the Encrypt with Password feature. Step 1: In the device directory, Select the encrypted file, and go to View > Tick File name extensions. File Explorer will show the selected file types (i.e., xlsx ). Step 2: Modify the File Extension to zip from xlsx.
Let's begin! 1. Rows and Columns in Excel. Let's start with a very short intro to rows and columns in Excel worksheets.. Basically, Excel has rows and columns that work together to make a grid of cells.On the left side of the sheet is a number that corresponds to each row.
Worksheet level protection is not intended as a security feature. It simply prevents users from modifying locked cells within the worksheet. Following are the different options available for protecting your Excel data: File-level: This refers to the ability to lock down your Excel file by specifying a password so that users can't open or ...