Subject Explorer
School Subjects
Math & Science
Business & Technology
Electives & Health
Board & Administration
Teaching & Learning
Audio/Video Lectures
Books & Documents
Classifieds
Jobs & Resources
Discussions
Language & Literature

Practice Projects for Microsoft Word

Word 9 Table
In this practice project for Word, students create a document with a title and table. The table has two columns that have different font alignment and incluces various fonts. …

Word 8 Formatting Text
In this practice project for Word, students create a document using a different size and color font for the title than the rest of the paragraph. …

Word 7 Bullets
In this practice project for Word, students create a document with two different types of bullets showing points and subpoints. …

Word 6 Letter
In this practice project for Word, students create a letter. Included in the letter is a heading on the right, indented paragraphs, and the closing and signiture near the middle of the document. …

Word 5 Text And Outline
In this practice project for Word, students create a document that contains several paragraphs of text and also includes an outline with key points and subpoints. …

Word 4 Modified Text
In this practice project for Word, students create a document with the heading on the right, a boldfaced, centered title, and indented paragraphs. The document is double-spaced. …
Word 3 Basic Text
In this practice project for Word, students create a document with the heading on the right, a boldfaced title that is centered, and several paragraphs that are indented. …

Word 22 Preset Headings
In this practice project for Word, students create a document using the preset headings to create a title bar. The document has different alignment and font, blanks, and a short outline. …

Word 21 Formatting Options
In this practice project for Word, students create a document that shows some different effects that can be used with the same font. …

Word 20 Numbered List
In this practice project for Word, students create a document that includes a centered title followed by a numbered list. …

Word 2 Heading 2
In this practice project for Word, students create a document that has a centered title, a heading in the upper right corner, and indented paragraphs. …

Word 19 Advanced Table
In this practice project for Word, students create a document with a table showing a school schedule. The blocks in the table are different sizes and will take individual work within the blocks to …

Word 18 Columns
In this practice project for Word, students create a document with a header and two colomns. The columns include boldfaced and italic font and different alignment. …

Word 17 Columns
In this practice project for Word, students create a document with two identical columns in landscape orientation. Included in each are indented lines and different alignment and font. …

Word 16 Lesson Notes Handout
In this practice project for Word, students create a document like a student handout. This includes an outline with several levels, blanks for students to write on, and different font. …

Word 15 Lesson Notes
In this practice project for Word, students create a document with a header and two outlines. Students are asked to use the automatic numbering and outlining features in Word. They must use different …

Word 14 Table
In this practice project for Word, students create a scoresheet using a table. Students must use different sizes, colors and styles of font, including different alignment. …

Word 13 Outline
In this practice project for Word, students create an outline using the automatic outline in Word, including many levels of subpoints. …

Word 12 Formatting
In this practice project for Word, students create a document with a centered title in all capitals, the first letter of each word slightly larger than the rest. Throughout the document the font is …

Word 11 Formatting
In this practice project for Word, students create a document similar to a test or quiz. They must include points and subpoints, blanks, boldfaced text, tabs, and spacing. …
Resource Type:
Pass it on:
Leave a Reply
- Skip to main content
- Skip to secondary menu
- Skip to primary sidebar
- Skip to footer
Erin Wright Writing
Writing-Related Software Tutorials
How to Create Newspaper-Style Columns in Microsoft Word
By Erin Wright
Newspaper-style columns, which are also called newsletter columns, allow text and images to flow from one column to the next. This tutorial shows how to create newspaper-style columns in Microsoft Word. We’ll also look at how to create column breaks and how to return to a single column.
Quick Links:
How to Create Newspaper-Style Columns
How to create column breaks, how to return to a single column.
This tutorial is available as a YouTube video showing all the steps in real time.
Watch more than 250 other writing-related software tutorials on my YouTube channel .
The images below are from Word for Microsoft 365. These steps also apply to Word 2021, Word 2019, and Word 2016.
Important Note: The steps to create columns are the same in Word 2013 and Word 2010. However, the steps to add column breaks are different in Word 2013 and Word 2010. In addition, your interface may look slightly different in those older versions of the software.
These steps show how to convert your current section or selected text into multiple columns. If your document doesn’t have section breaks or you don’t select specific text, the columns will be applied to the entire document.
- Place your cursor in the section where you want to create columns. Or, select the text you want formatted as columns. If you want the entire document formatted as columns, you can place your cursor anywhere in the text.
- Select the Layout tab in the ribbon.

- Select Columns in the Page Setup group.

- Select an option from the drop-down menu:
- Left (This option creates a thin column on the left side of the page.)
- Right (This option creates a thin column on the right side of the page.)
Alternatively, you can select More Columns for additional options.

- If you selected More Columns, use the Columns dialog box to create and customize your columns:
A. Use the menu arrows to enter a specific number of columns.
Important Note : The other options in the Columns dialog box only respond to numbers entered with the “Number of columns” menu arrows; they won’t respond to numbers typed into the text box.
B. Use the menu arrows to choose a column width and spacing between columns. (Uncheck Equal column width if you want to enter specific widths for individual columns.)
C. Select Line between to add a vertical line between the columns.

- Select the OK button to close the Columns dialog box.

Your text should now be formatted with columns.
Pro Tip: Add Images after Creating Columns
If your document contains images when you create columns, the images may need to be manually resized to fit in the columns, which can be difficult if the images are large.
Instead, add images after creating the columns; Word will automatically resize the images to fit within the existing columns.

The following steps show how to create a column break that will move the text after the break to the next column.
Important Note: The steps to create column breaks are different in Word 2013 and Word 2010. Please see the Microsoft Support website for more information.
- Insert your cursor where the break should begin.
- Select the Layout tab in the ribbon (see figure 1).
- Select Breaks in the Page Setup group.

- Select Column in the drop-down menu.

The content after the break should move to the next column.
The following steps show how to return your text to the normal one-column format.
- Insert your cursor into the text formatted with multiple columns.
- Select Columns in the Page Setup group (see figure 2).
- Select One from the drop-down menu.

Your text should return to a single column.
Important Note: If you selected specific text to be converted to columns, Word automatically created section breaks before and after the columns. Those section breaks may stay in your text unnecessarily after you return to a single-column format. Continue with step 5 to locate and remove those breaks.
- Select the Home tab in the ribbon.

- Select the Show/Hide button in the Paragraph group.

- Place your cursor at the start of the section break where the columns began.

- Press the Delete key on your keyboard to delete the break.
- Repeat steps 7 and 8 for the section break where the columns ended.
Related Resources
How to Adjust Page Margins in Microsoft Word
How to Create Drop Caps in Microsoft Word
How to Create, Change, and Modify Tabs in Microsoft Word
Updated January 29, 2024
- Microsoft Word Tutorials
- Adobe Acrobat Tutorials
- PowerPoint Tutorials
- Writing Tips
- Editing Tips
- Writing-Related Resources
How to Make Columns in Microsoft Word: A Step-by-Step Guide
Making columns in Microsoft Word might seem daunting, but it’s actually pretty straightforward. By using the ‘Columns’ feature under the ‘Page Layout’ or ‘Layout’ tab, you can easily organize your text into neat, professional-looking sections. If you want to create a newsletter, a menu, or simply want to enhance the look of your document, columns are the way to go. After reading this brief explanation, you’ll have a solid grasp on how to create columns and enhance your Word documents.
Step by Step Tutorial: Making Columns in Microsoft Word
Creating columns in Microsoft Word is a simple way to organize text and give your document a polished look. Whether you’re writing a newsletter or designing a menu, columns can help your content stand out. Let’s walk through the steps to create columns in Word.
Step 1: Open Microsoft Word and select your document
Open the Microsoft Word application and choose the document you want to format with columns.
When you open Word, you’ll either see a blank document or the last document you were working on. If it’s the latter, simply go to the ‘File’ menu, click on ‘Open’, and select the document you want to format.
Step 2: Highlight the text you want to format
Click and drag your mouse over the text that you want to divide into columns.
It’s important to note that you don’t have to format your entire document with columns. You can select a specific section or even just a paragraph. Just make sure the text you want in columns is highlighted before moving on to the next step.
Step 3: Go to the ‘Page Layout’ or ‘Layout’ tab
Find and click on the ‘Page Layout’ or ‘Layout’ tab in the ribbon at the top of Word.
The name of this tab can vary depending on your version of Word. In most recent versions, it’s called ‘Layout’. This is where you’ll find all the options for formatting your document.
Step 4: Click on ‘Columns’
In the ‘Page Layout’ or ‘Layout’ tab, click on the ‘Columns’ button.
After clicking on ‘Columns’, a dropdown menu will appear with different options for column layouts. You can choose a preset layout or customize the number of columns you want.
Step 5: Choose the number of columns
Select the number of columns you want from the dropdown menu or click ‘More Columns’ to customize further.
If the presets don’t fit your needs, ‘More Columns’ will open a new dialog box where you can set the exact number of columns, the spacing between them, and whether you want a line to separate them.
After completing these steps, your selected text will be formatted into the number of columns you chose. The text will flow from one column to the next, making your document look tidy and professional.
Tips for Making Columns in Microsoft Word
- Always preview your document before finalizing the column layout to ensure the text flows logically from one column to the next.
- If your document has headings, consider keeping them outside of the columns for a cleaner look.
- Adjust the spacing between columns to ensure the text is readable and not too cramped.
- Use the ‘Column Break’ feature to control where text ends in one column and begins in the next.
- Experiment with different column layouts to find the one that works best for your content and purpose.
Frequently Asked Questions
How do i undo the column formatting if i change my mind.
If you want to revert to the original layout, simply highlight the text again, go to ‘Columns’, and select ‘One’ to return to a single-column format.
Can I add columns to only part of my document?
Yes, you can format just a section of your document with columns by highlighting the specific text you want to modify before following the steps above.
Is it possible to have different numbers of columns on the same page?
Absolutely! You can have multiple sections with different column layouts on the same page by formatting each section separately.
How can I ensure that my text stays within the columns I’ve created?
Word automatically flows the text within the columns you create. However, you can use ‘Column Break’ to fine-tune the text flow.
Can I add a line between the columns?
Yes, when customizing your columns, you can check the option to add a line between columns to visually separate them.
- Open Microsoft Word and select your document.
- Highlight the text to format.
- Click the ‘Page Layout’ or ‘Layout’ tab.
- Select ‘Columns’.
- Choose the number of columns or customize further.
Mastering the art of making columns in Microsoft Word can significantly enhance the readability and aesthetic appeal of your documents. Whether you’re looking to create a newsletter, a menu, or simply want to organize your text in a more visually appealing way, columns are a fantastic tool at your disposal. The key is to practice and experiment with different column layouts to find what works best for your specific needs.
Don’t hesitate to try out different spacing options, column counts, and even adding lines between your columns to achieve the perfect look for your document. And remember, if you ever run into trouble or need to tweak your layout, Microsoft Word makes it easy to adjust your columns on the fly. Now that you know how to make columns in Microsoft Word, the only limit is your creativity. So go ahead, give it a try, and watch your documents transform!

Matthew Burleigh has been writing tech tutorials since 2008. His writing has appeared on dozens of different websites and been read over 50 million times.
After receiving his Bachelor’s and Master’s degrees in Computer Science he spent several years working in IT management for small businesses. However, he now works full time writing content online and creating websites.
His main writing topics include iPhones, Microsoft Office, Google Apps, Android, and Photoshop, but he has also written about many other tech topics as well.
Read his full bio here.
Share this:
Related posts:.
- How to Make All Columns the Same Width in Excel 2013
- How to Insert Text Box in Google Docs
- How to Remove Section Breaks in Word Documents
- How to Use the AutoFit Excel Shortcut for Columns and Rows
- How to Return to Normal View in Word 2010
- How to Add Word 2013 Columns
- How to Switch Columns in Google Docs
- How to Delete Column from Table in Word 2010
- How to Vertically Center Text in Word 2013
- How to Center Text in Word [2023 Guide]
- How to Remove the Page Number from the First Page in Word 2013
- How to Make a Table Fit on One Page in Word 2010
- How to Select All in Word for Office 365
- How to Do a Hanging Indent on Google Docs
- How to AutoFit All Columns in Excel 2013 (An Easy 4 Step Guide)
- How to Freeze Columns in Google Sheets
- How to Add Table Columns in Word 2010
- How to Make the Adjusted Column Spacing Even in Excel: A Step-by-Step Guide
- How to Use Document Borders in Word
- How to Make Multiple Bullet Columns in Microsoft Word: A Step-by-Step Guide

How to Make Columns in Word

Create and Format Newspaper-style Columns in Word Documents
by Avantix Learning Team | Updated September 6, 2022
Applies to: Microsoft ® Word ® 2013, 2016, 2019, 2021 and 365 (Windows)
You can make columns in Word documents in a few different ways. There are two types of columns you can create – newspaper-style columns where the text flows from column to column or tables with columns and rows. You can create documents that contain two, three or more columns. In this article, we'll review how to set up newspaper-style columns. If you want to create a table, check out 4 Ways to Create a Table in Word .
The best way to create and manage newspaper-style columns is to create them in sections. In Word, each section can contain a different number of columns. You could, for example, create a two section document if you want a heading to span the top of a document in one column and the remaining text in two, three or more columns.
Note: Buttons and Ribbon tabs may display in a different way (with or without text) depending on your version of Word, the size of your screen and your Control Panel settings. For newer versions of Word, Ribbon tabs may appear with different names. For example, the Layout tab may appear as Page Layout.
Recommended article: 10 Microsoft Word Tips, Tricks and Shortcuts for Selecting in Tables
Create columns (basic method)
The Columns command appears on the Layout or Page Layout tab in the Ribbon:

To create newspaper-style columns in a Word document:
- Click in the document where you want to create columns.
- Click the Layout or Page Layout tab in the Ribbon.
- Click Columns in the Page Setup group. A drop-down menu appears.
- Click one of the column options (such as Two) or click More Columns. If you click More Columns, a dialog box appears.
- In the dialog box, click or enter the number of columns you want.
- If you don't want your columns to all be the same width, uncheck or deselect the Equal column width checkbox (you will then be able to change the width of each column separately).
- Enter a width for each column if you want.
- In the area to the right of each column below Spacing, enter a gap amount if you want (gap is the space between the columns).
- Beside Apply To, select your preferred option – Whole document, This point forward, Selected text, or This section. This section appears only if you have inserted a section break. Selected text appears if you have selected text.
The Columns dialog box appears as follows with 2 columns and Equal column width selected:

Insert a section to contain multiple columns
If you create sections to contain columns, you can combine different numbers of columns in your document (and easily return to one column). The default in a Word document is one section.
It's a good idea to turn on Show / Hide Paragraph Marks when working with sections so you can see section breaks and other non-printing characters.
To turn on Show / Hide Paragraph Marks:
- Click the Home tab in the Ribbon.
- Click Show/Hide ¶ in the Paragraph group. Paragraph marks, tabs, spacing and section breaks will display but will not print.
The Show/Hide ¶ command appears on the Home tab in the Ribbon in the Paragraph group:

To insert a section to contain columns:
- Click in the Word document where you want to insert the section break.
- Click Breaks in the Page Setup group. A drop-down menu appears.
- Click the type of break you want. Typically, you would choose Continuous.
- Add another break (typically Continuous) at the end of the area where you want to end the columns.
The Breaks command appears on the Layout or Page Layout tab in the Ribbon:

Create columns in a section
To create columns in a section in a Word document:
- Click in the section where you want to create columns. There should be a section break at the beginning and end of this area.
- Complete steps 2-8 of the Create columns (basic method) using the dialog box.
- Beside Apply To, select This Section.
In the following example, a document has been set up with 3 sections, each with a different number of columns:

Create columns for selected text
Another way to create columns is to select text and change it to columns.
To create columns for selected text:
- Select the text you want to change to multiple columns.
- Beside Apply To, Selected Text should appear.
Create columns from a specific point in a document
You can also create columns starting at a specific location in a document.
To create columns starting at a specific point in a document:
- Click in the location in the Word document where you want to start columns.
- Beside Apply To, select This Point Forward.
Insert a column break
If you have created multiple columns, you may want to add a column break to force a new column.
To insert a column break:
- Click in the Word document where you want to insert a column break.
- Click Column.
You can also create a column break by pressing Ctrl + Shift + Enter.
When you insert a column break, the cursor will appear in the next column.
View column boundaries
You can display column boundaries when you are working with newspaper-style columns.
To display column boundaries:
- Click the File tab in the Ribbon.
- Click Options. A dialog box appears.
- Click Advanced in the categories on the left.
- Check or select Show text boundaries in the Show document content group.
View column boundaries appears in the Options dialog box in Word:

Remove columns in a section
To remove columns in a section:
- Click in the section with the columns you want to remove.
At this point, you can select and delete the section breaks if you want.
Remove columns for selected text
To remove columns for selected text:
- Select the text with the columns you want to remove.
If you want to remove all newspaper-style columns in a document, press Ctrl + A for select all and then select One in the Columns drop-down menu.
Remove columns starting at a specific point in a document
To remove columns starting at a specific point in a document:
- Click in the location in the Word document where you want to remove columns.
- Click More Columns. A dialog box appears.
- In the dialog box, select One.
Remove section or column breaks
If you have turned on Show/Hide ¶ in the Paragraph group, section breaks and column breaks will appear in the document. Simply drag over a break to select it and press Delete.
Newspaper-style columns are very different from tables with columns and rows and are used for different purposes. They are most often used in newsletters but can be used in any type of document.
Subscribe to get more articles like this one
Did you find this article helpful? If you would like to receive new articles, JOIN our email list.
More resources
14 Shortcuts to Quickly Select Text in Microsoft Word
10 Microsoft Word Shortcuts for Moving Around in Tables
How to Keep a Microsoft Word Table Together on One Page
How to Insert, Format and Update Cross-References in Word
Microsoft Word Tricks to Keep Text Together (Words, Lines or Paragraphs)
Related courses
Microsoft Word: Intermediate / Advanced
Microsoft Excel: Intermediate / Advanced
Microsoft PowerPoint: Intermediate / Advanced
Microsoft Word: Long Documents Master Class
Microsoft Word: Styles, Templates and Tables of Contents
Microsoft Word: Designing Dynamic Word Documents Using Fields
VIEW MORE COURSES >
Our instructor-led courses are delivered in virtual classroom format or at our downtown Toronto location at 18 King Street East, Suite 1400, Toronto, Ontario, Canada (some in-person classroom courses may also be delivered at an alternate downtown Toronto location). Contact us at [email protected] if you'd like to arrange custom instructor-led virtual classroom or onsite training on a date that's convenient for you.
Copyright 2024 Avantix ® Learning
You may also like

How to Insert or Type I with an Accent Mark in Word (Í, í, Ì, ì, Î, î, Ï, or ï)
You can insert or type i with an accent mark in Word using built-in tools or keyboard shortcuts (including Alt code shortcuts). The letter i can be inserted with an accent in both upper or lower case. The following are common accents in upper or lower case – Í, í, Ì, ì, Î, î, Ï, or ï.

How to Insert or Type A with an Accent Mark in Word (À, Á, Â, Ä, à, á, â, or ä)
You can insert or type a with an accent mark in Word using built-in tools or keyboard shortcuts (including Alt code shortcuts). The letter a can be inserted with an accent in both upper or lower case. The following are common accents in upper or lower case – À, Á, Â, Ä, à, á, â, or ä.

10 Word Shortcuts to Select Text Using a Keyboard
You can use several shortcuts in Word to select text in your documents using only your keyboard. When you select text, it will typically be highlighted in grey. After you select text, you can cut, copy, or delete the selected text or apply character or paragraph formatting.
Microsoft, the Microsoft logo, Microsoft Office and related Microsoft applications and logos are registered trademarks of Microsoft Corporation in Canada, US and other countries. All other trademarks are the property of the registered owners.
Avantix Learning |18 King Street East, Suite 1400, Toronto, Ontario, Canada M5C 1C4 | Contact us at [email protected]
Our Courses
Avantix Learning courses are offered online in virtual classroom format or as in-person classroom training. Our hands-on, instructor-led courses are available both as public scheduled courses or on demand as a custom training solution.
All Avantix Learning courses include a comprehensive course manual including tips, tricks and shortcuts as well as sample and exercise files.
VIEW COURSES >
Contact us at [email protected] for more information about any of our courses or to arrange custom training.
Privacy Overview
Pin it on pinterest.
- Print Friendly
How-To Geek
How to make columns in microsoft word.
Rearranging your text in multiple columns is easy!
Quick Links
Create columns in a new word document, add columns with existing text in a word document, insert column breaks in a word document.
Microsoft Word allows you to add one, two, or three columns to your documents. It offers various types of columns as well as custom column breaks you can make. We'll show you how to do that.
Related: How to Remove Section and Page Breaks in Microsoft Word
To make columns in a new Word document, first, open Microsoft Word on your computer and start a new document.
When the document editing screen opens, then in Word's ribbon at the top , click the "Layout" tab.
On the "Layout" tab, in the "Page Setup" section, click "Columns."
The "Columns" menu displays various column types you can add to your document. Each column type has a preview beside it, so you know how that column will look in your document.
The available column types are:
- One : This keeps only one column in your document, which equates to not adding any columns at all.
- Two : Select this option to add two equal-sized columns to your document.
- Three : This option adds three columns to your document.
- Left : This adds one column to the left of your document.
- Right : This adds one column to the right of your document.
When you have added a column in your document, start typing and your text will be formatted in the column style.
That's it. You now have columns similar to newspapers or magazines .
Columns in Word use a set width by default, however, you can adjust this width to your liking. That way your columns appear in the exact size you want.
Related: How To Adjust Column Size in Microsoft Word
Word allows you to insert columns into an existing document, too. In this method, you can add a column only to your selected text.
To do that, first, open your document with Microsoft Word. In the document, select the text you want to turn into columns.
While the text is selected, in Word's ribbon at the top, click the "Layout" tab.
In the "Layout" tab, click "Columns."
From the "Columns" menu, select the type of column you'd like to add to your text.
And instantly, Word will put the selected text into your chosen column type.
To reverse your action and remove your columns, press Ctrl+Z on Windows or Command+Z on Mac.
You're all set.
Are you looking to add a column to a table in your Microsoft Word document? If so, it's equally easy to do that.
Related: How to Quickly Add Rows and Columns to a Table in Microsoft Word
With a custom column break in your document, you get to specify where the new column starts. This allows you to arrange your text in your columns.
To add a custom column break, place your cursor where you want the new column to start in your document. Anything after the cursor will appear in the new column.
In Word's ribbon at the top, click the "Layout" tab.
In the "Layout" tab, click "Breaks."
From the "Breaks" menu, choose "Column."
Word has now placed the text after your cursor in a new column.
And that's how you change the layout of your traditional documents to the newspaper and magazine-like styles in Word. Very useful!
If you use Google Docs, you can add columns to your Docs documents, too.
Related: How to Create Multiple Columns in Google Docs
Creating Tables
Locked lesson.
- Lesson resources Resources
- Quick reference Reference
About this lesson
Exercise files.
Download this lesson’s related exercise files.
Quick reference
Tables provide a structure of columns and rows to help the user line up data, similar to a spreadsheet layout, but within a Word document.
When to Use
Often, tables are used to lay out contact lists inside a Word document, and a calendar would be a table layout as well.
Instructions
Table options.
To view the Table Options, go to the Insert Ribbon, Table.
The bottom option is the fastest: Quick Tables. The Designs are ready and you can easily edit the table with your own data.
Add Rows to a Table
Mouse to a row and click the + tool that appears between the rows.
To move a Row, use the keyboard combination of Alt+Shift+Up Arrow and Alt+Shift+Down Arrow
To Position the Table on the page
Use the Paragraph Alignment buttons.
Use the Ruler to adjust the column widths.
Convert Text to Table
Select the text to Convert, i.e.
Name Phone Address City, St, Zip Notes
Jane Doe 123-4567 123 Marigold St. City, St, Zip Staffing Dept
Go to the Insert Ribbon, Table, and click Convert Text to Table:
The resulting table will contain your data inside cells:
- 00:04 As we make our way through the Insert ribbon, the next option is Table.
- 00:09 Now, a table is simply a structure of data generally lined up in rows and
- 00:14 columns format.
- 00:15 In this particular case, we have some sample data on the screen.
- 00:19 Now, I can click into the data and
- 00:21 there is no new ribbon coming up on top that tells me I'm dealing with a table.
- 00:25 So let's turn on our show/hide codes and see what's happening in the background.
- 00:30 I'll go ahead and click the button for Show/Hide code, or
- 00:33 you can press Ctrl+Shift+8 or the asterisk.
- 00:36 And here, we can see that between each one of these sets of data is a tab,
- 00:41 that's simply a Tab key.
- 00:43 If you bring your eyes up to the ruler across,
- 00:46 you'll see that we've got tab settings across this entire ruler.
- 00:50 If I click into any one of these lines, these rows of data,
- 00:54 and if I remove this particular tab setting with a click and a drag,
- 00:58 pull it down, I've just broken the table format.
- 01:02 And that is why we don't use tabs to layout table structures, we use a table.
- 01:07 I'm going to Ctrl+Z to undo that.
- 01:10 Okay, well, let's show you where the tables are.
- 01:12 I'll click into a blank spot of this document and come up here, and
- 01:16 on the Insert ribbon, we have Table.
- 01:19 When we open this, we can literally click and
- 01:22 drag to tell it how many rows we need and how many columns.
- 01:25 So I want five columns by four rows.
- 01:30 As you can see on the screen, it is building itself right down there, and
- 01:35 then I would have to copy-paste the data into it.
- 01:38 Well, let's go below these grids.
- 01:40 Let's go below and check this out.
- 01:41 We have Insert Table, I can draw a table.
- 01:44 Literally, click and drag and use a little pencil and
- 01:48 draw the lines through my existing data.
- 01:51 I can convert text to table, which I will do in a moment.
- 01:55 We can have an Excel Spreadsheet on the screen.
- 01:58 We can also have Quick Tables.
- 02:00 Quick tables are delightful, because they're already set up for us.
- 02:04 Just little ideas of table, so if you need one of these,
- 02:07 you don't have to reinvent the wheel.
- 02:09 They're already created for you on this quick tables list.
- 02:13 Okay, well, let's back up a bit.
- 02:15 I'm going to go back into the document and I'm going to select the existing data.
- 02:21 I'm going to go to my Insert ribbon, click on Table.
- 02:25 Now, notice there's a big difference here.
- 02:26 You have pre-selected data, so it knows I'm not going to put in a brand new table.
- 02:32 And this time, my Convert Text to Table is bold, it's available for
- 02:37 me to click, and I'll do just that.
- 02:39 It's going to confirm, do you want five columns?
- 02:42 Fixed column width would be automated.
- 02:44 Notice, I do have options, AutoFit to contents, AutoFit to window.
- 02:51 I'll just go ahead and leave the Fixed column width at auto.
- 02:55 Separate text at Paragraphs.
- 02:58 Tabs, it even recognizes there's tabs in there, or
- 03:01 maybe there's other data, hit OK.
- 03:04 And now, we have a table structure.
- 03:06 Take your eyes up to the ribbons.
- 03:07 Check this out.
- 03:09 I have a Table Design ribbon and a table Layout.
- 03:11 That's how come I always know if I'm in a table or not.
- 03:14 I just look up to the ribbon.
- 03:17 Now, in this particular case, for this one, I can design this table.
- 03:21 We can choose anything we want.
- 03:22 A color with headings, I'll go ahead with the yellow one.
- 03:27 I can change the shading of any of these colors.
- 03:30 I can change the borders, I can change the width of the borders.
- 03:34 I can put no borders at all on this.
- 03:37 Maybe I've decided that the Phone column is too wide.
- 03:42 Well, I've clicked into the table, take a look at the ruler up there.
- 03:47 I can actually click and drag the column widths by using the ruler tools.
- 03:53 Well, what if I want to add some extra data?
- 03:55 I can float my mouse on these columns and a tiny little blue plus sign shows up,
- 04:01 that's the insert column button, click, just like that.
- 04:05 Well, now, I decided I want to get rid of that column.
- 04:07 Well I could Ctrl+Z to undo it.
- 04:10 Or when I float my mouse above a column, notice the black drop-down arrow,
- 04:14 simply right-click and look at your options here.
- 04:17 I can insert new columns, delete columns, merge columns.
- 04:22 I'll go ahead and delete columns.
- 04:24 Well, let's say I want to insert a row, same story.
- 04:26 Just float yourself into the table, come out to the outer edge of it,
- 04:31 and you'll see a blue plus sign, click that.
- 04:35 Now, we have a brand new row.
- 04:36 To get rid of it, simply use the black arrow to the left of it,
- 04:40 right-click, and delete rows.
- 04:43 Now, this is just an introductory to the table structure.
- 04:47 I just want you to know how simple it is to take existing data, and format and
- 04:51 structure it as a table.
Lesson notes are only available for subscribers.
Facebook Twitter LinkedIn WhatsApp Email
© 2024 GoSkills Ltd. Skills for career advancement

22 Basic Microsoft Word practice exercises for beginners
- May 23, 2017

Microsoft Word Exercises for Practice: – This article is very important for a basic computer course, for college and school students learning Microsoft Word online and offline. In this, you will get the best ideas on how to learn and practice Microsoft Word. And you can explore the capabilities of Microsoft Word as a business software in this post.
The best way to learn anything is by doing exercises and creating samples of existing materials from experts. It’s ok that you know about Bold, Italic, Page Layout, Insert Menu, View options, etc. but it’s great if you can use such options in creating anything in Microsoft Word.
I mean tools are the same, but the field, seed, and process are changed. So, Can you do that with the same tools? I know farmers do it daily.
So, let’s explore how to learn Microsoft Word. Microsoft Word Exercises ideas that I think every student around the world should practice.
Microsoft Word practice exercises for beginners:
1. create and design admission/enquiry forms etc..
To create this kind of form, you need to use shapes, text boxes, colors, formatting options, tables, and horizontal lines in MS Word. This is a very good exercise to practice because it will give you an idea of how to use such options practically on various official documents that we use in our daily official life.
These days many people do not create forms and charts usually they download them. That makes the forms boring. And often you see similar kinds of formats in forms. But as a student or teacher or small business owner if you learn to create such forms not only do you expand your thinking and creativity but you can also utilize this ability in business and job.
See a sample in the image below.

2. Create bills/leaflets/brochures. See the sample below.
Everyone has various designs of bills such as your refrigerator shopping bill, computer bill, electricity bills, and various other kinds of bills. So you can practice in Microsoft Word to create that type of bill format. It’s good for practice in which you will learn the Insert menu option, text adjustment between the table, page size, and text boxes.
3. Design E-book cover pages / Magazine front/ books front/back page using the cover page option in Insert Menu.
This practice is an advance. But try to find the books and magazine cover pages. And try to make it similar in MS Word. Imagine if you’re the designer, how you will design the same content or front page. You will learn while practicing this about the Cover Page option in MS Word or you can design without using that option. The benefit of learning this is about understanding the various practical uses of Microsoft Word in our daily lives.

4. Create Business Cards using Shapes, text, and colors.
People use Adobe Photoshop, Corel Draw, and websites to create business cards nowadays automatically and manually. You can also use that. But it’s about mastering MS Word options and skills. When you create and design anything in Microsoft Word. Your basic computer skills become strong. That helps you in the future when you start working on a Computer or MS Office or MS Word. Also, basic computer skills are very important before doing any degree course in IT. So, Design the business cards similarly you see in the below sample picture.

This is an advanced exercise, but if you do it and create cards then the options you’ve learned during your computer courses in MS Word remain forever in your brain.
Related: Importance of MS Word in Education
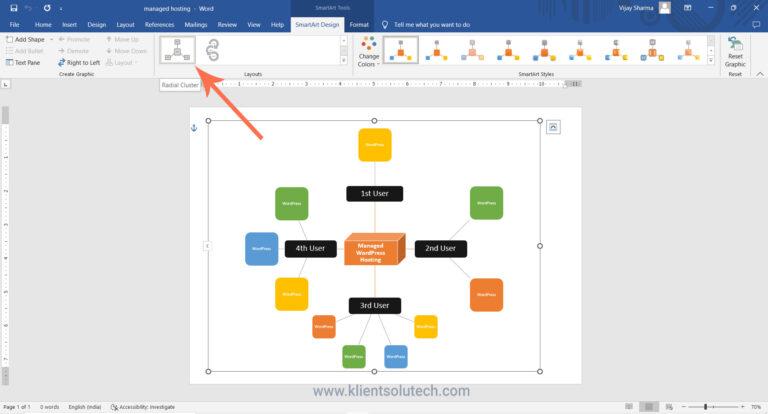
5. Use smart art and create organizational charts and showcase relations:
Smart Art is one of the favorite options in Microsoft Word. Smart art is used to draw diagrams that are used to showcase the content visually that will be easy to understand and manage. As you see below the smart art image Hierarchy Diagram is used to create an organizational chart or structure of the Telecom company.
This is the best method to understand and teach certain things to students, teachers, parents, and companies. You will see such organizational charts in the company’s office and government head offices.

Radial Cluster:
I have created this radial cluster diagram and organizational chart using Smart Art in Microsoft Word to showcase the difference between Managed WordPress Hosting and Shared Hosting” in one of the latest published posts. You can practice and create a similar chart to showcase the relation or useability differences.
Structural Chart:

I hope that you can see (if not zoom in the browser using (Ctrl+ + ) both WordPress hosting and shared hosting smart images that are created in Microsoft Word.
When you practice MS Word Option to create the above diagram or any other, you get many problems. Those problems were not there while you were learning MS Word. These are the problems such as font size adjustment, lines adjustment, etc. colors, shape adjustment, etc. when you use tools or Word applications to communicate your point of view.
So, when you solve these problems by yourself or with the help of your computer course instructor it will be great for your computer knowledge and MS Office skills. Because when you solve the problem you learn very important working lessons in MS Word. This is why you’re learning.
Related: Steps to create a simple business plan using templates in Word App
6. Make book content page or index page
This is another idea in which you need to create an index or content page of the book. In this process, you will learn about the first-line indent, hanging indent, and the perfect use of the ruler bar in Microsoft Word.
And also about a page number, and a hyperlink (if it is an eBook). You can discuss this article with your computer teachers, to allow us or provide us with similar things to practice on.

7. Try to create a similar Header and footer that you’re seeing in the Book
This is the most important option and thousands of students find it difficult to use the header and footer. It’s easier to learn header and footer one time but if you’re not practicing it in various ways or the things such as books header and footer, it’s tough for you to explain it to others.
That’s why I am suggesting you try using the different styles of header and footer. And you will get such an example from the books.

8. Insert the Image into the shape
This is a little easy. But you must know easier things more than difficult things. Because in interviews especially related to IT, people ask easier questions than difficult ones.
So, practicing even on small things is also beneficial. You don’t know when it will be helpful for you in the future.
So, insert an image into the shape. Take and draw a shape from the Illustration menu, place it on a page a little higher in size, and then double-click on the shape. Go to the shape fill option and click on the picture. As an example, you can see the following image.

Related: – Top 10 powerful uses of Microsoft Word.
9. Practice hyperlinking and creating links between Word document texts to D: /, Play songs from Microsoft Word text, and create links between internal and external files.
This is the most important option in Microsoft Word. Most of the processes on the internet contain links. The hyperlink is the starting point in which you learn how things are connected.
It’s also a great option for Web Designers or web designing teachers to teach “How website links work” by using the hyperlink as an example.
As you can see in the image below, I am displaying the connection between the play song text to the location of the song.
Now you need to select the text in which have written the play song and then insert a hyperlink (Ctrl+K) and in the hyperlink address, put the path of the song. After that press, the Ctrl button and click on the blue link, so now any song that you selected will start playing.

Here is my complete article based on the Hyperlink option: – Hyperlink Example within Microsoft Word Document
10. Design a Happy Birthday Message by using Word Art and print it.
I think it’s the easiest thing for you. You can use the Word Art option for this. You can create the best wishes message in MS Word. After that, you can print. And give it to the person. It’s about creating small things at home. This is also a good way to make kids interested in learning the computer.
Also good for students and kids to create fun things and print or give them as a gift to parents. So, they will enjoy your creativity.

11. Create a chart and show the product price comparison between years:
The chart option is very important in Microsoft Word and Excel. However, the use of the chart option and any other option in MS Word depends on the demand for a certain content type.
For example, you’re writing a book or making notes about something in which you have to write and explain the price comparison between 3-4 years. Then you can use the chart for visualizations to analyze the data.
In visual format or the chart, it’s easier for people to understand, what you mean. Also, it gets more views or focus than the content.

So, try to create the chart you’re seeing in the above image.
12. Get the newspaper and see the text-based advertisement and Design
Design and create text or image-based advertisements that you saw in the newspaper. Designing such an advertisement will be a very beneficial role for Microsoft Word students or people learning Advanced Microsoft Word skills. Advertisement designs contain high-quality images, text, and layouts. And these designs are created by experts. When students practice expert material and create similar or better than that.
I think that movement is great for learners and teachers. So, try to create as many as you like. It will make you master MS Word. And I think doing exercises after completing the class topic is the best way to learn MS Word.

13. Take a double-column book or newspaper and design or create a similar paragraph style in the Word document .
Not all often type or create content in a double column. I know computer teachers can teach you such options. But they will not be able to explain the deepest or professional uses of such options for certain reasons.
So, I will suggest that you use the column option and find the newspaper similarly as you see below and create or type the text as you’re seeing in the newspaper. And if you’re having a problem, ask your teachers. So, when your teachers teach you how to do that thing or this thing, it will be great for your knowledge.
14. Create a letterhead or identity card of any company or institution that you have and insert the Watermark with that company name in the document.

You can create an identity card, visiting card or birthday card in MS Word. As you’re seeing below this is an example of cards and letterheads. But you can find such things. And practice your MS Word knowledge in creating an identity card, and letterhead.
This will give you an idea of how to adjust the text in different shapes and areas. Also, this is a good exercise in which you learn after printing, what size you need to adjust on the page. And when you do that, you learn very precious things in MS Word.
In this video tutorial, you will get basic ideas to create a letterhead. You will get ideas to insert letterhead content in the header and footer, you will also learn how you can use watermarks in letterhead, and how to print and adjust content on the page. The video tutorial is in Hindi, but even if you’re not familiar with the Hindi language, you can still learn and watch it for practice ideas:
Step by Step Guide to create printable letterhead in Microsoft Word and Google Docs
15. Decorate a Word document with a page border, and content border, add patterns, and write beautiful text in it.
This is the easiest page layout option, in which you can learn about page borders in MS Word, text borders, color or shading on the page, and pattern.
These options are very beautiful when you’re creating eBooks, making notes, and doing anything that requires the following type of style. See the image below and try to create something similar to this one.

16. Insert Images and Practice on Format Menu and Image Options.
You can use image options and style to decorate, retouch, and adjustment of colors and brightness in MS Word. As you can see, I have created various styles and image effects. These are easy to create.
But to learn more advanced effects later in other professional software, you need to learn and practice such things during your basic computer course.

17. Insert a template or download the new template in Microsoft Word from the Internet and edit those templates with your content.
There are 100+ templates almost for anything in the Microsoft Word Template option. The top benefit of using the template is that if you don’t know how to create or design a certain thing then you can just download the template and replace the existing text with your text. And it’s done.
This is the most important option that you should learn because it’s tough when you don’t know how to design or create anything, so try to practice on 10+ templates and see what it will look like.

Related: Uses and features of Microsoft Word.
18. Practice Typography
Write 10 lines or 10 sentences and then change the font, style, color, and size of each sentence. make each one different from than previous and next..
Fonts are the face of the text. The following image displays various fonts and styles. Just create similarly. During the practice, you will learn which font will be better for the specific text. Just write 10 lines and differentiate each one.

19. Create a Tenant management form in Hindi or your native language.
We use computers or technology mainly for two reasons the one is Innovation and the second is problem-solving. There are various ways of solving problems using computers. Some problems are solved immediately or some take time. For example, you can create an accounts management software to manage business incoming, outgoings, cash flow, balance, and taxes.
Similarly, there are software and mobile apps to manage tenants. I have created this form for my office space owner. He wanted a simple solution that they could follow and manage easily. They are not that much familiar with apps and other digital methods. I told them about digital options. But they want something that can be taken care of easily and also send tenants’ details for police verification when needed.
So we created the following form and this is also an example of immediate problem-solving using a computer and Microsoft Word. Now after printing one copy of this, they can photocopy it as per the number of tenants they want to manage.

So as beginners, you can try to create a similar form by using the Table feature in Microsoft Word. For the best practice 1st create and decide on columns on rough physical paper and the details that you want. You can create a better form than this and I expect that from you.
And for Hindi or your native language, even if you do not have Hindi font or French or Spanish font on your computer or in Microsoft Word. You can use Google Translate for this, convert the word into Hindi or Spanish, and then copy and paste it into the form table column.
20. Practice to design a brochure for an event
When you try creating this brochure design in Microsoft Word, you’ll learn basic and advanced techniques. This includes using image effects, grouping shapes, adding colorful bullets, and creating textures. These skills are valuable, especially if you plan to work with Word or as a virtual assistant. But even as a Word beginner, practicing these exercises is essential for building your Word skills.

Here you can watch a free video tutorial to learn brochure design : Brochure Design Practice in Microsoft Word | Word Exercise for Beginners | Hindi Tutorial
21. Learn and Practice creating business card designs in Microsoft Word
Today, there are plenty of software options available for creating business cards, such as online tools, Adobe InDesign, Corel Draw, Photoshop, Canva, and more. However, making a printable business card may seem straightforward but does involve some technicalities and creative flair.
As a student, it’s beneficial to tackle challenging and intricate design tasks in Microsoft Word, like this business card project. This practice will help you strive for excellence and mastery of Word skills. Consider it your 21st exercise towards becoming a Word expert.
Here you can watch a complete and detailed video tutorial on this: How to Create Modern Business Card Design in MS Word | Step-by-Step Detailed Tutorial
22. Practice to create a professional-looking certificate design
Practicing certificate design and Microsoft Word is essential because it empowers you with valuable digital skills that are increasingly relevant in today’s technology-driven world. By honing your proficiency in Microsoft Word, you not only gain the ability to create professional certificates but also enhance your competence in document formatting, layout design, and image manipulation. These skills have broad applications across various personal and professional tasks, making you more adaptable and capable in a digital environment.
Furthermore, practicing certificate design offers you a practical avenue for skill development while producing tangible outcomes. It allows you to create certificates for courses, achievements, or even for your own business, helping you develop an eye for aesthetics, attention to detail, and the ability to produce polished documents. Overall, this practice not only enhances your digital competence but also provides you with a versatile skill set that can significantly benefit your personal and professional growth.
By creating and practicing below certificate design below, you will be able to explore various design options to create a professional-looking certificate. This is just a sample but along with this design, you can take it’s design to the next level.

If you want to learn how you can do it please follow this step tutorial: How to create a professional-looking certificate design in Word | Step-by-Step Tutorial in Hindi
I think if you practice Microsoft Word by working on these exercises then it will be enough to make you above average among all the students around the world doing basic computer courses or learning Microsoft Word.
Because after learning Microsoft Word, you have to work with professionals or in companies. And almost all official works are related directly and indirectly to the above exercises.
So, this is the best method to learn Microsoft Word by doing exercises. And this is about practical knowledge.
I hope these Microsoft Word Exercises ideas will be helpful for you. To learn more visit: Top 10 Basic and Advanced Microsoft Word skills
How useful was this post?
Click on a star to rate it!
Average rating / 5. Vote count:
No votes so far! Be the first to rate this post.
We are sorry that this post was not useful for you!
Let us improve this post!
Tell us how we can improve this post?

Vijay Sharma
Hi, Welcome to my personal blog, Klient Solutech, where I share insights, strategies, trends, and observations on the dynamic world of Technology, Digital Marketing and Web Development.
Related Posts
Simple process to create engaging presentations in powerpoint.
- November 21, 2023
How to learn Microsoft Office Online at Home
- October 9, 2023
5 Best CRM Software to build intact customer relationships
- July 7, 2023
good practical please send more practical in winword. Thanks
These are good Practical exercises. Please send list of practicals of MS Word in Vocational IT NSQF level-1 subject code-402 class IX
please send a book which covers exercises like this
Great content! Thanks for putting this out there!
This is very nice
I have recently joined a Private Computer classes at the age of 53. Can you guide me through WORD, EXCEL, POWERPOINT & INTERNET
Is it possible for you send step by step Assignments for all the above 4 courses, so that I can evaluate whether I am learning properly or not ?
Hi, That’s a very good concern as a student “whether I am learning properly or not” I think 80% students ignore this. I will contact you by email. Age is not a problem. I expect you have strong reason or specific task or goals to learn all these three + internet in this age. Yes, I can evaluate through giving you assignment and testing it.
Leave a Reply Cancel Reply
Your email address will not be published. Required fields are marked *
Name *
Email *
Save my name, email, and website in this browser for the next time I comment.
Post Comment

Want to create or adapt books like this? Learn more about how Pressbooks supports open publishing practices.
Word Practice 1

Here is a video demonstrating the skills in this practice. Please note it does not exactly match the instructions:
Complete the following Practice Activity and submit your completed project.
For our first assignment in Word, we will create a flyer to be printed or posted online. The flyer will advertise a volunteer opportunity for Health Sciences students at Paradise Valley Community College. Key skills in this practice are inserting text and pictures, textboxes, formatting text and footers.
- Start Word. Click Blank Document .
- Show formatting marks by navigating to the Home Tab, Paragraph Group, and selecting the Show/Hide icon. This is a Toggle Button . This means it has two modes, on and off. To turn it on, click it once, to turn it off, click it again.
- Show the ruler by navigating to the View tab, Show Group, and selecting the Ruler Check Box . A Check Box is a type of input control . A checkboxes value is only included in the submitted data if the checkbox is currently checked. In other words, when the box is checked, the value is included.
- Navigate to the File Tab to enter Backstage View. In backstage view, select File, then Save As. Click the Browse button. In the Save As dialog box , navigate to your file structure from the previous chapter, then open the Word folder. In the Name field, type Yourlastname_Yourfirstname_Word_Practice_1 as the file name, and then save.
- Type Volunteer Opportunity Available and press Enter twice.
- Type the following text: This fall, Paradise Valley Community College is offering a unique volunteer opportunity for Health Sciences students . Press spacebar.
- Navigate to the Insert Tab, Text group, and choose the Object arrow. Then choose text from file. In the Insert File dialog box, browse to the location where you saved the files from Canvas. Select the file Text_Word_Practice1. Click OK. The text will automatically update your document.
- Select all of the text in the document. On the Home Tab, Font Group, ensure the Font is Calibri and font size is 12.
- Select the title, Volunteer Opportunity Available, including the paragraph mark. On the Home Tab, Font Group, select the arrow next to Text Effects and Topography . In the third row, third column, a pply the Fill: Blue, Accent color 5; Outline: White, Background color 1; Hard Shadow: Blue, color 5 text effect.
- With the title still selected, change the font size to 36.
- On the Home Tab, Paragraph Group, choose Center to align the title centered on the page.
- On the Home Tab, Font Group, change the font color to Blue, Accent 1 for the title.
- With the title still selected, on the Home Tab, in the Font Group, choose the arrow next to the Text Effect and Typography icon. Apply a Shadow and under Inner, click Inside: Right text effect.
- Position the insertion point at the beginning of the paragraph that begins with This Fall.
- On the Insert tab, Illustrations group, choose Pictures . Navigate to your saved files from Canvas and choose the HSPicture_Word_Practice1 image.
- Be sure the picture is selected, and apply the Square text wrapping option.
- Using the sizing handle at the lower right hand corner of the picture, drag up and to the left until the bottom of the graphic is aligned at approximately 3.5 inches on the vertical ruler.
- Click Undo to return the picture to its original size. The Undo icon is located in the quick access toolbar in the upper left hand corner.
- On the Picture Tools, Format tab, in the size group, change the shape width to 4”.
- On the Quick Access Toolbar , click the Save icon. Then, compare your document to the image below.

- Ensure the picture is still selected. Display the Layout dialog box by selecting the Layout Options shortcut menu, then choose see more. In the Layout dialog box for the picture, make sure the Position tab is selected.
- Set the horizontal alignment to Left, relative to Margin.
- Set the vertical alignment to Top, relative to Line. Select OK to close the dialog box.
- With the picture selected, apply the Soft Edges 10 Point picture effect. This is on the Picture Tools Format Tab, Picture Styles group, under Picture Effects, Soft Edges.
- With the picture selected, on the Picture Tools, Format tab, in the Adjust Group choose the Artistic Effects arrow. Apply the Pastels Smooth artistic effect. Dese lect the picture .
- On the Design Tab, in the Page Background Group, select Page Borders. Add a page border selecting the:
- Shadow setting
- Triple Lines style
- Blue, Accent 1 color
- Whole document
- Position the insertion pointer at the blank paragraph below the title and press Enter six times.
- On the Insert Tab, in the Illustrations group, choose Shapes . Insert a Rounded Corners Rectangle shape at the left margin at approximately 1.5 inches on the top ruler. Click once to insert a 1-inch by 1-inch Rounded Rectangle, or use the drag and drop feature.
- On the Drawing Tools, Format Tab in the Size group, Change the shape height to approximat ely 1.8 and the shape width to 6.4.
- Select the Rectangle shape and type the following text: For more information, please contact Grace Smith at 602-787-6714. Or, email [email protected]
- Italicize the text, change the font to Calibri and increase the font size to 16. Deselect the text.
- Select the same text as above and explore the mini-toolbar , by clicking the Font Color button arrow and under Theme Colors, click on Blue, Accent 5, Darker 50%.
- With the shape still selected, go to the Drawing Tools, Format Toolbar, the Shape Styles Group. Select the arrow next to Shape Outline and under Theme Colors, click on Blue, Accent 5, Darker 50%. Change the weight to 3pt.
Compare your document to the image below.

- Using the keyboard shortcut CTRL+END , navigate to the end of your document. If your keyboard does not have these keys, click to put your insertion point after the period on opportunity. Hit enter 3 times.
- Your insertion point should be approximately at the 8” mark on the side ruler. On the Insert tab, in the text group, click the arrow next to the textbox and draw a text box at approximately the 1”mark on the vertical ruler. Draw a text box by dragging down to create a text box that is approximately 1.5 inches high by 4.5 inches wide. Type the following in the text box: Volunteering is an excellent way to gain service hours. Service hours are required for entry into some Health sciences programs, and looks great on your resume. Dedicating your time as a volunteer helps you make new friends, expand your network, and boost your social skills.
- Select and Drag the textbox, by clicking and holding on the outer edge, until the horizontal green alignment guide displays above the first blank paragraph mark and the vertical green alignment guide displays in the center of the page. To be more precise:
- In the Layout dialog box on the Position Tab for the text box set the horizontal alignment to Centered, relative to Margin.
- Set the Vertical alignment by typing .25 in the Absolute position box and selecting Below Paragraph .
- On the Size tab, type 1.5 in the Absolute Height box and 4.5 in the Absolute Width box. Then, click OK.
- With the textbox still selected, on the Drawing Tools, Format Tab, in the Shape Styles group Apply the Colored Outline – Blue, Accent 1 shape style.
- Under Shape Effects , apply the Offset Center outer shadow shape effect to the text box.
- Select the text in the text box, change the font size to 13 italics, and center the text.
- Save the document. Compare your document to the image below.

- On the Insert tab, in the Header & Footer Group, choose Edit Footer. On the Header & Footer Design Toolbar, in the Insert Group, choose Document Info. Use Document Info to insert the file name in the footer. Select the File Name Field . The File Name should display in the lower left hand footer of the document. Do not type it in, rather use the Document Info Field.
- In Backstage view, click on Show All Properties, and type the following:
- In the Tags box: trainee, flyer, internship
- In the Subject box: Your course name and section number
- In the Author box: Your first and last name
- Turn off formatting marks. As a reminder, formatting marks are on the Home Tab, Paragraph Group.
- Take a moment to compare your document to the image below and make any modification based on what you have learned.
- Using Find and Replace, (Home tab | Editing | Replace), change all instances of pvcc and Paradise Valley to spscc or South Puget Sound.

- Zoom in to view the document in a larger size. Zoom is located in the lower right hand corner of the Word window.
- Save again, and ensure you have your file saved in a safe location. Take note of that location because you will need to find your file to upload it for grading.
- Submit the file for grading per your instructor’s instructions.
A starting point for creating a new document in Microsoft Word
Characters that display on the screen but do not print, indicating where the Enter key, the Spacebar, and Tab key were pressed, also called non printing characters
A button that can be turned on and off by clicking it once to turn on, and clicking again to turn it off
A small box which can be clicked to indicate a check is turned on or off to indicate an on or off response
Allows the user specify the drive, directory, and name of a file to save their file
Decorative formats, such as shadowed or colors that make text stand out
Images or graphics that are stored locally on a computer or flash drive and can be uploaded to a document to add visual interest
The manner in which text displays around an object
Located above the Ribbon (top-left) and provides access to commonly used features and commands, such as Save and Undo/Redo, and is customizable
Picture formatting options that control the manner in which text wraps around a picture or other object
Formats applied to images that make pictures resemble sketches or paintings
A decorative border that appears outside the margins on each page and can be solid, dashed, or an artistic style
Lines, arrows, starts, banners, ovals, rectangles, and other basic shapes with which you can illustrate an idea, a process or a workflow
Appears whenever you right-click text in Word, Excel or PowerPoint and provides a quick-access version of the Font group on the Home tab, plus a few extra buttons from other groups
Allows you to apply preset colors and effects to quickly change the appearance of your shape
Allows you to change the outline color, weight (thickness), and style of a the outline surrounding a shape
One or more keys used to perform a menu function or other common functions
A moveable, resizable container for text or graphics
A green vertical or horizontal line that displays when you are moving or sizing an object to assist with proper placement
A grouping of coordinating effects that can be applied to a shape including shadows, glows, reflections, soft edges, bevels, and three-dimensional (3-D) rotations
Placeholders that store and display data, and can perform simple tasks like returning the page number or current date and time
Any word, phrase, or number string related to the file that may help you locate the file later
Intro to Microsoft Office Copyright © 2021 by Abby Rusu & Maricopa Millions is licensed under a Creative Commons Attribution 4.0 International License , except where otherwise noted.
Share This Book

- Get started with computers
- Learn Microsoft Office
- Apply for a job
- Improve my work skills
- Design nice-looking docs
- Getting Started
- Smartphones & Tablets
- Typing Tutorial
- Online Learning
- Basic Internet Skills
- Online Safety
- Social Media
- Zoom Basics
- Google Docs
- Google Sheets
- Career Planning
- Resume Writing
- Cover Letters
- Job Search and Networking
- Business Communication
- Entrepreneurship 101
- Careers without College
- Job Hunt for Today
- 3D Printing
- Freelancing 101
- Personal Finance
- Sharing Economy
- Decision-Making
- Graphic Design
- Photography
- Image Editing
- Learning WordPress
- Language Learning
- Critical Thinking
- For Educators
- Translations
- Staff Picks
- English expand_more expand_less
Word - Columns
Word -, word columns.

Word: Columns
Lesson 15: columns.
/en/word/breaks/content/
Introduction
Sometimes the information you include in your document is best displayed in columns . Columns can help improve readability, especially with certain types of documents—like newspaper articles, newsletters, and flyers. Word also allows you to adjust your columns by adding column breaks .
Optional: Download our practice document .
Watch the video below to learn more about columns in Word.
To add columns to a document:

- Select the Layout tab, then click the Columns command. A drop-down menu will appear.

Your column choices aren't limited to the drop-down menu that appears. Select More Columns at the bottom of the menu to access the Columns dialog box. Click the arrows next to Number of columns: to adjust the number of columns.

If you want to adjust the spacing and alignment of columns, click and drag the indent markers on the Ruler until the columns appear the way you want.

To remove columns:
To remove column formatting, place the insertion point anywhere in the columns, then click the Columns command on the Layout tab. Select One from the drop-down menu that appears.

Adding column breaks
Once you've created columns, the text will automatically flow from one column to the next. Sometimes, though, you may want to control exactly where each column begins. You can do this by creating a column break .
To add a column break:
In our example below, we'll add a column break that will move text to the beginning of the next column.

- Select the Layout tab, then click the Breaks command. A drop-down menu will appear.

To learn more about adding breaks to your document, review our lesson on Breaks .
To remove column breaks:

- Open our practice document .
- Scroll to page 3 .
- Select all of the text in the bulleted list below Community Reminders and format it as two columns .
- Place your cursor at the beginning of the fourth bullet in front of the word Visitors .
- Insert a column break .

/en/word/headers-and-footers/content/

Contribute to the Microsoft 365 and Office forum! Click here to learn more 💡
April 9, 2024
Contribute to the Microsoft 365 and Office forum!
Click here to learn more 💡
Word Forum Top Contributors: Stefan Blom - Charles Kenyon - Doug Robbins - MVP Office Apps & Services (Word) - Suzanne S. Barnhill - Bob Jones AKA: CyberTaz ✅
May 10, 2024
Word Forum Top Contributors:
Stefan Blom - Charles Kenyon - Doug Robbins - MVP Office Apps & Services (Word) - Suzanne S. Barnhill - Bob Jones AKA: CyberTaz ✅
- Search the community and support articles
- Microsoft 365 and Office
- Search Community member
Ask a new question
How do I add 3 columns to part of a word document without section or column breaks?
I cannot have any breaks in this document. Is it possible to use the margins to create columns for one section instead?
- Subscribe to RSS feed
Report abuse
Reported content has been submitted
Replies (3)
- Volunteer Moderator
Sorry, that's not possible. You can add a borderless three-column table to simulate the effect of three columns.
2 people found this reply helpful
Was this reply helpful? Yes No
Sorry this didn't help.
Great! Thanks for your feedback.
How satisfied are you with this reply?
Thanks for your feedback, it helps us improve the site.
Thanks for your feedback.
John has given you the best alternative, a three-column, borderless, table.
Other possibilities would be Frames or Textboxes. Neither is especially simple to edit and maintain for this purpose.
Use Tables and Tabs to Arrange Text in Microsoft Word
Frames and Textboxes in Microsoft Word
By the way, adjusting the Margins in a document also introduces Section breaks.
I am curious, why can you have no Section breaks?
What will the columns be used for?
Tables are often what people want when they ask about columns here even with no problem having Section breaks.
See Do you want Columns or a Table?
1 person found this reply helpful
If you use linked Text Boxes, the text will flow from one to the other as in "newspaper style" columns.
Question Info
- For business
- Norsk Bokmål
- Ελληνικά
- Русский
- עברית
- العربية
- ไทย
- 한국어
- 中文(简体)
- 中文(繁體)
- 日本語
IMAGES
VIDEO
COMMENTS
Word 11 Formatting. ★★★★★. Kendall Myers November 15, 2017. In this practice project for Word, students create a document similar to a test or quiz. They must include points and subpoints, blanks, boldfaced text, tabs, and spacing. …. 1 2.
The following steps show how to return your text to the normal one-column format. Insert your cursor into the text formatted with multiple columns. Select the Layout tab in the ribbon (see figure 1). Select Columns in the Page Setup group (see figure 2). Select One from the drop-down menu.
To add columns to a document: Select the text you want to format. Select the Layout tab, then click the Columns command. A drop-down menu will appear. Select the number of columns you want to create. The text will format into columns. Your column choices aren't limited to the drop-down menu that appears. Select More Columns at the bottom of the ...
Step 1: Open Microsoft Word and select your document. Open the Microsoft Word application and choose the document you want to format with columns. When you open Word, you'll either see a blank document or the last document you were working on. If it's the latter, simply go to the 'File' menu, click on 'Open', and select the document ...
Click in the document where you want to create columns. Click the Layout or Page Layout tab in the Ribbon. Click Columns in the Page Setup group. A drop-down menu appears. Click one of the column options (such as Two) or click More Columns. If you click More Columns, a dialog box appears.
Select the text you want to format. Click the Page Layout tab. Click the Columns command. A drop-down menu will appear. Adding columns. Select the number of columns you want to insert. The text will then format into columns. If you want to remove the columns, click the Columns command and select One for the number of columns.
In this video, we'll see how to create and work with columns in a Microsoft Word document.In a hands-on demo, I'll show you how to:00:00 - Video intro00:22 -...
Download this lesson's related exercise files. Using Columns in a Newsletter - Exercise.docx. 166.6 KB Using Columns in a Newsletter - Exercise Solution.docx. 166.6 KB. Learn to divide text into long columns to make the best use of available space.
By the end of this class you will be able to complete the following skills in Microsoft Word 2016 and Microsoft Word 365: • Create numbered and bulleted lists • Organize and manage long documents using breaks and styles • Format text into multiple columns • Save Word documents in different formats for sharing • Comment and track ...
Exercise files. Download the 'before' and 'after' Word documents from the video tutorial and try the lesson yourself. Using Columns .docx. 195.1 KB Using Columns - Solution.docx. 61.1 KB. Learn to divide text into long columns to make the best use of paper.
Welcome to Microsoft Word: Intermediate. By the end of this class you will be able to complete the following skills in Microsoft Word 2016 or Microsoft Word 365: • Insert and edit a variety of images into a Word document • Insert and edit a table into a Word document • Edit the Header and Footer of a Word document
To make columns in a new Word document, first, open Microsoft Word on your computer and start a new document. When the document editing screen opens, then in Word's ribbon at the top, click the "Layout" tab. On the "Layout" tab, in the "Page Setup" section, click "Columns." The "Columns" menu displays various column types you can add to your ...
There are 7 modules in this course. This course is intended for learners with some experience using Microsoft Windows, who are seeking to build presentation skills with Microsoft Word. To be successful in this course you should have an understanding of the basics of using a Windows-based computer. Experience with printing and using a web ...
29.8 KB Creating Tables - Exercise Solution.docx. 31.4 KB. Inserting Pictures and Clip Art. Tables provide a structure of columns and rows to help the user line up data, similar to a spreadsheet layout, but within a Word document.
Exercise 2 1. Type the following document in Microsoft Word. a. The table should contain 3 columns and 5 rows. b. The column widths should be adjusted so that it looks like the figure. c. The Unit Price and Quantity columns should be right aligned. d. The table should be auto formatted using the 'Table 3D Effects 3' style and
And I think doing exercises after completing the class topic is the best way to learn MS Word. 13. Take a double-column book or newspaper and design or create a similar paragraph style in the Word document. ... I hope these Microsoft Word Exercises ideas will be helpful for you. To learn more visit: Top 10 Basic and Advanced Microsoft Word skills.
How to add a page break and column break in Microsoft Word 2016 ... 'Open', and in our exercise files-- 'Browse', on our 'Desktop', 'Word Exercise Files'. If you haven't got them, check out the link on the screen here somewhere, there'll be a link to download these exercise files. Then we go, 'Newsletter', and there's 'Newsletter Text - Page 2 ...
Key skills in this practice are creating and modifying tables, and sharing documents online. Launch Microsoft Word. Click Blank Document. Show formatting marks and show the ruler. Save the document as Yourlastname_Yourfirstname_Word_Practice_3 in your Word Folder. On the Insert Tab, in the Header and Footer group, Choose Footer, then Edit Footer.
1. Getting Started with Word Get to know the Ribbon, Quick Access Toolbar, and Backstage view to produce Word documents. 2. Understanding OneDrive Learn all about working with your Microsoft account and OneDrive. 3. Creating and Opening Documents Learn all about opening existing documents and creating new ones. 4.
Navigate to the File Tab to enter Backstage View. In backstage view, select File, then Save As. Click the Browse button. In the Save As dialog box, navigate to your file structure from the previous chapter, then open the Word folder. In the Name field, type Yourlastname_Yourfirstname_Word_Practice_1 as the file name, and then save.
If you'd like some extra help while doing this exercise (or using Word at any time), select Help from the menu bar and click Microsoft Office Word Help from the pull down menu. A column of advice will appear on the right-hand side of the screen. You can also access help hints from pressing the F1 key. Keep this handout as a reference page.
To add columns to a document: Select the text you want to format. Select the Layout tab, then click the Columns command. A drop-down menu will appear. Select the number of columns you want to create. The text will format into columns. Your column choices aren't limited to the drop-down menu that appears.
MS Word Exercise 2. Type the following document in Microsoft Word. The table should contain 3 columns and 5 rows. The column widths should be adjusted so that it looks like the figure. The Unit Price and Quantity columns should be right aligned. The table should be auto formatted using the 'Table 3D Effects 3' style and applying special ...
John has given you the best alternative, a three-column, borderless, table. Other possibilities would be Frames or Textboxes. Neither is especially simple to edit and maintain for this purpose. Tables. Use Tables and Tabs to Arrange Text in Microsoft Word. Frames and Textboxes in Microsoft Word