
Crafts by Theme
Crafts by occasion, crafts by season, crafts by age.
- Alphabet & Numbers
- Bags & Baskets
- Coloring Pages
- Crowns & Hats
- Flowers & Nature
- Greeting Cards
- Masks & Glasses
- Valentine's Day
- Craft Recipes
Paper Crown
Make paper crowns using our awesome collection of crown templates. This craft tutorial shows you how to decorate and assemble the templates into easy-to-make paper crowns. Make these paper crowns for birthday parties, classroom activities, or anytime you need a crown in a jiffy.

Featured Crafts

Paper Bowl Jellyfish
Supplies needed.
- A4 or Letter size cardstock
- Plastic gems, rhinestones, glitter glue, stickers, foam or paper shapes, buttons, small pompoms, lace, ribbons, and other accents

1 Choose the crown template.
Choose from any of the crown templates below. Crowns A to C have a main crown piece in front and two straight bands that meet at the back.
- Prince & Princess Crowns - template 1, 2 or 3
- Frozen Princess Crown - plain template
- Superhero Tiara - plain template

Meanwhile, Crowns D and E have repeating patterns that go all around the crown.
- King & Queen's Crown - template 1 or 2
- Zigzag Band

2 Print out the template.
Print out your chosen crown template on gold, silver, or any colored A4 or Letter size cardstock. If you want to color or paint your crown, go with white cardstock.

For the zigzag band template, two copies need to be printed out to make one crown.

3 Cut out the template.
Cut out all template pieces.

For the zigzag crown, cut out each rectangle then cut along the zigzag line to come up with 4 crown sections. Set one crown section aside since you only need 3 to make a crown.

4 Glue the pieces together.
Crowns A to C - for the Prince and Princess Crowns, Frozen Princess Crown, and Superhero Tiara, glue one straight band behind the crown's left edge and the other band behind the right edge.

Zigzag Crown - connect all three crown sections by gluing the half-triangle edge of one crown section to a full-triangle edge of another crown section.

King and Queen's Crown - connect all three crown sections by gluing along the marked side tabs.

5 Decorate the crown.
Decorate the crown with a variety of materials like plastic gems, rhinestones sequins, buttons, beads, foam or fabric shapes, paper cut-outs, stickers, washi tape, lace, ribbons, rickrack, glitter glue, and other notions.

6 Glue the ends together.
Measure the crown around your head. Trim the ends to achieve the right length before gluing the ends of the bands together. Once the glue sets, try on your paper crown.

Decorate with colorful scraps of paper.
Cut out various shapes from colorful paper scraps and glue them around your crown for a truly inexpensive yet charming paper crown. Line the base of the crown with a long strip cut from gift wrap paper or any kind of colorful paper.

Create a royal crown.
Create a bejeweled royal crown by gluing plastic gems, rhinestones, sequins,shapes cut out from glitter paper or tinsel paper. You can also use glitter glue or metallic puffy paint to make sparkly dots, lines and patterns on your crown.

Print out on patterned cardstock.
Try printing out the crown template on patterned cardstock for a charming paper crown.

Create fun party crowns.
Print out the templates onto bright-colored or patterned cardstock to come up with some very eye-catching paper crowns. Use them as cute party hats. Let kids decorate the crowns themselves as a fun party activity.
- Birthday Crafts
- Halloween Crafts
- Halloween Printables
- Printable Crafts
- Printable Crowns & Hats
- Valentine's Day Crafts
- Wearable Crafts
You Might Also Like

Craft Foam Crown

Birthday Hat

Print and Color Crown
How to Make a Paper Crown

Introduction: How to Make a Paper Crown

Hi there, this is my first time writing an instructables, so I hope you like it!
This is an easy project that you can do whenever! It's simple and quick to make, and it's completely made out of paper. This crown is great for all ages and anyone can make it! I had a lot of fun and creativity while making this, and I hope you do to!
- Decorative tape
- Decorative paper
Step 1: Cut

I started with two 9 x 12 in. papers, then I cut them into 4 x 4 in. squares. I cut 6 black squares and 6 white squares, making 12 total squares.
Step 2: Fold

Take one square and fold it in half so that two opposite corners meet each other. Form a crease and then unfold it so it is a square again.

Take the square and place it so that the crease is vertical, then take the corners on the left and right side, and fold them to the crease.

Fold the bottom corner up a tiny bit.

Fold the bottom side up again, it should maintain a triangle shape

Fold the bottom side up again, this time it should make a boat-like shape
Step 7: Repeat

repeat steps 2-6 again until you have used all of your squares
Step 8: Connect the Pieces

if you've done the previous step correctly, then you should be able to slide the pieces together until they fit together.

repeat step 8 again for the rest of the pieces. Some advice if some pieces aren't fitting correctly, try cutting off a little tiny bit from the corners or the bottom. Also if it's falling apart, try using some glue or tape.
Step 10: Connect the Crown

For the last pieces, just connect the left end to the right end, the crown might not be perfectly round but that's fine. Check the crown to see if it is a suitable size, if it's too big just remove some pieces, and if it's too small try adding some more pieces. I ended up using 10 pieces since it was a little bit big. If needed, apply some glue or tape for extra support. You can leave your crown here or decorate it in the next step.
Step 11: Decorate

Bring your creativity out in this step! You can use pens, markers, stickers, decorative tape, yarn, or anything else to decorate your crown. I used a pretty white moon washi tape on all of the black pieces, then in a few places I used vintage rub-on transfers from the dollar store. I used multiple stickers, scrap-paper, and other washi tapes to decorate the rest of it. I hope you had fun making and decorating your crown, I'm proud of your final creation, I bet it looks amazing!

Participated in the Paper Contest
Recommendations

Engineering in the Kitchen - Autodesk Design & Make - Student Contest

All Things Pi Contest

Made with AI - Autodesk Design & Make - Student Contest


- arts & crafts
- _famous artists
- _process art
- _paint recipes
- _keepsake crafts
- _book activities
- _sensory bins
- _sensory play recipes
- _science experiments
- _free printables
- _colouring pages
- _valentines day
- _st patrick's day
- _mother's day
- _father's day
- _thanksgiving
Printable Crown Template - Make Your Own Paper Crown Craft Fit For A King or Queen!

Free Printable Crown Template

King Crown Template

Simple Crown Template

Design Your Own Crown Template

How to make a Paper Crown Craft

Paper Crown Craft - Supplies
- Printable crown template
- Glue or tape
- Markers, pencil crayons or watercolour paints
STEP 1: Print out the crown template
Step 2: colour the crown template, step 3: cut out the printable crown template , step 4: make up your paper crown craft.

- — Share It —
No comments

Hello & Welcome!

Follow By Email
Join the fun subscribe to our newsletter to have fun ideas delivered to your inbox subscribe.

Get FREE craft and activity ideas
Join our newsletter to have ideas delivered to your inbox each week!
There was an error submitting your subscription. Please try again.
Copyright Messy Little Monster . Blog design by Designs by Kassie . Privacy Policy Here
- Skip to primary navigation
- Skip to main content
- Skip to primary sidebar
- Crochet Patterns
- Sewing Patterns
- DIY Projects
- Pallet Projects
- Home Organization
- Kids Crafts
- Drawing Ideas
- Fashion & Beauty
- DIY Cat Projects
- DIY Dog Projects
- DIY Wedding Projects
- Jewelry Making Ideas
- Inspiration
- Parenting Tips
How to Make a Paper Crown: 25 DIY Paper Crown Templates
Making a DIY paper crown is a fun and creative way to add some royal flair to any party or dress-up occasion. Discover how to make a paper crown with 25 DIY templates . Our guide simplifies the process, explaining material options and providing detailed instructions.. Learn how to make beautiful crowns using household items, recycled materials, and a touch of creativity. This guide is designed to be comprehensive yet straightforward, ensuring that anyone can follow along and produce stunning results.
As we move forward, you’ll discover various ways to customize your paper crown , adding personal flair with colors, textures, and themes. Additionally, we emphasize safety tips to ensure a fun crafting experience for all ages. Finally, we tackle common troubleshooting issues , providing solutions to ensure your crown is as perfect as your vision. Curious about the next steps? Let’s dive into the materials needed to start this creative adventure.

Material Alternatives for Your DIY Paper Crown
Making a paper crown can be a fun and engaging craft activity. To ensure everyone can participate, regardless of what materials they have on hand, here are some alternative materials you can use to make your DIY paper crown.
Common Household Items
- Cereal Boxes : Instead of construction paper, you can use the cardboard from cereal boxes. It’s sturdy and can be easily cut and shaped into a crown.
- Newspaper : For a more rustic look, newspapers are a great alternative. They’re flexible and can be painted or decorated as you like.
- Magazine Pages : Colorful magazine pages can add a vibrant touch to your crown. They’re glossy and can be layered for extra strength.
Going Green with Recycled Materials
- Toilet Paper Rolls : Save those rolls! They can be cut into strips and combined to form a unique crown base.
- Old Greeting Cards : Don’t throw away those birthday or holiday cards. Their firmness makes them perfect for a durable crown.
- Used Gift Wrap : If you have leftover gift wrap, it’s a fantastic way to add patterns and shine to your crown.
For Added Decoration
- Fabric Scraps : Have bits of fabric lying around? They can be glued onto your crown for a textile touch.
- Bottle Caps : Cleaned bottle caps can be painted and glued on as jewels for your crown.
- Pasta : Yes, pasta! Shapes like farfalle (bow-tie pasta) can be painted gold or silver to mimic gemstones.
Creativity is key for DIY projects. Save money and recycle with these alternatives.
How to Make a Paper Crown – Step by Step
Crafting a paper crown is a delightful and creative way to express your royal side or make a fun accessory for parties and play. This simple guide will walk you through the steps of making a charming crown out of paper, without the need for glue or complex materials. Embrace your inner royalty by crafting a unique crown with these easy-to-follow steps.
You Will Need:
- Thick paper (A4 size is sufficient, though larger sizes can also work)
Step by Step Instructions
Learn how to make a paper crown with our easy step-by-step guide below:
Step 1: Draw the Crown
Using your pencil, draw the outline of your crown on the paper. You can opt for a traditional pointed design or get creative with waves, curves, and other shapes. Make sure the design spans the length of your paper for a fit that can comfortably wrap around your head.
Step 2: Cutting Out the Crown
Carefully cut along the outline of your crown design with scissors. Accuracy here will ensure your crown looks neat and professional.
Step 3: Cut a Strip for the Back of the Crown
Cut a long strip of paper from what’s left of your sheet. This will be used to adjust the crown’s size to your head and secure it in place. The strip should be about 2 inches wide and long enough to cover the back half of your head.
Step 4: Making the Slits to Fasten
On both the strip and the bottom edges of your crown, carefully cut slits that are around 1 inch deep. These slits will help you fasten the crown securely around your head without using glue. Make sure the slits on the crown align with those on the strip, allowing them to interlock.
Step 5: Attaching the Strip for the Back of the Crown
Now, slide the strip’s slits into the corresponding slits on the crown. This should form a circle that can be placed on your head. Adjust the tightness by interlocking the slits at different positions until you achieve a comfortable fit.
Step 6: The Finished Crown
Once secured, your paper crown is ready to wear! You now have a wonderful, handmade crown to show off to your subjects or to add a regal touch to any outfit.
Video Tutorial
For a step-by-step video tutorial on how to make a paper crown without glue, you can watch this helpful video:
Customization Ideas for Your DIY Paper Crown
Adding a personal touch to your DIY paper crown can make the crafting experience even more enjoyable. Here are some creative ideas to customize your crown and make it truly one-of-a-kind.
Personalize with Color and Texture
- Color It Your Way : Grab markers, crayons, or paint to color your crown. Choose your favorite colors or match them to a theme.
- Texture Talk : Add texture with materials like fabric scraps, aluminum foil, or tissue paper. Crumple, layer, or twist these materials to make interesting effects.
Sparkle and Shine
- Glitter Galore : Apply glitter glue or loose glitter to areas you want to highlight. Use it sparingly for subtle sparkle or go bold for maximum shine.
- Sequins and Beads : Glue on sequins, beads, or faux pearls to mimic precious stones. They catch the light beautifully and add elegance.
Themes and Characters
- Fairy-Tale Fantasy : Cut out shapes like stars, moons, or hearts from construction paper. Attach them to your crown for a fairy-tale look.
- Superhero Style : For the comic book fans, make a superhero-themed crown. Use symbols or logos of your favorite heroes.
Eco-Friendly Embellishments
- Nature’s Bounty : Decorate with leaves, dried flowers, or seeds for an earthy vibe. Make sure they are clean and dry before attaching them to your crown.
- Recycled Riches : Use bottle caps, old buttons, or paper clips as jewels. Paint them or wrap them in foil for a metallic finish.
Safety Tips for Crafting Your DIY Paper Crown
Crafting a paper crown should be a fun and safe activity. Here are some safety tips to ensure that everyone can enjoy making their paper crowns without any worries.
Choose the Right Materials
- Non-Toxic Adhesives : Always use glue that is non-toxic, especially if children are involved in the crafting process.
- Child-Safe Scissors : Opt for scissors with rounded tips to prevent accidental cuts.
Crafting in a Safe Environment
- Well-Lit Area : Make sure your crafting area is well-lit to avoid eye strain and to ensure precision in cutting and decorating.
- Clean Workspace : Keep your workspace clean and organized to prevent accidents and to keep track of all materials.
Be Mindful of Small Decorations
- Choking Hazards : Be cautious when using small items like beads or sequins that could be choking hazards for young children.
- Secure Attachments : Ensure that all decorations are securely attached to prevent them from falling off and becoming hazards.
Supervision is Key
Adult Supervision : Always have an adult supervise when children are crafting, particularly when using scissors or working with small items.
Discover how to make a delightful paper crown safely with these essential tips. Safety always comes first in crafting!
Troubleshooting Common Issues in DIY Paper Crown Crafting
Crafting a paper crown is usually straightforward, but sometimes you might encounter a few hiccups. Here are some common issues and how to solve them, ensuring your crafting experience remains enjoyable and stress-free.
The Crown Doesn’t Fit
- Measure First : Before cutting, measure the head circumference of the person who will wear the crown. Add an extra inch for overlap where the ends will meet.
- Adjustable Closure : Make slits at the ends of the crown and use a paper tab to make the size adjustable.
Decorations Keep Falling Off
- Right Glue for the Job : Use a strong adhesive like hot glue or double-sided tape for heavier decorations.
- Press and Hold : After applying glue, press the decoration firmly onto the crown and hold for a few seconds to ensure a strong bond.
Crown Is Too Flimsy
- Reinforce with Layers : If the crown feels too weak, glue two layers of paper together, or use a sturdier material like cardstock.
- Support Strips : Glue strips of paper or cardboard along the inside of the crown for added support.
Crown Edges Are Uneven
- Use a Template : For symmetrical edges, make or download a crown template. Trace the template onto your paper to get even edges.
- Steady Cutting : Use a sharp pair of scissors and cut slowly following the lines for a clean edge.
FAQs for DIY Paper Crown Crafting
When it comes to crafting a DIY paper crown, questions are bound to arise. Here’s a helpful FAQ section to address common queries and provide clear, reliable answers.
What materials do I need to make a paper crown?
You’ll need:
- Construction paper or cardstock
- Glue or tape
- Decorative items like stickers, glitter, or gems (optional)
How do I measure the paper for my crown?
Measure a strip of paper about 24 inches long and 3-4 inches wide. This will ensure it fits around your head comfortably.
Can I make a crown without glue?
Yes, you can use tape or make tabs that slot into each other for a glue-free crown.
How can I make my crown stand out?
Get creative with decorations! Use bold colors, add glitter, stickers, or even natural elements like leaves or flowers.
What if the crown is too big or too small?
Make an adjustable closure with slits and a tab, or measure your head beforehand and add an extra inch for overlap.
How do I keep decorations from falling off?
Use a strong adhesive like hot glue or double-sided tape, especially for heavier items.
Can I make a crown for a themed party?
Absolutely! Tailor your crown’s design and decorations to fit the theme, like a superhero logo for a hero-themed party.
25 DIY Paper Crown Template
Make stunning paper crowns with our 25 DIY Paper Crown Template collection. Perfect for parties, events, or dress-up fun! Download now.
1. DIY Paper Party Crown

Celebrating a child’s birthday can be both joyful and memorable with handmade touches like DIY paper crowns. Persia Lou offers a creative way to add a special sparkle to your kid’s party with easy-to-follow instructions for crafting colorful, intricate paper crowns. Gather some cardstock, adhesive, and optional embellishments like rhinestones or glitter to personalize a regal accessory.
The provided templates make assembly straightforward, ensuring a fun activity for parents and children alike. Delight your birthday child with this unique and personal creation, and watch their face light up as they don the special crown on their big day. It’s an engaging project that brings extra charm to birthday celebrations without the stress.
2. How to Make a Princess Crown

Make magical moments for your little princess with a homemade touch! Made To Be A Momma provides a fantastic guide to crafting DIY Princess Crowns that are perfect for any princess-themed party or imaginative play. With easy-to-follow instructions and a printable crown template, you can cut, decorate, and assemble charming crowns with ease.
Embellish these regal creations with gemstones, ribbons, and your unique artistic flair. An engaging and fun activity, these DIY crowns are sure to sparkle at slumber parties, dress-up sessions, or as a creative pastime. Dive into crafting and make your child’s royal dreams come true with a personalized princess crown.
3. Handmade Paper Spring Floral Crown

Welcome spring with a handmade touch using the DIY Paper Spring Floral Crown guide from The House That Lars Built . Perfect for festive occasions or simply brightening up your day, this craft tutorial walks you through making a durable and vibrant paper floral crown.
You’ll need common materials like crepe paper, stem wire, and a glue gun to bring this beautiful accessory to life. Follow clear, step-by-step instructions to cut, shape, and assemble buds, leaves, and blossoms. With optional painting steps, you can add a personalized flair to your crown. Crafting enthusiasts will appreciate the simplicity and charm of this project, making it a joyful addition to any springtime ensemble.
4. How to Fold Origami Crown

Step into the enchanting realm of origami with Persia Lou ‘s guide to making your very own paper crowns. Perfect for crafters of all ages, these step-by-step instructions make it easy to fashion a regal accessory for parties or playful dress-up. You’ll only need a few simple materials—origami paper, adhesive gems, and optional colorful brads—to embark on this paper folding adventure.
Transform a simple square of paper into a charming crown without the need for scissors or glue. The process is not only engaging but also sparks creativity, as you can personalize each crown with decorations to suit your taste. Ideal for spending quality time with kids or enjoying a moment of creative mindfulness, crafting these origami crowns promises a fun and fulfilling experience.
5. Free Printable Paper Crown

Celebrate Father’s Day by crowning Dad with a handmade paper crown, a special craft from Emily’s collection of DIY projects. This fun and engaging activity allows for personalized touches, perfect for kids and adults looking to make a memorable gift. Download the printable template, grab some scissors, and gather craft supplies like double-stick tape and any decorative items you desire. Follow the straightforward steps to cut, assemble, and embellish a regal crown fit for the king of the family. It’s a charming way to show appreciation and love, ensuring dads everywhere enjoy a touch of majesty on their special day. Darcy Miller Designs
6. Personalized Crown for a Princess Birthday Party

For those keen on adding a personal touch to a princess-themed birthday bash, Merriment Design offers an inspiring DIY project to craft personalized 3D paper crowns. Perfect for a royal celebration, this tutorial provides a straightforward guide to making vibrant king and queen crowns using card stock and a Silhouette Portrait machine.
The process is simplified for those new to crafting, complete with tips on handling sticky cutting mats and achieving the ideal name cutout. The result is a fun and unique party favor that doubles as a festive accessory, showcasing each guest’s name in an elegant font. Engaging and helpful, this guide empowers you to make memorable crowns that will crown the party with success.
7. How to Make a Paper Crown

Make a charming paper crown for your little ones with a simple, step-by-step guide from The Craft-at-Home Family . Perfect for imaginative play, these crowns can be crafted with everyday materials like construction paper, scissors, and tape. Dive into creativity with a free downloadable template, making the process even smoother. Once cut and assembled, encourage kids to personalize their crowns with colorful decorations. It’s an engaging and easy-to-follow activity that promises a royally good time for all young crafters.
8. Free Printable Paper Birthday Crown

If you’re planning a birthday bash or nurturing a dress-up enthusiast at home, Small for Big’s extra special paper crowns are a fantastic DIY craft to add a regal touch to your celebrations. Mari introduces four distinctive crown designs – the Geo Crown, Crown of Gems, Crown of Flowers, and a Superhero Crown – each offering a unique flair to suit your little monarch’s style.
Crafted for ease and fun, these printable crowns are a breeze to assemble, and yes, they’re adjustable for adults who want to join in the merriment! With just a bit of folding and creativity, your festive coronation awaits. Dive into crafting these charming crowns and make magical moments that reign supreme in memory. Small for Big
9. DIY Paper Crown With Paper Doilies

Engage your kids in a magical crafting adventure with the Paper Crown Craft tutorial from Easy Peasy Creative Ideas . Ideal for inspiring imaginative play, this simple yet enchanting project transforms ordinary paper doilies into regal crowns fit for any young prince or princess.
With easy-to-follow steps, you’ll guide your children through painting, decorating with glitter, and assembling their very own paper tiaras. Not only does this activity foster creativity, but it also provides a wonderful opportunity for quality family time. So grab your cardstock, watercolors, and a dash of sparkle to make a craft that’s sure to be a crowning achievement in fun!
10. Easy to Make Paper Crown

Make a charming paper crown with ease using the tutorial from oh partyland. This fun and simple craft activity is perfect for engaging kids at home or adding a special touch to birthday celebrations. All you need is construction paper, glue, scissors, and some glitter paper for decoration. Follow the step-by-step instructions to fold and assemble your squares of paper into a regal accessory. Decorate it with glittery cut-outs for an extra sparkle. With these clear guidelines, crafting a homemade paper crown becomes an enjoyable and rewarding project for everyone involved. Oh Party Land
11. Make Your Own Paper Crown

Make a royal paper crown with ease using the step-by-step guide provided by Instructables . This crafting project is fun, engaging, and suitable for all ages. You’ll only need simple materials such as paper, scissors, and glue to construct your majestic headpiece. Each stage is explained in clear, easy-to-follow instructions, ensuring a smooth crafting experience.
Customize your crown with decorations like stickers and washi tape to make it uniquely yours. Perfect for parties, playtime, or just a creative afternoon, this paper crown project will help bring out your artistic side and leave you with a charming handmade accessory.
12. Autumn Paper Crow Craft

Make your own Autumn Crown with a few simple supplies and a touch of creativity. Start by measuring heads for a comfortable fit and cut a two-inch-wide strip from a brown paper grocery bag. Customize the top edge with a pattern of your choice for a regal look.
Lay a piece of duct tape, sticky side up, and attach the plain and patterned strips, leaving space to adhere natural fall elements like leaves and flowers. This engaging, easy-to-understand guide ensures a fun crafting experience perfect for the season, without the need for intricate skills. Enjoy crafting a unique piece that celebrates the beauty of autumn. Small Hands Big
13. DIY Toilet Paper Roll Birthday Crown

Crafting toilet paper roll birthday crowns is a whimsical and environmentally friendly way to add a touch of royalty to any celebration. Creative Jewish Mom offers a simple, yet charming guide for turning these household staples into adorable party accessories.
With a few craft supplies like colored tubes, permanent markers, fabric paint, and elastic thread, you can make unique crowns that will bring smiles to your guests. The tutorial is easy to follow, ensuring a delightful crafting experience that culminates in a memorable addition to your festive decor. Remember, it’s all about enjoying the process and watching your loved ones light up with joy when they don these handmade crowns.
14. Handmade Paper Crown for Everyone

Crafting a paper crown can transform any ordinary day into a regal affair, and HonestlyYUM provides a simple, fun DIY project to do just that. Perfect for special occasions like birthdays, anniversaries, or even as a unique addition to your monthly celebrations, making your own paper crown is a delightful activity.
With some Dresden trim, ribbons of varying widths, and a sewing machine, you’ll be on your way to making an elegant, handmade accessory. The process involves stitching the trims together, adding ribbons for stability and charm, and securing the pieces for a snug fit. Follow these steps for a majestic paper crown that will surely add sparkle to any celebration.
- Also, Find these DIY birthday cards with tips and instructions to make Birthday cards yourself.
15. DIY Fairy Paper Crown

Discover how to make a magical fairy paper crown with a helpful guide from Lia Griffith . Ideal for birthdays, celebrations, or festival whimsy, this DIY project is simple and enchanting. Lia provides a template and SVG file, making it accessible for those with cutting machines. For hand-cutting enthusiasts, a PDF is available for manual crafting. Assemble this charming accessory in three easy parts, and learn how to use it not just as a crown, but also as an adorable cake stand decoration. Lia Griffith’s site offers all the steps to bring a sprinkle of fairy-tale elegance to your special occasions.
16. How to Make a Birthday Paper Crown

Add a dash of sparkle to your celebration with a DIY glitter crown, perfect for winter birthdays or any festive gathering. A Subtle Revelry offers an engaging guide on crafting these elegant crowns adorned with crystal-like glitter, playful pom-poms, and metallic shapes.
Transform yourself into an ice queen or simply brighten up a gloomy winter day with this easy-to-follow project. Suitable for bridal showers, bachelorette parties, or even a whimsical first birthday accessory, these crowns are sure to lift spirits. With step-by-step instructions and vibrant photography, you’ll have all the inspiration you need to make a stunning piece that will turn heads and add a touch of magic to your special occasion.
17. Fun and Easy DIY Paper Crown

Transform your child’s royal dreams into reality with a DIY Paper Crown craft straight from the We R Memory Keepers Blog . Engage in a delightful crafting session with your kids, making a vibrant and majestic paper crown. This project involves simple tools like the Trim and Score Board, Banner Punch Board, and a USB Glue Gun to shape and embellish a colorful crown fit for a young king or queen.
The guide walks you through each step, ensuring safety and fun as you cut, punch, and glue your way to a regal masterpiece. Perfect for imaginative play or a themed party, this hands-on activity not only promises a charming outcome but also quality bonding time with your little ones.
18. DIY Paper Flower Crown

Discover how to craft a beautiful paper flower crown with a step-by-step tutorial from Honestly WTF . The guide takes inspiration from the French Globe de Mariée tradition and adds a creative twist by using crepe paper and wax for durability and a realistic look. Perfect for weddings, festivals, and midsummer events, this project is both romantic and enduring. With a list of supplies, clear instructions, and optional steps for wax coating, you’ll be able to make a stunning floral accessory that’s designed to last. Dive in and enjoy the process of making a piece of wearable art that captures the essence of special occasions.
19. Making a Paper Crown From Upcycled Wrapping Paper

Transform leftover wrapping paper into enchanting DIY paper crowns with Compost and Cava’s creative guide. Perfect for New Year’s Eve or adding a playful touch to any gathering, these upcycled crowns are not only a sustainable craft project but also a charming way to celebrate. The step-by-step instructions make it easy to repurpose wrapping paper scraps into festive headwear. With detailed tips on constructing various crown styles, you can personalize your creation for a unique accessory. Get ready to adorn your friends and family with these delightful, eco-friendly paper crowns.
20. Making a Paper Crown for Kids

Discover a charming paper crown craft activity at Taming Little Monsters that’s perfect for engaging toddlers, preschoolers, and kindergarteners in creative play. This step-by-step guide helps little ones develop their crafting skills by making colorful, decorative crowns fit for any young monarch. The craft involves easy-to-follow instructions and uses simple materials like A4 colored craft paper, scissors, stickers, and tape.
It’s an excellent opportunity for children to practice their fine motor skills while embracing their imaginative side. By personalizing their crowns with stickers or gems, kids can take pride in a unique creation that doubles as a playful prop for dramatic play. Get ready to watch your classroom transform into a royal court where every child feels like royalty.
21. Gorgeous DIY Paper Crown

Get ready to celebrate King Charles’ coronation with a handmade touch by crafting your very own paper crown. Prima provides a step-by-step guide on making these colourful and fun paper crowns, perfect for parties or watching the ceremony at home. Suitable for craft enthusiasts of all levels, you’ll need only simple materials like coloured card, fabric scraps, and pompoms. The process is enjoyable and can be a wonderful activity for involving children, who will love adding their personal flair to their regal creations. Enjoy the festivities with a unique, handcrafted accessory that will add sparkle to your celebration.
22. Fun DIY Paper Flower Crown

Discover how to make a vibrant paper flower crown with this engaging guide from Bespoke-Bride: Wedding Blog . Perfect for weddings, festivals, or just a touch of everyday whimsy, these handmade crowns add a playful and colorful element to any outfit. Follow step-by-step instructions to craft elegant flowers from cardstock, and assemble them into a unique accessory.
You’ll need colored cardstock, scissors, a glue gun, and the provided templates. Prepare to spend some enjoyable time cutting, curling, and gluing as you construct a charming crown fit for any spring or summer event. Remember to measure the base for a comfortable fit, and get creative with your floral arrangements for a truly bespoke piece. Enjoy the satisfaction of wearing your handcrafted creation!
23. Make a Paper Crown Without Glue

Looking to craft a royal accessory for playtime, a costume party, or a creative project? YouTube offers a handy tutorial on how to make a paper crown without the need for glue. This step-by-step guide is perfect for crafters of all ages, providing clear instructions to make a charming paper crown with ease.
The video walks viewers through each fold and cut, ensuring that anyone can follow along and achieve a beautiful result. The tutorial is engaging and easy to understand, making it a fantastic resource for a fun crafting experience. With this video, you’ll learn how to transform simple paper into a wearable piece of art that’s sure to impress. So grab your paper, and let’s get started on your regal creation!
24. How to Make a Crown With Paper

Making a paper crown is a fun and easy DIY craft that anyone can enjoy. With a simple A4 sheet of paper, you can design a charming crown perfect for dress-up games, birthday parties, or even as a creative project to share with kids. The process involves folding and cutting techniques that are simple to follow and result in an adorable accessory. If you’re keen to craft your own regal headwear, YouTube offers a step-by-step tutorial by Origami & Alesya Gor, guiding you through each fold and cut. Get ready to transform a plain sheet of paper into a majestic paper crown and add a touch of royalty to your day!
25. DIY Mini Paper Crown

Discover how to craft a charming mini paper crown with this engaging and easy-to-follow tutorial on YouTube. Perfect for adding a royal touch to dolls or for a fun activity with kids, this origami project requires just simple paper folding techniques, making it accessible to crafters of all skill levels.
Watch the video and learn the step-by-step process to make your own adorable 3D paper crown. Dive into the creativity of paper crafting and enjoy making these tiny treasures, whether it’s for playtime, a themed party, or just for the joy of crafting. Get ready to impress with your miniature paper artistry, all explained in a clear and helpful manner.
Conclusion:
Wrapping up , our journey into the world of 25 DIY paper crown templates has shown us the simplicity and joy of making beautiful, personalized crowns from the comfort of home. With materials easily found around the house or through eco-friendly alternatives, and a plethora of customization options, you can craft a unique accessory for any occasion. We’ve walked through step-by-step guides to ensure your paper crown making is as seamless as possible, alongside safety tips and troubleshooting advice to avoid common crafting pitfalls. This guide aims to inspire your next crafting project, demonstrating how easy and fun making your own paper crown can be. Happy crafting!
Related DIY Ideas to Try:

Quill And Fox
Best Design Studio

Amber Robertson
Amber Robertson is the founder of Quill and Fox. A creative writing studio that helps people find their voice and share their stories. Amber is also a published author, with her first book slated for release in 2020. She loves spending time with her family and friends, reading, writing, and traveling. When Amber was younger, she loved to write short stories and plays. But somewhere along the way, she lost touch with her creativity. It wasn’t until she became a mom that she realized how important it was to share her stories—both the good and the bad—with the people she loves most. That’s when Quill and Fox was born. Amber is passionate about helping others find their voice and share their stories. She believes that every person has a story worth telling, and it’s her mission to help them tell it in a way that is authentic and true to themselves

How to Make a Paper Crown: A Step-by-Step Guide
Table of Contents
Are you in need of a quick, easy and fun DIY project? Look no further than making your very own paper crown! Perfect for a children’s party or a fun craft to do with friends, making a paper crown can be a simple and inexpensive activity that will leave you with a unique and personalized accessory.
In this step-by-step guide, we will walk you through the materials needed and the steps required to make your very own paper crown. Let’s get started!
Materials Needed

Before we begin, let’s gather the materials needed to make your paper crown:
- Construction paper or cardstock in any color of your choice
- Glue or tape
- Decorative items such as stickers, glitter, markers, and gems (optional)
Now that we have all the materials needed, let’s move on to the next section and start making our paper crown.
Steps in Making a Paper Crown
Measure and cut the paper: Take a long strip of paper, measuring approximately 24 inches long and 3-4 inches wide. Cut the strip to size using scissors or a paper cutter.
Decorate the paper: If desired, decorate the paper strip with stickers, glitter, markers, or gems. Get creative and make it your own!
Fold the paper: Take the decorated paper strip and fold it in half lengthwise, creasing it in the center. Open the paper and fold both ends towards the center crease, creating a point at the top.
Cut triangles: Cut triangles along the folded edge of the paper, being careful not to cut all the way through to the other side. This will create the points of the crown.
Fold the crown: Fold the paper strip into a circle and glue or tape the ends together, creating a seamless circle. Adjust the size of the crown to fit your head.
Add finishing touches: Add any additional decoration to your paper crown, such as stickers or gems, to make it your own unique creation.
Congratulations! You have successfully made your very own paper crown. Wear it with pride and show off your DIY skills to your friends and family. In the next section, we will provide you with additional tips and tricks to make the process even easier.
Let’s take a closer look at the steps involved in making a paper crown:
Measure and cut the paper: Start by taking a long strip of paper, approximately 24 inches long and 3-4 inches wide. Use a ruler and pencil to mark the measurements before cutting the strip to size using scissors or a paper cutter.
Decorate the paper: Get creative and decorate the paper strip with stickers, glitter, markers, or gems. This is your chance to make your paper crown unique and personalized.
Cut triangles: Use scissors to cut triangles along the folded edge of the paper, being careful not to cut all the way through to the other side. This will create the points of the crown.
Tips and Tricks
Here are a few additional tips and tricks to make the paper crown-making process easier and more visually appealing:
Use a thicker paper: If you want your paper crown to be more durable, try using cardstock instead of construction paper.
Add texture: To make your paper crown stand out, try adding texture with materials such as tissue paper, ribbon, or lace.
Use a template: If you find it difficult to cut the triangles evenly, try using a template to guide you.
Mix and match colors: Experiment with different color combinations to create a bold and eye-catching paper crown.
Get creative with the shape: Don’t limit yourself to a traditional crown shape. Try creating a heart-shaped crown or one with curved edges for a unique twist.
By following these tips and tricks, you can take your paper crown-making skills to the next level and create a one-of-a-kind accessory that is sure to impress.
Variations of Paper Crowns
While the basic steps outlined above will result in a classic paper crown, there are many variations and unique designs that you can experiment with to create a personalized accessory. Here are some ideas to get you started:
- Animal-themed crowns: Cut out shapes of animal ears or horns and attach them to your paper crown for a fun and playful look.
- Flower crowns: Use colorful paper flowers to decorate your crown, creating a whimsical and bohemian accessory.
- Themed crowns: Customize your crown to fit a specific theme, such as a princess or superhero party. Use stickers, glitter, and other decorations to create a crown that fits the theme.
Get creative and experiment with different designs and patterns to make a paper crown that is unique to you.
Making a paper crown is a fun and easy DIY project that anyone can do. With just a few materials and some basic instructions, you can create a personalized accessory that is perfect for a party or a fun craft activity with friends.
To recap, you will need construction paper or cardstock, scissors, a ruler, pencil, glue or tape, and optional decorative items. Follow the steps outlined above, including measuring and cutting the paper, folding and cutting triangles, and decorating the crown to your liking.
With these instructions, you can create a classic paper crown or experiment with different variations to make a personalized accessory. We encourage you to try making a paper crown for your next party or craft activity, and show off your creativity and DIY skills.
- Skip to primary navigation
- Skip to main content
- Skip to primary sidebar

How to Make a Paper Crown
Sharing how to make a paper crown out of a simple piece of paper. We are sharing a free printable template along with the tutorial.

We're It is my birthday week and I cannot think of a more festive way to celebrate than with a crown. Am I right?
Well, rather than just buying a set of the boring foam ones at the store, we thought why not make our own? What is fun about this is that while at the craft store, you can pick out whatever kind of card stock you'd like. As you can see we were catering to some littles and some bigs (me!)
We highlighted this Easy Paper Craft along with some other fun kid's crafts in our February Crafts for Kids along with our 101+ Easy Craft Ideas for kids .
Check out this printable crown along with 101+ other free printables for kids .

Want to save this project?
Enter your email below, and then we'll send it straight to your inbox. Plus get awesome new projects from us each week.
Celebrate with a Crown
There are plenty of different events where a paper crown could or should be worn. We know we have used them in Kid's New Year's Eve Parties , Tea Parties , or even for Mardi Gras .
Regardless if it's an event or your prince or princess likes to dress up, these sweet paper crowns can be made easier with a free template and are filled with hours of dress-up fun!
Paper Crown

I made a quick template on my silhouette and was able to use it to cut the thinner card stock ones out. The thicker glitter card stock was either too thick for the machine or I just don't know what setting to put them on (which is most likely the case) and so for those, we printed out a template and traced it, and cut them ourselves.

I created a free PDF template of the crowns for you in case you don't have a cutting machine. You can do it one of two ways.
Print the template right on the paper, or print it out on copy paper, cut them out and then use it as a template. Once you have them cut it's all about letting the kids decorate to their heart's content. We used stickers and sequins and puffballs.
We even found a bag of feathers in the clearance at Michaels and used them. Then using the round elastic cord cut a piece approximately a foot long. We found that length fit both the kid's heads and the adult's.
Using a hole punch on each side, tie the cord to the crown, and viola, you have yourself some fancy crowns that the kids absolutely adore. P.S. This is my crown. Pink glitter with puffs. Just need to add my pink and yellow feather and I'll be set for tomorrow!
MWH Boy was in love with his Spiderman crown. He called himself Spider Knight. HAHAHA. Auntie Jen got to wear it for our playdate since its her birthday too! See fun for both kids and adults 🙂
Happy Crafting!

Other Crown Activities
- Princess Color By Number
- How to Draw a Crown
- DIY Flower Crown
CONNECT WITH MADE WITH HAPPY!
Be sure to follow me on social media, so you never miss a post!
Facebook | Twitter | Youtube | Pinterest | Instagram
Looking for crafts to keep your child busy? Sign up for my 5 Ridiculous HAPPY Activities in under 30 minutes for your kids delivered directly to your inbox!
Find and shop my favorite products on my Amazon storefront here!
HOW TO MAKE A PAPER CROWN
Pin it to your diy board on pinterest.
FOLLOW MADE WITH HAPPY ON PINTEREST FOR ALL THINGS HAPPY!

More Kids Crafts

Discover a world of creativity and joy with Alli Ward, the creative mind behind Made with Happy. From DIY crafts to delicious recipes, Alli brings happiness to every project!
- Gardening Gloves
- Garden Spade Shovels
- String Trimmers
How To Clean a Leather Purse: The Expert’s Guide to Maintaining Your Bag’s Beauty
How to clean candle wax off floor: a safe and effective guide for hardwood floors, how to propagate prayer plant: a step-by-step guide to success, how to get slime out of carpet: effective methods for removing slime – a step-by-step guide, 19+unusually gorgeous baby girl room ideas, 19+ baby boy room decor ideas & plans [pictures], 17+ master bathroom remodeling decor ideas [pictures], 21+ basement kitchen ideas & plans [pictures].

How to Make a Paper Crown: Step-by-Step Guide for Kids and Adults
You need paper to make a crown. It is the base of your craft . You can pick any type you like – colored, white or patterned . Even an old newspaper works ! Just ensure it’s big enough for your head.
Table of Contents
The fun part is, there’s a free template you can use. This makes cutting and folding much easier. You just trace, cut and fold! No glue needed for one way we will talk about later on too!

To make a paper crown, you will need a few materials, including a pencil. The pencil is used to trace and draw the crown template onto the paper. It helps create precise lines and shapes for cutting later on.
A regular pencil with a sharp point works perfectly fine for this craft project. Make sure it’s easy to hold and control so that tracing becomes easier. With your trusty pencil in hand, you’re ready to move on to the next step in making a beautiful paper crown!

When making a paper crown, scissors are an essential tool . You will need them to cut out the crown template and shape the paper into the desired design. Make sure to use sharp scissors that can easily glide through the paper without tearing it.
Take your time and be precise with your cuts to ensure clean edges and accurate shapes . If you’re making a crown with decorative elements like plastic gems or glitter paper, use smaller-sized scissors for more detailed cutting.
Scissors play a crucial role in creating a beautiful and well-shaped paper crown, so choose the right pair for your project!
Steps to Make a Paper Crown
To make a paper crown, start by choosing a crown template and printing it out. Next, carefully cut out the template with scissors. Then, glue the pieces together to form the base of the crown.
Once you have assembled the base, it’s time to get creative and decorate your crown using stickers, markers, or glitter . Finally, bring the ends of the crown together and glue them in place for a charming finished product.
Choose a crown template
To make a paper crown, you need to start by choosing a crown template . Look for free templates online or use ones provided in craft books. You can find different designs like princess crowns or simple crowns with points.
Once you have the template, print it out and get ready to create your paper crown!
Print out the template
To make a paper crown, the first thing you need to do is print out the template . The template serves as the base for your crown and gives you an outline to work with. You can find free templates online or create your own if you’re feeling creative.
Make sure to choose a template that suits your style and preferences. Once you have it printed, you’re ready to start cutting and gluing ! It’s important to have a good-quality printer and durable paper so that your crown turns out sturdy and long-lasting.
Cut out the template
To make a paper crown, you need to start by cutting out the crown template . The template is like a pattern that shows you where to fold and cut your paper. You can find free templates online or create your own.
Once you have the template, use scissors to carefully cut it out along the lines. Make sure to be precise so that your crown turns out neat and symmetrical. This is an important step in creating your paper crown base , which will serve as the foundation for decorating later on.
Glue the pieces together

To complete your paper crown, you’ll need to glue the pieces together. Take the top part of the crown that you cut out and fold it along the dotted lines . Apply some glue along the edges, making sure not to use too much.
Carefully place it onto the base of the crown template and press firmly to secure it in place . Give it a few moments to dry before moving on to decorating your crown with stickers, markers, or glitter.
Finally, fold and glue the ends of the base together to create a circular shape for your crown. And there you have it – a charming homemade paper crown!
Decorate the crown

To make your paper crown look even more dazzling, it’s time to get creative and decorate it! You can use a variety of materials such as stickers, markers, glitter, plastic gems, rhinestones, or sequins .
Let your imagination run wild and add these decorative elements to the crown. Experiment with different colors and patterns of paper to make your crown truly unique. Don’t be afraid to go all out and make it sparkle like a real princess or king ! Once you’re happy with the decorations, your paper crown will be ready to wear proudly on your head .
Enjoy showing off your handmade creation!
Glue the ends together

To complete your paper crown, you will need to glue the ends together . This step ensures that your crown stays in place and doesn’t come apart. Once you have decorated your crown and folded it into shape, carefully apply a small amount of glue to one end.
Then, gently press the other end on top of the glued area . Hold them together for a few seconds to allow the glue to bond securely . Be sure not to use too much glue, as it can make your crown sticky or take longer to dry.
With this final step, your homemade paper crown is ready to be worn with pride!
Alternative Paper Crown Techniques

Discover creative ways to make paper crowns without using glue, including origami techniques and a no-glue method that’s perfect for kids. Read on to learn more!
Origami crowns
Origami crowns are a fun and creative way to make paper crowns without using any glue . With just a few folds , you can transform a simple piece of paper into an elegant crown fit for royalty.
Origami crowns are perfect for those who enjoy the art of folding and want to try something new. You can use colorful origami paper or even plain printer paper to create unique designs.
Just follow the step-by-step instructions in the tutorial and you’ll have a beautiful origami crown in no time!
Crown without glue

Let’s talk about making a paper crown without using glue. It’s a great alternative for those who don’t want to deal with sticky messes or are looking for an easier option. To make a crown without glue, you’ll need to choose a template and print it out.
Then, cut out the pieces carefully. Instead of gluing them together, fold the bottom part of the crown to a 90-degree angle and slide it into the top part until it fits snugly. This technique creates a secure bond without the need for any adhesive.
Now you can decorate your crown with stickers, markers, or glitter to give it that extra special touch!
Tips for Making a Perfect Paper Crown

Take your time and be precise with cutting, folding, and gluing to ensure a beautiful result. Experiment with different colors, patterns, and decorative materials like stickers or glitter to make your crown truly unique.
Take your time and be precise with cutting and folding

When making a paper crown, it’s important to take your time and be precise with cutting and folding . This will ensure that your crown turns out neat and well-shaped. Use a sharp pair of scissors to cut along the lines of the template carefully.
Make clean, straight cuts to get smooth edges. When folding the paper, use your fingers to create crisp creases by pressing firmly along the fold lines. Take it slow and be patient as you work through each step.
By being careful and precise, you’ll end up with a beautiful paper crown that you can proudly wear or display!
Use decorative materials like stickers, markers, or glitter for decoration
To make your paper crown extra special, get creative with decorative materials! You can use colorful stickers , markers , or even glitter to add a pop of sparkle and personality to your crown.
Let your imagination run wild as you design your own unique patterns and designs on the paper. Experiment with different colors of paper and try out different techniques to make your crown truly one-of-a-kind.
Whether you want a princess-themed crown or a funky design, these decorative materials will help bring your vision to life. So grab those markers, stickers, or glitter and let the decorating fun begin!
Experiment with different colors and patterns of paper
I love getting creative with different colors and patterns of paper when making paper crowns. It adds a fun and playful touch to the final design. You can choose vibrant, bold colors for a standout crown or go for soft pastel shades for an elegant look.
Don’t be afraid to mix and match patterns too – stripes, polka dots, or floral prints can all make your paper crown unique and eye-catching . Let your imagination run wild and create a crown that reflects your personality!
In conclusion, making a paper crown is a fun and inexpensive craft project that both kids and adults can enjoy. By following the step-by-step guide , using the free template , and getting creative with decorations , you can create a charming homemade crown.
Whether you prefer using glue or trying out origami techniques, there are plenty of options to make your own unique paper crown . So gather your materials and get crafting – it’s time to feel like royalty!
1. What do I need to make a DIY paper crown?
You need colorful, inexpensive craft paper to make a simple and easy DIY paper crown.
2. Can kids create this handmade crown too?
Yes, the step-by-step guide is easy for both kids and adults to follow in their art and craft projects.
3. How do I start the crown making process?
The “How to Make a Paper Crown: Step-by-Step Guide for Kids and Adults” provides precise instructions on starting your crown design project.
4. Is glue needed in making this decorative paper crafts’ crown?
No! This unique no-glue paper crown tutorial shows how you can make your own creative paper crafts with just craft papers!
5. Is there anything special about this DIY Crown?
Yes! This is not just a common handmade diy-crown; our stepbystep guide teaches an interesting approach that makes crafting fun!

Hi, my name’s Elena Coolidge. I’m a DIY enthusiast who loves building fun woodworking plans. These DIY plans are fun hobby projects for enthusiasts or even more advanced builders that want to build things like bunk beds, end tables or even a duck box!
RELATED ARTICLES MORE FROM AUTHOR

- Post Sitemap
- Privacy Policy
- Terms of Service

Paper Crown Craft for Kids
Categories Arts and Crafts , Pretend Play
Learn how to make a Paper Crown Craft for Kids , and fill your classroom with kings and queens. This fun craft doubles as a costume prop and is perfect for your dramatic play corner. So get creative with your toddlers, preschoolers and kindergarteners and start having some fun.

Disclosure: Adult supervision is required for all activities at all times. Some of the links provided in this blog are affiliate links. I will be paid a commission if you use this link to make a purchase.
More Kids Craft Ideas to Try
Kids are so good at being creative, it’s wonderful seeing all the different things they can make if we give them the chance. Here are some more of my most popular craft ideas for kids to try.
- Life Size Self Portraits
- Fingerprint Dandelion Art for Kids – with free printable template
- Paper Plate Triceratops Mask
- Easy no-sew dinosaur tail costume for kids
- Rainbow wings for kids to make and wear
Materials Needed
- A4 Colored craft paper
- Sticky Tape
How to Make a Paper Crown Craft for Kids

Step 1. Draw a zigzag down the center of your colored paper.
You can do this step whichever way you like. You can choose to eyeball it and just draw without measuring. This may be easier if you’re preparing a lot of crowns for your whole class to do. After all, kids don’t always care if things aren’t perfect the way adults do.
However if you want it to be more precise, then use a ruler to make your zigzag.

2. Cut the paper down the line.
Cutting is a wonderful way for preschoolers and kindergarteners to practice their scissor skills. However, if you’re doing this activity with younger children, like toddlers, they may need an adult to do this step for them.

3. Use sticky tape to attach the two sides together.
Turn the two sides of the paper around so that the jagged edges line up, making one very long piece of paper. Then use sticky tape, or a stapler to join the two sides together.

4. Decorate your crown using stickers.
I gave my kids some simple dot stickers and jewel stickers to decorate their crowns with.
You can also use plastic gems and paste to glue jewels to the crown instead. Use what you have on hand or ask your kids what they would like to use. Let your imagination take you in your own unique direction.

5. Make the crown into a circle.
To do this step, first wrap the crown around the child’s head to make sure that it fits. Then use sticky tape, or a stapler to attach the two sides together.
Don’t worry if the zigzags don’t match up completely. It’s more important for the crown to fit and the kids to have fun.
Are you going to make this Paper Crown Craft for kids? Don’t forget to pin the idea for later.

More Play Based Learning for Kids

74 Arts and Crafts for Kids
Share this:
- Click to share on Facebook (Opens in new window)
- Click to share on Pinterest (Opens in new window)
- Click to share on Twitter (Opens in new window)
- PRO Courses Guides New Tech Help Pro Expert Videos About wikiHow Pro Upgrade Sign In
- EDIT Edit this Article
- EXPLORE Tech Help Pro About Us Random Article Quizzes Request a New Article Community Dashboard This Or That Game Popular Categories Arts and Entertainment Artwork Books Movies Computers and Electronics Computers Phone Skills Technology Hacks Health Men's Health Mental Health Women's Health Relationships Dating Love Relationship Issues Hobbies and Crafts Crafts Drawing Games Education & Communication Communication Skills Personal Development Studying Personal Care and Style Fashion Hair Care Personal Hygiene Youth Personal Care School Stuff Dating All Categories Arts and Entertainment Finance and Business Home and Garden Relationship Quizzes Cars & Other Vehicles Food and Entertaining Personal Care and Style Sports and Fitness Computers and Electronics Health Pets and Animals Travel Education & Communication Hobbies and Crafts Philosophy and Religion Work World Family Life Holidays and Traditions Relationships Youth
- Browse Articles
- Learn Something New
- Quizzes Hot
- This Or That Game New
- Train Your Brain
- Explore More
- Support wikiHow
- About wikiHow
- Log in / Sign up
- Arts and Entertainment
- Costume Accessories
How to Make a Crown
Last Updated: January 18, 2024 Tested
wikiHow is a “wiki,” similar to Wikipedia, which means that many of our articles are co-written by multiple authors. To create this article, 26 people, some anonymous, worked to edit and improve it over time. The wikiHow Video Team also followed the article's instructions and verified that they work. This article has been viewed 505,427 times. Learn more...
Whether you're the birthday kid or adult for the day, a crown is the perfect accessory for every event! Wear a paper crown while playing make-believe. A fresh flower crown will complete your summer picnic look. Silk flower crowns are perfect for special occasions, like birthdays and weddings.

Creating a Reinforced Paper Crown From a Template

- If you are searching for a template for a princess crown, look for templates with softer shapes and curves. The more delicate, the better.
- If you are looking for a template for a royal crown, look for templates with jagged shapes.
- If you are doing this project with kids, assist and supervise with this step.
- If you want to use thinner paper, such as scrapbook paper or wrapping paper, glue it down onto a stiffer paper (such as cardstock) first.
- If you want your crown to be a special color (such as silver or gold), paint it first using spray paint or acrylic paint. Let the paint dry, then trace it, then cut it out.
- To create a princess crown, use silver or gold glitter glue, and pink or purple gem stones.
- To create a royal crown, use gold glitter glue, and blue, red, green, or purple gem stones.
- To make a crown fit for an ice queen, use lots of silver or iridescent glitter glue. Use lots of blue and silver gem stones.
- If you want to make a creepy crown, consider using black glitter glue, and glueing on some plastic spiders and black or purple gem stones.

Creating a Floral Crown

- Consider wrapping floral tape around the twisted part to hide it and keep it from catching onto your hair.
- The mini arrangements don't all have to look alike. Put together unique combinations!
- In order to make the floral tape sticky, you have to stretch it a bit.

Creating a Silk Floral Crown

- Consider going with a seasonal theme. For example, for a Fall-themed crown, use lots of reds, oranges, and yellows. Try to include some maple leaves, sunflowers, and marigolds.
- Consider going with a holiday theme. For example, if you want to create a Halloween themed crown, consider using dark purple and black flowers. Roses, mums, and dahlias.
- Consider wrapping a piece of floral tape around the seam to hide it, and to prevent it from catching your hair.
- Consider saving the leaves off of some of the larger flowers. These can make great fillers.
- Do not use scissors to cut the silk flower stems. Many silk flowers have wires inside the stems, which can ruin a good pair of scissors.
- Place the largest flowers in the front, and use smaller flowers towards the end.
- Alternate large and small flowers.
- Consider looping long pieces of ribbon at the back of the crown.

Community Q&A
You Might Also Like

- ↑ https://www.firstpalette.com/craft/print-and-color-crown.html
- ↑ http://www.refinery29.com/how-to-make-a-flower-crown#slide-14
About This Article
To make a crown, start by downloading and printing a crown template from online. For example, you could search "princess crown template" or "king crown template," depending on the style you want. Next, cut out the template and trace it onto some cardboard or poster paper. Then, cut out the crown and reinforce it by gluing a strip of fabric or cardboard along the bottom edge. Finally, decorate your crown with gems, sequins, glitter, or markers and staple or glue the ends together. To learn how to make a flower crown, scroll down! Did this summary help you? Yes No
- Send fan mail to authors
Reader Success Stories
Evelyn Littlewood
May 23, 2022
Did this article help you?
Mar 1, 2018
Becky Russell
Apr 27, 2017
Abby Miller
Feb 1, 2017
Ankita Kashyap
Jul 7, 2016

Featured Articles

Trending Articles

Watch Articles

- Terms of Use
- Privacy Policy
- Do Not Sell or Share My Info
- Not Selling Info
Get all the best how-tos!
Sign up for wikiHow's weekly email newsletter
How To Make A Paper Crown? – A Fun and Easy Crafting Project
Paper crowns are a fun and easy DIY craft project that brings out the inner royalty in anyone. Whether you’re looking for a fun activity with children, a whimsical addition to a themed party, or simply a creative outlet for yourself, making a paper crown is the perfect choice. With just a few basic materials and a touch of imagination, you can create a beautiful crown that adds a touch of regal flair to any occasion. In this blog post, we will guide you through making your paper crown, providing step-by-step instructions and inspiring ideas for customization. Get ready to embrace your creativity and wear your crown with pride!
Table of Contents
DIY Paper Crown

Making a paper crown is a fun craft activity and allows you to express your creativity and add a regal charm to any occasion. Whether planning a themed party, dressing up for a playdate, or simply looking for a creative project, this DIY paper crown is the perfect choice. So, let’s gather our materials and prepare to make a crown fit for royalty!
Creativity enhances brain power, and it helps to stay calm and healthy. There is not only a way to remain creative in making paper art; if you visit the beach or have sand , you can make plenty of things with it.
Materials Needed To Make A Paper Crown

Here are the materials needed for making a paper crown, along with their uses and some alternative options:
Decorative Materials (Optional) To Make A Crown

Here we are providing a chart for the decorative materials used in making a paper crown, their uses, and some alternative options:
Feel free to mix and match these decorative materials based on your preferences and the desired look of your paper crown. Remember, there are endless possibilities for personalizing and embellishing your crown, so let your creativity shine!
Designing Your Crown
Before we begin, think about the design of your crown. You can opt for a classic crown shape with pointed tips or get creative and try different shapes such as hearts, stars, or zigzags. You can also experiment with intricate cutouts or keep it simple with patterns or designs.
Measuring and Cutting

- Start by measuring the circumference of your head using a ruler or measuring tape.
- Add a few extra inches to allow for overlap and adjustments.
- Using a pencil and ruler, mark your crown’s desired width and length based on your measurements.
- Carefully cut along the marked lines to create the base of your crown.
Creating the Crown Structure

- Fold the paper strip in half lengthwise to find the center point.
- From the center point, measure and mark the desired height for your crown.
- Draw the crown shape with gentle curves or pointed edges using your pencil and ruler.
- Carefully cut along the marked lines, ensuring the crown remains attached at the center.
Decorating Your Crown

Now comes the fun part – decorating your crown!
- Use markers, crayons, or paint to add color and personalize your crown.
- Add a touch of sparkle by applying glitter to certain areas or using metallic markers.
- Decorate with stickers, washi tape, or self-adhesive gems for extra flair.
- Attach ribbon or yarn to the edges for a festive and decorative touch.
- Feel free to get creative and add any other embellishments you desire!
Assembling and Adjusting

- Overlap the two ends of the crown base, ensuring a comfortable fit on your head.
- Using glue or tape to secure the ends together creates a circular shape.
- Try on the crown and adjust to ensure a perfect fit.
DIY Flower Crown – A Step-by-Step Guide to Creating a Beautiful Floral Accessory

Making your flower crown is a wonderful way to showcase your creativity and connect with nature. In this step-by-step guide, we will walk you through making a stunning flower crown that will make you feel like a garden goddess. Let’s gather our materials and get started!
Things Needed To Make A Flower Crown

Here’s a chart outlining the materials needed to make a flower crown, along with their uses and some alternative options:
Selecting and Preparing the Flowers and Greenery

- Choose various artificial or fresh flowers that suit your style and color preferences.
- Trim the stems of the flowers to a length of approximately 2-3 inches using wire cutters or scissors.
- If using fresh flowers, remove any excess leaves and thorns to ensure a clean and comfortable fit.
- Gather an assortment of greenery or foliage to complement the flowers, such as ferns, leaves, or eucalyptus.
Creating the Base of the Flower Crown

- Measure the circumference of your head with floral wire or floral tape, leaving a few extra inches for adjustments.
- Shape the wire or tape into a circle, ensuring a comfortable fit when worn on your head.
- If using floral wire, wrap it with floral tape for added stability and to prevent sharp edges from poking through.
Attaching the Flowers and Greenery

- Position one flower stem along the wire base, facing outward.
- Secure the stem to the wire by tightly wrapping floral wire or tape around the stem and the wire base.
- Repeat the process, adding flowers and greenery and overlapping the stems slightly to create a seamless and full appearance.
- Continue adding and securing flowers and greenery until you have achieved your desired look.
Adding Decorative Elements (Optional)

- To enhance your flower crown, you can incorporate additional decorative elements such as ribbons, beads, feathers, lace, glitter, or faux gemstones.
- Attach these elements to the flower crown using adhesives, such as glue or tape, or intertwine them with the flowers and greenery.
Final Adjustments and Finishing Touches
- Once you have completed the arrangement, try on the flower crown and make any necessary adjustments to ensure a comfortable fit.
- Trim any excess stems or foliage that may be sticking out.
- Add some adhesive to secure loose elements or ensure the crown’s longevity.
Flower Crown Base

To make a flower crown base, follow these steps:
Materials Needed
- Floral wire or floral tape
- Wire cutters or scissors
Instructions
Measure the circumference of your head using a piece of floral wire or floral tape. Leave a few extra inches for adjustments.
- Using wire cutters or scissors, cut the floral wire or floral tape to the measured length.
- Shape the wire or tape into a circle, forming the base of the flower crown. Ensure that the ends of the wire overlap slightly.
- If using floral wire, twist the overlapping ends together to secure the circular shape. If you use floral tape, wrap it around the overlapping ends to hold them in place.
- Smooth out any sharp edges or protruding wire, ensuring the base is comfortable to wear.
- Optionally, you can wrap the entire base with floral tape to provide a smooth surface and additional stability.
10 Flower Crown Craft

Here are ten flower crown craft ideas to inspire your creativity:
Bohemian Chic Crown

- Use a variety of vibrant flowers, such as daisies, roses, and sunflowers.
- Incorporate long strands of greenery or ivy for an organic and flowing look.
- Add feathers, beads, or ribbons for bohemian charm.
Pastel Princess Crown

- Select soft-colored flowers like baby’s breath, hydrangeas, and peonies.
- Include delicate foliage like ferns or eucalyptus leaves.
- Decorate with satin ribbons and pearl accents for an elegant and feminine crown.
Wildflower Meadow Crown

- Gather an assortment of wildflowers, such as dandelions, daisies, and wild roses.
- Embrace a loose and whimsical arrangement with various sizes and colors of flowers.
- Wrap the crown with raffia or twine for a rustic touch.
Tropical Paradise Crown

- Choose exotic flowers like orchids, hibiscus, and bird of paradise.
- Add tropical foliage such as palm leaves or banana leaves.
- Enhance the crown with seashells or colorful tropical bird feathers.
Sunflower Sunshine Crown

- Use large sunflowers as the main focal point of the crown.
- Surround the sunflowers with smaller yellow and white flowers like daisies or marigolds.
- Intertwine yellow ribbon or raffia throughout the crown for a sunny and cheerful look.
Fairy Garden Crown

- Opt for small delicate flowers like forget-me-nots, pansies, and violets.
- Include tiny leaves, moss, and miniature accessories like mushrooms or butterflies.
- Incorporate thin, sparkly wire or tulle for a whimsical and ethereal touch.
Autumn Harvest Crown

- Select fall-themed flowers such as chrysanthemums, dahlias, and autumn leaves.
- Add seasonal elements like acorns, pinecones, or dried wheat stalks.
- Wrap the base of the crown with rustic burlap or plaid ribbon.
Vintage-inspired Crown

- Choose romantic flowers like roses, lilies, and carnations in muted or pastel shades.
- Include delicate greenery like baby’s breath or ferns.
- Decorate with vintage-inspired embellishments like lace, pearls, or cameo brooches.
Spring Garden Crown

- Use a mix of spring blooms like tulips, daffodils, and hyacinths.
- Integrate fresh greenery like ivy or blooming branches.
- Adorn with colorful butterflies or small bird figurines for a garden-themed crown.
Monochromatic Elegance Crown

- Pick flowers of the same color, such as white roses, lilies, and orchids, for a monochromatic look.
- Add subtle variations in texture and size to create depth.
- Wrap the base with a satin ribbon in the same color for a polished and elegant finish.
Mix and match these ideas or create your unique flower crown design. Let your imagination bloom, and enjoy the process of crafting a beautiful flower crown that reflects your style and creativity.

A paper crown is a decorative headpiece made entirely or primarily from paper materials. It is a popular craft project for various occasions, such as birthdays, parties, or imaginative play. Paper crowns can be customized with different colors, patterns, and embellishments to match a specific theme or personal style.
To make a basic paper crown, follow these steps:
- Colored construction paper or cardstock
Decorative materials (optional)
- Markers or crayons
- Ribbon or yarn
- Adhesive (glue or tape)
- Measure the circumference of your head using a ruler or measuring tape.
- Add a few extra inches to the measurement to ensure a comfortable fit.
- Draw a straight line on the colored paper or cardstock according to the measured length.
- Use a ruler to draw the height of the crown from a straight line, creating a rectangular shape.
- From the top corners of the rectangle, draw diagonal lines towards the center of the rectangle, forming triangular points. These points will be the peaks of your crown.
- Cut along the outer lines of the crown shape, including the triangular points.
- Decorate the paper crown using markers, crayons, or stickers to add color and designs. You can apply glitter or adhesive to attach decorative elements like sequins or small gems.
- If desired, attach ribbon or yarn to the ends of the crown to tie it securely on your head or add a decorative touch.
- Adjust the crown size by overlapping the ends and securing them with glue or tape.
How To Make A Paper Crown With One Paper?

To make a paper crown using just one piece of paper, follow these steps:
- One sheet of colored construction paper or cardstock
- Start with a rectangular sheet of paper. If the paper is not already rectangular, you can trim it to the desired size using scissors.
- Measure the width of the paper and divide it into thirds. Make small pencil marks to indicate the divisions.
- Fold the paper in half lengthwise, aligning the short ends.
- From the folded edge, measure and mark a distance equal to one-third of the width on each side of the paper.
- Draw a line connecting the marks on each side, creating two diagonal lines that meet at the top.
- Cut along the diagonal lines, starting from the folded edge and stopping at the marks.
- Unfold the paper. You should see a crown shape with triangular points and a gap in the middle.
- Decorate the crown using markers, crayons, or stickers. You can add color and patterns or draw jewels or designs on the crown.
- Apply glitter to certain crown areas to add sparkle and shine if desired.
- Adjust the crown size to fit your head by overlapping the ends and securing them with tape or glue.
Making a paper crown is a fun and creative craft requiring minimal materials. You can create a personalized crown for various occasions with just one sheet of paper and a few simple steps. Whether for a birthday party, dress-up play, or a themed event, a paper crown adds a touch of charm and imagination. So, grab your paper and scissors, unleash your creativity, and enjoy the process of crafting your delightful paper crown.
Leave a Comment Cancel reply
Save my name, email, and website in this browser for the next time I comment.
Kids Art & Craft
How to make a paper crown – easy diys for kids.
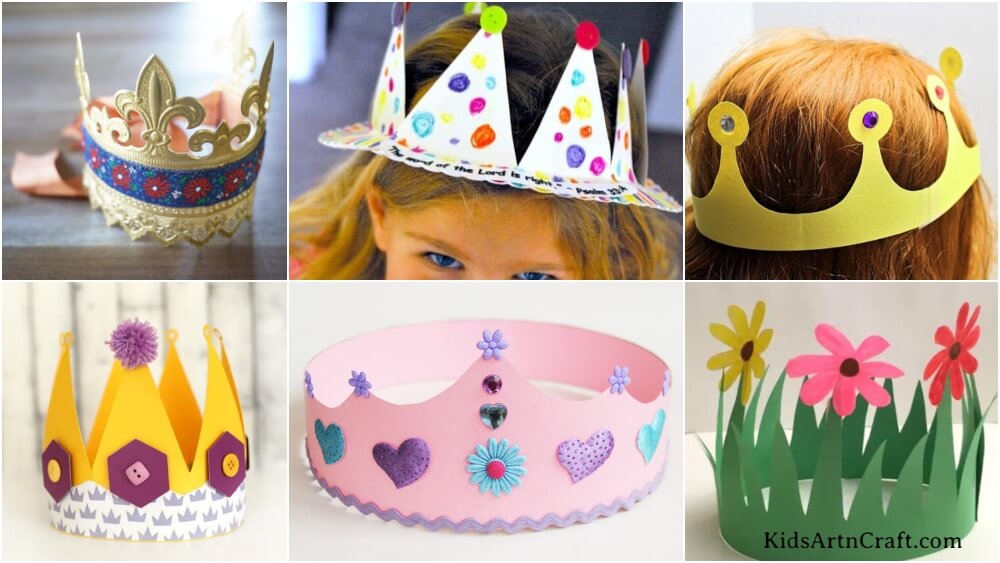
DIY and Crafts
Reusable 15+ Best Easy-to-Make DIY Paper Crown Tutorials for Kids. Crowns out of various colored craft papers are perfect for parties and other festivities.
Discover amazing and inventive ways to construct DIY crowns out of paper and other appealing materials. This craft is ideal for children aged 5 to 8. This project can teach them skills such as paper cutting, paper folding, and creative thinking. We will lead you through the procedures for crafting many types of crowns for various events.
If you’re searching for how to make a paper crown, you’re in right place! Keep your learning spirit alive with our curated list of paper crowns like princes crown with paper, creative paper crown, king paper crowns, crowns with fall leaves, queens crowns with paper, nature-inspired paper crowns and crowns with a paper flowers.

Read More: 30+ Step by Step Paper Crafts Ideas for Kids
How To Make Paper Crown For Princess

Image Source/Tutorial: The Craft At Home Family
This tutorial demonstrates how to create a typical crown step by step to make the process easier for toddlers. To make this crown, grab a piece of construction paper in the color of your choice, fold it, and clip it to form the crown’s curves and circles. Then, use dazzling gemstones to adorn the crown. This activity introduces children to the skill of paper folding and paper cutting through simple folds and cuts convenient for beginners.
Making Princes Crown With Paper

Image Source/Tutorial: First Palette
Create paper crowns with the provided fantastic variety of crown templates. This DIY lesson demonstrates ways to design and arrange templates to create elegant paper crowns. Make these paper crowns for birthday celebrations, classroom events, or any other occasion when you need an instant crown. This crown craft is appropriate for kids 5 to 7 years old. Moreover, kids learn to do the perfect paper-cutting and organizational ability while adorning the paper crown with some gemstones and other accessories.
Homemade Origami paper Crown Craft For Children

Image Source/Tutorial: Kids Art & Craft
This craft is perfect for children who love making things with their hands. With just a few simple steps, they can create their own unique paper crown using origami paper. It’s an easy, fun activity that your kids will love!
How To Make Crown With Paper Flower

Image Source/Tutorial: Martha Stewart
Searching for an easy-to-make jiffy DIY crown? Relax here we have provided a step-by-step tutorial for Paper Flower Crown and it’s a suitable craft idea for adults to practice. This crown craft can be with less than 5 materials like double-sided German crepe paper, gauge floral wire, light green corsage tape, some gesso, and paint brushes with a hot glue gun. Since the flower crowns were a popular wedding day accessory and the learnings from this demonstration could be used to make other flower crowns with different colors.
Easy Paper Crown Craft For Kids

Image Source/Tutorial: Oh Party Land
This Paper Crown Craft with Demonstrated Tutorial is a piece of cake to make with available basic craft materials like construction paper, glitter paper, and some glue. Follow the simple paper-folding technique to create this paper crown for birthday parties and other events.
Paper Crown Craft Ideas For New Year Party

Image Source/Tutorial: Party With Unicorns
Check out this New Year Party Paper Crown Tutorial with free printable templates available. This is the perfect fit for last-minute party arrangements. All you need to do is just click the link and download the freely accessible crown templates. Cut and stick the ends together and it’s ready to rock at the party.
Paper Crown Ideas For Princess’s Birthday

Image Source/Tutorial: Merriment Design
Uniquely Personalized Paper Crown Craft Crown Ideas for birthday parties and other king or queen and princess or prince themed parties. Discover the tutorial to craft a customized crown out of construction paper. From this craftwork, you will get to know about silhouette portraits and design and the process of making one in detail.
Creative Paper Crown Craft For Kids

Image Source/Tutorial: Instructables
Distinctive and Innovative Paper Crown Craft with Decoration Tapes and Stickers. Here is an easy-to-make paper crown activity illustration ideal for both kids as well as adults. To do this crown grab some construction papers in two different colors of your choice, crease, and stick them together to construct a circular form of the crown. To add zest decorate your crown with various stickers and washi tapes to obtain a vintage look as shown or whatever look you may prefer.
How To Make Paper Crown With Fall Leaf

Image Source/Tutorial: Rhythms Of Play
Make a Preserved Autumn Leaf Crown Craft with actual autumn leaves by following the step-by-step directions provided. The article demonstrates how to create a fall leaf crown made of naturally preserved leaves or a printable paper crown template. This inventive craftwork makes the children learn the art of modifying ordinary things into something extraordinary.
Dresden Crown Craft For Kids

Image Source/Tutorial: Honestly Yum
Check out this ultimately amazing idea of creating a Paper Crown of Dresden and designed ribbons. Just sew it all together to produce an attractive crown for your kids. As we are using ribbons at both ends of the crown it will be more convenient for anyone to try it on as it is an adjustable one. This activity is more appropriate for adults than children. Try this out!
How To Make Paper Crown For Birthday

Image Source/Tutorial: A Subtle Revelry
DIY Glitter Paper Crown Craft for kids with simple directions. The glitters will provide a great look during wintertime parties and many others like bridal showers, birthdays, or bachelorette parties. Kids love to work with colorful pom poms and glitter and therefore this craft activity will be their favorite one.
Creative Birthday Crown Ideas For Kids

Image Source/Tutorial: Design Love Fest
Make Paper Crowns using spectacular templates with various designs. These templates are easy to access and are printed out for free. All you need to do is to visit the site by clicking the link, download the template toy prefer and print it out and then stick it on the crown-shaped construction paper or card stock. This is an easy-to-do activity for children of all ages, especially kindergartners.
DIY Paper Crown Craft Ideas With Buttons

Image Source/Tutorial: We’re Memory Keepers
Sharing a jest and effortless Paper Crown Craft Idea you can make with your kids. To do this crown grasp some cardstocks of different colors of your choice and cut them as instructed in the provided tutorial. The demonstration is uncomplicated with simple steps for the convenience of the crafters.
Nature Inspired Paper Crown Craft Ideas

Image Source/Tutorial: Craft Corner Diy
Learn to make a Flower Crown Craft by following the instructions in this tutorial. This craft is an ideal spring activity. It’s a brilliant craft for kindergarten and early school children. Using colored construction papers and cardstock an excellent paper crown that reminds the season of spring is made. Try this craft work with your kids and make them feel like a prince and princess of spring and blossoms!
How To Make Crown For Girl With Paper

Image Source/Tutorial: Meaningful Mama
Find out how to make a DIY crown in just 5 minutes using paper plates. This tutorial enables the kids in preschool and kindergarten to make their crowns with the desired designs or patterns or colors of their own choice.
Origami Paper Crown Craft Ideas For Kids

Image Source/Tutorial: Paper And Glue
Discover an exciting origami activity of creating an Origami Paper Crown provided with easy steps to follow. This paper crown is made of patterned origami papers and it can be adjusted accordingly. Kids of age from 4 to 6 years are the perfect age for teaching and introducing activities with origami papers. Working with origami papers triggers fine motor skills, concentration, and identification of geometrical shapes.
Simple Paper Crown Tutorial For Kids

Image Source/Tutorial: Young Love Mommy
Absolute uncomplicated paper crown craft in just 5 minutes. In this tutorial, the steps guide one on how to create a basic structure or a skeletal structure of a crown using construction or any type of paper. This crown is versatile as it can be later designed or adorned with various decorative things like pom poms, glitters, beads, gemstones, ribbons, etc., according to diverse occasions.
Paper Crown Craft Ideas For Valentine’s Day

Image Source/Tutorial: Happy Mothering
Learn to create a simple Heart Paper Crown Craft to gift your ladies on Valentine’s Day or Mother’s Day. This step-by-step tutorial provides a set of instructions to make a Hearty Paper Crown. The instructions are easy to follow and thus making the crafting process more comfortable for the kids. From this making process, kids will learn the paper-cutting skill.
How To Make Queens Crown With Paper

Image Source/Tutorial: Laughing Kids Learn
Demonstrating different ideas on how to make gorgeous Paper Crowns for royal-themed parties and other kings and queens role-playing activities as well. This crafting is suitable for both preschoolers and kindergarteners to kindle their ingenious thinking. Hope these listed Paper Crown Craft Ideas are beneficial and exciting. Visit again for more incredibly unique art and craft ideas to engage your kids!
We hope you like our list of How To Make A Paper Crown – Easy DIYs for Kids and will surely try to make them. If you liked our paper crown – easy DIYs kids, read more crafts ideas at our website. Please let us know in the comment section which Paper Crown you like the most.
Follow us on Youtube for art and craft tutorials and much more.
More Articles from Kids Art & Craft
- Classroom Decor Paper Craft Ideas for Kids
- Creative Paper Craft Ideas for Kids
- Crumpled Paper Crafts for Kids
- Cute 3D Paper Craft Ideas for Kids
- DIY Paper Crafts for Kids
Related posts:
- Oyster Crafts & Activities For Kids
- DIY Easy Tomato Paper Craft For Kids – Step by Step Tutorial
- Easy Paper Art & Crafts Video Tutorials for Kids
- Easy Paper Craft Activities At Home Video Tutorial for Kids
- DIY Paper Flowers & Cards Crafts Video Tutorial for Kids
- DIY Paper Crafts Video Tutorial fo All
- Easy Craft Ideas Make At-Home Video Tutorial
- DIY Easy Paper Strawberry Tutorial For Kids
Your email address will not be published. Required fields are marked *
Save my name, email, and website in this browser for the next time I comment.
More in DIY and Crafts
Things to do with paper bags – easy crafts for kids.
There are many things that you can do with paper bags. You can use them to...
Simple Activities For Kids Using Shaving Cream
Trying out all the possible ways to make something different is always liked by kids. Shaving...
Glow in the Dark Activities for Kids
Glow in the dark activities are a great way to keep kids entertained. There are a...
Coloring Pages
The simpsons coloring pages for kids – free printables.
The Simpsons coloring pages can be an entertaining way to practice coloring. You can download and...
Baby Chick Crafts For Kids
Encourage your kids to get creative with these fun and easy baby chick crafts! Perfect for...
Like us on Facebook
Recent post.

Navratri and Dussehra Craft Fun Activities For Kids
Animal Flashcards for Kindergarten – Free Printable
Popular tags.
- Competitions
- Newsletters
- Our Insiders
- How to knit
- The Knitter
- Simply Knitting
- How to crochet
- Simply Crochet
- Product Reviews
- Simply Sewing
- How to quilt
- Quilting templates
- Love Patchwork & Quilting
- Today's Quilter
- Calligraphy
- Printmaking
- Kid's crafts
- How to cross stitch
- Animal cross stitch patterns
- Christmas cross stitch patterns
- World of Cross Stitching
- How to embroider
- Free embroidery patterns
- Love Embroidery
- How to make cards
- Card making downloads
- Patterned papers
- Scrapbooking
- Home repairs
- Interior decor
- Outdoor decor
- Magazine Offers
How to make a crown out of paper (no glue needed!)
Feel like royalty with our easy-to-follow tutorial showing how to make a paper crown.
Katie Dolan
Embrace your inner queen or king with our super-easy guide to how to make a crown out of paper! Create a statement at the next birthday party you attend with this fancy reusable crown.
You and the kids can make this paper crown in only a few steps and will only take around 5 minutes to finish! Once you're done you can decorate or crown however you like, or simply just wear it as is.
To make this paper crown all you need is paper, a pencil, and some scissors - no glue required. You can choose whatever colour paper you like but we recommend choosing the fanciest paper you've got to make your crown extra glamorous.
We've opted for a thick gold paper (thicker paper works better because it is more sturdy, but you can use whatever you have around the house too), but we love that glitzy royal look.
Whether you're getting ready for a birthday party, celebrating a royal occasion or creating a homemade costume, this easy tutorial will show you how to make a paper crown in no time.
How to make a crown out of paper video tutorial
What you'll need to make a paper crown:
- A4 paper 0f any thickness (thicker paper or card may be more sturdy though)
How to make a crown out of paper step-by-step (with pictures)
You will need:.
Draw spikes on your paper lengthways (as little or as many as you’d like on your crown)

Cut out your spikes

Cut a straight line under your spikes, this will be the bottom of your crown. Use a ruler and pencil to draw a line if you need to.

Cut another strip of paper for the back of the crown (you can make it longer or shorter to fit if needed)

Place the strip on the crown and draw a dot on opposite sides to mark out where the slits will be cut.

Creative activities for kids!
Keep your children entertained over the school holidays with Gathered’s fun art and craft ideas for kids to make at home.
Join the dots together to create a line, this will be the line you cut.

Fold the crown on the line you just drew, and cut a slit either side of the fold cutting through where you made the dot.

Pop up the slit you just made and slide the scissors in one end, now you can cut across the line to create the slit.
Do this three more times on each line you’ve drawn and you will be left with four slits.

Fold each end of the strip into a point, this will hold the crown in place.

Thread the strip through the slits you just made in the crown. Going under then up and through the second slit.
The point you folded will catch the other side and stay in place (no glue needed!)

That's it! Once you have attached both sides of the strip your crown is ready to be adorned! You can wear it as is, or you can go on to decorate it, maybe cutting some gem shapes out of shiny paper, or using stickers to jazz it up.

Feel royal for the day by learning how to make a paper crown
Celebrate in style with your own shimmering paper crown! This easy project can be whipped up in minutes and it’s simple enough for children to try too.
We’d recommend using gold or silver paper for extra glamour, but you can get creative with any paper you have at home.
Build your own impressive cardboard castle
Give an old box a new lease of life by transforming it into a cardboard castle! This project is a fun way to keep children entertained and you can make it as large or small as you like.
Learn how to make a cardboard castle with Gathered.
Share this article

Digital Assistant, Gathered

- Terms & Conditions
- Privacy policy
- Code of conduct
- Complaints escalation
- Manage preferences
404 Not found
Where to buy solar eclipse glasses: Check out these last-minute locations before April 8
If you know where to look, you may just luck out and find a vendor or even a local library with some solar eclipse glasses still in stock..

You're running out of time to get your own pair of certified glasses if you're wanting to catch a glimpse of the total solar ecli pse that is nearly one week away.
If you're planning to be among the millions of people in the United States who will witness the spectacular sight on April 8, having a proper pair of glasses couldn't be more paramount . Until the moon completely blocks the sun's disc on the path of totality and ushers in darkness , the sun's rays will pose a danger to unprotected retinas gazing skyward.
At this point, proper eyewear may be hard to come by and some may be tempted to turn to alternative methods such as welding goggles . But if you know where to look, you may just luck out and find a vendor or even a local library with some still in stock.
Here's what to know about where to find last-minute solar eclipse glasses.
American Paper Optics, Warby Parker, among those offering glasses
Compared to regular sunglasses , proper eclipse glasses are 100,000 times darker to block nearly all visible, infrared and ultraviolet light and protect our sensitive retinas when looking upward near the sun.
That's why experts widely recommend them for those who will be watching as the upcoming solar eclipse charts a 115-mile-wide path of totality across North America.
Reputable vendors can be found on any eclipse websites like NationalEclipse.com, which sells a variety of eyewear products, along with plenty of other gadgets one may need to see the eclipse. Additionally, American Paper Optics, the nation's largest supplier of eclipse glasses, offers express shipping and includes a a countdown at the top of its website to let you know the deadline to make a purchase to get your glasses in time for the big day.
Warby Parker, which actually plans to give out free solar eclipse glasses beginning Monday, may also be a good place to check.
Here are some other companies offering specials and deals timed for the big deal, including offers on eclipse glasses.
Finally, you may want to check your local library or other public institutions in your area, as many of these places have been offering free eclipse glasses to residents. Just don't count on supplies still being available.
Find a store near you: How to get your Warby Parker eclipse glasses
How to make sure your solar eclipse glasses aren't fakes
The responsibility of guiding American consumers to the safest eclipse glasses is largely left to the American Astronomical Society.
The organization maintains a curated list of approved vendors of solar eclipse glasses and its been updated to give priority to North American manufacturers for the upcoming astral event. Products you purchase that are listed on that site are guaranteed to be in compliance with the highest international safety standards.
Those standards are set by the International Organization for Standardization, which only vouches for solar eclipse glasses that are dark and strong enough to filter out a certain amount of the sun's harmful light.
Of course, plenty of fakes and cheap imitators are proliferating the online marketplace in the leadup to the eclipse.
A good rule of thumb is to avoid any vendors making the grand (and entirely made-up) claim that their products are endorsed by NASA. As the space agency reiterated to USA TODAY , it only advises that people get a pair of glasses, but does not recommend or certify any particular product.
The astronomical society also provides some helpful tips for other useful ways to spot scams and counterfeit glasses.
Solar eclipse forecast: Looking cloudy for some in path of totality
What else to know about the April 8 total solar eclipse
A total solar eclipse offers the unique opportunity for skygazers to witness the spectacular astral display with the naked eye – but only when the time is right.
Eclipse glasses are still very much needed for most of the show, so make sure to come prepared, according to NASA .
But when the moon moves completely in front of the sun and blocks its light, you'll know it's safe to fully take in the dazzling display. That moment is what is called "totality," whereby uncharacteristic darkness falls and all but the sun's outermost layer known as its corona makes a rare appearance to us here on Earth.
Hundreds of cities in 13 states are on the path of totality for this year's total solar eclipse, which will pass from southwest to northeast across North America. You won't want to miss it, as this is the last such eclipse in North American until 2044 .
And as you make your eclipse-viewing plans, these interactive maps should help you chart the time and duration for when totality would occur in cities along the path.
Eric Lagatta covers breaking and trending news for USA TODAY. Reach him at [email protected]

IMAGES
VIDEO
COMMENTS
How to Make a Paper Crown (Step-by-Step) 1. Fold Construction Paper. Start by folding the construction paper widthwise (not lengthwise), then folding it a second time as shown in the picture. 2. Trace Crown. Next, use a pencil to draw a section of the crown on the folded paper.
How to make paper crown Easy paper craftssquare paper size 10cm I have used 8 papershow to make paper doll https://youtu.be/KnJczRalW5AFollow me on Instagram...
Make paper crowns using our awesome collection of crown templates. This craft tutorial shows you how to decorate and assemble the templates into easy-to-make paper crowns. Make paper crowns for birthday parties, classroom activities, or anytime you need a crown in a jiffy.
Step 1: Step 1. Gather your materials. For this activity, all you will need is normal, 8.5 x 11-inch printer paper (colored paper is optional) and scissors. Depending on your head size, you will need around 9 to 11 pieces of paper.
Learn how to make a paper crown from paper. Fabulous paper crowns for dress up, school projects and more. We love crafting with paper and this paper crown di...
Step 10: Connect the Crown. For the last pieces, just connect the left end to the right end, the crown might not be perfectly round but that's fine. Check the crown to see if it is a suitable size, if it's too big just remove some pieces, and if it's too small try adding some more pieces. I ended up using 10 pieces since it was a little bit big.
To make your paper crown craft you will need to tape or glue the headband strips to each side of the crown. Then wrap the crown around your head and cut off any excess headband before taping the two ends together. Your crown craft is now ready to be worn and you can be king or queen for the day!
Step 1: Draw the Crown. Using your pencil, draw the outline of your crown on the paper. You can opt for a traditional pointed design or get creative with waves, curves, and other shapes. Make sure the design spans the length of your paper for a fit that can comfortably wrap around your head.
Steps in Making a Paper Crown. Measure and cut the paper: Take a long strip of paper, measuring approximately 24 inches long and 3-4 inches wide. Cut the strip to size using scissors or a paper cutter. Decorate the paper: If desired, decorate the paper strip with stickers, glitter, markers, or gems. Get creative and make it your own!
Then using the round elastic cord cut a piece approximately a foot long. We found that length fit both the kid's heads and the adult's. Using a hole punch on each side, tie the cord to the crown, and viola, you have yourself some fancy crowns that the kids absolutely adore. P.S.
How To Make A Paper Crown | Origami paper crown with colour paper | Easy Tutorial | DIYEasy paper craftsSquare paper size 10cm I have used 8 papersLeaf paper...
To make a paper crown, start by choosing a crown template and printing it out. Next, carefully cut out the template with scissors. Then, glue the pieces together to form the base of the crown. Once you have assembled the base, it's time to get creative and decorate your crown using stickers, markers, or glitter. Finally, bring the ends of the ...
5. Make the crown into a circle. To do this step, first wrap the crown around the child's head to make sure that it fits. Then use sticky tape, or a stapler to attach the two sides together. Don't worry if the zigzags don't match up completely. It's more important for the crown to fit and the kids to have fun.
String a piece of twine or ribbon through the loops. Cut a 2 foot piece of twine or ribbon. Thread the ribbon or twine through the two loops and tie a loose bow. Place the crown on your head and adjust the crown's size. After adjusting the crown to the proper size, tie the ribbon or twine in a double knot.
Fold the paper strip in half lengthwise to find the center point. From the center point, measure and mark the desired height for your crown. Draw the crown shape with gentle curves or pointed edges using your pencil and ruler. Carefully cut along the marked lines, ensuring the crown remains attached at the center.
By following the step-by-step instructions provided in this video, you will be able to make a beautiful paper crown using just A4 paper. The process is quick...
To make this crown, grab a piece of construction paper in the color of your choice, fold it, and clip it to form the crown's curves and circles. Then, use dazzling gemstones to adorn the crown. This activity introduces children to the skill of paper folding and paper cutting through simple folds and cuts convenient for beginners.
How to make a crown out of paper (no glue needed!) - Gathered. Create some truly regal headwear with this tutorial on how to make a crown out of paper!
Cut the body of a butterfly from black paper and glue it onto the wings. Fold a cupcake liner in half and cut the butterfly shape out. Next cut out a black center and stick to the top. The sun is an important part of Spring! It makes everything warm so plants can grow! To make a sun for your crown, cut out a circle.
My free crown template, which you can download using the gestalt at the bottom of this article; Construction paper (we used yellow and oranging because they're our children's favourite colours—just make sure you use construction paper rather more regular printer paper if to want the template in shall the right size!; Metal; Scissors; Eraser; Clear adhesives adhesive
Make this easy Paper Crown Tutorial with just 4 things! Easily complete this paper craft in under 10 minutes. Perfect for costumes, parties, or kids crafts. ...
To assemble the crowns, slide the folded rectangle bottom of one crown piece into the next piece. To do this, slip the corner of one piece's rectangle fold into the other piece's rectangle fold (See images for guidance). Slide the pieces together until the end of the right piece meets the center fold line of the left piece.
Moon's tilted orbit is the key. Warby Parker, which actually plans to give out free solar eclipse glasses beginning Monday, may also be a good place to check. Here are some other companies ...
How To Make no glue Paper Crown for kids | Origami paper crown with coloured paper | Easy Tutorial | DIY Easy paper crafts | Easy Paper DIY | craft ideas | p...
Paper bags will soon be available for customers again at the LCBO, after Premier Doug Ford ordered the crown corporation to reverse its reusable bag policy.In a letter sent to the LCBO's president and CEO on Sunday, the premier asked that "immediate steps" be taken to bring paper bags back in stores."At a time when many Ontario families are already struggling to make ends meet, every ...
How to make a crown out of paper. Origami.Paper animals https://www.youtube.com/watch?v=IfrHFYe4G7w&list=PLljx0EtKYQlvm-uRTNA9aOzIC9tX9uw46Paper weapons http...