Music | Technology

Roland TR-8: A Guide to Live and Studio Use – “Hidden” Menu and Other Settings
It’s getting to be time to cover situational use of the TR-8, but one last thing should be covered beforehand– the infamous “hidden” settings menu. The settings in this menu are crucial to properly configure the device for use in various situations. Otherwise, you will find yourself fighting the machine more often than working with it.
The settings menu of the TR-8 isn’t really hidden at all. It’s very easy to get to, but it is inaccessible once the machine is switched on.
Accessing the “Hidden” Menu
In order to access the settings menu, your TR-8 must be OFF. Press and hold the PTN SELECT button, then switch the device on. Do not release the PTN SELECT button until the device boots up.
Rather than starting up normally, the TR-8 will boot into the settings menu. Now, because the TR-8 has only one very basic display, these options can only be manipulated if you know which switch controls which option.
Let us now go into each of the options in the TR-8 hidden settings menu and their main applications.
MIDI Channel – TEMPO Knob

This setting adjusts the MIDI channel to which TR-8 transmits and receives MIDI data. This is helpful if you are using TR-8 to control other devices, or if you have other devices controlling TR-8.
By default, TR-8 uses channel 10, but you can set any channel 1-16. Additionally, OFF isolates TR-8 from the rest of the electronic ecosystem (with the exception of clock information), while OnN (omni) sets TR-8 to receive MIDI on all channels. In Omni mode, TR-8 will transmit only on channel 10.
Application: Setting the MIDI Channel to OFF will allow the TR-8 to exist in an electronic ecosystem without triggering – or getting triggered by – other instruments. Conversely, setting a MIDI channel will allow the TR-8 to control other devices or be controlled by other devices via MIDI.
Clock Source – Step 1 Button
Lit – Auto; Unlit – Internal
This setting tells TR-8 where to get its clocking information. Lit is the ideal setting, as TR-8 will automatically listen to incoming clock signals, with USB taking priority over DIN. Otherwise, TR-8 will use its own internal clock.
“Internal” will have TR-8 disregard any incoming clock information in favor of its own internal clock. This is helpful if you are sending/receiving MIDI, but wish for TR-8 to function as the master clock in your system.
MIDI Thru – Step 2 Button
-Lit – On; Unlit – Off
This is the most clutch trick up TR-8’s sleeve. It turns the MIDI Out port into a MIDI Thru. This means that TR-8 will take any incoming MIDI messages (including clocking information) and re-transmit them verbatim.
Application : This is great in a small ecosystem where you need to pass MIDI from one device to another in addition to clocking information from the TR-8. In many cases, this single option can eliminate the need for external MIDI routing hardware such as signal splitters or mergers.
Signal Boost – Step 3 Button
Lit – On; Unlit – Off
This setting boosts the levels coming out of the MIX Out, A, and B jacks.
Application: If you are using TR-8 in a live situation, like pushing it through a DJ Mixer channel, you may want additional gain on the machine. However, for studio use, you can turn this setting off – it will likely clip in your DAW.
External In Type – Step 4 Button
Lit – Stereo; Unlit – Mono
This setting dictates whether the External In jacks operate as a single stereo input or dual mono inputs. In stereo, the inputs are hard-panned left and right. In mono, they are both panned center.
Application : You can connect a mixer, media player, or groovebox and retain the stereo imaging. Inversely, you can also connect any combination of external devices – for example, two synths.

Scatter Control Type – Step 5 Button
This decides how the Scatter function will behave. On means Scatter is engaged only for as long as the ON button is held. Off means Scatter is engaged and disengaged by separate button presses.
Application : This is purely preferential. Personally, I like the ON setting because on the rare occasion I use this function, it is often very quick.
MIDI Message Reception – Step 6 Button
Lit – Clock only; Unlit – Clock and Start/Stop received
This setting decides whether or not TR-8 will ignore Start/Stop messages when receiving MIDI clock information.
Application : This is helpful if you are sending Start/Stop to other devices in your MIDI ecosystem, but need TR-8 to keep going. Personally, I use TR-8 as a slave device most of the time, so I keep this button unlit.
Pattern Sequencer Operation – Step 7 Button
Lit – Precision Timing; Unlit – Timing modeled by TR-808
The original 808 had considerably loose timing, especially when you consider it’s supposed to be a computer of sorts. At higher tempos, the original TR-808 actually drifted in time before resetting itself at the start of a loop. This actually influenced the sound of early jungle and drum-and-bass music.
This option on the TR-8 allows the user to decide whether they want precise, bang-on timing or loose, drifting 808-style timing.
Application : This is also preferential. It largely depends on what type of feel you are going for.
Hi Hat Link – Step 8 Button
This option allows for both the Closed and Open hi hat to be controlled by the CH controls. It specifically links tuning and volume, which makes sense. In the real world, they are two sounds produced by the same piece of kit.
Application : This streamlines hi hat programming by marrying settings that often are changed by the same amount at the same time. Leave it unlit for greater control over your hi hat sounds.
Scale Operation – SCALE Button
This setting controls how easily the user can change the rhythmic scale in a live situation. When this option is engaged, the user must hold down the SCALE button and cycle through the scales with the TEMPO knob. When disengaged, the available scales are cycled with each press of the SCALE button.
Application : For the love of God, make SURE this option is engaged. It is far too easy to accidentally press the SCALE button in a live situation. And if you do, you will regret it. Your beat will immediately fall off and the only way to get it back is to restart the sequencer. I dare say that 90% of you will use one scale anyway. (Four-to-the-floor, of course!)
Assignable Outs A and B – A Button and B Button, respectively
Hold Down A; Hold Down B
This allows the user to reassign instruments to one of the two alternate outputs on the TR-8. When neither is held down, the focus buttons of the instruments assigned to the MIX Out will light up.
To reassign them, hold down the desired output and press the desired instrument’s focus button. It will light up. When you release the A or B button, it will go dark, indicating that the instrument is no longer assigned to the MIX Out.
Application : This setting is great for studio use. It allows you to group your instruments to up to four isolated tracks. In live settings, this can be used to isolate your kick drum for independent processing or to key a side-chained compressor.

Screen Saver – TAP + Tempo Knob
Hold down TAP, turn TEMPO
This specifies the length of idle time until the “screen saver” (sweeping patterns of lights across the face of the machine) switches on. The screen saver stops as soon as you press something on the device, and you are returned to wherever you left off.
Application : This is another preferential setting. It really doesn’t affect the operation of the machine, but it may be a good idea to turn it off in a studio setting.
Sequencer Programming Mode – TR-Rec Button
Lit – Pad; Unlit – INST
This setting decides how the user accesses weak (ghost) notes in TR-Rec mode.
When this setting is active (lit), you need to press the step button twice to access a weak note, thrice to switch the note off.
In INST mode, you would hold down the focus button of the appropriate instrument in order to input a weak note.
Application : Another preferential application. This has to do with how you like to work. Personally, I like to program with a simple ON/OFF functionality. If I want a weak note, I’ll use the focus button.
Effect Mode – KIT Button
Lit – effect types are saved per kit; Unlit – effect types are globally applied to all kits
There are many different types of effects available for the Reverb and Delay sections. This option allows the user to use specific effects for specific patterns.
Application : This is most useful for live players, as it allows the user to call up different effect types for different situations.
Color Scheme – DEPTH button
This allows the user to choose from multiple color schemes for the Sequencer Panel. Each color scheme also changes the colors denoting ghost notes. Some are more visible than others. Press START/STOP to confirm your selection.
Application : Purely preferential. I recommend using a color scheme in which ghost notes are easily identifiable.
Other Settings
Some settings on TR-8 are accessible at any time via button combinations. Here are some key settings available outside of the “hidden” options menu:
Instrument Pan – Drum Select INST Mode + Instrument Focus Button + TEMPO Knob
You can pan all of your instruments any way you see fit. The pan setting will be displayed in the Tempo window. Note that these settings only apply to instruments assigned to the stereo MIX Out output.
Application : This is used to add width to your drum machine in the overall mix. Many will pan their instruments to reflect what a real drum kit may sound like.
Instrument Gain – Drum Select KIT Mode + Instrument Focus Button + Tempo Knob
This allows you to set the maximum volume attainable with your instruments’ faders.
Application : Just as in any sound situation, gain staging is crucial to a good sound. The best practice here is to adjust your gains with your faders maxed out. This way you can ensure no clipping occurs, and you can mix your kit so you won’t have to worry about weak or overbearing sounds.
Local Control and MIDI Controller Modes
While sequencer is STOPPED, LAST STEP Button + SCATTER Knob
This mode allows the user to choose when, if at all, TR-8 produces its own sounds.
Local Control ON allows TR-8 to make its own sounds, in addition to being triggered by external devices. (This is where most people want it).
Local Control OFF disables TR-8’s internal sequencer and pad play functionality, only sounding off at the command of incoming MIDI signals.
MIDI Controller Mode completely disables on-board sound production, only allowing TR-8 to send MIDI signals. Essentially, this renders the TR-8 a (very complex and capable) MIDI controller.
These past articles have been quite long, I know, but they are important. The TR-8 is an incredibly deep, versatile machine. In order for one to unlock its potential, one must gain a deep understanding of its logic and functionality.
Now that we have covered the TR-8’s physical layout, basic operation, and system settings options, we are ready to dive into situational use. The forthcoming articles in this series will cover the key settings and connections needed in order to properly assimilate the TR-8 into an electronic ecosystem – be it a studio system, a live electronic system (with or without a computer), or a hybrid DJ system.
Additionally, we will cover performance techniques and tricks for unleashing this powerhouse of a rhythm machine in any setting.
Until next week, Audiomunk
Missed the earlier parts in this series? Check them out below!
- Part 1: Introduction
- Part 2: Layout and Overview
- Part 3: Basic Operation
Share this:

Discover more from Audiomunk
Subscribe now to keep reading and get access to the full archive.
Type your email…
Continue reading
You must be logged in to post a comment.
Roland TR-8S Rhythm Performer review
The flagship aira drum machine gets a major update and added sample playback.

MusicRadar Verdict
An excellent update that builds on the success of its predecessor in all the right ways. The best Roland release in some time.
Sample capabilities dramatically add to the flexibility.
Far deeper sound shaping and effects than those of the original TR-8.
Extra variation modes and automation add considerably to the sequencer.
Added depth means that it loses a little immediacy.
Effects are decent, but lack a bit of character.
Auto-Fill mode gets old fairly quickly.
MusicRadar's got your back Our team of expert musicians and producers spends hours testing products to help you choose the best music-making gear for you. Find out more about how we test.
Roland ’s original TR-8 certainly wasn’t without flaws, but it managed to capture the fun, tactile experience of jamming out on a classic X0X groovebox.
While Roland’s later Boutique TR-08 and TR-09 boxes look, function and - debatably - sound closer to their original inspiration, both are held back by their small and slightly fiddly interfaces.
On the other hand, the TR-8, with its chunky sequencer buttons, sturdy rotaries and individual channel faders, felt ready to be bashed and cranked in a manner similar to the way artists like Jeff Mills or Egyptian Lover handle their original machines. It’s pleasing then, to see Roland return to the TR-8 format for a follow-up that builds upon the original and addresses most of its flaws and foibles.
The most significant change here is the addition of sample playback. The original TR-8 was built entirely around Roland’s Analogue Circuit Behaviour (ACB) tech, which emulates the circuitry of the original hardware units on a component-by-component basis. That same technology is still at the heart of the TR-8S, providing models of the 808, 909, 707, 727 and 606. This time around though, these emulated instruments are joined by sample tracks.
Any of the TR-8S’s 11 instrument tracks can be assigned to either an emulation or a sample, meaning that, alongside the expected pure emulation kits, the drum machine comes equipped with plenty of interesting hybrid kits, with lots of scope for mixing and matching the two sound sources. Those core ACB tracks once again offer high-quality, largely convincing recreations of the original boxes they’re based on.
We’re not going to get too bogged down on the authenticity of these sounds here. Due to multiple design iterations, production quirks and decades of wear and tear of the original machines, trying to establish an ‘authentic’ sound can be a murky business. Plus, we’ve become so accustomed to hearing these sounds processed, sampled or emulated, that there can be a bit of a difference between what people expect from an X0X box and what the originals actually sound like.

Interestingly, with the TR-8S, Roland seems to be acknowledging this somewhat by offering multiple variations on many of the sounds. For instance, we get a total of 11 ACB kicks, offering different takes on each instrument, including two ‘long’ variations of the 808 kick, as well as punchy ‘attack’ and bass-heavy ‘low’ variants of the 909. Suffice to say, the TR-8S certainly offers sounds that tick all the important boxes for what we expect from Roland drum machine emulations.
As with the original TR-8, we’re sure opinion will remain divided, but for our money you’d be hard pressed to find better sounding emulations of these drum machines elsewhere. The ability to mix these up with sample tracks adds dramatically to the drum machine’s flexibility though.
There are over 300 preset samples onboard and, although the TR-8S can’t act as a sampler itself, users can import their own sounds via an SD card (both mono and stereo, in WAV or AIFF format). Even without adding any additional samples though, the TR-8S is generously packed with an impressive range of sounds.
Roland’s Aira branded gear has sometimes tended to skew a little too hard toward the EDM/big room end of the spectrum when it comes to preset sounds. Those bases are still covered, but they’re joined by a broad range of tones covering analogue beats, vinyl stabs, retro FX, melodic one-shots and much more. It’s not just the range of sounds that have been upgraded from the original TR-8, but also the depth of shaping.
As with the original, each track has its own level fader, along with front panel controls for the tuning and decay of the sound. Here those are also joined by an assignable CTRL rotary, which can be set to control one of a list of parameters for each track accessed via the top right menu screen. Thanks to this screen and its associated controls, it’s possible to go much deeper into the setting of each sound than on previous versions.
As well as the front panel parameters each track also has editable gain, pan, reverb and delay send levels as well as an assignable LFO per-track. Some sounds have their own unique parameters too: kicks have an adjustable attack setting, snares have a ‘snappy’ parameter, and toms have an adjustable ‘colour’ setting, controlling the length and ambience of the sound.
One of the most significant upgrades for the TR-8S is the addition of six assignable outputs alongside the main stereo outs. This total of eight jack outs still doesn’t quite equate to one-out-per-track, but it does feel like a big step up from the original’s four outs. What’s more, the process of assigning outputs is much easier here; with the original TR-8, directing an instrument to an auxiliary output involved switching the machine off and on again to access a boot menu, here assignment can be made from the screen, meaning you can adjust output assignments without breaking the flow of a session or performance. Each of these outs can also act as trigger out, for routing to external analogue gear and other hardware. There’s also an additional mini-jack trigger out too, in the style of those on Roland’s recent Boutique machines. As before, there’s also a stereo pair of audio ins. These can be used as an external audio sidechain, or to process audio with the auxiliary or master effects. The TR-8S also has a USB connection. As with the original, this allows for MIDI over USB, as well as allowing the unit to act as an audio interface with individual outputs for each.
Sample tracks have a number of additional menu parameters too, allowing users to adjust the base tuning, rate and envelope shape of the playback. Samples can also be shaped with their own high/low-pass filter, which has its own AD envelope, along with a bit reduction effect, and spread setting that offsets the left and right channels to create a stereo widening effect. Beyond these parameters, each track now has an insert effect slot. This can be filled from a list of 12 effect types, covering multiple types of filter and EQ, a transient shaper, compression, drive and bitcrushing.
Each effect has multiple parameters to shape and tailor the sound, with primary ‘performance’ parameters - filter cutoff, drive level, etc - that can be assigned to the front panel CTRL knob, automated or modulated by the track’s LFO. In addition to these individual track effects, the TR-8S also features delay and reverb auxiliaries and one master effect slot.
Both the auxiliaries feature multiple effect types, and the master effect slot features 19 options, again featuring a host of filter and EQ types, multiple flavours of distortion, compression, two transient shapers, as well as a phaser and flanger.
On the whole the quality of these is solid, if not always inspiring - the EQs, filters and compression are great shaping tools but don’t impart much in the way of character, and the distortion and drive lacks a little warmth for our taste. We’re not one of those who gets hung up on Roland’s refusal to release an analogue X0X reissue, but this is the one area we do feel the TR-8S shows its digital roots - the addition of a master analogue distortion or drivable filter would really set some of these sounds off.
Beyond the sounds, the sequencer sees a number of improvements too. The main is the addition of eight variation modes for each pattern. The original TR-8 had two chain-able pattern variations, labelled A and B. Here that’s bumped up to A to H, which can be chained, or triggered in any assortment of combinations to mix up and rearrange longer patterns. The other major sequencing enhancement comes from the addition of parameter automation. This allows front panel parameter changes to be saved as part of a sequence. These can either be record live or input on a step-by-step basis. These features really enhance the TR-8S’s potential as the hub of a live setup; making it possible to program and play back long beat tracks.
The new Fill functionality is great too; this allows two of the A to H variations to be assigned as Fills, which can be punched in manually or automatically to add breaks or interest to your patterns. The TR-8S also gains an Auto-Fill mode. This is essentially an evolution of the original’s Scatter effect, which can insert automated randomisation. This works fine, although personally we’d get tired of the effect pretty quickly - it’s no match for programming your own fills and turnarounds.
Finally, it’s worth saying that the TR-8S also addresses one of our other (slightly fickle) bugbears about the original TR-8: its garish green trim. The new sleeker, matt black chassis is much easier on the eye. The one thing we’d say though, is that its new flat profile - as opposed to the slightly angled top panel of the original - is less convenient when using the drum machine at desk level in the studio.
On the whole though, the TR-8S is excellent. It builds on the potential of the original in all the right ways. The added depth does lose a little of the immediacy - we miss the front panel controls for snare snap and kick attack - but the trade off is balanced well overall, creating a machine that’s far more flexible but still intuitive and, most importantly, a lot of fun to use. It’s nice to see Roland releasing a ‘heritage’ product that’s also packed with new ideas and doesn’t get bogged down in revisiting the past.

I'm Editor-in-Chief of Music Technology, working with Future Music, Computer Music, Electronic Musician and MusicRadar. I've been messing around with music tech in various forms for over two decades. I've also spent the last 10 years forgetting how to play guitar. Find me in the chillout room at raves complaining that it's past my bedtime.
Alex Lifeson and Geddy Lee are still jamming together: "We’re actually playing a lot of Rush songs" – but there are caveats
"One of the largest collections of music production software in the world": Native Instruments unveils NI 360 subscription platform
"The G5024E delivers a rich, resonant tone typical of dreadnought guitars but with a distinct clarity and brightness": Gretsch G5024E Rancher review
Most Popular

Rhythm Performer
Authentic TR-808 and TR-909 Experience in a Modern, Performance-Ready Instrument

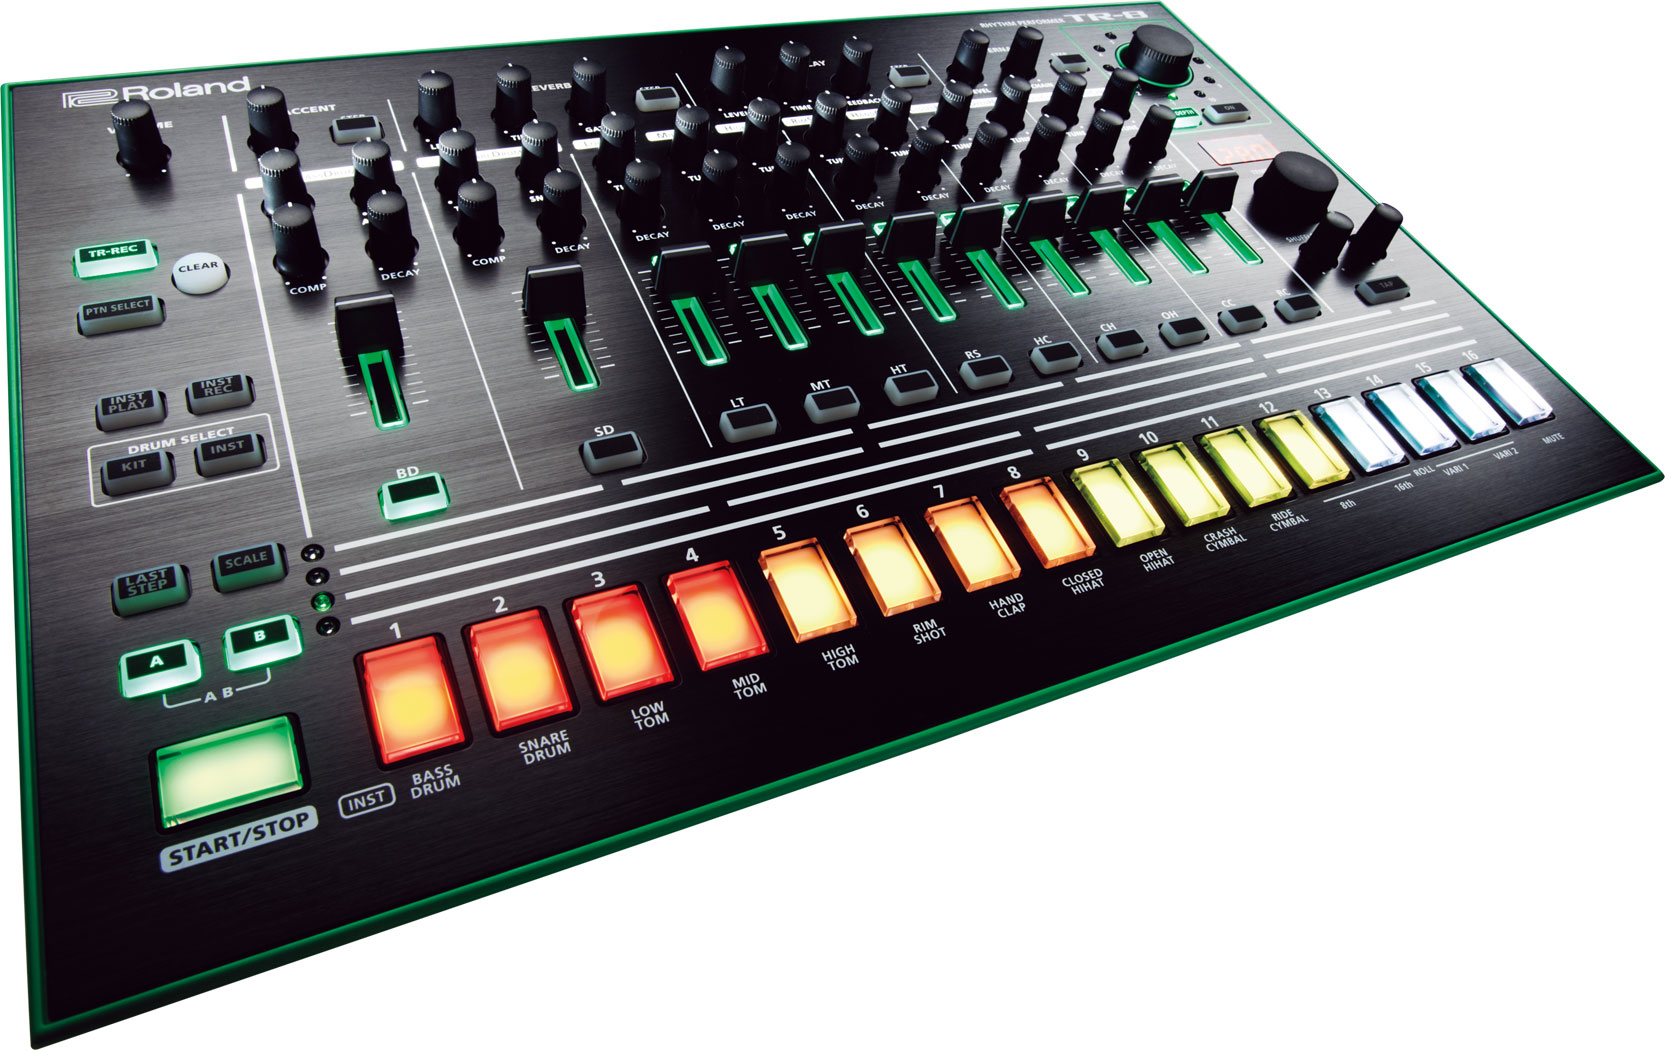
The TR-8 is a performance rhythm machine that melds the legendary sound and vibe of the TR-808 and TR-909 with features and functions for the modern age. Genre-defining sounds, classic effects, unprecedented live pattern manipulation, and solid, intuitive performance controls. It’s the TR…evolved.
Capturing the Originals
- Full reproduction of the classic TR-808 and TR-909 rhythm machines, based on original design spec sheets and detailed analog circuit analysis of many original TR machines, including Roland’s own pristine units
- Newly developed Analog Circuit Behavior (ACB) technology allows part-by-part analyses and faithful recreation of tonality and behavior, including the smooth variations of tone that occur when you work the controls of each instrument
- Obsessive attention to detail, such as reproducing the original TR’s unique variations in tone that occur when multiple instruments are entered in accented steps
- Authentic 16-step sequencer with faithful TR-REC behavior, including A and B pattern variations and the ability to play instruments and record to steps in real time
- 16 stunning kits made up of 11 instrument types, including custom dream kits that use both TR-808 and TR-909 sounds
- Large Tempo knob with Tap Tempo button and continuous Fine and Shuffle adjustment knobs
- Control the intensity of the Accent function with a dedicated knob
- Per-step reverb and delay effects with dedicated knobs
- Mix sources connected to the External In jacks with built-in per-step Side Chain function for rhythmic ducking and gating effects
- Scatter lets you freak and tweak your grooves with real-time control and perfect sync
- 7 segment, 4 character LED display and 16 per-step pads with bold, full-color LEDs
- Real-time pattern creation up to 32 steps with on-the-fly step count adjustment
- Rec/Play modes have been eliminated, enabling seamless switching between step input and real-time pattern making and performance
- Real-time play of 4 different types of rolls (8th, 16th, VARI 1, VARI 2) and per-instrument mutes
- Pattern copy and pattern randomization for rapid, spontaneous creativity
- Two assignable analog outputs and full parallel outputs via USB for total mixing flexibility

The Lineage
Unleashed upon an unsuspecting world in the 1980s, the TR-808 and TR-909 produce arguably the most influential drum sounds in modern music. Not only have they appeared on thousands of dance tracks over the course of three decades, they’ve helped define the sound of entire musical genres. From rap and house to techno and trance, the TR-808 and TR-909 have left an indelible mark on the art and culture of music. Roll the drums…
In developing the TR-8, we’ve obsessively analyzed and faithfully recreated every detail and nuance of the analog circuitry of these legendary rhythm machines—the boom and snap of the 808; the thud of the 909; the robotic click of an 808 rim shot or a classic 909 snare roll. It’s all here. But not content with mere recreations, we’ve enhanced these classic instruments with capabilities that go far beyond the original units.
Tune and Decay knobs are now present on every instrument, and the Bass Drum and Snare Drum have additional controls such as Attack, Snappy, and Comp. This allows for a wide variety of tones, from subtle ambient percussion to pounding dance grooves. Per-step effects and the massively addictive Scatter function take things into entirely new territory.
With the authentic tone and character of the original units and new sound-tweaking capabilities inspired by legions of users, the TR-8 breathes new life into the sounds we all know and love.

Make no mistake—the TR-8 has been carefully designed from the ground up as an instrument to be played. Every control has a solid, predictable feel, with each drum instrument having robust, “playable” faders. Numerous lighted knobs and RGB buttons give both real-time performance feedback and a striking appearance on stage.
Pattern creation is creative and intuitive using an evolved version of the TR-REC method, which originated in the TR-808 and eventually became the standard for electronic rhythm programming. Based on detailed analysis of the original TR-808, the TR-REC behavior has been faithfully modeled in the TR-8. But the TR-8 goes well beyond the original, allowing you to seamlessly switch between programming and performance modes, and to introduce lots of groovy rhythmic variations from subtle snare fills to total glitch meltdowns.
What Is Scatter?
Scatter is a unique performance function that gives you detailed real-time control over variations in your patterns and any incoming external input signal.
- Scatter can reverse, glitch, gate, truncate, stutter, and perform all manner of rhythmic variations from subtle to extreme, and all in perfect sync
- Pick from 10 different types of Scatter and smoothly adjust the intensity—or “Scatter Depth”—with the large, comfortable dial
- Seamlessly switch between Scatter patterns and quickly toggle Scatter on/off for cool variations when and where you want them
Try it…you’ll like it!
A Few More Things
The TR-8 looks great and is designed to work seamlessly with other products in the AIRA series. In addition, you can connect the TR-8 to your computer via USB to send and receive both audio and MIDI data, including MIDI clock information for syncing with external devices and other AIRA units.

TR-8 Version 1.1 New Features
Backup and restore.
- Manage your kit and pattern library with easy backup and restore over USB.
Improved Playability
- Instrument Levels — Customize kits by adjusting the gain of each instrument to suit your individual style.
- Better Rolls — Rolls are now easier to engage, offer more control, and sound better overall.
- Scatter Latch On/Off — Alternate unlatched trigger mode engages only while “On” button is held down.
- Scatter Cycle — Scatter will enable for one cycle and then automatically disengage.
- Sync Reset — Get back in the groove by instantly starting a pattern from the top.
Improved Editing
- Pattern Lock — Lock the contents of a pattern so you can experiment without losing your original groove.
- Nonstop A/B Pattern Editing — Now you can edit both A and B parts of a pattern without stopping the sequencer.
Improved MIDI
- Modes — Local On/Off and MIDI Controller modes determine how MIDI data is sent and received.
- Accent Velocity — MIDI velocity is variable by the accent setting.
- Kit Select — Select kits using MIDI control change messages.
- Scatter — Scatter On/Off, Type and Depth can be controlled via MIDI control change.
- External Record — Record patterns in real-time from external MIDI devices.
- MIDI Off — Disable sending of all MIDI messages.
- Ignore Play/Stop — Toggle whether or not TR-8 responds to PLAY/STOP messages.
- Effect Control — Control effects using MIDI control change messages.
User Drum Kits 16 User Patterns 16 Steps per 1 measure 1 – 16 steps x 2 (Variation A/B) Tempo 40 – 300 Instruments & Controls BASS DRUM: LEVEL, TUNE, ATTACK, COMP, DECAY, INST SELECT SNARE DRUM: LEVEL, TUNE, SNAPPY, COMP, DECAY, INST SELECT LOW TOM, MID TOM, HIGH TOM, RIM SHOT, HAND CLAP, CLOSED HIHAT, OPEN HIHAT, CRASH CYMBAL, RIDE CYMBAL: LEVEL, TUNE, DECAY, INST SELECT Effects and Controls ACCENT: LEVEL, STEP REVERB: LEVEL, TIME, GATE, STEP DELAY: LEVEL, TIME, FEEDBACK, STEP EXTERNAL IN: LEVEL, SIDE CHAIN, STEP Mode TR-REC, PATTERN SELECT, INST PLAY, INST REC, DRUM KIT SEL, DRUM INST SEL Controllers VOLUME knob SCATTER knob TEMPO knob FINE knob SHUFFLE knob PADS: 16 MODE buttons: 6 CLEAR button VARIATION buttons: A, B SCALE button LAST STEP button START/STOP button SCATTER ON button SCATTER DEPTH button TAP button Power Switch (Rear) Display 7 segments, 4 characters (LED) Effects REVERB, DELAY, SIDE CHAIN Scatter Types: 10 Nominal Input Level -10 dBu Input Impedance 100 k ohms Nominal Output Level -10/+4 dBu (Selectable) Output Impedance MIX OUT, ASSIGNABLE OUT: 1 k ohm PHONES: 130 ohms Connectors PHONES jack: 1/4-inch stereo phone type MIX OUT (L/MONO, R) jacks: 1/4-inch phone type ASSIGNABLE OUT (A, B) jacks: 1/4-inch phone type EXTERNAL IN (L, R) jacks: 1/4-inch phone type USB port: USB type B (Audio, MIDI) DC IN jack USB Audio, MIDI Power Supply AC adaptor Current Draw 1,000 mA Accessories Owner's manual Leaflet "USING THE UNIT SAFELY" AC adaptor Size and Weight Width 400 mm 15-3/4 inches Depth 260 mm 10-1/4 inches Height 65 mm 2-9/16 inches Weight 1.9 kg 4 lbs. 4 oz. * 0 dBu = 0.775 Vrms
Video Library
Sp-404a & tr-8 performance.
Watch the powerful combination of sampling and rhythm synthesis with the Roland SP-404A and Roland AIRA TR-08 Rhythm Performer in this video.
AIRA Introduction
With roots in the very origins of electronic music, AIRA is the new series of products designed to meet the evolving needs of today's electronic musicians.
TR-8 Tutorial
A short tutorial on the TR-8 Rhythm Performer.
Movement Detroit 2015
The Roland AIRA crew headed to Movement in Detroit - a city integral to the history of electronic music and to our history as a company.
AIRA in Miami
The Roland crew hit Miami Music Week with AIRA, and we thought we’d show you some of what happened. We shared AIRA with a lot of big artists, and, as you can see, it caused quite a stir and blew a lot of minds.
Movement Detroit 2014
The Roland AIRA crew headed to Movement in Detroit—a city integral to the history of electronic music and to our history as a company. AIRA gear was in lots of the performance rigs, keeping the music thumping and the crowds jumping.
On Stage with Example
Roland caught up with Kai Smith and Andy Sheldrake of Example during Ultra Festival in Croatia.
Analog Circuit Behavior
Go behind the scenes and learn how Roland's newly developed Analog Circuit Behavior (ACB) faithfully captures the sound and feel of some our most revered classics.
Artists First Contact
Groundbreaking artists talk about their experiences with Roland instruments and make first contact with the AIRA gear.
Artist Interviews
Artists Arthur Baker, Ricardo Villalobos, Hardfloor, Netsky, Dr Meaker, A Guy Called Gerald and Boys Noize talk about their experiences with Roland instruments and discuss the joys and challenges of performing electronic music live.
TR-909 Rhythm Composer
Roland engineers discuss the technologies involved in getting the right sounds for the successor to the TR-808. The TR-909 Rhythm Composer evolved from the TR-808, adding digital samples and MIDI. House and Techno were born. Now the next step begins.
TR-808 Rhythm Machine
Roland Engineers discuss the initial concept of the TR-808 which was conceived and built in 1980. Although it was designed to create “backing tracks,” creative musicians started to use the Rhythm Machine as an instrument and music changed forever. Now the evolution begins again.
MX-1 with Ableton Live and TR-8
Armed with only a few sustained sounds from Ableton Live and a TR-8, KiNK shows how the MX-1 takes electronic music performance to the next level.

Mathew Jonson Interview
Mathew Jonson interview and exclusive content. Read more…

TR-8 and Effects — Part 3: Modular Effects

TR-8 and Effects — Part 2: Pedals

TR-8 and Effects — Part 1: Onboard Effects

The Ultimate Guide to the AIRA TR-8 Rhythm Performer

Nate Morton: My TR-8 Setup for the Voice

CB-BTRMX Black Series Instrument Bag
Custom carrying bag for the TR-8S, TR-8, and MX-1.

RH-A7 Open-Air Headphones
Enjoy All the Dynamics of Your Digital Piano, Day or Night.

RH-D20 Monitor Headphones
Light and comfortable headphones with 40mm drivers and rotating earpieces.

RH-A30 Open-Air Headphones
Premium Open-Air Headphones with a Wide Range of Applications.

RH-200 Monitor Headphones
Clear, Accurate and Comfortable for Studio-Quality Monitoring.

RH-200S Monitor Headphones

RH-300 Monitor Headphones
Premium Closed-Back Studio Headphones for Pro Level Monitoring.

RH-5 Headphones
Headphones for Everyday Music Making and Audio Playback.

RH-iE3 In-Ear Headphones
Attractive in-ear headphones with deeper bass and extended frequency performance.

7X7-TR8 Drum Machine Expansion for TR-8
Every sound of the TR-707 and TR-727 Rhythm Composers, faithfully reproduced using the original PCM wave data and detailed models of the original circuitry.

M-100 AIRA Headphones
Designed and built by V-MODA in collaboration with Roland, the Crossfade M-100 AIRA is an audiophile-quality headphone for users of Roland’s AIRA range of electronic instruments and effects.
Updates & Drivers
Tr-8 system program (ver.1.61), tr-8 driver ver.1.5.1 for windows 10/11, tr-8 driver ver.1.5.0 for windows 8.1 / 7, tr-8 driver ver.1.5.5 for macos sonoma 14.x, tr-8 driver ver.1.5.4 for macos big sur 11.x / monterey 12.x / ventura 13.x, tr-8 driver ver.1.5.3 for macos 10.15, tr-8 driver ver.1.5.2 for macos 10.13 / 10.14, tr-8 driver ver.1.5.1 for macos / os x, tr-8 driver ver.1.0.1 for windows 8.1/8/7/vista, tr-8 driver ver.1.0.0 for mac os x 10.6.8/10.7/10.8/10.9, mathew jonson drum kits and patterns.
If you have questions about operating your Roland product, please check our Knowledge Base for answers to the most common questions. You can also contact our Product Support through Roland Backstage . In addition, we have a library of Owner’s Manuals and Support Documents that you can download and reference.
Owner’s Manuals
Tr-8 owner's manual, tr-8 update, roland tr / serato dj pro connection guide, tr-8 midi implementation chart.

- Roland Manuals
- Operation manual
Roland TR-8 Operation Manual
- Manual (27 pages)
- Quick start manual (4 pages)
- Update procedure (3 pages)
- page of 1 Go / 1
Advertisement
Quick Links
Related manuals for roland tr-8.

Related Products for Roland TR-8
- Roland TL-16
- Roland TD-25
- Roland TurboStart VS-880
- Roland V-Drums TD-02
- Roland Rhythm arranger TR-66
- Roland Rhythm Composer TR-505
- Roland TR-77
- Roland TR-909
- Roland TR-606
- Roland TR-707
- Roland TR-626
- Roland TR-727
- Roland TR-808
- Roland TRI-Capture
- Roland TR-808M
- Roland Aoutique TR-09
Rename the bookmark
Delete bookmark, delete from my manuals, upload manual.
Roland TR-8 Rhythm Performer system settings
Updated on February 5, 2018
To access the system settings for the Roland TR-8 Rhythm Performer , hold the [PTN SELECT] button while powering the unit on.
Press the [START/STOP] button to save your settings and restart the TR-8.
MIDI Local On/Off and MIDI Controller mode
This setting is available during normal operation while the sequencer is stopped.
Turn the [SCATTER] knob while holding down the [LAST STEP] button.
This setting is available when the 7x7-TR8 Drum Machine Expansion has been installed. ↩ ↩ 2 ↩ 3 ↩ 4 ↩ 5
- Cheat Sheets
Published by Nig on 07 May 2015 at 12:56 pm
Power on modes
The TR-8 has a number of different modes available depending on what button is depressed when the power is switched on. These are described in the following table.
Press and hold the button in the left-hand column and power on the TR-8 to get into the desired mode.
The different modes and the functions available are detailed in the sections below.
Factory Reset
Press and hold CLEAR and power on.
Display shows ‘rSt’ Press START/STOP button. When display shows ‘CNP’ power off (Scatter wheel LEDs flash).
Press and hold PTN SELECT and power on.
START/STOP button flashes, the instrument LEDs and pads 1-4 are lit and the display shows C10.
Change the MIDI Channel
C10 refers to the MIDI channel used by the TR-8. To change the channel rotate the TEMPO wheel. The channel number is updated in the display as the wheel is turned.
Assignable Outputs
The TR-8 has two assignable outputs along with the main ones. Any combination of the instrumts can be set to use the outputs. This means that some additional external effects, say, can be used on selected instruments.
The instrument LEDs that are lit show those instruments that are routed via the main audio output. Press the A/B buttons to set individual instruments to the assignable outputs. A refers to ASSIGNABLE OUT A. Press and hold A and select the instruments to be routed via output A. Release the A button and the the instrument LEDs will return to show the main output routing. Any instruments that have been changed to use the assignable outputs will no longer show as lit when neither button A or B are pressed.
The operation for OUTPUT B is the same as for A.
PAD Functions
The pads 1-7 have specific functions when in setup mode:
PAD 1 – MIDI Clock source
- LIT – Clock is derived either via MIDI or USB. USB has priority
- UNLIT – Clock is internal
PAD 2 – MIDI THRU
- LIT – MIDI THRU is ON
- UNLIT- MIDI THRU is OFF
PAD 3 – Audio signal boost
- LIT – Output level boost is ON
- UNLIT – Output level boost id OFF
PAD 4 – External audio mode
- LIT – Input is STEREO
- UNLIT – Input is MONO
PAD 5 – Scatter Mode
- LIT – Momentary
- UNLIT – Latched
PAD 6 – MIDI Play/Stop messages
- LIT – Disabled
- UNLIT – Enabled
PAD 7 – Sequencer timing mode
- LIT – TR-8 uses precise timing
- UNLIT – TR-8 emulates TR-808 timing
Screensaver
Enter SETUP mode, press and hold TAP. By default, the display will show the number of minutes inactivity until the screensaver comes on. The default is 5.
Turn TEMPO wheel to adjust time. When display shows OFF, screensaver is disabled.
Colour Scheme
Enter SETUP Mode, press and hold scatter DEPTH button and turn scatter wheel to select colour pattern.
1 is the default 2 is a dimmed version of the default 3 thru 6 change the instrument pads to various colour schemes.
Press the START/STOP button to save any changes. The TR-8 will restart.
Firmware Update
To perform an update:
1. Power off the TR-8 2. Press and hold STEP 1 pad, then power on the TR-8. All of the instrument LEDs flash. 3. Connect a USB cable to the TR-8 The BD instrument LED and STEP 1 buttons flash and the TR-8 appears as a drive on the PC. 4. Copy the system file from the download directory into the TR-8 drive. When complete, eject the drive from the PC and disconnect the USB cable, then press STEP 2 pad. 5. When the update completes, power cycle the TR-8 to start the new firmware.
Pattern and Kit Backup and Restore
1. Power off the TR-8 2. Press and hold STEP 2 pad, then power on the TR-8.0 If there is no USB cable connected to the TR-8 when powered on, all of the pads are lit solid green. Connect a USB cable and the STEP pads flash in a zarjaz, alternating coloured pattern, the BD and RC LEDs come on with the other instruments LEDs flashing one after the other. The Scatter wheel LEDs flash. 3. The drive that appears in the PC now contains two folders, BACKUP and RESTORE. The BACKUP folder contains 32 files, sixteen kit (TR8_KITn.PRM) files and 16 pattern files (TR8_PTNn.PRM). To backup these files, copy them to another drive/folder on the PC. 4. To restore kits and patterns, copy the required files from the PC to the RESTORE folder on the TR-8 drive. Note that the files you copy must follow the same naming format as shown above. In addition, note also that kits and patterns in the RESTORE directory will overwrite whatever is currently stored in the TR-8. 5. Disconnect the USB cable. 6. Wait until the light display changes from the flashing rainbow pattern and the pads turn green, restart the TR-8.
Saving Patterns
There is no explicit save function on the TR-8. Any changes to patterns are automatically saved to the current pattern. This includes any kit, effect or accent changes. Because of this, there is no undo function either, so it is not possible to revert back to an original pattern once changes are made. The only way to ‘undo’ any changes is to remove them from the current pattern.
It is possible to lock patterns from being changed in the TR-8’s storage however and this is done by applying a LOCK to the pattern. To lock a pattern, press and hold the PTN SELECT button and turn the TEMPO wheel so that the display shows LocK. To unlock a pattern, press and hold the PTN SELECT button and turn the TEMPO wheel so that the display shows OFF.
Copy Patterns
In order to copy patterns play must be stopped.
Press PTN SELECT. Select the PAD corresponding to the pattern to be copied, then press the PAD to paste the copied pattern to.
This page has the following sub pages.
- TR-8 Creating Patterns
- TR-8 Patterns
No Comments Yet
Comments are closed.
- Search for:
Recent Posts
- MC101/707 v1.71
- Roland MX-1 Mixing Manual
- Zenology Pro offer on Roland Cloud
- MC-707 Random Patches
- MC-707 Cheatsheet
Recent Comments
- alex st-louis on TR-8 Creating Patterns
- Nig on MC101/707 v1.71
- luc on MC101/707 v1.71
- Maarcin on System-1 Patches
- fortunehappy on TR-8S
- TB-3 Editor
- TB-3 Patterns
- TR-8S Samples
- SH-101 Patches
- System-1 Patches
- Promars Patches
- SYSTEM-8 Patches
- January 2021
- November 2020
- September 2020
- December 2019
- November 2019
- December 2018
- November 2018
- October 2018
- August 2018
- August 2017
- December 2016
- November 2016
- October 2016
- September 2016
- October 2015
- August 2015
- EFX Modules
- Entries feed
- Comments feed
- WordPress.org
Aira Info Copyright Nig © 2024 All Rights Reserved.
Thanks to WordPress Theme Land !
- 'How To' Articles , Product Guides
The Ultimate Guide to the TR-8S Rhythm Performer
- Guest Blogger
- March 12, 2019

Since the introduction of the legendary TR-808 in 1980, and the TR-909 in 1983, Ro-land TR drum machines have been used to create countless hit records, and have contributed to the development of entirely new genres of music. In 2014, the Roland TR-8 Rhythm Performer brought us incredibly accurate ACB recreations of the 808 and 909 sounds, and a performance-oriented control surface. The hugely popular Roland TR-8S continues that evolution, with major enhancements to the feature set and performance controls, a sleek new look, and the ability to load your own samples. This ultimate “how to” guide includes everything you need to know to get the most out of your TR-8S, both on stage and in the studio. The articles below include videos, diagrams, along with more detailed descriptions and tutorials. There are also some useful pro tips scattered throughout!
How To: Create Your Own Patterns and Kits
Electronic music production software has become increasingly powerful over the last decade. One side effect of this is that sometimes the process itself can be an impedi-ment to creativity. Producers are now more often looking outside the computer and their preferred digital audio workstation for inspiration.
Music creation on the TR-8S is intuitive and straightforward, with a wide variety of kits and tools readily available. The first section of this guide focusses on basic operation of the drum machine to help you get started. You’ll be creating inspired grooves in no time at all!
Playing live with the TR-8S
Creating complex beats with automation and lfo’s, sculpting your kit to make it unique, using your tr-8s with other gear.
The TR-8S integrates perfectly into almost any studio environment! It connects with other Roland AIRA devices, your computer via USB, and other MIDI devices (synths, drum machines, controllers, etc.). The assignable audio outputs double as trigger out-puts, enabling the TR-8S to control synths that receive trigger input. The external in-puts on the TR-8S can also receive an audio output from another device, process it us-ing the onboard effects, and mix it with the TR-8S sounds. For more details, see the articles below:
Apply Sidechain FX to another Instrument using External In Utilize Mono and Stereo Input with EXT IN Make the Most of the MIDI Features Utilize Analogue Outputs and Trigger Outputs Recording TR-8S as Separate Tracks to Your Computer Backup your Creations
Roland TR-8S Rhythm Performer v2.0 Update: FM Synthesis, New INST FX & More
The Roland TR-8S v2.0 Update adds a powerful FM sound engine that brings a whole universe of sonic textures to the modern drum machine classic. Unlock the power of FM with the new MORPH feature—an ultra-expressive macro control that lets you sweep through an array of tonal variations, wildly manipulating FM depth, ratio, and feedback…all with a simple twist of a knob. Also, in the TR-8s v2.0 Update is a new RELOAD feature that lets you immediately jump back to your previous settings with a simple shortcut. Not only does this save time getting back to your initial sound, but you can use it as a performance feature for build-ups and transitions. RELOAD also works for PATTERNS, TRACKS, FADERS, and KNOBS too. After adding layers and layers of instruments to your pattern, jump back to your original saved pattern with a simple shortcut! We’ve also added a few more INSTRUMENT FX in v2.0 to inspire your next drum sound designs. Add SATURATOR to give more warmth and drive to your drums or use SPREAD to give them a 3D feel. FREQ SHIFTER and RING MOD work perfectly with the TR-8S FM sound engine providing everything from smooth bell-like tones to harsh, clangorous noise depending on your mood.
Visit roland.com for more details on the Roland TR-8S v2.0 Update:
➤ PRODUCT INFO: https://www.roland.com/au/products/tr-8s/ ➤ DOWNLOAD UPDATE: https://www.roland.com/au/products/tr-8s/downloads/
Article written by Alex Marlowe

Related Products

Related Posts

The Ultimate Guide to the TR-8S Rhythm Performer – Create Movement with the LFO
The LFO is an often overlooked feature of the Roland TR-8S that has a great deal of power and flexibility to modify the sound of

The Ultimate Guide to the TR-8S Rhythm Performer – Recording TR-8S as Separate Tracks to Your Computer
The Roland TR-8S includes the functionality of Multitrack Transfer over USB. This is very useful if you want to take your grooves and transfer Individual

The Ultimate Guide to the TR-8S Rhythm Performer – Create Flams and Adjust Flam Spacing
Flams are created on the TR-8S in manner very similar to Sub Steps. For a refresher on Creating Sub Steps, take a look at the

The Ultimate Guide to the TR-8S Rhythm Performer – Applying Reverb to Your Kit and Instruments
The TR-8S provides a lot of flexibility in how you can apply reverb to your Kits and Instruments. The performance-oriented design allows you to set
Want to hear about the latest news, products, offers, and have the chance to score some amazing freebies from Roland & BOSS Australia?
Please let us know which of the following products you are interested in.
Or Keep In Touch
- Boss Australia
- Roland Pro A/V Australia
- BOSS Tone Central
- Roland Apps
- Featured Products
- Synthesizers
- Guitar & Bass
- Drums & Percussion
- Accessories
- Updates & Drivers
- Owner's Manual
- Support Documents
- Quick Start Video
- Power Adaptors
- Support News
- Warranty / Consumer Guarantee
- Company Overview
- Roland Australia
- Corporate Strategy
- Privacy and Cookie Policies
- Employment Opportunities
DEALER LOGIN
Sign up to download this td-50 custom patches.

IMAGES
VIDEO
COMMENTS
Configure the Channels. Ensure the TR-8 has all outputs sequentially connected to the audio interface. Open a DAW, and create 4 mono audio tracks with inputs 1-4. The Assignable outs are ready to go, but now the remaining drums need to be configured. By hard panning Left and Right, we can use the MIX OUT as separate outputs.
Use the [VALUE] knob to select the KIT:OUTPUT "BD"-"RC" parameter, and press the [ENTER] button. 3. Use the [VALUE] knob to select the jack that you want to assign, and press the [ENTER] button. 4. Press the [KIT] button. Exit the KIT Edit screen. All It's possible to assign instruments in your TR-8S to individual outputs via the ...
First to make sure the TR-8S is configured for Audio Output on all 8 Outs: Press Utility to view the Utility Screen. Hold Shift and turn the Value Knob to select Mix Out and press Enter. Turn the Value Knob to select the Mode, Normal or Boost, and press Enter. Turn the Value Knob to select Assign Out 1 and press Enter.
Turn the Value Knob to select the ASSIGN OUT Number of each additional Assignable Output on which to send Triggers, press Enter and select TRIGGER. PRO TIP You can create a Pattern of Triggers which will be sent to the Mini-Plug Trigger Output Jack on the rear panel of the TR-8S.
The Roland TR-8S Beginner's Guide. How to assign a channel/instrument to one of the 6 assignable outs and use the external in. Simple step by step explanatio...
Assignable Outs A and B - A Button and B Button, respectively. Hold Down A; Hold Down B. This allows the user to reassign instruments to one of the two alternate outputs on the TR-8. When neither is held down, the focus buttons of the instruments assigned to the MIX Out will light up.
The 7X7-TR8 Drum Machine Expansion contains some instruments that contain an alternate sound e.g. the 707 bass drum has both BD1 and BD2 in the same step. This allows you to create more complex patterns and variations by accessing more sounds. ... (A or B) ASSIGNABLE OUT. Once you've set your sound how you want, press START/STOP to save your ...
Using the ASSIGNABLE OUT/TRIGGER out Jacks as Trigger out. Assigning an Instrument to the ASSIGNABLE OUT/TRIGGER out Jacks. Inputting an External Audio Source (EXT IN) ... 7x7-tr8 drum machine expansion (1 page) Drums Roland TR-8 Update (2 pages) Drums Roland TR-6S Parameter Manual.
A quick video on how to set up your assignable outputs as trigger outs. This will allow the trigger data to be sent through the Assignable Out and the instru...
One of the most significant upgrades for the TR-8S is the addition of six assignable outputs alongside the main stereo outs. This total of eight jack outs still doesn't quite equate to one-out-per-track, but it does feel like a big step up from the original's four outs.
MIX OUT, ASSIGNABLE OUT: 1 k ohm PHONES: 130 ohms Connectors PHONES jack: 1/4-inch stereo phone type ... 7X7-TR8 Drum Machine Expansion for TR-8. Every sound of the TR-707 and TR-727 Rhythm Composers, faithfully reproduced using the original PCM wave data and detailed models of the original circuitry.
14. 6. MEMO. In this operation guide, functions added by installing the TR-8 update (ver. 1.10, ver. 1.11) and. 7X7-TR8 Drum Machine Expansion are printed in red. 1. [VOLUME] knob. Adjusts the output volume of the MIX OUT jacks and the PHONES jack. * This does not affect the volume of the ASSIGNABLE OUT jacks.
To access the system settings for the Roland TR-8 Rhythm Performer, hold the [PTN SELECT] button while powering the unit on. Press the [START/STOP] button to save your settings and restart the TR-8. Specifies the MIDI transmit/receive channel. The display indicates the channel (default: C10).
Push [Utility] and scroll to "USB Audio" ASGN or INDIV. Selects the audio signals that are sent. from the TR-8S to the computer via. USB IN 1-2-IN 5-6. * The same signals as MIX OUT are. always sent to USB IN MIX. ASGN: The same signals as are being. output from the ASSIGNABLE OUT/. TRIGGER OUT jacks are sent to USB.
A refers to ASSIGNABLE OUT A. Press and hold A and select the instruments to be routed via output A. Release the A button and the the instrument LEDs will return to show the main output routing. ... The BACKUP folder contains 32 files, sixteen kit (TR8_KITn.PRM) files and 16 pattern files (TR8_PTNn.PRM). To backup these files, copy them to ...
The assignable audio outputs double as trigger out-puts, enabling the TR-8S to control synths that receive trigger input. The external in-puts on the TR-8S can also receive an audio output from another device, process it us-ing the onboard effects, and mix it with the TR-8S sounds. For more details, see the articles below:
How to setup tr-8S trigger out to use one of the great feature of the Roland TR-08S: the triggers. Of course there is the dedicated trigger out, but also eac...
Question in regards to the Roland TR8's assignable outputs. So Im aware you can have two groups running on the two assignable outs..does stuff assigned to those soley go to those, or does it head out the master outs too (otherwise essentially giving you 4 outputs). Im working out ways of grouping stuff up to bring into ableton in a live ...
Hi, I've been trying to use the assignable output A on my Tr8 as a trigger signal to my juno60 clock in. I used the rim shot sound to do it. It sort of ... TR8 trigger out When you buy products through links across our site, we may earn an affiliate commission. Learn more 📝 Reply Options. 27th October 2014 ...
An In-Depth look at Trigger Out on the Roland TR-8S. Connecting to, and setting up, the SE-02 and SH-01A boutique synths.Join us on Facebook at https://www....
The ideal would be sockets labelled things like BD, SD that automatically subtracted those instruments from the main mix. Which Roland managed to get right 43 years ago on the 808. *sigh*. ive been having the same problem, I just updated to version 3.0, did a backup>updated>factory reset got new kits> restored my patterns back, lost my kits to ...
So no stereo output possible? When making the settings you have to hold the variation A or B button and then hit the step button at the sidechain thingy. But when I have set the step button to light up when I hold A and then want to do the same for B, the step button will go dark for A again. So I always only have the audio output on one of the ...
About the TRIGGER OUT jack. The TRIGGER OUT jack outputs a trigger pulse. This can control an external device (like the SH-01A, TB-03) connected via a mini-plug (mono) to advance the steps in a sequencer or an arpeggiator. NOTE: Do not use a stereo mini-plug cable. It will not work correctly. TRIGGER OUT button, Use this to input a trigger out ...