
A Beginner’s Tutorial on Applying Light and Shadow in Art

- Last Updated: December 11, 2023

Art Ignition is supported by its audience. When you buy through links on our site, we may earn an affiliate commission. Learn More.
Light and shadow are some of the most powerful tools in your artistic toolkit. These fundamentals help you craft paintings that seem to leap out at the viewer.
The fundamentals of light and shadow in art are among my favorites. With just a few strokes of a pencil or brush, I can create something that feels real enough to touch. In fact, I’ll share a few tips I’ve learned along the way that greatly enhanced my understanding.
Just like any other art fundamental, you can break light and shadow into simple parts. My guide has easy-to-follow tutorials and essential terminology to get you on the path to mastery.
Step #1: Position Your Reference Under a Strong Light Source
Step #2: do a simple, fast sketch on paper, step #3: draw out light and shadow, step #4: start filling in each shadow with crosshatching, step #5: use your eraser to exaggerate highlights and create reflected light, tools you’ll need for this tutorial, step #1: position your reference under a bright light, step #2: draw your sphere onto the canvas or use transfer paper, step #3: consider drawing out your light and shadow, step #4: lay down the base colors, step #5: block in your shadows first, step #6: block in your light areas, form shadow core, cast shadow, reflected light, strong light and shadow will make your paintings feel real , how to shade a sphere in graphite.
Before you dive into complex subjects like humans or still lives, it’s easier to learn the fundamentals with a simple sphere. The toolkit for this tutorial is simple: just a pencil, paper, and an eraser.
While you can use any eraser, kneaded erasers are best since you can shape them like clay. This makes it easy to erase tiny areas or ‘lift off’ large areas.

Any kind of sphere will do. You can use a toy ball or something else round and shiny, like an apple. Just make sure your sphere doesn’t have patterns, designs, or anything else that could distract from the lesson.
Your first step is to place your reference under a bright light source to get the full effect of the tutorial. If your light source is too dim, you’ll miss out on subtle details such as cast or occlusion shadows.
Create a dedicated space for your sphere, such as a still-life box where you can shift different items around. While daylight is beautiful, it’s unreliable if you want to take your time. A desk light or nearby table lamp is more than sufficient.
Place your sphere on a light surface, like a pale rag or a light-colored table. This feature will do wonders for creating reflected light.
The sketch doesn’t need to be complex since we’re focusing predominantly on light and shadow. You can speed up this step by using a circular template or the bottom of a mug.
There’s no shame if you have difficulty creating a smooth circle – shortcuts like shape templates, rulers, and grids are staples of artists everywhere. In fact, stencils were used by some of the world’s oldest human societies .
One of my most valuable experiences in community college was learning to draw out light and shadow. Yes, you can draw out your cast shadow or soft light before shading!
Understanding light is easier when you view both light and shadow as their own shapes. You can trace out a single light source with a hard edge, just like you’d trace the edges of an existing drawing. You can then find dark areas and separate them with another hard edge.
This technique helps you figure out how you will approach your drawing with paint or crosshatching. While you’ll need to get comfortable visualizing the final piece, mapping out light, mid tones, and shadow takes some of the guesswork out.
Avoid getting wrapped up in the minor details of your spherical object or the surrounding items. Focus on bringing out the form in the sphere with the most basic light and shadow: highlight, highlight, core shadow, and cast shadow.
You don’t have to jump straight into the widest tonal range. It can be helpful to start light with the lightest mid-tones, then gradually darken toward your cast shadow. Going over your lines repeatedly will both darken and smooth out an area.
If you go too dark, too quickly, this approach can make it harder for you to erase your mistakes.
Once you block in the basics, you can transition into the more subtle areas such as the halftone, terminator, and center light. A combination of crosshatching and using your eraser will help you create softer transitions between light areas, mid-tones, and darker areas.
One of the most enjoyable parts of using an eraser is not just fixing a mistake but enhancing what’s on the page. Erasers allow you to carve out light by removing darker parts of your drawing.
Once your mid-tones and form shadows are in place, you can go back in with your eraser and lift graphite off the opposite end of the sphere. This trick is fantastic for simulating bounce light or ambient light.
How to Shade a Sphere in Paint
Art’s fundamentals of light and shadow translate well from pencil to paint. However, you should know a few nuances depending on the type of paint.
Shading a sphere with acrylic, oil, or gouache also doesn’t need many mediums – just your surface, paint, and brush. I also recommend a pencil, eraser, paper, and transfer sheet for getting a sketch onto your surface.
If you use oil paints, you’ll need an oil like walnut, poppy, or safflower. If you prefer acrylic or gouache, just water.
While you can use additives to speed up or slow down drying times, you won’t need them for this simple tutorial.
Similar to the first tutorial, you’ll need a bold light source and something reflective on the bottom or side for reflected light. Bright light not only creates more exaggerated form shadow and cast shadow, but it also enhances your colors.
Again, I don’t recommend an item that’s covered in splashy details or tons of different colors. A smoothly colored ball, apple, or orange is a straightforward option for this exercise.
Since the subject is a circle, either directly drawing onto the canvas or using transfer paper is suitable for a beginner. Again, I recommend using a template to save you time.
Like with the graphite tutorial, you can also map out your light and shadow before you paint. Once you’re ready to paint, you’ll cover up this linework gradually.
In the video above, you can see the artist lightly mapping out the borders between lighter areas and shadows before fully committing to the darkest part.
The next steps will also show you how to map out light and shadow as well as paint the rest.

Laying down flat colors without any blending or changes in light/shadow is more than acceptable for now. This step also helps overcome hesitation when starting a painting since it’s just filling in your linework.
However, that’s not to say this step doesn’t teach you anything. Laying down base colors crisply within your linework will be a lesson in motor control. You’ll also have some good practice accurately capturing the color or shades of your subject.
It’s also important to pay attention to how your paint interacts with the surface. Acrylic paint dries quite fast, while oil paint takes longer. Gouache also dries fairly fast, but you can make it wet again if you add more water.

I recommend starting with shadows for three main reasons. First, they’re more dramatic to the eye and pop out at the viewer much more intensely than pale light.
The second reason is that the dark-to-light technique is widespread in multiple painting mediums, particularly oil and acrylic. This step will give you a great head start in crafting light and dark areas in a way that makes them pop.
Lastly, the shadow side – whether cast shadows or general dark tones – are nice and straightforward. There’s nothing wrong with starting things off easy as you get your feet wet with a complex art fundamental.
Try using a little oil or water to help your paint glide along the surface here. While a little blending between form shadows and core shadow is fine, don’t go overboard. You want to get comfortable with shadow shapes first before you dive into the buttery details.

Once all of your shadows are in place, your flat surface will already start looking more three-dimensional. It’s time to gather up your direct light by adding in the basic hard light and highlight of your sphere.
While using a little water or oil is terrific for shadows, light sources can benefit from both dry and wet. In fact, the dry brush technique does well for subtle areas such as center light. Since the effect is soft and loose, it stimulates the subtlety of light well.

Fan brushes are useful for getting down a subtle half-tone or mid-tone with little effort. The soft edges do much of the blending for you and can create some truly buttery light.
However, wet paint is best for sharp highlights so you don’t dilute the paint at all. Many artists (myself included) will dab a speck of paint onto the palette, and then work directly from it.

Light and Shadow Terms You Need to Know
While light and shadow in art have many complex terms, the basics below will give you a well-rounded perspective. In fact, you can already create powerful and three-dimensional paintings with just these five.
The highlight is the brightest spot of light and closest to the direct light source. Use an extra visual example to portray this (such as a shiny spot on a person’s nose).

The Milkmaid by Johannes Vermeer is a stellar example of light and shadow in art. You can see the direct light source in the upper center and right of the illustration.
Notice how the area brightest on the subject is her forehead and head covering. In contrast, the shadow side on the direct opposite of the light source darkens the tablecloths and far wall.
Becoming comfortable with these light and dark areas is easier when you understand how value in art works .

Girl With a Pearl Earring is another work by Johannes Vermeer you should study to understand light and shadow. This portrait shows incredibly subtle halftones along the subject’s cheek, nose bridge, and clothes.
This is a subtle part of the light and shadow spectrum, transitioning from the lightest area to the darkest area – basically, the ‘gray’ area. If you want to know the impact well-placed light and shadow can have on an audience, just read up on the enduring legacy of this portrait .
If you’ve ever admired how soft and seamless the transitions between light and shadow are, consider trying your hand at sfumato. This term refers to a technique that focuses on softening up colors and adding faint blurring to create an enchanting effect.
While the first two terms refer to relatively soft areas of a subject, the form shadow core is where things get heavy and dramatic. The form shadow core refers to the darkest parts of the shadow, a feature that halftones often blend into.

Sacred and Profane Love by Giovanni Baglione demonstrated the raw power of the form shadow core and how it can be used for multiple purposes. Not only does the light hitting the subjects make them pop out vividly, but it also sets the stage for an intense atmosphere.
A dark background with subjects ‘peeling’ out into the light is the basis for many bold and ferocious Renaissance paintings. In fact, this piece is also an example of a Renaissance painting technique known as chiaroscuro, an approach that used light sources to breathtaking effect .
Cast shadow is one of the easiest terms to remember since it’s the dark shadow beneath an object or a subject. In fact, it tends to be one of beginner artists’ first introductions to light sources in art.

The Night Watch by Rembrandt used cast shadows to accentuate the dark and mysterious atmosphere of one of his signature paintings. It’s important to remember that light and shadow exist in direct relation to each other – you literally can’t have one without the other.
The cast shadow beneath the two central subjects makes the surrounding light pop out even more. It also helps create the illusion of perspective by leveling out the ground beneath them – without these cast shadows, they would appear to be standing on mushy, undefined ground.
Reflected light is one of my absolute favorite places to paint because it really rounds out a subject. This term refers to the light bouncing off a nearby object back onto the subject.

Flaming June by Frederic Leighton is a masterwork of how light reflecting onto a subject makes them feel much more alive. Look closely at the subject’s folded arms and how her vivid orange dress ‘bounces’ back onto her skin.
While the painting would still be stunning without it, the light coming off her gown lends an extra layer of warmth and nuance that’s true to life. Reflected light (also known as bounce light) is also unique in how it can blend into a halftone or bleed out of an occlusion shadow. This term really gives you an appreciation for how lively light and shadow is.
The rest of the painting is also cloaked in an ambient light that makes everything feel a little dreamlike. As you continue along your art journey, you’ll learn more about all the large and small ways you can add depth to your illustrations .
Learning your way around light sources will make your art feel more alive than ever. Whether you’re sketching with a pencil or trying your hand at oil, this fundamental is brilliant at bringing your inner worlds to life.
However, it can still be daunting to understand more complex elements such as multiple light sources or subtle mid-tones. Was this article helpful? Sign up for Evolve Artist, an online resource with one-on-one feedback that will help you grasp light and shadow in art even more.
Featured Image: Source
Related posts:
- Top 15 Best Oil Painting Mediums (With How To Choose Guide)
- What is Tempera Paint? An In-Depth Look at An Ancient Medium
- Acrylic vs Oil Paint: What’s the Difference?
- Oil Painting for Beginners: How to Paint With Oils
- How Long Does Oil Paint Take to Dry? Improve Your Drying Times
Like our Content? Share It With Other Artists
Article Written By

Let's Be Friends
Affiliate Disclaimer
Art Ignition is reader-supported. When you buy through links on our site, we may earn an affiliate commission. As an Amazon Associate we earn from qualifying purchases.
Copyright © 2024 by Art Ignition
Art Instruction For Beginners - Online Art Lessons
Drawing Lesson – A Theory of Light and Shade
August 4, 2009 by Ralph S 52 Comments
A Theory of Light and Shade ©Sheri Lynn Boyer Doty
All Illustrations for a theory of light and shade are by Sheri Doty accept for Manet’s painting “The Railway” showing an undefined light source. Before you undertake your practice of the use of light and shade in your art you need to understand the significance that light and dark contrast has in making a painting or drawing visually believable.
Value is the term used to describe light, gray and dark tones.
Johannes Itten wrote “the contrast between light and dark is one of the most expressive and important means of composition.” Value contrast can be encountered in both colorful and non-colorful art renderings.” All neutral tones from white, black and all the gray tones between are called achromatic, meaning having no color. All tones that have some color are call chromatic. When investigating art in all its components, you must consider the relationship of value to other art elements, color, line texture and shape. All these elements must exhibit some value contrast in order to remain visible.
A simple Value Scale shows figure-ground relationship s

Figure-Ground is the condition in which backgrounds tone or hue changes the visual impact of the figure resting on it. The same hue or value appears to be a different depending upon the contrast of tone or hue of the background upon which it is placed. Conversely, two different tones or hues appear to be the same when placed on contrasting grounds. Each will have an impact on how believable your art will be perceived by the viewer. Most people have difficulty perceiving “figure-ground” relationships. When the same medium toned figure is placed on varied light and dark backgrounds, it will be perceived to be as a different value.Example: When a medium gray is placed on a near black background, the mid-gray tone appears very light. When the same gray tone is placed on a near white background, it is perceived to be very dark. But when a mid gray tone is placed on a similar value background, the contrast is minimal. Note how the same mid-tone value patch looks different when placed on backgrounds of contrasting values.
Chiaroscuro
Value describes volume and depth of space In Europe artists of the Renaissance were concerned with showing depth and volume in opposition to the artists of the Middle or “Dark Ages.” Men of the Renaissance considered their time period to be the Age of Reason and rebirth of artistic and mathematical achievements. Renaissance artists manufactured the term “Chiaroscuro” to describe how light and dark can imply depth and volume. The word Chiaroscuro is a combination of two Italian words that mean light and dark. (chiaro (clear, light) + oscuro (obscure, dark) Atmospheric or Ariel perspective was one of the artistic strategies used in the study of Chiaroscuro during the Renaissance. (Atmospheric or Ariel perspective is covered in depth in the section “Objective Color Harmony”.)
Chiaroscuro and the Illusion of creating intuitive space.

One of the most used and useful applications of value is creating the illusion of volume and mass on a two dimensional surface. When a mass is exposed to light, a solid object will receive more light from one side than another when that side is closer to the light source. A spherical surface demonstrates this as an even flow tone from light to dark. A cast shadow is created when the source of light is obstructed by the sphere. An angular surface shows sudden contrast of light and dark.
Intuitive Space is merely a trick the artist uses to create depth on a two dimensional surface.
“Intuitive space” is merely the illusion space created by using artistic methods to trick the viewer into seeing depth, volume and mass on a two dimensional surface. Intuitive space is sensed or ”felt” on a two dimensional plane. Intuitive methods of space control include overlapping, transparency, and other applications of spatial proportion. In a “Theory of Light and Shade” I will show how to create intuitive space by using “Light Logic”.
Light Logic refers to how light interacts with objects. Light Logic is the term Betty Edwards uses in her book “The NewDrawing on the Right Side of the Brain”
Light Logic and the Rendering of Three Dimensional Objects onto a Two Dimensional Surface.
You will make your art more believable when you keep these basics in mind.
A Light Source and Shadows
A light projected onto an object or figure creates lights, darks, and cast shadows. Your source of light may be the sun, the moon, a light through a window or an artificial light. When several light sources are present the light and dark tones vary and are less predictable. To simplify the study of light and shadow in this first section, I will use only one light source.
Two Kinds of Shadows
There are two kinds of shadows that occur when one light shines on an object, a cast shadow and a form shadow.

Cast Shadow
When an object blocks a light source it casts a shadow. A cast shadow is not a solid shape but varies in tone and value. The farther a cast shadow is from the object which casts it the lighter and softer and less defined becomes its edges.
Form Shadow
A form shadow is the less defined dark side on an object not facing the light source. A form shadow has softer less defined edges than a cast shadow. Form shadows are subtle shadows essential for creating the illusion of volume, mass and depth. The changes in form shadows require careful observation – quinting at the subject to see value definition affected by figure-ground making value relationships clearer.
A Light Side and a Dark Side on Round or Circular Surfaces

When one light source is present, I was taught the dark side is “always”darker than the light side of the object and the light side is “always” lighter than the dark side. Establishing a definite light side and dark side makes round objects appear round and defines the form of an object accurately. Use this simple trick to make your artwork more true to life, separate light tones avoiding figure-ground confusion.
THE LIGHT SIDE IN TWO PARTS

The lightest spot or streak is where the light strikes the subject in exactly the middle of the light side between the shadow edge and the edge of the object. A highlight can be shinny and crisp on a glass or metallic surface, or fuzzy and muted on a dull or textured surface.
Light middle tones
Note, to avoid confusion, “always” keep the values on the light side lighter than the values on the dark side. In reverse, the values on the dark side are darker than the values on the light side. It’s the middle tones on either side that confuse the artist’s eye in value relationships
The Dark Side in Three Parts
Form shadow in three parts, “shadow edge” or “core shadow”.
The edge where the light is blocked from the light source is the darkest value on the dark side. The core or darkest value blends into the middle tones from the shadow edge on round subjects.
Dark middle tone
The variable values blended form the shadow edge on the dark side. Again, the dark middle tones are darker than any values on the light side. The human eye can trick the brain into believing the lightest values on the dark side are the same as the darkest values on the light side. If the artist is confused about lights and darks, the rendering is less understandable.
Reflected light
If the object being painted is sitting on a white table, the light from the table reflects back onto the object and makes the shadow side lighter. If the object of the painting is resting by something black or dark, the middle values will become a dark reflection. The concept also holds true when the object of the painting is sitting on a colored surface. If the reflected light is reobject.
Cast Shadows

When the source of light is blocked by an object it casts a shadow. The length and shape of the cast shadow depends on the placement of the light source. Long shadows are cast from a side light source (as from the sun in late afternoon or early evening), and short cast shadows are cast from over head (as from a noonday sun). The shape a shadow casts depends on the shape of the object casting it and how close source is to the object.
CAST SHADOWS IN THREE PARTS
The vocabulary used to describe cast shadows in art come from shadow descriptions in astronomy. The umbra, penumbra and antumbra are the three distinct names given to the description of shadows cast by heavenly bodies. The umbra is the darkest part of a shadow considered the absence of light. The penumbra is a lighter outer shadow where the object is only partially obscuring the light. The antumbra is more obscure. When it is visible it seems to extend out from the penumbra in a lighter and less distinct way.

Light Source, Cast Shadows and the Axis

Cast Shadows The Sphere

The Cylinder and Cone

More on Cast Shadows

Too many complex cast shadows can be confusing. Such objects can be rendered by blurring the edges.
Daylight and Cast Shadows

Cast shadows of irregular shapes and in natural sun light are open for interpretation because of the constant changing sunlight: As you work on location, the sun will continue to advance and change what you are drawing. Note the place you would have the sun be positioned, and keep that constant to avoid a confusing spread of shadows. The nature of shadow is affected by weather, sunlight, moonlight, or artificial light.
Multiple Light Sources or an Undefined Light source
Multiple light sources or an undefined light source minimizes the gradation of values and flattens the sense of volume in three dimensional objects. Because of this lighting affect, artists such as Manet painted colors in flat areas neglecting the use of one light source to create shadows. An undefined light source causes a sense of shallow space. Some art critics believe this sense of shallow space to have paved the way for “nonrepresentational” uses of value and color.

Manet’s Painting, “The Railway” shows value contrast in composition, but the sense of shallow space is emphasized by a lack of a single light source.

Objects Have Light, Medium or Dark Values
Objects have an allover light, medium or dark quality. To make your representation more believable, you should take into consideration the light or dark value of each object. Before you render details, block in the value characteristics of each object. Using this strategy will save you time and achieve a more realistic result.

Value Schemes and Mood
You create a sense of mood or interest depending on the combination of values present in a work of art. When value contrast is limited to a small range of tonal variations the result is one of understatement and calm. “High Key” is the term used for a light value scheme. All middle tone values are in a “Medium Key” range.
And “Low Key” refers to an allover dark toned value scheme. Sharp value contrast evokes strong emotions in the viewer suggesting drama or conflict. Extreme value contrast in a value scheme refers to a style of chiaroscuro called “Tenebrism”.

Tenebrism – Violent Chiaroscuro
In the 17th century, a group of painters instituted the so called “dark manner” of painting. They were inspired by Michelangelo di Caravaggio. Rembrandt perfected this manner of Chiaroscuro. Tenebrism made value an instrument of strong contrast that lends itself to a dramatic and even theatrical style of using light and dark contrast. The tenebrists were interested in peculiar lighting causing mood or emotional expressionism. The deviation from standard light conditions into unexpected lighting locations creates unusual and special effects. This style is used today by photographers.
The analytical study of Chiaroscuro in the art of today
Using chiaroscuro to create excitement and interest in composition is a modern concept. Artists of the Renaissance were concerned with showing depth and volume on a two dimensional surface. The expression of light and contrast in old and new masterpieces reveal the continued importance of Chiaroscuro in art.
Notan is a Japanese word meaning dark-light. The principle of Notan is the interaction between positive (light) and negative (dark) space. This interaction is confirmed by the ancient Chinese symbol of Yin and Yang. This is represented by mirror images of one black and one white shape revolving around a center point. The positive and negative areas make a whole through a unity of opposites that are equal and inseparable. In Notan, opposites complement and do not conflict.

“An understanding of Notan traditionally has been and will be a requirement for mastery of any field of art. It enables the artist to compose a work in which all the parts relate to create a unity of visual organization, impression, or pattern. Notan enables the artist to achieve a Gestalt – or more simply to create a design.”Notan The Dark-Light Principles of Design by Dorr Bothwell and Marlys Mayfield
Lao-Tse wrote a poem that to me simply states the Essence of Notan:
Thirty spokes meet in the hub, but the empty space between them is the essence of the wheel.
Pots are formed from clay, but the empty space within it is the essence of the pot.
Walls with windows and doors form the house, but the empty space within it is the essences of the house.
The Principle: Matter represents the usefulness Non-matter the essence of things.
Poem taken from Johannes Itten’s book Design and Form, Revised Edition Basic Course at the Bauhaus and Later, John Westly & Sons, INC, page 13

Value as Pattern
Controlled shallow space is illustrated by the early cubists such as Picasso and Braques. Their paintings are taken from realistic subject matter and abstracted into unified flat tonal planes. The planes are shaded individually with the semi-illusion of space with no light source. Later, each plane takes on characteristic value combined with other planes with the same style of value pattern. This produces a carefully conceived two dimensional pattern of light and dark values. The shallow space develops a three dimensional effect through the characteristics of the advancing and receding values.
Decorative Effects of Light and Dark Contrast
Artists using the decorative effects of light and dark contrast ignore the use of the conventional tools of light logic all together. When light effects appear, it is often based on the total design of the artwork.

Compositional Functions of Value
Today most artists use value as a vital tool in pictorial composition. Value contrast is an intrinsic factor in pictorial organization, in showing dominance in design, creating two dimensional patterns, establishing mood and producing spatial unity. The effectiveness of a work of art or design is in large measure based on the use of value.
Resource Material : Ideas for this section came from my own experience, education and observations; “Basic Perspective for Artists” by Keith West; “Perspective Without Pain” by Phil Metzger, North Light Books 1988; The Basics of Drawing by Parramon Ediciones Editorial Team’ Barron’s Educational Series 1994; The Practice and Science of Drawing, by Harold Speed, Dover, first published in 1917 by Seeley, in London, reprinted by Dover,1972; Art Fundamentals Theory and Practice – Second Edition WM.C. Brown Company, Publishers/Dubuque, Iowa 1968 by Ocvirk, Bone, Ssinson and Wigg; Design Basics Fifth Edition, by David A. Lauer and Stephen Pentak, Wadsworth-Thompson Learning
Sheri Lynn Boyer Doty CPSA -Biography
Sheri Doty received a B F A degree in 1972 from the University of Utah with a painting and drawing emphasis. Having experimented with non-representational styles during her student years, Sheri preferred classic realism as thought by professor Alvin Gittons. He and the professors, under whom she studied, emphasized strong drawing and painting skills. Sheri is a faculty member of Salt Lake Community College and Peterson’s Art center where she teaches Fine Art and Design.
Sheri’s paintings have earned her awards in regional, national and international art exhibitions and invitational shows including purchase awards and permanent museum acquisitions. Sanford Corporation has used her artwork to showcase its PRISMACOLOR colored pencil product line internationally. Sheri is a charter member and signature member of the Colored Pencil Society of America [C.P.S.A.].
Sheri’s artwork has been published in numerous books including The Encyclopedia of Colored Pencil Techniques by Quarto Publishing, London England;Most of The Best of Colored Pencil series by Rockport Publishers, Creative Colored Pencil Techniques by Rockport Publishers, Creative Colored Pencil Portraits byri’s art work is included is Rockport Publishers and The Best of Portrait Painting by North Light Books, Dear Sisters by Covenant Communications Inc. Sheri’s artwork is published on book covers, in newspapers, periodicals, and exhibit catalogues.
People have been known to say, “She possesses a unique ability to paint the breath of life into her subjects – a gifted talent.” Because Sheri expresses not only the likeness of her clients but also their lifestyle, her portraits are in high demand. Sheri has also has prints and greeting cards on the market.
Sheri Says:
“The art professors under whom I studied had us draw and paint from live models and “open air” studies, not from photographs. To truly see and paint a subject, I need to see it from all angles. The human eye sees so much more than what is pictured in a photograph. I am glad of the rich ridged training I received from my teachers. I have married the use of photography and live studies to create my paintings. I take my own photographs as resource material employing a variety of ways to recreate what the human eye sees. My paintings are not exact reproductions, but an interpretation of life from my view as an artist.
“Thirty years of study and experience in this field has taught me that talent isn’t the reason for success in any endeavor. The keys to success are desire, perseverance and determination. But most of all, I depend on Father in Heaven’s influence. When I pray about what I paint, I can feel His help and guidance.”

Follow this link to visit Sheri’s website to view more of her work and to learn more about her.
August 4, 2009 at 4:34 pm
This is a great, comprehensive article! Once you understand how light works and how to shade basic shapes, drawing more complicated subjects becomes much easier. Thanks for this info! .-= Miranda´s last blog .. How to Draw the Nose – Tutorial =-.
August 5, 2009 at 5:00 am
This is a wonderful article…. thanks for sharing…
August 5, 2009 at 10:19 am
very complete article. Thank you. Judy
August 5, 2009 at 8:35 pm
This is a wonderful article, full of information. Good for beginners and also as a reminder for the rest of us. 🙂
Thanks. .-= Jo Castillo´s last blog .. Another Hunting Sketch =-.
August 6, 2009 at 5:38 pm
Great article, so much information,Thank you
August 11, 2009 at 6:20 am
it was very helpful
August 17, 2009 at 5:00 pm
Thanks for this excellent article
August 27, 2009 at 2:18 pm
I’ve been searching for such an article for so long. You’ve outlined things in a way that will make it much easier to understand and render what the eye sees. Thank you.
September 1, 2009 at 8:54 pm
the lesson is an artistic antacid for a creatively constipated artist. it is well cherished
September 8, 2009 at 4:17 am
Great articles and Thanks a million for the visuals. I did a painting a while ago and had some issues with the shading. I really wish I had seen this article back then. Great stuff. Keep it coming!!! Thanks…
September 22, 2009 at 11:04 am
basic knowledge of drawing is how to create light and dark sides of our object image and here I can get that knowledge -.
September 29, 2009 at 10:10 pm
I was actually looking for a word to describe light and dark as a concept and i think you article shed a little light on the darkness. Do you have any other word to describe light and dark as a concept. Thanks
April 23, 2010 at 9:52 am
A very comprehensive article. Many of my vague concepts were cleared.
May 1, 2010 at 2:17 am
tried a lot to understand light n shade…..this article made me clear about many confusions i was goin thru!!! thnks a lot [o_0]
May 11, 2010 at 6:08 am
This is a brilliant article Sheri. My son is currently studying art at A-Level and doing brilliantly. Sketching is his favourite side of art and this will be invaluable.
July 15, 2010 at 3:37 pm
Great stuff! keep up the good work, ilook forward to reading more of your articles
July 19, 2010 at 3:30 am
thank u for ur explanation on light and shade.being a fine art student am have been confused on Chiaroscuro.his article made me clear about many confusions.thank u once agail Sheri.
October 5, 2010 at 2:07 am
Feel like I am in class with my teacher again. 😉 Thank you for this great lesson.
November 6, 2010 at 2:51 am
i am quite new to painting, and am always scared of color combinations not knowing if one chosen would really work. this article has developed my understanding of paint and its shades. immense gratitude and thanks to the author for putting it simply to dummies like me.
March 12, 2011 at 7:40 am
This is absolutely informing. I had a great time with this lesson. I struggled a lot with how light hits an object, particularly with the angles of light. Thank you.
March 31, 2011 at 8:57 pm
I loved the lesson. I bookmarked for future referencing. I’m new to drawing and art; but, I’m not wasting any time to understand every viable principle in art to achieve great and realistic work. Thank you!
May 5, 2011 at 6:47 pm
Sheri, I have never seen drawing explained quite like this. I love how you talk about the different angles of light and shadows.Again Awesome! Thank you for the awesome article!
June 25, 2011 at 10:31 am
Perhaps the most thorough explanation of value and it’s importance that I have found. In my opinion, value is the most important element of art.
June 25, 2011 at 10:04 pm
thanks for the help! wonderful article. 🙂 i have now my assignment in drafting.
July 14, 2011 at 2:38 am
I like your lesson on Light and Shadow. I need to find more lessons and learn to improve my drawing skill on internet.
August 23, 2011 at 10:28 pm
I’ve been an art instructor and illustrator for more than 20 years. What is your source for the impressionist theory of painting flat surface planes? Value has always been a vital tool and multiple light sources were not a big concern with impressionist painters as a group. Impressionism developed from the idea of using tonal shapes reflected on the retina of the eye versus the more sculptural painting and drawing of most Renaissance Masters whose works depicted form as 3D objects identified in space by touch and ‘sympathetic touch memory’. Impressionists identified every tone shape as a light and assigned a color value to the brightest tint and deepest shade. Color temperature and chroma exceeded value and volume as a painting concern for most impressionists. They were interested in depth as the relationships of color value shapes juxtaposed in space. Light source, like value is inseparable from representational works and was unavoidable, just not a primary concern.
September 26, 2011 at 5:17 pm
This is really a good article! Very impressive and helpful.
Best Regards, Vlad
October 26, 2011 at 1:26 pm
Brilliant article, I’ve bought a few recommended books on the subject, but this made things much clearer to me, thank you 🙂
January 22, 2012 at 6:44 am
You have laid the cornerstone upon which the building of all art rises. When this is understood, really, then all doors of creativity and confidence are opened; freedom of ones expressions now unfold.
January 24, 2012 at 11:36 am
Thank you do much for sharing! Great article and it really helped me.
January 26, 2012 at 5:18 am
I would like to ask you a Q. What do you think it is that the quality of the light effects the value of color?
May 11, 2012 at 5:52 am
Beautiful article, nice presentation.
September 28, 2012 at 4:54 pm
Excellent tutorial on light and shadow! Thank you.
November 23, 2012 at 9:03 am
This website is known as a walk-by means of for all the info you wished about this and didn’t know who to ask. Glimpse right here, and also you’ll definitely discover it.
November 28, 2012 at 3:45 am
its very nice article,simple and clear.. thank u so much
June 17, 2014 at 2:08 am
This is the best article I’ve read so far, I wish they would explain the subject like this in art school…
Thank you so mach for this one.
June 17, 2014 at 2:52 am
I’m late to the party, but in case you’re reading this, THANK YOU!
December 13, 2014 at 3:36 pm
I stopped water coloring because I was making some great pictures, but I didn’t really understand how I was doing it. I decided to use graphite to train my eye and mind–wow, was it hard to get any information about how to observe what happens to light. I’d intuitively got the dark side, but yikes on the light–missing link was the distance of the light source. Thank you, thank you.
February 28, 2015 at 6:46 am
sorry. you just share some images about shade. U didn0t explain or teach to people the rules behind shade on perspective, or axonometry.
April 10, 2015 at 2:53 am
it was really of great help, felt like i was in a drawing class. Thank u.
June 21, 2015 at 9:47 am
This is what we call a complete art class Its actually better than my college lectures..Thankyou so much.You are a great artist 🙂 Regards
September 3, 2015 at 10:13 am
Excelente! Gracias Me ha servido mucho
January 1, 2016 at 11:06 pm
Muy completo e instructivo. Gracias
January 3, 2016 at 2:54 pm
De nada! Mercedes…
May 3, 2016 at 1:59 pm
awesome…thnx
December 13, 2016 at 6:27 am
KNOWLEDGE IS ALWAYS VALUABLE AND MUST CONTINUE ITS TRAVEL FROM ONE TO ANOTHER….. EDUCATION MUST BE FOR ALL ON “EQUAL RIGHTS” GROUNDS. THANKS TO ALL OF YOU.
May 26, 2017 at 12:59 am
thank you a lot .
January 2, 2018 at 4:14 pm
Uh, “Men of the Renaissance”? How about “Artists of the Renaissance” instead?
February 11, 2019 at 7:21 am
Dear Sheri, You are a great artist and a generous soul. Thank you so much for sharing these extremely important and useful basics.
October 17, 2019 at 10:21 pm
beside been pretty you are kind and virtue… because you are an excellent teacher ..!!
September 17, 2021 at 4:53 pm
I now know a fancy word to describe extreme light and dark, Chiaroscuro! This was a very comprehensive and completes my understanding of values, light, dark, medium shading in relationship to objects and people.
October 20, 2021 at 9:13 am
Informative and helpful
Leave a Reply
Your email address will not be published. Required fields are marked *

Beginner’s Guide to Light and Shadow for Artists
If you are just starting out in painting, one of the first areas I suggest you learn is how light and shadow work. It influences almost everything we do as artists – the colors we use, our compositions, our brushwork, how we render form and so on.
It is also one of the few aspects of art which is not that subjective because it is based more on science. With light and shadow, you either have it right or wrong. There is usually no in-between. This is handy for artists as so many other aspects are subjective by nature, like color and composition .
This post is a beginner’s guide to how light and shadow work. I will be painting an egg to demonstrate my points. I will cover:
What Do You Need?
Light and shadow terms, direction of the light and contour of the egg, block in light and dark, giving context to the egg and adding mid-tones, render with more detail, want to learn more, thanks for reading.
I’ll walk you through the entire process using one of my recent paintings. You’ll see how I go from idea all the way through to reflecting on the finished painting.

If you are a beginner, then you might want to follow along with this egg tutorial. Here is what I used:
- Burnt sienna and titanium white to represent dark and light.
- A reference photo of an egg (which you can download here ).
- A small canvas .
- A few medium sized filbert and flat brushes and a small round brush (you can learn more about brushes in this post ).

Before I go any further, I will run through some of the common light and shadow terms.

Light : Direct light from a light source.
Highlight : Where the light is directly bouncing off the object. This is usually the lightest part of the object. The position of the highlight varies depending on the position of the light and the viewer. If either of these move, the highlight will move (it is not fixed on the object).
Mid-tone : A range of tones which transition from light to dark.
Form shadow : Area of the object which is in shadow.
Cast shadow : Shadow which is left by the object (but is not on the object itself).
Reflected light : Light bouncing back into the form shadow from the surroundings.
Core shadow : Area of the form shadow which is not being hit by any reflected light .
There are some other light and shadow terms which I have ignored to make this a simple process.
First, you need to determine the direction, distance and intensity of the light. This influences the way light and shadow fall on the egg.
In this case, the light is coming from the upward left corner and appears to be close and intense. As a result, there is a sharp cast shadow.
I start by indicating where the light is coming from and drawing the contour of the egg and shadow. I am not that worried about how well I render the egg at this stage as I can easily fix mistakes in the wet paint later on if needed. I am really just trying to develop an understanding of the form and where the light and shadow is falling.

I then block in the light and dark areas of the egg. This is what you get when there are no mid-tones. Notice how little information is conveyed from this. You don’t get a sense of form without the mid-tones and it appears very flat.
This is kind of like a notan study , in that you get to see the most basic abstract design created by the balance between light and shadow. Once you introduce the mid-tones, this basic design can be difficult to spot.

I then did the following:
- I added context to the egg by painting in a dark background (otherwise the egg just appeared to be floating in space). This also allowed me to create an interesting pattern with the darks of the egg linking with the dark foreground.
- I started to add some basic rendering to the egg with mid-tones. Notice how much more information is conveyed with these mid-tones. Suddenly, it appears to be a round form rather than a flat surface. The balance of lights and darks has not changed, but now there is a subtle transition between them.
- I painted in the cast and form shadows, but I ignored any reflected light. As a result, there is no way to separate the dark of the egg from its cast shadow.

An interesting point from this tutorial is that the more you render the egg, the more realistic it appears. But, if you over-render the egg then you lose the distinct line between light and dark. It all just becomes a soft gradation of mid-tones. You will usually want to avoid this, even just for stylistic reasons. There are many benefits to keeping a strong notan design (strong lights and strong darks).
Below, you can see I rendered the transition from light to dark with more detail, but you can still tell there is a clear line between light and dark. I did not want to lose this line. Also notice how I took advantage of my brushwork to follow the form of the object.
I added reflected light to the form shadow (light which is bouncing back into the shadow). This is an important part which many people miss. The reflect light introduces light into the shadow, but you need to be careful that you do not compromise the integrity of the shadow itself. For stylistic reasons, you might want to consider darkening the core shadow and cast shadow rather than introducing white to the shadow itself.

Here are some of the key points from this tutorial:
- To accurately paint light and shadow, you just need to know the direction, distance and intensity of the light from an object. With this information you can reliably predict how light and shadow will fall on an object (this is not subjective like color and composition).
- Get familiar with the light and shadow terms as they will be used frequently throughout your art journey.
- Mid-tones give a sense of form to an object.
- The more you render the transition from light to dark, the more realistic the object will appear. But, this comes at the expense of distinct light and dark areas. Be careful not to lose that distinct line which marks the point where light goes to dark.
You might be interested in my Painting Academy course. I’ll walk you through the time-tested fundamentals of painting. It’s perfect for absolute beginner to intermediate painters.
I appreciate you taking the time to read this post and I hope you found it helpful. Feel free to share it with friends.
Happy painting!

Draw Paint Academy
About | Supply List | Featured Posts | Products
Dan Scott is the founder of Draw Paint Academy. He's a self-taught artist from Australia with a particular interest in landscape painting. Draw Paint Academy is run by Dan and his wife, Chontele, with the aim of helping you get the most out of the art life. You can read more on the About page .
Enjoyed this post? Join over 123,000 artists who subscribe to the Draw Paint Academy newsletter.
34 comments on “Beginner’s Guide to Light and Shadow for Artists”
Very helpful as always
Thanks Hetta!
Very understandabel! Viveca
Thanks Viveca
The assignment is hard thoo for meeeeeeeeeeeee
Thanks Dan. Love your tutoring. Stela
Thanks Stela! Glad to hear. Dan
I enjoy your posts!
Thanks Judy
Muy interesante y luz util,toda la información. Gracias
I will translate for others “Very interesting and useful light, all the information. Thank you”.
Thanks Jorge!
Hello Dan, I don’t have much time to paint so many things, but it is true: things need light and shadow will they are interesting and visible. kind regards Hans Peters
Thanks Hans
Thank you so much! You explain everything so well!
Glad to hear thanks Lavinia! Dan
Very good explanation. Thank you.
Thanks Jamie
Thanks…. very useful tips…. Sir…
No problem thanks Anagha
Thank you – your explanations and demonstrations are very useful to me as a beginner.
Thanks Heleen
Thank you !
No problem Cristina! Dan
A really good, clear explanation Dan thank you. A question, midtones and halftones are the same thing right? Thanks again.
Thanks Ben! Yes same thing. Dan
When I was taking a beginners class, we painted an egg. Although it was white, she explained the cast shadow and reflective shadow. Your article was great. It was a good class. Not as easy as it looks
Thanks Bonnie. It is oddly difficult.
Wonderful, thanks a lot.
Thanks Frances!
Thank you for explaining how to create a three dimentional form. Is midtone same as turning color. Thanks again.
Great explanation i will never look at an egg the same again thanks Dan
My pleasure Paul! Keep up the good work. Dan
This course is great. So much information and a great review of things I learned before and totally forgot.
Thank you! Your lessons are so clear -exciting as one considers the spiritual aspects of light and dark too . Learning art terminology for the first time .
Leave a Comment Cancel reply

How I Choose Subjects to Paint
October 30, 2023

European Masterpieces – Monet, van Gogh, Rubens, Velázquez, and More
October 22, 2021

A Closer Look at Gardanne by Paul Cézanne
November 9, 2021

Throwback to My Childhood Paintings
October 11, 2021

Clarice Beckett: Melbourne’s Quiet Observer
June 15, 2023

7 Tests to Check the Accuracy of Your Paintings
March 6, 2023

Light and Shadow in Art – The Fundamentals of Light, Part 1: The Science & The Basics Made Clear
The science & the basics.
I’m not sure many people fully appreciate the nature of what artists attempt to do each time we set out to render light and shadow in art. I know I haven’t, even when I’m in the middle of rendering, and I love light and shadow in art!
As I continue to dig into what light and shadow in art really is , I am awestruck and so thankful to all the scientists and artists who came before me—the giants upon whose shoulders we stand—because the subject of light and shadow in art is huge, and I am glad they already figured all this stuff out for us ?.
It is difficult not to get philosophical here because what we are really doing when we render light and shadow in art is re-creating the properties and behaviors of light in a 2D space—and those behaviors and properties encompass several sub-branches of modern Physics, including: Quantum Physics, Modern Optics, Geometric Optics, and Physical Optics.
Let’s take a moment to appreciate the fact that different aspects of light behavior and properties come under several different categories of Physics that are each quite involved areas all their own.
That was my not-so-subtle warning that The Fundamentals of Light–light and shadow in art– gets quite technical.
The understanding we gain for our art is totally worth it, and we need three things for sure: 1) Patience, 2) Plenty of visual examples, and 3) More than one post to go through the massive amounts of information.
For any of you who are much better scientists than I, please forgive any inaccuracies in my scientific understanding or explanation. I endeavor to be an expert artist, not physicist ? , but I do try to be as accurate and as clear as possible. If I get something wrong, please let me know in the comments and I will do my best to make corrections.
I hope you will hang in there with me as I break down the technical bits (that’s the patience part), I hope the examples and information I share help your practice, and that you’ll find it useful enough to look forward to the future posts in this series. Since this is the first, let’s start digging into to the science of light and shadow in art, shall we?
The Science—What is Light?
To understand how to render light and shadow in art we must grasp the concept of what light is and how it behaves .
Light is a type of energy created by the emission of photons within the electromagnetic spectrum. If that sounded like gobbledygook, fear not, I shall explain.
A photon is a “small bundle” of electromagnetic energy and the basic unit that makes up all light. Thus, photons are the building blocks of light.
Electromagnetic energy describes forms of energy that are reflected or emitted from objects as electrical and magnetic waves that can travel through space. The Electromagnetic Spectrum shown below describes these energies as frequencies and wavelengths.

The light effects we paint represent a fixed and narrow range of the Electromagnetic Spectrum called the Visible spectrum, which is a narrow group of wavelengths between approximately 380 nm (nanometers) and 730 nm.
As illustrated in the diagram above, The Electromagnetic Spectrum contains several other forms of light, however most of them are at frequencies we can feel but not “see”.
All light has both a frequency and a wavelength, and all light can behave as both a particle and a wave depending on the situation. In fact, both light and matter have particle-wave duality in their properties and behavior. It’s important for artists to understand this duality because it affects our thinking and problem solving regarding light at different stages during rendering.
When we begin to invent our images we must also invent our lighting. When we are mentally calculating the direction of our light source, its reflections, and fall off, it is helpful to think of light as particles, or rays, that travel in straight lines.
This helps us figure out how much of our object will be lit, how to place the form shadows and cast shadows, and where the bounce light will land. When objects are opaque, I have found considering light primarily as rays helps me best determine how to render the light.

When objects are translucent, transparent, or have variable reflectivity, things start to get more complex because light is not simply being absorbed and reflected but also transmitted through the object. Transmission of light through objects gives us more to consider and calculate because it gives us more to paint, like subsurface scattering, refraction, and more reflections.
Let me put your mind at ease and say it is not necessary to do any complex mathematic calculations to paint these effects, just some additional concepts to understand and visual calculations to make.

When we think about reflection, refraction, and absorption, it helps to think of light first as a particle or ray (for determining the light’s intensity, direction, and bounce) and then as a wave—for determining which wavelengths are reflected off, absorbed by, and/or transmitted through the object and the ground.
That was a huge mouthful, I know. I will be going over all of these more nuanced areas in other articles in this series.
Understanding the particle-wave duality of light begins to give us a clear view of how light’s behavior changes as it interacts with different materials. Watching the videos below helped me gain a clearer understanding of this concept, and I hope you find them useful, too.
As we bring together the elements we need to understand, we start to define the contours of The Fundamentals of Light (light and shadow in art) so that we can start filling in details and particulars—and don’t worry, there will be photographic examples and demos so all of this becomes more clear.
Properties of Light & Matter for Artists
I know this has been a little science-heavy so far, and that’s intentional. It is how I make sense of complex topics, and I hope you find it helpful. Now that we’ve covered the basics of what light is, I’ll change things up a bit to keep everything digestible. I’ll cover a little science and do some explaining, and then use photographic examples or demos to clarify how the information helps in creating art.
Next, let’s dig into the properties of light, but first I want to give you a list of all the properties to keep in mind whenever it’s time to render light. This is a list according to me, and they’re based on my experience rendering light in both 2D (Photoshop) and 3D (Maya).
Some of these are straightforward, so let’s talk about those briefly. The number of light sources is an important consideration because we need to know how much light information we’re working with. More light sources in a scene makes for a brighter image, but how each source affects the picture plane depends on all the other properties on the list.
The size and angle/height of each source are also straightforward properties and they ask questions like: Is a light source large, small, or medium? Do several small lights make up one larger source because of how closely grouped they are? Do these sources sit high or low on the picture plane? Are they even visible in the image, or are they shining from somewhere out of frame?
Under properties of matter, shape, form, local color, and material type are the most straightforward. We must know what shapes and forms make up the volume of the objects we’re rendering, and we need to know what color and material type they are. After all, there is quite a difference between painting a shiny chrome ball and painting a shiny colored plastic ball. Sure, they’re both shiny; but one is metal and ridiculously reflective while the other is plastic, softer, and much less reflective.

The Two Ways Our World is Lit
Despite all the science, properties, and moving parts involved with understanding how objects are lit, there really are only two ways anything receives light in our world: directly or indirectly.
Objects are either lit directly by a light source or indirectly by reflected light when the rays from the source bounce off some surfaces and objects to illuminate others. This kind of indirect lighting is also called Ambient Light and it is much weaker in comparison to direct light. Most lighting schemes will involve both direct and indirect lighting.
Next, we’ll go over the categories that light sources fall into.
Properties of Light – Types of Light Sources
There are 3 types of light sources:
A key light is the strongest light source in your scene. It defines the emotional impact of the scene and is the primary descriptor of forms and drama. When you decide how to “key” your scene, you are choosing the overall mood and tonal range that will define it.

A fill light is not as bright as a key light and is often softer and a lot darker. Fill lights support your scene and subjects by adding light and color information in the shadows, which can illuminate an area of interest you wish the viewer to see or just provide added interest or balance to your scene. Fill light can be ambient (reflected) light, as I’ve done in my examples below, or it can come from an additional light source(s).

A rim light travels the outer edges of objects. Rim light helps define shapes, add dramatic appeal, and can be a helpful tool for adding compositional information and/or emotional impact.

No matter what kind of mood a story or scene calls for, any lighting scheme will have at least a key light and, likely, some combination of all three light source types.
Okie dokie, how’re you doing? I know this has been a lot to get through, and I hope you’re still hanging in there with me. Deep breaths, we’ve got this!
Now, it’s time to go over some terminology to help keep things clear as we continue to move through the Fundamentals of Light (light and shadow in art).
Defining Terminology + Sphere Tests
Think of this as the glossary section of this post. Here I’ll define the frequently used terms that will show up quite often from now on in both my writing and the call-outs in demos and examples.
Light Source
Anything that creates and emits light. Light sources can be natural, like the sun, moon, and fire, or artificial, like lamp posts, flashlights, and device screens.
Light Direction & Angle
The orientation of a light source relative to the picture plane. For example, low and out of frame on the left, or mid-level and in frame on the right.
The intensity or strength of a light source. A high exposure light source makes for a brighter, “high key” scene, while a lower exposure light will make a scene appear less bright. I tend to use exposure and intensity interchangeably.
Center Light
The area of a form receiving most of the light; the lit side of a form.
The brightest area on a form. This is usually a small area that is receiving the most direct light and reflecting a bit of it back.
The area on a form that has begun to turn away from the light source, resulting in a transition area of light to shadow. This area is receiving some light, but not nearly as much as the parts of the form facing the light source more directly.
Reflected/Bounce Light
Light that bounces off a surface and then lands on another form or surface is Reflected or “bounce” light. Reflected light is much weaker than direct light and can occur on any part of a form, except occluded areas.
Terminus/Terminator
The point at which light cannot land on a surface. This is where the shadow side of the form begins.
Shadow Core
The darkest part of the form shadow. The shadow core on a sphere typically looks like a dark band right next to the terminus, a clear separator between the light and shadow. The core shadow is also the part of the form shadow least affected by reflected light.
Form Shadow
The areas of a form that are in complete shadow and receive no direct light.
Occlusion Shadow
Occlusion shadows are the darkest areas in shadows and on/within forms where absolutely no light can reach. When something is occluded it is completely obstructed or blocked, so when light is occluded you have complete darkness.
We see occlusion most often in narrow areas right beneath forms before the cast shadow begins, and with narrow openings, cracks, and crevices of surfaces/forms. Occluded areas are not sufficiently open enough to the environment to receive any light, so there is only shadow.
Cast shadow.
Cast shadows is created when an object’s form blocks light. Objects block light adjacent to themselves and in the shape of their contours. There are three distinct parts to a cast shadow, the Umbra, Penumbra, and Antumbra. Much of the time, in art, we are only painting an umbra and penumbra. When multiple light sources of different intensity and direction/angle are involved, we begin to see examples of all three parts of a cast shadow.
- Umbra : Umbra is Latin for “shadow”. The umbra is the innermost and darkest part of a cast shadow, where the light source is completely blocked by the form creating the shadow. [i]
- Penumbra : Penumbra is Latin for “nearly” and “almost”. The penumbra is further from the object and lighter than the umbra. Further away from the object light from the source and the environment can influence and brighten the shadows.
- Antumbra : The antumbra is the lightest and softest part of a cast shadow. The technical definition is confusing and unnecessary for our purposes, but if you’re curious click here .
Now, I’m going to show a few sphere test examples to visually illustrate the terms above so we can make practical sense of all you’ve been reading.

The Distance of Light Sources & Why It Matters
Each property of light and shadow in art plays a role in affecting the mood of our scene and the light effects we paint. The appearance and quality of shadows are determined by the light and forms that cast them. How near or distant a light source is to an object has a significant impact on the appearance of an object’s form shadows and cast shadows, so let’s get into that next.
Distant Light Sources (Sunlight, moonlight, spotlights, etc)
We can group lights into categories based on their characteristics, like size, distance, and how intense they are to get a starting place for how those lights would interact with the objects in our scenes.
Distant light sources are things like sunlight, moonlight, and powerful spotlights like those in stadiums and theaters. Distant lights tend to:
- Be neutral lights.
- Cause soft-edged form shadows.
- Create cast shadows that are the same size and shape as the object because their light rays are parallel.
As one example, we know the sun is a huge, very distant, powerful light source, and from observation we know that light from the sun strongly illuminates everything it reaches. That means light is bouncing around everywhere in our atmosphere and reflecting a lot of light, so we can expect brighter and more colorful shadows when the sun is involved.
Playing with exposure also makes a big difference, so an overcast grey sky lowers the exposure, diffuses the light, and makes the sunlight seem much less energetic than a clear and cloudless sky, and creates lighter, softer, and less colorful shadows.
The Sun is also larger than our Earth, and any object we would light with it, so we must also consider the sun as an “oversized” light, which we’ll get into in a minute.

Nearby Light Sources
Nearby light sources are things like lamps, candles, device screens and monitors, lighters, matches, lanterns, etc. Nearby light sources tend to create:
- Larger cast shadows because the light rays are no longer parallel.
- Shorter and sharper (harder edged) cast shadows the closer they are to objects, longer and softer cast shadows the further they are from objects.
- A higher terminus and a larger form shadow.
- A more active or energetic feel and added tension to a scene.

When nearby light sources are also quite small (like candlelight or a lighter), they tend to cast hard-edged cast shadows. They present an additional composition challenge because they can become distracting if not handled carefully. Nearby light sources tend to become a focal point in a scene, so it’s important to be mindful of that and use it to your advantage for your chosen lighting scheme and compositional design.
Oversized or Diffuse Light Sources
Examples of oversized or diffuse light sources are the entire sky on an overcast day (sky light), light coming through large windows, and any light that is scattered by being translucently covered or blocked (like a paper lantern, a light sheet or cloth, an umbrella, or frosted glass covering for light bulbs). Oversize or diffuse light sources tend to:
- Cause an object’s terminus to move further away from the light source (the larger the light source is larger relative to the object).
- Create softer edged shadows.
- Make environments and characters feel softer, warmer, and more friendly.
In the case of light sources that are larger than the objects they illuminate, the light rays are travelling out in random directions, reflecting off the atmosphere and other objects and surfaces, and filling in the shadows, which softens them. Shadows become softer edged because light does not reach each part of the shadow area equally, and because the object blocks (occludes) part of the light area behind it.

Ambient Light
Ambient light is created when light from a source is reflected off the ground, other objects, and the environment. It is possible for objects to be exclusively lit by ambient light, but a key light (which is usually a direct kind of light) is still needed to emit the light that will be reflected.
Terms like indirect light, reflected light, and bounce light all mean the same thing: they are all ambient light. Ambient light is most noticeable in shadows because of the contrast, but it is present whenever and wherever reflected light lands on an object or surface.
Light rays lose most of their strength and brightness (90%) with each bounce, and they are bouncing around multiple times. This loss of strength is why ambient light is generally weak and cannot reach into occluded areas.
You may have come across the term ambient occlusion, especially as it relates to lighting in 3D modeling apps like Maya and Zbrush. In drawing and painting, if zero light can reach an area, I simply refer to this as an occlusion shadow or an occluded area.
For a bit more on ambient light and ambient occlusion, here’s a video by Marco Bucci (awesome artist!) that I found helpful.
Light Direction & Angle: How They Affect A Scene
In any lighting scheme, cast shadows are a compositional and mood element that should be considered and planned. Choosing the light’s direction and angle is an important step in setting the emotional tone of a scene as well as defining forms and helping viewers to understand how to react to what they are seeing. Cast shadows can add drama and mystery to a scene, particularly when the object or character casting the shadow is off-camera.
Different light directions and angles offer a variety of mood options, and I’ve listed a few here:
- Tend to read as unnatural.
- Can help create tension and drama, and how much depends on the light’s exposure and temperature.
- Defines form.
- Reads as active and energetic.
- Adds dramatic tension.
- Comfortable way of positioning light.
- Keeps an object/character from being in too much shadow.
- Good at defining form.
- Reads as soft and friendly.
- Is the most unnatural of all the lighting directions.
- Feels dramatic in spooky, creepy, threatening, and unnatural ways.
How you choose to render the light and shadow in art you create will always depend on the position and point of view of the audience, and the message that needs to be conveyed.

The Fundamentals of Light (Light and Shadow in art)—Breaking Down The Parts
Even though we learn in steps and stages, I find it helpful to get the “lay of the land” because it provides a road map, and it’s nice to at least have some idea of what we’re doing, right? With that in mind, I have listed the major headings that are part of studying The Fundamentals of Light (light and shadow in art) and broken out some detail for the area we’ve covered today.
Deep breath…
- Light Sources
- Types of Light
- Terminology & Sphere Tests
- Fall Off & Form Changes
- Light & Surface Color
- Reflections
- Translucence & Transparency (Transmission)
- Light & Materials
- Atmospheric Effects & Atmospheric Perspective
- The Human Experience of Light
- Rendering/Visual Styles
Next Time: The Fundamentals of Light, Part 2!
Take a moment to think of your absolute favorite treat for relaxing and pampering yourself. See it, visualize it in your mind’s eye. Now…get yourself that treat! You have just made it through a massive amount of information in a relatively short(ish) amount of time.
Congratulations!
Thank you for hanging in there with me to learn about light and shadow in art! I’ve tried to keep things clear and concise, but I know this was a lot to take in. I commend you, I thank you, and I am sending you virtual high fives and fist bumps!
We need some forms before we render light and shadow in art, so if you need guidance in that area I have some articles covering Form and The Fundamentals of Art to help.
The next couple of articles in my Fundamentals of Light series will cover exposure and fall off, and then absorption, reflection, and refraction of light wavelengths.
If I’ve confused you or you have questions, or if I’ve gotten anything wrong, please message me in the comments and I’ll do my best to clear things up.
I hope you’ll join me for those as well.
Take care and happy drawing with light and shadow in art everyone!
[i] https://en.wikipedia.org/wiki/Umbra,_penumbra_and_antumbra
6 thoughts on “Light and Shadow in Art – The Fundamentals of Light, Part 1: The Science & The Basics Made Clear”
I found your article helpful, especially differences in light source and their effect.
Hi, That’s great! I’m so glad you found my article helpful! Please let me know if there are any other topics you’d be interested in having me write about to help you with your art journey.
so amazing, thank you so so much for this article! this has been super helpful in guiding me through lighting the layouts for my grad film <3
Hi! I’m so glad my article was helpful to you! That’s wonderful news 😍
Amazing article! When can we expect part 2!
Hello Rolando, Thank you so much for visiting my site! I appreciate your compliment, and I’m so glad you found my article helpful. For part 2, I’m not sure. I wish I could say it would be soon, but, as happened to most people, a lot of life has been happening in my small corner of the universe and it has brought with it a lot that I’ve been carrying largely on my own. I am a single mother with two jobs and two children, and a lot of responsibility. I was married when I started my website and business, now I’m divorced. I’m working toward being a full time content creator here on my site and for my YouTube channel, CecelyV Art. I’m scheduled to achieve that early next year. So, please be patient with me. It’s a process that takes time and bandwidth that I don’t really have much of right now, sadly. I will endeavor to make part two of this article a priority as soon as I can resume writing and posting articles again. Thank you for visiting my site! Take care and happy drawing!
Leave a Comment Cancel reply
Save my name, email, and website in this browser for the next time I comment.
This site uses Akismet to reduce spam. Learn how your comment data is processed .
Recent Posts

How to draw Scales (Coming in 2024)

Reflected Light: A clear-cut explanation for painting reflected light 2024
How to draw wings (coming in 2024), how to draw a cactus (coming in 2024), how to draw a bat (coming in 2024), top categories.

Guides/Tutorials (25)
Drawing (24), how to draw (19), design (17), fundamentals (6).

CecelyV (16)
Artist (14), drawing (14), shapes (12).
If you're seeing this message, it means we're having trouble loading external resources on our website.
If you're behind a web filter, please make sure that the domains *.kastatic.org and *.kasandbox.org are unblocked.
To log in and use all the features of Khan Academy, please enable JavaScript in your browser.
AP®︎/College Art History
Course: ap®︎/college art history > unit 1.
- Line as an art element
- Shape and form
- Surface and Depth
Light and Shadow
Want to join the conversation?
- Upvote Button navigates to signup page
- Downvote Button navigates to signup page
- Flag Button navigates to signup page

Video transcript
Light and Shadow in Fine Art
Let’s continue to deal with the most significant principles of drawing, and now I want to introduce you to such concepts as light and shadow in fine art. These are important means by which you can give expressiveness to a drawing.

The rules for the transmission of light and shadow were discovered in the Middle Ages, and artists to this day are guided by these principles for drawing three-dimensional objects. Light and shadow in the fine art serve to convey the volume of the subject.
Lighting is a means of constructing the volume of objects and the depth of space. Light divides the surface of an object into shadow and illuminated sides.
With the help of light, you can set the mood of the drawing. For example, you can make the landscape more joyful if you use bright colors. In order to correctly depict a three-dimensional object , you must know the basic concepts:
- Core shadow;
- Reflected light;
- Cast shadow.

The glare on the surface of any object is the brightest place on which the shortest and most direct beam of light cast. Rays that glide over the surface of an object at an angle form halftone. Halftone, in turn, borders on the shaded part.
Light is the illuminated part of an object. Own shadow is the dark part of the object, which is located on the unlit side. The darkest place is on the border with light – at the turn of the form.
Here the law of contrast takes place, which suggests that opposites enhance the qualities of each other. The shadow that goes into the depth gradually brightens and in this area you can see the reflected light of the environment, which is called a reflected light. A shadow is cast from an object, which is called a cast shadow.

The light source can be located in different ways. If the light source is on the side of objects, then it emphasizes their volume. If the lighting is changed, then the visible image of the illuminated objects will also change at the same time.
Once you have learned what light and shadow mean in fine art, try to depict any simple object using the basic principles of drawing.

For example, you can draw a ball and depict a highlight, light, halftone, shadow, reflected light, and cast shadow on it. Thanks to this training, you will be able to depict the volume of more complex objects.

Knowing the laws of construction of light and shadow, you can easily cope with any creative task, for example, with the image of a landscape or a thematic composition.

A professional artist and drawing teacher with many years of experience, creator and author of howtodrawforkids.com. Holds a higher education in art, spent many years teaching drawing at an art college, and worked on creating comics and animated short films. Aram uses innovative teaching methods to inspire young students to be creative and express themselves through art.
Similar Posts

What is Hatching
An important step in learning fine art is to study the basic techniques, and now I will tell you what is hatching. This is a technique that is used to create tone with thin, parallel lines. The challenge for any novice artist is to learn how to draw confident, continuous lines without lifting the pencil…

Human Body Proportions
In order to correctly draw the human figure, it is necessary to understand the ratio of individual parts of the body. With the help of this article, you will learn what should be the proportions of the human body in the fine arts. Each person is unique and the structure of the body is different…

Form, Volume, and Construction
To correctly depict objects on paper or canvas, you need to know what form, volume, and construction are. This article will introduce you to these basic concepts. So, the main characteristics of any object are the shape, volume, and construction. These concepts are inextricably linked with each other. Form is a geometric quantity that characterizes…

Human Face Proportions
If you want to learn how to draw portraits correctly, then you need to know the human face proportions. I will teach you this in this lesson. Here the ideal human face proportions, which are used in artistic practice, will be described. Of course, in real life it is rare to find a person who…

20+ Christmas Drawing Ideas
Get into the holiday spirit with unique Christmas drawing ideas. From Santa Claus to festive trees, add holiday cheer to your art this season. Unleash your holiday creativity with our unique Christmas drawing ideas. Discover easy drawing ideas to spark your creativity! Engage in delightful art projects that bring the spirit of Christmas to life,…
Leave a Reply Cancel reply
Your email address will not be published. Required fields are marked *
Shadow/Silhouette Drawings
Categories *Grades 3-5 , *Grades 6-8 , Drawing
Home » Art Lessons » Drawing » Shadow/Silhouette Drawings

Students can use their own profiles to create art. This activity teaches students about light, shade and shadow.
By Andrea Mulder-Slater
What You Need:
- Flashlight (and a dark(ish) room)
- Construction paper (white & black)
- Poster board
- Masking tape
- A friend to trace your silhouette
What You Do:
- Tape a piece of white construction paper to the wall in a dark room.
- Place the flashlight on a table. Shine the light at the white construction paper.
- Sit between the light and the paper so that your profile appears on the paper.
- Have a partner trace around your silhouette onto the paper.
- Remove the paper from the wall and make sure your lines are smooth.
- Next, cut the silhouette out of the paper, place onto black construction paper, trace around it and cut it out.
- Glue the black silhouette onto white poster board. Add your name and date to the work.
Optional: You may wish to add more than one silhouette to the poster board (as shown in example above).
Join Our Club

You are currently on the KinderArt.com site which features lots of free art activity ideas for kids (I hope you are enjoying them!) HOWEVER, if you are looking for more detailed art lesson plans, drawing lessons, printables, sketchbook starters (and more) provided monthly, you will LOVE The KinderArt Club - a membership portal designed for parents, homeschoolers, classroom art teachers and studio instructors .
Inside the club you will find hundreds of printable PDF art lessons designed to work in small or large group settings, with a range of ages (from 5 to 12 years).
Get creative teaching kids at home, instructing students in a classroom, leading workshops in a studio, or sharing online, as you explore artists, art periods, science, nature, history, cultures and themes, with creativity and flexibility in mind.
Join us today at: TheKinderArtClub.com

Light and Shadow Theory for Painters Part II with Steve Huston
Share this video lesson:.
To view this video please enable JavaScript, and consider upgrading to a web browser that supports HTML5 video
More Videos

Ready to watch the whole lesson?
Become a member and get unlimited access to the entire New Masters Academy library
- Lesson Details

In this video lesson world-renowned painter Steve Huston will continue to demonstrate the laws of light by painting a simple bowl in oils. Steve will teach you how to break up your scenes into simple three-dimensional forms like the cylinder and how to analyze form as a series of planes, as well as how to work with value and half-tones.
- Gamblin Artist Grade Oil Colors
- Simply Simmons Paintbrush
- Canvas Panel
This lesson has 3D Models reference. Subscribe now
Free to try
Watch the whole lesson with a subscription
NEW MASTERS ACADEMY
- Instructors
- Testimonials
- Privacy Policy
- Terms and Conditions
- Video Lessons
- Reference Images
- Community Forums
- Frequently Asked Questions
- Customer Support
New Masters Academy 16182 Gothard St Huntington Beach, CA 92647 Contact US
Light & Shadow Drawing Course

(Scroll down ↓ to Add to Cart)
Want to experiment with new mediums such as charcoal & chalk but unsure of where to start?
Moving into a new drawing medium can be a challenge, especially if you’re using the wrong materials.
I was trying to draw with charcoal for years and kept on ‘missing’ the vital ingredient. I thought it was my technique, my paper choice.
My problem?
I was using the wrong charcoal.
This course has been designed to help bridge the gap between graphite pencil drawings to charcoal, chalk and pens whilst subtlety introducing colour. Discover how to add three-dimensional depth and richness to drawings, using light and shade.
With over 2 hours of tuition, you’ll discover chiaroscuro, the classic technique for achieving bold contrasts and find out how to make your drawings more balanced with shadow mapping and compositional patterns. Explore how great artists of the past, like Caravaggio and Da Vinci, used light and shadow to make their work more realistic, to draw focus and to paint a mood.
Working through these simple step-by-step tutorials, you’ll learn about new materials, figurative and still life drawings as well as applying tonal paper, charcoal, and chalk to their best advantage.
- £ 35.00
Description
Lesson breakdown, course delivery, course requirements, what students say, student success, how can charcoal improve your pencil drawings.
You wouldn’t think it would make much difference, a burnt stick! But choosing the right materials for the effects you’re trying to achieve – can be vital.
The secret to successful ‘Sfumato’ is easy with charcoal.
But it has to be the right charcoal.
So what is Sfumato?
A smoking of edges that can transform a flat, two-dimensional sketch into a lively three-dimensional drawing. To create drawing studies that look three-dimensional you need to understand how to arrange your compositions to ‘draw themselves’ before we even start.
Think ‘Lights off’
A form is developed by light and shade, without these two everything appears flat.
The problem is, most of our drawing environments at home have far too many lights on at once.
With too many light sources & too many different colours of light, it can be almost impossible to create form under these conditions, your drawings end up looking flat, childlike as if they’ve been outlined.
It’s not your fault.
It’s your lighting.
Would you like to know a simple way to instantly improve your drawing?
Step 1. Turn off the lights.
I’m serious.
Turn off the lights until you’ve got a dark room.
Then introduce one single table lamp. Voila, instant Rembrandt.
Drawing in the dark (ok semi-dark) can be very enlightening!
A simple approach to three-dimensional drawing
This course shows you how to observe and draw light and shade. Beginning with the basics of drawing simple three-dimensional shapes and then moving onto shadows and cast shadows.
It will develop your observation skills and you’ll discover new materials and techniques, giving you valuable insights into effective drawing and sketching.
If you can draw simple geometric forms you can quickly and easily move on to figurative, portraiture, and animals. (With step-by-step video demos of all 3 in the lessons)
Giving you the confidence of knowing ‘what to look for’ and then ‘how to draw it’.
A 3 step learning process
This course has been carefully designed to be simple, structured and easy to actually get drawing – not just information overload!
Structure helps you learn progressively – your individual personal style and expression turn you into an artist.
- The History
- The Practical
Simple explanations that give you an insight into the hidden techniques of the Old Masters and a context to base your drawings within. Looking at comparisons with painting (and how the Mona Lisa can help your drawings) to create strong, professional looking drawings.
If there is one ‘secret’ I want you to come away with from the course, it’s the power of edges.
Learning to see lost and found edges and where you can blend out – or sharpen up, will give an instant change to the quality of your work (not just in your drawings but also your paintings!)
“The first things to study are form and values. For me, these are the things that are the basics of what is serious in art.” Jean Baptiste Corot , Artist
What’s in the Course?
- 9 follow-along drawing demonstrations.
- 7-downloadable video lessons, split into separate chapters that follow on sequentially.
- Practical step-by-step instructional videos so that you can follow along at your own pace.
- ‘Done for you’ reference images to break through overwhelm and get drawing, faster.
- Downloadable jpeg reference images and a full materials list.
- Over 2 hours of detailed video instruction.
- Lifetime access, downloadable on separate devices.

An Introduction to Lighting and Materials
A visual introduction to all the materials from pencils, chalks, charcoals to paper stumps. Observing different lighting setups and the effects these choices have on the subject. Looking for light source clues within the shadows.

The Principles of Chiaroscuro
Uncovering the history of light & shade in art to observe patterns of shadows, composition and drama. Considering the characteristics of light to understand the basics of light logic.

Lesson Three
Shaping the light in nature.
Reflecting on Cezanne’s treatment of nature to then look at soft and hard lighting effects. Observing how different lighting angles change the mood and feel of a subject.
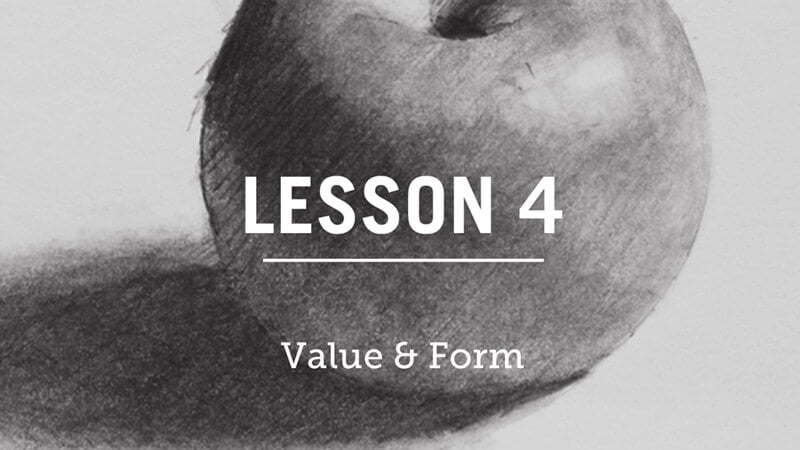
Lesson Four
Value & form.
Looking at the importance of cast shadows with a still life cast shadow tone drawing. Changing the position of an object in relation to surrounding light sources to give a three-dimensional feel and observing reflected light.

Lesson Five
Compositional patterns.
Learning about shadow mapping multiple objects with pen and ink. Observing light & dark patterns to understand compositional rules on figurative and landscape studies.

Using Tonal Paper
Looking at the three tone masses, lights, mid-tones and darks. Smudging edges to give a Sfumato glow and comparing the visual appearance of hard and soft edges with a portrait.

Lesson Seven
Final project.
Our final project brings all of the elements together.One directional light hitting the subject, with a strong shadow pattern, looking for a wide tonal range, hard and soft, smokey edges to give that illusion of form.
I’ve taken care to film everything from my perspective so you can see exactly what I’m doing as we go through the entire drawing process in real-time with over 2 hours of video instruction, alongside full-colour photographs and drawing guides.
How is the course delivered?
- 7 Downloadable Step-by-Step Video Lessons – over 2 hours of video instruction that once downloaded – you have any time, anywhere access.
- A Quick Start PDF guide – which includes your materials list.
- ‘A Your Drawing Downloads PDF guide’ – which includes all the reference images used throughout the course.
- The video files are large (1.5GB) so you need a broadband internet connection and enough space on your computer hard drive.
Cut by the Artist
I filmed, edited, and coloured the course myself (with a little help from Vanessa!) rather than working with a production company.
Artists have different needs than editors so I wanted to cut the course like an artist, showing you exactly what I wanted to see when I was learning.
I show all the real-time pencil marks so you don’t miss a step.
Requirements for the Course
A broadband internet connection – the files sizes for the video lessons are quite large (1.5GB in total) so can take a while to initially download (depending on your internet speed.) Once downloaded, they are yours to keep forever, watch without buffering or take to the garden and watch away from an internet connection!
Enough free space on your Computer or iPad – You can download the files to a separate USB stick if you need extra strorage.
A Colour Printer – to print out the reference images or access to a Print Shop.
Glossy Photo Printer Paper – I use Epson Photo Glossy.
Dear Will, I did a drawing of apple today. It’s drawn from life with a red apple that I have. It impressed me that how much it’s improved compared with the couple of apples I have done before. First of all, I’m much clearer about what I was doing, such as the stage I was in, the goal I was after. Also, I forced myself to go way darker than I felt. Then I reminded myself to simplify the shadow shapes, to soften the edges in the back. Finally, when I cropped the image, I remembered what you said about the composition, the rule of thirds. I also remembered many other things that you said in other lectures, such as not to look directly at the object, not to exaggerate the reflection. Thanks and wish you all the best! Best Regards, Ping , Light and Shadow Course
Good Morning Will, As I work my way through the 4th of your courses (I’ll start the portrait one next), I can’t thank you enough for these wonderful offerings. I was in my acrylics class here in Concord, New Hampshire, USA, starting a new painting, and because of your color-mixing course, I had no problem knowing that I needed an underpainting and how to mix the colors in the painting I was making. The Light and Shadow drawing course, which I’m about to finish, is fantastic. I’ve told everyone I know about your excellent classes and I can’t wait for you to offer more! Thank you so much, Erica , Light and Shadow Course
Will does a great job of breaking things down into digestible bits and pieces. The problem I always have is simplifying artwork to have a more relaxed, yet realistic look. Light and Shadow Course

Is there a time limit for the course?
No, there is no time limit, you can watch them as many times as you like.
The course is a series of downloadable video lessons, once they are downloaded they are yours to keep forever. If you change computer in the future just drop me an email and I’ll send you through some fresh links.
How many times can I watch the course?
You can watch the lessons and courses as many times as you like and have lifetime access. If you change computer in the future just drop me an email and I’ll send you some fresh links through.
Can I download to an iPad?
Yes, you can download to an iPad using Files App, or the free app called ‘ Documents ’. Without either of these apps, you will not be able to download directly to an iPad.
You can also download the video lessons to multiple devices (home PC, laptop etc) and if your storage space is running low on your laptop, you can download to a separate USB stick.
Is the course subtitled?
Can i stream the videos.
No, not at the moment.
The courses are available as a download only, there is not a streamable option.
If you only have an iPad you need to use either the Files App or the free Documents App to download and have enough space on your device
But there is one exception.
If you open the download links in the Safari browser on an iPad, Safari will give you an option to View or Download, if you click View, you can watch the videos without downloading.
Will it cost much in materials?
Not hugely, I’ve kept the material list as small as possible.
For the painting courses, I try to keep the colour palette small and use the same base colours for many of the other courses. I demonstrate with artist quality paints which have a higher pigment ratio so a little goes a long way.
Are there any image downloads to help me?
Yes, there are reference images and drawing worksheets to work from. You can print out the images in A4 size allowing you to work 1:1 with your reference image (a classical technique called ‘sight-size’)
What skill level is the course for?
Beginner to intermediate.
What drawing skills do I need already?
A basic understanding of the foundations of drawing, if you’re completely new to drawing I would recommend the Absolute Beginners Drawing Course which gives you a great overview to how drawing ‘works’. If you can draw a reasonable outline of common forms, spheres, cubes etc. this course will help you to turn those flat shapes into realistic three-dimensional forms.
Who is the course for?
If you can draw a reasonable outline of common forms, spheres, cubes etc but have only worked in pencils, this course will help you to turn those flat shapes into realistic three-dimensional forms whilst introducing new mediums and methods.
What if I don’t have a printer? can I just work from the screen?
Related products.
- Beginners Art Courses , Morning Paintings Art Courses , Still Life Acrylic Painting Courses
Modern Acrylic Still Life Course
- Add to cart
- Beginners Art Courses , Sketching Courses for Beginners
Landscape Sketching Course
- £ 57.00
- Beginners Art Courses , Still Life Acrylic Painting Courses
Floral Still Life Acrylic Painting for Beginners
- New? Start Here
- Shop All Courses
- FAQ’s & Contact Will
- Free videos
- 7 Painting Principles
- Student Success Stories
- Art Tuition Bundle Offers
Subscribe to stay in the loop!
Chiaroscuro: the art of light and shadow.

Prefer to read in Ebook format?
We will send you this complete Ebook to facilitate your reading.

Light and shadow are fundamental elements of visual arts, so knowing how to work with them makes all the difference in the final result. The Chiaroscuro technique is great for getting the best out of light, shadow, and their shades.In…
Sending the ebook
You will receive the ebook directly in your email a few minutes after confirming your request in the form below.
Ebook sending confirmed!
You will receive the ebook directly to your email in a few minutes.
Attention! Please check your spam folder if you cannot find the email in your main box .
Once you find the email in spam, move it to your main box and add the email [email protected] to your contact list, thus preventing other emails from the spam folder.
Light and shadow are fundamental elements of visual arts, so knowing how to work with them makes all the difference in the final result.
The Chiaroscuro technique is great for getting the best out of light, shadow, and their shades.
In this article, we'll talk about the Chiaroscuro technique, the artists involved, and how it has influenced other visual arts.
What is chiaroscuro?
Chiaroscuro is a painting technique that was established and became famous in the Renaissance period in the 15th century.
The technique is about working with high contrast between light and shadow and requires good knowledge of perspective, physical effects of light, brightness, and even the paints used.
In other words, it is a very complex and advanced technique with striking results.
Contrast is the driving force of chiaroscuro. And it is from this contrast that objects are defined – without using contour lines – and volume through the most defined shadows.
Generally, a painting based on the chiaroscuro technique has its motifs at first dark, illuminated by a single light source not shown in the scene.
Chiaroscuro influenced other artistic movements, such as the Baroque and Mannerism , and what became known as Tenebrism , where the technique was taken to the extreme.
Reading tip: Color management: Keeping Your Colors Consistent
The history behind the technique
Although the chiaroscuro technique was established during the Renaissance, the technique was around before that.
There are paintings by the Greek artist Apollodorus (5th century B.C.) that already used shadows and contrasts to build volume.
Unfortunately, none of Apollodorus' art survived time, but it is possible to find his influence and technique in Greek art from the Hellenistic period.

In the Renaissance, the technique was revived and perfected.
The Renaissance was meant to revive classical and ancient ideas , such as those of Ancient Rome and Ancient Greece.
The movement focused on anthropocentrism, humanism, and individualism without completely letting go of Christianity and religion.
Leonardo da Vinci was the first Renaissance artist to work with shadows and light. He used colored paper and added colors, light, and tones through paint, chalk, and charcoal.
Da Vinci painted layers of color from the dark tones, lightening areas of interest and creating shadows to add volume.

New types of paint
The Renaissance was a time marked by great artists and the development of a new resource: oil paint.
Before oil paint, artists used other techniques, such as tempera, where the paint and pigments were mixed with egg white.
The problem with this technique was its opacity and its quick-drying characteristic, which made it impossible to paint several layers.
Oil paint is a slow-drying paint in which the pigments are mixed in oil.
The development of oil paint also helped in the development of chiaroscuro since its slow drying and translucency allowed artists to mix and create various shades.
Artists who established chiaroscuro
Leonardo da Vinci was the first Renaissance artist to work with contrast, lights, and shadows, starting the popularization of chiaroscuro.
However, other artists further refined this technique, created remarkable works, and established themselves as chiaroscuro masters.
There is no way to discuss this technique without mentioning Michelangelo Merisi da Caravaggio.
Caravaggio: taking Chiaroscuro to the extreme
Caravaggio dedicated part of his life to producing works using the chiaroscuro technique.
In addition, the realism and high drama in his art were characteristics that, together with the use of shadows and lights, made Caravaggio a provocative artist.
Caravaggio's art was marked by totally darkened backgrounds, with the objects and models illuminated by a single light source.
This combination created a high dramatic index in his works, and this extreme use of contrasts and chiaroscuro gave rise to a movement called Tenebrism .
Tenebrism was born in the Renaissance, but grew stronger in the Baroque movement and extended into Romanticism.
Dica de Leitura: Caravaggio – Luz, Sombras, Rebeldia e Fotografia
Rembrandt and Gerard van Honthorst: Dutch chiaroscuro
Not all artists used the chiaroscuro technique to the extreme, as did Caravaggio.
These approaches were also important to show that the technique can be used to create profound works without going to a darker, more provocative, or even uncomfortable side.
Rembrandt van Rijn was a good example of a more subtle use of Chiaroscuro . However, his first phase as an artist used a lot of dramatic Chiaroscuro, much under the influence of his teacher Pieter Lastman, a student of Caravaggio.

Rembrandt used more golden tones and softened the drama of his works in the second phase of his artistic life, with more reflective and introspective characters.
He also began to use light not only as illumination of the environment of his works but as something more connected to the spiritual realm. In this regard, light creates the shapes of objects and the other colors are subject to it.
This technique and sensibility made Rembrandt known as the master of light and shadow.

Gerard van Honthorst was another Dutch master who used the contrasts, light and shadow of the chiaroscuro technique in his works.
The artist painted many pictures with festive themes , rather than religious themes, as Caravaggio did. This was due to the times in which Holland lived, with religious disputes and conflicts. Thus, most commissions for artwork avoided religious themes.

Gerard van Honthorst and chiaroscuro
Georges de La Tour was a French painter who also benefited from the influence of Caravaggio's chiaroscuro, but unfortunately, his works were only discovered long after his death.
The artist played with the contrasts of light and shadow, using artificial light sources such as candles and torches.
In his works, one can feel the warmth of the light coming from these light sources.

Joseph Wright of Derby and Sir Joshua Reynolds: English chiaroscuro
More than 100 years after Caravaggio's death, his works and his dramatic chiaroscuro technique have continued to influence artists around the world – and, indeed, continue to do so to this day.
The technique was also used by two English artists during the 18th century, Joseph Wright of Derby and Sir Joshua Reynolds.
Both artists were famous portrait painters and applied the techniques of light and shadow in their works.

The influence of Chiaroscuro on other arts
Since the chiaroscuro technique works with contrasts between light and shadows, its exploration by other types of art becomes very possible, especially in photography and film.
The use of chiaroscuro in photography is not surprising, as paintings can be considered an analogy to photographs.
Some even consider Caravaggio one of the forerunners of photography for framing his works, using light and contrast, and illuminating areas of interest, guiding the gaze of his audience.
Light is one of the raw materials of photography. So it is only natural that chiaroscuro has directly influenced photography.
We can notice the technique in portraits, which adds drama and depth to the art.
We can take as an example the work of Brazilian photographer Monica Paes with her project called "Chiaroscuro."

In cinema, one can observe the use of the chiaroscuro technique in Film Noir , whose darker and pessimistic themes allowed chiaroscuro to bring even more dramatic characteristics.
Using a light source and exaggerated shadows contributed to contextualizing and provoking the audience, making them dive into the plot more intensively.
The technique, and Film Noir in general, was well explored in German Expressionism , leading to the production of classic works of cinema such as "The Cabinet of Dr. Caligari" and "Nosferatu."
Chiaroscuro played an important role in defining future movements , and artists who used the technique are remembered to this day.
In addition, the influence of chiaroscuro in other media and arts is still seen today, whether in photography or film.
For these reasons, chiaroscuro is not only a Renaissance technique, but a true art revolution.
- Rembrandt Hermanszoon van Rijn
- Chiaroscuro: como a iluminação do Renascimento influenciou o cinema
- Chiaroscuro
- Chiaroscuro in Art – The Ultimate Guide
Don't forget to like and share if you enjoyed this content! This small gesture helps us a lot! Feel free to continue browsing, and if you'd like to stay up-to-date, sign up for our newsletter !

The Modern Art Week of 1922: A Cultural Revolution in Brazil

Artificial Intelligence: How AI is Changing Art

Greek Art and 2,000 Years of History

Career in Product Design: How to Set Goals that Work

Empower and Transform: The Astonishing Impact of User-Centered Design

Transform Your Product Design: The Powerful Impact of Expert Feedback
We are proud to have people from our community hired every month by great companies, in countries such as Brazil, USA, UK, Ireland, Germany, Netherlands, Spain, Portugal, Austria, Czech Rep., New Zealand, and Canada.
Privacy Overview

Wacom’s digital art lesson plans: Exploring light, shadows, and highlights, Part One
As your resource for creative education, the Wacom team is excited to share an introductory mini unit on exploring light, shadows, and highlights .
This unit was inspired by the presentation of Sarah Honeywell, a digital arts, photography, and art history teacher at Columbia Heights High School . Her presentation at the 2024 NAEA Convention , on Grisaille painting techniques, reminded us of the importance of starting at the beginning to support student artists with digital painting.
The activities in these lessons will prompt students to observe how light creates shadows and highlights on objects and how to recreate this in digital art. Students will manipulate light to take a photo for their reference image, then digitally paint the image demonstrating their understanding of color scales, gradients, layers, shadow, and highlights.
This is lesson one of a four-lesson series , and can be used independently of the other lessons.

Mini-Unit: Exploring Light, Shadows, and Highlights
Introduction to lesson one.
In this lesson, we delve into the fundamental aspects of digital painting, focusing specifically on the interplay between light, shadow, and highlights. Your students will be guided towards exploring the art of utilizing light sources to infuse depth and dimension into their digital artwork.
The primary objective of this lesson is for your students to develop the ability to identify and manipulate light sources. By doing so, they will create shadows and highlights that add realism and depth to their digital paintings.
This lesson is designed to be adaptable for students ranging from middle school to high school levels, ensuring that it caters to a diverse range of skill levels and interests. With a duration of 60 minutes, the lesson provides ample time for your students to engage in hands-on activities while also allowing for meaningful reflection and discussion.
Overview of Lesson One
Prior to the lesson, you will need to gather a variety of items for your students to photograph and provide a range of lighting options. These preparations will allow your students to experiment and explore with different materials and techniques.
The lesson begins with a brief mini-lesson, during which you will introduce the key concepts of light, shadow and highlights. Through examples and discussion, they will learn how these elements contribute to the overall composition and visual impact of a digital painting.

During your lesson, provide opportunities for students to examine artwork and analyze the direction and intensity of light sources, your students will gain a deeper understanding of how to effectively use shadows and highlights when it is time for them to take their own photos.
Following the mini-lesson, demonstrate for the students how they should select an object and use various lighting options to take multiple photos of their object. This hands-on activity will allow your students to experiment with various light sources and directions, enabling them to observe firsthand how light affects the appearance of shadows and highlights.

During the independent practice phase of the lesson, your students will be given the opportunity to apply what they have learned during the lesson and demonstration. They will select objects to photograph and experiment with different lighting setups to achieve a desired effect. Throughout this process, your students will be encouraged to reflect on their choices and make adjustments as needed to enhance the overall composition and visual impact of their work.
As a form of assessment, your students can analyze artwork to identify the direction of light sources and the placement of shadows and highlights. In a slide deck, prepare a couple of photographs from known artists. Students will then apply their knowledge by uploading three of their own photographs and marking similar elements, demonstrating their understanding of how to effectively use light and shadow to create depth and dimension.
The lesson concludes with a review and reflection session, during which your students can discuss their observations and share their experiences with their peers. Through guided questioning, your students will reflect on the effectiveness of different lighting strategies and consider how they can apply these techniques in future projects. This reflective process serves as a valuable opportunity for your students to consolidate their learning and gain insights into their own artistic practice.
Interested in the full lesson plan?
An overview of Lesson Two in this mini unit will be posted to this blog soon! If you are interested in getting a more detailed lesson plan, along with teaching resources for this lesson, you should join our new Wacom Creative Educators Facebook group launching June of 2024! Members will get exclusive access to resources like lesson plans and other fun opportunities. Stay tuned to this blog or follow our WacomEdu Facebook page for updates and access once the Facebook group goes live!
Feature image for this blog post by Av Creations on Unsplash
Related posts:

Level up your classroom with Wacom’s new Education Product Bundles

Artist and animator Joshua Leonard on his career, why diversity matters, and advice for young artists

Wacom isn’t just for artists: streamlining daily business with a digital stylus

Educators: Building Your Wacom Skills to Take Full Advantage of Technology in the Classroom
Connect with wacom on social media.
A magical midnight forest... 🌲🌙🦉🎨🖌️ That`s what @yingshiart was conjuring in this amazing piece #MadeWithWacom. Tayler loves using color to evoke emotion and fullness in her paintings, and liberally uses adjustment layers, filters, and gradient maps. She trusts the creative process and lets go, allowing the subconscious to put one hand on the wheel instead of micromanaging every detail. Do you trust your creative process? #WacomOne #digitalillustration #moodpainting #environmentdesign

Easy to pack & ready to go! 🏃🏻♂️ 🆕 The new Wacom Movink easily fits in any bag and can be set up anywhere with a single cable. The best solution for creative professionals on the go! Wanna get yours? Follow the link in our bio! #wacommovink
Dive into the insightful first look of the NEW Wacom Movink by @wieger_poutsma, Digital Artist and Creative Director, working for clients like Netflix, Warner Bros, HBO and many more. 💻 🙌🏻 👉🏻 Follow the link in bio to discover all the benefits of our NEW Wacom Movink and shop yours! #WacomMovink #CreativeProfessionals #CreativesOnTheGo
🆕 Movink is SUPER slim & ultra-light How slim and light? It’s only 4mm at its thinnest point and weights as little as 420g! 🚀 So yes, VERY light and thin, but the robust Corning Gorilla Glass and durable magnesium alloy body makes it sturdy and versatile. Try it yourself! Follow the link in bio and get yours now. #WacomMovink #CreativesOnTheGo
You got this! ✍️ Never stop creating. 🤘 Animation made by the wonderful @javadoodles #MentalHealthAwareness #madewithwacom #TVPaintAnimation
🆕 Alex Wätzel @dgtlcraft_postproduction , High-end photo retoucher & video editor with years of experience on the creative industry, also tried the NEW Wacom Movink! Now’s your turn! Follow the link in our bio and discover all the amazing benefits of our new Wacom Movink💥 Ph: @akazie.photography #WacomMovink #CreativeProfessionals #CreativesOnTheGo #MovinkMakers
🆕 Wacom Movink: the thinnest and lightest Wacom professional pen display ever. We created this creative pro-set studio, easy to pack and ready to leave without compromising on performance, precision and software preferences. 🚀 Follow the link in bio and get yours! #WacomMovink #CreativeProfessionals #CreativeOnTheGo
We can feel the breeze here 🌬️ Swipe to see @fedanya8`s process ➡️ We love seeing the reference picture and her step by step progression in this series. #madewithwacom #wacomone Go check out more of @fedanya8`s process 🖤🩷🤍
Mental health awareness month is upon us and we want to give a shout-out to anyone out there struggling, yet creating. We see you and you`re absolutely wonderful. 😍 Art by @chibirdart 🐤💓 #MentalHealthAwareness #webcomic #comic #webtoon
Meet the NEW Wacom Movink 🆕💥 first of its kind OLED pen display perfect for creative professionals on the go! A professional device that you can easily pack and carry with you anywhere, everywhere. If you switch workstations, visit clients, travel frequently or work in different locations and studios, this device is all you need. Follow the link in our bio and discover all of the benefits of our NEWEST product: Wacom Movink Now, get ready to Make your move! 😎 #WacomMovink #CreativeProfessionals #CreativesOnTheGo
Introducing Wacom Movink: our first OLED pen display and our thinnest and lightest Wacom pen display ever. 🚀 Unite the art of drawing and inking with mobility and portability with Movink’s brilliant 13.3”, full HD OLED display. This super slim, ultra-light, highly versatile, sturdy device is designed to meet the needs of creative professionals, digital artists and creative students. 🙌🏻 Are you ready to go? Learn more about Movink in our stories and through the link in bio! ✨ #WacomMovink #Movink #WacomNews
Curious about which program is best for drawing vector graphics in 2024? Visual artist @studio_viv has you covered! 🙌 Head to the #WacomBlog to see how Vivienne designs a book cover in Adobe Illustrator vs. Affinity Designer using Wacom One M. ✍ Link in bio! #wacom #design #designer #graphicdesign #vector #digitalart #artprocess
The Painter Every Photographer Should Know
If you’re a photographer looking for inspiration, look no further. This article dives into the life and work of Michelangelo Merisi da Caravaggio and how his dramatic use of light and shadow can revolutionize your photography techniques.
Michelangelo Merisi da Caravaggio, a name often synonymous with dramatic intensity and revolutionary artistry, offers a wealth of inspiration for photographers. Born near Milan in 1571, Caravaggio's tumultuous life and profound experiences shaped his distinctive style, known for its dramatic use of light and shadow—techniques that continue to resonate with visual artists today.
The video begins with an overview of Caravaggio's journey from his troubled beginnings near Milan to his artistic triumphs in Rome. It highlights his unique style of tenebrism, where stark contrasts between light and dark create a striking visual impact. For example, in "The Calling of St. Matthew," Caravaggio uses directional light to bring the scene to life, emphasizing the narrative through dramatic illumination.
Caravaggio's life was as intense as his art. He often painted real people from less prosperous backgrounds, who were not the usual subjects of art at the time. Yet, this approach brought an unprecedented realism and emotional depth to his work. This aspect of his technique offers a valuable lesson for photographers: capturing the raw, unfiltered essence of your subjects can add profound authenticity to your images.
Understanding Caravaggio's method of using light to tell a story can deeply enhance your photographic practice. His ability to depict human complexity through lighting and composition serves as a timeless guide for creating powerful visual narratives. By studying his work, photographers can learn to use light not just as a tool, but as a medium to convey emotion and drama, transforming ordinary scenes into extraordinary moments.
Tatiana Hopper's insightful analysis and detailed breakdown of Caravaggio’s techniques provide a rich resource for anyone eager to elevate their photography. Her video is a compelling watch for those wanting to explore how classical art principles can be applied to modern visual storytelling.

Kim Simpson is a photographer based in the West of Scotland. Her photographic practice is an exploration of the human experience, with a particular emphasis on themes of identity and belonging.

Tatiana Hopper's channel is one of the very best for well thought-out, well-presented, philosophical and artistic approaches to photography.
Very much so! She has a valuable perspective.
- Share full article
For more audio journalism and storytelling, download New York Times Audio , a new iOS app available for news subscribers.
The Possible Collapse of the U.S. Home Insurance System
A times investigation found climate change may now be a concern for every homeowner in the country..
This transcript was created using speech recognition software. While it has been reviewed by human transcribers, it may contain errors. Please review the episode audio before quoting from this transcript and email [email protected] with any questions.
From “The New York Times,” I’m Sabrina Tavernise. And this is “The Daily.”
[MUSIC PLAYING]
Today, my colleague, Christopher Flavelle, on a “Times” investigation into one of the least known and most consequential effects of climate change — insurance — and why it may now be a concern for every homeowner in the country.
It’s Wednesday, May 15.
So, Chris, you and I talked a while ago about how climate change was really wreaking havoc in the insurance market in Florida. You’ve just done an investigation that takes a look into the insurance markets more broadly and more deeply. Tell us about it.
Yeah, so I cover climate change, in particular the way climate shocks affect different parts of American life. And insurance has become a really big part of that coverage. And Florida is a great example. As hurricanes have gotten worse and more frequent, insurers are paying out more and more money to rebuild people’s homes. And that’s driving up insurance costs and ultimately driving up the cost of owning a home in Florida.
So we’re already seeing that climate impact on the housing market in Florida. My colleagues and I started to think, well, could it be that that kind of disruption is also happening in other states, not just in the obvious coastal states but maybe even through the middle of the US? So we set out to find out just how much it is happening, how much that Florida turmoil has, in fact, become really a contagion that is spreading across the country.
So how did you go about reporting this? I mean, where did you start?
All we knew at the start of this was that there was reason to think this might be a problem. If you just look at how the federal government tracks disasters around the country, there’s been a big increase almost every year in the number and severity of all kinds of disasters around the country. So we thought, OK, it’s worth trying to find out, what does that mean for insurers?
The problem is getting data on the insurance industry is actually really hard. There’s no federal regulation. There’s no government agency you can go to that holds this data. If you talk to the insurers directly, they tend to be a little reluctant to share information about what they’re going through. So we weren’t sure where to go until, finally, we realized the best people to ask are the people whose job it is to gauge the financial health of insurance companies.
Those are rating agencies. In particular, there’s one rating company called AM Best, whose whole purpose is to tell investors how healthy an insurance company is.
Whoa. So this is way down in the nuts and bolts of the US insurance industry.
Right. This is a part of the broader economy that most people would never experience. But we asked them to do something special for us. We said, hey, can you help us find the one number that would tell us reporters just how healthy or unhealthy this insurance market is state by state over time? And it turns out, there is just such a number. It’s called a combined ratio.
OK, plain English?
Plain English, it is the ratio of revenue to costs, how much money these guys take in for homeowner’s insurance and how much they pay out in costs and losses. You want your revenue to be higher than your costs. If not, you’re in trouble.
So what did you find out?
Well, we got that number for every state, going back more than a decade. And what it showed us was our suspicions were right. This market turmoil that we were seeing in Florida and California has indeed been spreading across the country. And in fact, it turns out that in 18 states, last year, the homeowner’s insurance market lost money. And that’s a big jump from 5 or 10 years ago and spells real trouble for insurance and for homeowners and for almost every part of the economy.
So the contagion was real.
Right. This is our first window showing us just how far that contagion had spread. And one of the really striking things about this data was it showed the contagion had spread to places that I wouldn’t have thought of as especially prone to climate shocks — for example, a lot of the Midwest, a lot of the Southeast. In fact, if you think of a map of the country, there was no state between Pennsylvania and the Dakotas that didn’t lose money on homeowner’s insurance last year.
So just huge parts of the middle of the US have become unprofitable for homeowner’s insurance. This market is starting to buckle under the cost of climate change.
And this is all happening really fast. When we did the Florida episode two years ago, it was a completely new phenomenon and really only in Florida. And now it’s everywhere.
Yeah. And that’s exactly what’s so striking here. The rate at which this is becoming, again, a contagion and spreading across the country is just demolishing the expectations of anyone I’ve spoken to. No one thought that this problem would affect so much of the US so quickly.
So in these states, these new places that the contagion has spread to, what exactly is happening that’s causing the insurance companies to fold up shop?
Yeah. Something really particular is happening in a lot of these states. And it’s worth noting how it’s surprised everyone. And what that is, is formally unimportant weather events, like hailstorms or windstorms, those didn’t used to be the kind of thing that would scare insurance companies. Obviously, a big problem if it destroys your home or damages your home. But for insurers, it wasn’t going to wipe them out financially.
Right. It wasn’t just a complete and utter wipeout that the company would then have to pony up a lot of money for.
Exactly. And insurers call them secondary perils, sort of a belittling term, something other than a big deal, like a hurricane.
These minor league weather events.
Right. But those are becoming so frequent and so much more intense that they can cause existential threats for insurance companies. And insurers are now fleeing states not because of hurricanes but because those former things that were small are now big. Hailstorms, wildfires in some places, previous annoyances are becoming real threats to insurers.
Chris, what’s the big picture on what insurers are actually facing? What’s happening out there numbers-wise?
This is a huge threat. In terms of the number of states where this industry is losing money, it’s more than doubled from 10 years ago to basically a third of the country. The amount they’re losing is enormous. In some states, insurers are paying out $1.25 or even $1.50 for every dollar they bring in, in revenue, which is totally unsustainable.
And the result is insurers are making changes. They are pulling back from these markets. They’re hiking premiums. And often, they’re just dropping customers. And that’s where this becomes real, not just for people who surf balance sheets and trade in the stock market. This is becoming real for homeowners around the country, who all of a sudden increasingly can’t get insurance.
So, Chris, what’s the actual implication? I mean, what happens when people in a state can’t get insurance for their homes?
Getting insurance for a home is crucial if you want to sell or buy a home. Most people can’t buy a home without a mortgage. And banks won’t issue a mortgage without home insurance. So if you’ve got a home that insurance company doesn’t want to cover, you got a real problem. You need to find insurance, or that home becomes very close to unsellable.
And as you get fewer buyers, the price goes down. So this doesn’t just hurt people who are paying for these insurance premiums. It hurts people who want to sell their homes. It even could hurt, at some point, whole local economies. If home values fall, governments take in less tax revenue. That means less money for schools and police. It also means people who get hit by disasters and have to rebuild their homes all of a sudden can’t, because their insurance isn’t available anymore. It’s hard to overstate just how big a deal this is.
And is that actually happening, Chris? I mean, are housing markets being dragged down because of this problem with the insurance markets right now?
Anecdotally, we’ve got reports that in places like Florida and Louisiana and maybe in parts of California, the difficulty of getting insurance, the crazy high cost of insurance is starting to depress demand because not everyone can afford to pay these really high costs, even if they have insurance. But what we wanted to focus on with this story was also, OK, we know where this goes eventually. But where is it beginning? What are the places that are just starting to feel these shocks from the insurance market?
And so I called around and asked insurance agents, who are the front lines of this. They’re the ones who are struggling to find insurance for homeowners. And I said, hey, is there one place that I should go if I want to understand what it looks like to homeowners when all of a sudden insurance becomes really expensive or you can’t even find it? And those insurance agents told me, if you want to see what this looks like in real life, go to a little town called Marshalltown in the middle of Iowa.
We’ll be right back.
So, Chris, you went to Marshalltown, Iowa. What did you find?
Even before I got to Marshalltown, I had some idea I was in the right spot. When I landed in Des Moines and went to rent a car, the nice woman at the desk who rented me a car, she said, what are you doing here? I said, I’m here to write a story about people in Iowa who can’t get insurance because of storms. She said, oh, yeah, I know all about that. That’s a big problem here.
Even the rental car lady.
Even the rental car lady knew something was going on. And so I got into my rental car and drove about an hour northeast of Des Moines, through some rolling hills, to this lovely little town of Marshalltown. Marshalltown is a really cute, little Midwestern town with old homes and a beautiful courthouse in the town square. And when I drove through, I couldn’t help noticing all the roofs looked new.
What does that tell you?
Turns out Marshalltown, despite being a pastoral image of Midwestern easy living, was hit by two really bad disasters in recent years — first, a devastating tornado in 2018 and then, in 2020, what’s called a derecho, a straight-line wind event that’s also just enormously damaging. And the result was lots of homes in this small town got severely damaged in a short period of time. And so when you drive down, you see all these new roofs that give you the sense that something’s going on.
So climate had come to Marshalltown?
Exactly. A place that had previously seemed maybe safe from climate change, if there is such a thing, all of a sudden was not. So I found an insurance agent in Marshalltown —
We talked to other agents but haven’t talked to many homeowners.
— named Bobby Shomo. And he invited me to his office early one morning and said, come meet some people. And so I parked on a quiet street outside of his office, across the street from the courthouse, which also had a new roof, and went into his conference room and met a procession of clients who all had versions of the same horror story.
It was more — well more of double.
A huge reduction in coverage with a huge price increase.
Some people had faced big premium hikes.
I’m just a little, small business owner. So every little bit I do feel.
They had so much trouble with their insurance company.
I was with IMT Insurance forever. And then when I moved in 2020, Bobby said they won’t insure a pool.
Some people had gotten dropped.
Where we used to see carriers canceling someone for frequency of three or four or five claims, it’s one or two now.
Some people couldn’t get the coverage they needed. But it was versions of the same tale, which is all of a sudden, having homeowner’s insurance in Marshalltown was really difficult. But I wanted to see if it was bigger than just Marshalltown. So the next day, I got back in my car and drove east to Cedar Rapids, where I met another person having a version of the same problem, a guy named Dave Langston.
Tell me about Dave.
Dave lives in a handsome, modest, little townhouse on a quiet cul-de-sac on a hill at the edge of Cedar Rapids. He’s the president of his homeowners association. There’s 17 homes on this little street. And this is just as far as you could get from a danger zone. It looks as safe as could be. But in January, they got a letter from the company that insures him and his neighbors, saying his policy was being canceled, even though it wasn’t as though they’d just been hit by some giant storm.
So then what was the reason they gave?
They didn’t give a reason. And I think people might not realize, insurers don’t have to give a reason. Insurance policies are year to year. And if your insurance company decides that you’re too much of a risk or your neighborhood is too much of a risk or your state is too much of a risk, they can just leave. They can send you a letter saying, forget it. We’re canceling your insurance. There’s almost no protection people have.
And in this case, the reason was that this insurance company was losing too much money in Iowa and didn’t want to keep on writing homeowner’s insurance in the state. That was the situation that Dave shared with tens of thousands of people across the state that were all getting similar letters.
What made Dave’s situation a little more challenging was that he couldn’t get new insurance. He tried for months through agent after agent after agent. And every company told him the same thing. We won’t cover you. Even though these homes are perfectly safe in a safe part of the state, nobody would say yes. And it took them until basically two days before their insurance policy was going to run out until they finally found new coverage that was far more expensive and far more bare-bones than what they’d had.
But at least it was something.
It was something. But the problem was it wasn’t that good. Under this new policy, if Dave’s street got hit by another big windstorm, the damage from that storm and fixing that damage would wipe out all the savings set aside by these homeowners. The deductible would be crushingly high — $120,000 — to replace those roofs if the worst happened because the insurance money just wouldn’t cover anywhere close to the cost of rebuilding.
He said to me, we didn’t do anything wrong. This is just what insurance looks like today. And today, it’s us in Cedar Rapids. Everyone, though, is going to face a situation like this eventually. And Dave is right. I talked to insurance agents around the country. And they confirmed for me that this kind of a shift towards a new type of insurance, insurance that’s more expensive and doesn’t cover as much and makes it harder to rebuild after a big disaster, it’s becoming more and more common around the country.
So, Chris, if Dave and the people you spoke to in Iowa were really evidence that your hunch was right, that the problem is spreading and rapidly, what are the possible fixes here?
The fix that people seem most hopeful about is this idea that, what if you could reduce the risk and cause there to be less damage in the first place? So what some states are doing is they’re trying to encourage homeowners to spend more money on hardening their home or adding a new roof or, if it’s a wildfire zone, cut back the vegetation, things that can reduce your risk of having really serious losses. And to help pay for that, they’re telling insurers, you’ve got to offer a discount to people who do that.
And everyone who works in this field says, in theory, that’s the right approach. The problem is, number one, hardening a home costs a fantastic amount of money. So doing this at scale is hugely expensive. Number two, it takes a long time to actually get enough homes hardened in this way that you can make a real dent for insurance companies. We’re talking about years or probably decades before that has a real effect, if it ever works.
OK. So that sounds not particularly realistic, given the urgency and the timeline we’re on here. So what else are people looking at?
Option number two is the government gets involved. And instead of most Americans buying home insurance from a private company, they start buying it from government programs that are designed to make sure that people, even in risky places, can still buy insurance. That would be just a gargantuan undertaking. The idea of the government providing homeowner’s insurance because private companies can’t or won’t would lead to one of the biggest government programs that exists, if we could even do it.
So huge change, like the federal government actually trying to write these markets by itself by providing homeowner’s insurance. But is that really feasible?
Well, in some areas, we’re actually already doing it. The government already provides flood insurance because for decades, most private insurers have not wanted to cover flood. It’s too risky. It’s too expensive. But that change, with governments taking over that role, creates a new problem of its own because the government providing flood insurance that you otherwise couldn’t get means people have been building and building in flood-prone areas because they know they can get that guaranteed flood insurance.
Interesting. So that’s a huge new downside. The government would be incentivizing people to move to places that they shouldn’t be.
That’s right. But there’s even one more problem with that approach of using the government to try to solve this problem, which is these costs keep growing. The number of billion-dollar disasters the US experiences every year keeps going up. And at some point, even if the government pays the cost through some sort of subsidized insurance, what happens when that cost is so great that we can no longer afford to pay it? That’s the really hard question that no official can answer.
So that’s pretty doomsday, Chris. Are we looking at the end of insurance?
I think it’s fair to say that we’re looking at the end of insurance as we know it, the end of insurance that means most Americans can rest assured that if they get hit by a disaster, their insurance company will provide enough money they can rebuild. That idea might be going away. And what it shows is maybe the threat of climate change isn’t quite what we thought.
Maybe instead of climate change wrecking communities in the form of a big storm or a wildfire or a flood, maybe even before those things happen, climate change can wreck communities by something as seemingly mundane and even boring as insurance. Maybe the harbinger of doom is not a giant storm but an anodyne letter from your insurance company, saying, we’re sorry to inform you we can no longer cover your home.
Maybe the future of climate change is best seen not by poring over weather data from NOAA but by poring over spreadsheets from rating firms, showing the profitability from insurance companies, and how bit by bit, that money that they’re losing around the country tells its own story. And the story is these shocks are actually already here.
Chris, as always, terrifying to talk to you.
Always a pleasure, Sabrina.
Here’s what else you should know today. On Tuesday, the United Nations has reclassified the number of women and children killed in Gaza, saying that it does not have enough identifying information to know exactly how many of the total dead are women and children. The UN now estimates that about 5,000 women and about 8,000 children have been killed, figures that are about half of what it was previously citing. The UN says the numbers dropped because it is using a more conservative estimate while waiting for information on about 10,000 other dead Gazans who have not yet been identified.
And Mike Johnson, the Speaker of the House, gave a press conference outside the court in Lower Manhattan, where Michael Cohen, the former fixer for Donald Trump, was testifying for a second day, answering questions from Trump’s lawyers. Trump is bound by a gag order. So Johnson joined other stand-ins for the former president to discredit the proceedings. Johnson, one of the most important Republicans in the country, attacked Cohen but also the trial itself, calling it a sham and political theater.
Today’s episode was produced by Nina Feldman, Shannon Lin, and Jessica Cheung. It was edited by MJ Davis Lin, with help from Michael Benoist, contains original music by Dan Powell, Marion Lozano, and Rowan Niemisto, and was engineered by Alyssa Moxley. Our theme music is by Jim Brunberg and Ben Landsverk of Wonderly.
That’s it for “The Daily.” I’m Sabrina Tavernise. See you tomorrow.

- May 21, 2024 • 24:14 The Crypto Comeback
- May 20, 2024 • 31:51 Was the 401(k) a Mistake?
- May 19, 2024 • 33:23 The Sunday Read: ‘Why Did This Guy Put a Song About Me on Spotify?’
- May 17, 2024 • 51:10 The Campus Protesters Explain Themselves
- May 16, 2024 • 30:47 The Make-or-Break Testimony of Michael Cohen
- May 15, 2024 • 27:03 The Possible Collapse of the U.S. Home Insurance System
- May 14, 2024 • 35:20 Voters Want Change. In Our Poll, They See It in Trump.
- May 13, 2024 • 27:46 How Biden Adopted Trump’s Trade War With China
- May 10, 2024 • 27:42 Stormy Daniels Takes the Stand
- May 9, 2024 • 34:42 One Strongman, One Billion Voters, and the Future of India
- May 8, 2024 • 28:28 A Plan to Remake the Middle East
- May 7, 2024 • 27:43 How Changing Ocean Temperatures Could Upend Life on Earth
Hosted by Sabrina Tavernise
Featuring Christopher Flavelle
Produced by Nina Feldman , Shannon M. Lin and Jessica Cheung
Edited by MJ Davis Lin
With Michael Benoist
Original music by Dan Powell , Marion Lozano and Rowan Niemisto
Engineered by Alyssa Moxley
Listen and follow The Daily Apple Podcasts | Spotify | Amazon Music | YouTube
Across the United States, more frequent extreme weather is starting to cause the home insurance market to buckle, even for those who have paid their premiums dutifully year after year.
Christopher Flavelle, a climate reporter, discusses a Times investigation into one of the most consequential effects of the changes.
On today’s episode

Christopher Flavelle , a climate change reporter for The New York Times.

Background reading
As American insurers bleed cash from climate shocks , homeowners lose.
See how the home insurance crunch affects the market in each state .
Here are four takeaways from The Times’s investigation.
There are a lot of ways to listen to The Daily. Here’s how.
We aim to make transcripts available the next workday after an episode’s publication. You can find them at the top of the page.
Christopher Flavelle contributed reporting.
The Daily is made by Rachel Quester, Lynsea Garrison, Clare Toeniskoetter, Paige Cowett, Michael Simon Johnson, Brad Fisher, Chris Wood, Jessica Cheung, Stella Tan, Alexandra Leigh Young, Lisa Chow, Eric Krupke, Marc Georges, Luke Vander Ploeg, M.J. Davis Lin, Dan Powell, Sydney Harper, Mike Benoist, Liz O. Baylen, Asthaa Chaturvedi, Rachelle Bonja, Diana Nguyen, Marion Lozano, Corey Schreppel, Rob Szypko, Elisheba Ittoop, Mooj Zadie, Patricia Willens, Rowan Niemisto, Jody Becker, Rikki Novetsky, John Ketchum, Nina Feldman, Will Reid, Carlos Prieto, Ben Calhoun, Susan Lee, Lexie Diao, Mary Wilson, Alex Stern, Dan Farrell, Sophia Lanman, Shannon Lin, Diane Wong, Devon Taylor, Alyssa Moxley, Summer Thomad, Olivia Natt, Daniel Ramirez and Brendan Klinkenberg.
Our theme music is by Jim Brunberg and Ben Landsverk of Wonderly. Special thanks to Sam Dolnick, Paula Szuchman, Lisa Tobin, Larissa Anderson, Julia Simon, Sofia Milan, Mahima Chablani, Elizabeth Davis-Moorer, Jeffrey Miranda, Renan Borelli, Maddy Masiello, Isabella Anderson and Nina Lassam.
Christopher Flavelle is a Times reporter who writes about how the United States is trying to adapt to the effects of climate change. More about Christopher Flavelle
Advertisement
IMAGES
VIDEO
COMMENTS
The 3 areas of a form: When you're first starting you just need to think of the three simple areas of the form: 1. Light side - This includes the Highlight and the Halftones. The Highlight is the lightest part where the light directly hits the object. The Halftones are always going to be lighter than any value on the shadow side and blend ...
Tools You'll Need for This Tutorial. Step #1: Position Your Reference Under a Bright Light. Step #2: Draw Your Sphere Onto the Canvas or Use Transfer Paper. Step #3: Consider Drawing Out Your Light and Shadow. Step #4: Lay Down the Base Colors. Step #5: Block In Your Shadows First. Step #6: Block in Your Light Areas.
Cast Shadows. When the source of light is blocked by an object it casts a shadow. The length and shape of the cast shadow depends on the placement of the light source. Long shadows are cast from a side light source (as from the sun in late afternoon or early evening), and short cast shadows are cast from over head (as from a noonday sun).
We'll learn how to draw spheres with shading and lighting. This simple art lesson is aimed at providing a detailed and step-by-step understanding of basic li...
Direction of the Light and Contour of the Egg. First, you need to determine the direction, distance and intensity of the light. This influences the way light and shadow fall on the egg. In this case, the light is coming from the upward left corner and appears to be close and intense. As a result, there is a sharp cast shadow.
Core shadow is the area that faces away from the light source and is therefore not illuminated by it. Reflected light is diffuse reflection hitting the core shadow. It is never brighter than the full light. Cast shadow is the area blocked from the light source by the object. Although it may seem obvious, the main lesson you need to take from ...
Here is the second installment of my art lesson series! In this video, I go over some of the basics of light and shadow and how to get started in the world o...
The Fundamentals of Light (Light and Shadow in art)—Breaking Down The Parts. Even though we learn in steps and stages, I find it helpful to get the "lay of the land" because it provides a road map, and it's nice to at least have some idea of what we're doing, right? With that in mind, I have listed the major headings that are part of ...
Soften out the tail of the cast shadow. Pull back the highlight on the light side of the apple. The finished drawing. Whether you download and use the reference image or set up your study, take it a step at a time, look out for the soft transitions, and I hope you get some fantastic results!
The idea behind drawing on tone paper is that the paper provides a neutral value. We, as artists get to draw both the shadow and the light. The result is striking and dramatic. By making drawings on both white paper and toned paper, you'll get a much better understanding of how light and shadow work.
The shadow area is all area not in direct light. Part of the shadow area is illuminated by reflected light. Another part of the shadow area is the core shadow. Core shadow, or terminator, is the darkest dark on the form, and it appears as a line or plane parallel to the light source, benefiting from neither direct light nor reflected light.
By using light to tell the story, Tanner creates something miraculous. 600 miles away in Germany, Käthe Kollwitz created art that reflected her personal experiences of suffering and loss using experimental etching techniques. Traditional etching involves scratching lines into a coated metal plate.
Understanding light is an art superpower. And it's my favourite topic to teach. GET THE GUIDE. ... The downloadable package includes three video lessons, a 10-page eBook, and a printable cheat-sheet. 3 Video Lessons. Covering Foundations, Creating Realism, and Inventing Light. ... Dorian's information on light and shadow was a game changer ...
Exploring shadows and tone. In this lesson, we will be hunting for shadows and exploring the different ways we can use shadows to inspire our drawings. Later on in the lesson, we will begin to discuss 'tone' and experiment with a range of drawing materials to understand a bit more about this term. Download all resources.
Light and shadow in the fine art serve to convey the volume of the subject. Lighting is a means of constructing the volume of objects and the depth of space. Light divides the surface of an object into shadow and illuminated sides. With the help of light, you can set the mood of the drawing. For example, you can make the landscape more joyful ...
Place the flashlight on a table. Shine the light at the white construction paper. Sit between the light and the paper so that your profile appears on the paper. Have a partner trace around your silhouette onto the paper. Remove the paper from the wall and make sure your lines are smooth. Next, cut the silhouette out of the paper, place onto ...
Light & shadow art projects for kids, teens and adults. Keep your kids busy and help relieve stress through creating art. ... Pop up Art School - your one stop for art lessons. Ditch the car keys, choose a lesson, fire up your device, and create with Pop up Art School - from the comfort of home! ...
Duration. 1h 42m 7s. In this lesson, you will learn the essential elements of light and shadow with instructor Iliya Mirochnik. You will explore the components of light theory such as light, shadow, half-tones, terminator line, cast shadow, and highlight. Iliya will teach you how to describe planed and curved surfaces on cylindrical objects.
3h 6m 35s. In this lesson, you will learn the laws of light and shadow. Instructor Steve Huston will lecture on how light casts on a figure and helps you visualize the body in three dimensions. You will watch Steve demonstrates how to create graphically pleasing shadow patterns in your figure drawings and explore the benefit of working on toned ...
Light and Shadow Theory for Painters In this video lesson world-renowned painter Steve Huston will continue to demonstrate the laws of light by painting a simple bowl in oils. Steve will teach you how to break up your scenes into simple three-dimensional forms like the cylinder and how to analyze form as a series of planes, as well as how to ...
A simple approach to three-dimensional drawing. This course shows you how to observe and draw light and shade. Beginning with the basics of drawing simple three-dimensional shapes and then moving onto shadows and cast shadows. It will develop your observation skills and you'll discover new materials and techniques, giving you valuable ...
Chiaroscuro is a painting technique that was established and became famous in the Renaissance period in the 15th century. The technique is about working with high contrast between light and shadow and requires good knowledge of perspective, physical effects of light, brightness, and even the paints used. In other words, it is a very complex and ...
In this lesson, we delve into the fundamental aspects of digital painting, focusing specifically on the interplay between light, shadow, and highlights. Your students will be guided towards exploring the art of utilizing light sources to infuse depth and dimension into their digital artwork. The primary objective of this lesson is for your ...
Born near Milan in 1571, Caravaggio's tumultuous life and profound experiences shaped his distinctive style, known for its dramatic use of light and shadow—techniques that continue to resonate ...
Artist Emma Majury demonstrates how to draw a self-portrait, looking at perspective, proportion, shadow, texture and different materials. Suitable for Key Stage 1, Key Stage 2, Early and First ...
Even Brett Martin, a contributing writer for The New York Times Magazine and the titular Nice Man, didn't hear the 1 minute 14 second song until last summer, a full 11 years after it was ...
88. Hosted by Sabrina Tavernise. Featuring Christopher Flavelle. Produced by Nina Feldman , Shannon M. Lin and Jessica Cheung. Edited by MJ Davis Lin. With Michael Benoist. Original music by Dan ...