 "add ssl certificate to iis powershell")

Adding an HTTPS binding to an IIS Website using PowerShell
The PowerShell IISAdministration module allows you to write scripts to automate the configuration and management of IIS. I wanted to use it to automate the setup of local development environments and found a good article written by Paul Stovell at Octopus Deploy that describes how the module works and provides plenty of good examples - if you're only just starting out with the module, as I was, it is well worth a read.
Using these examples I was able to achieve most of the tasks I had set out to accomplish with my scripts, but I wanted to add an HTTPS binding to my Website and that is not covered in the article. After a quick search around I didn't come across a succinct guide to achieving my task so I am documenting my solution here.
Before we begin I want to point out two things:
I'm making an assumption at this point: you already have an SSL certificate on the machine where you're running this script that IIS can "see"
By "see" I mean that if you try to add a binding through IIS Manager, it is listed in the "SSL certificate" dropdown
I don't have a lot of experience with PowerShell so there may very well be improvements to be made on the code samples provided, but they have worked well for me!
There are three parts to this solution:
Get the SSL certificate thumbprint
Convert the thumbprint from hexadecimal to a byte array, add the https binding.
To be able to add an HTTPS binding I needed to associate it with an SSL certificate, and to do that via the IISAdministration module I needed the thumbprint of the certificate. This can be achieved in PowerShell using the below function:
The SSL certificate thumbprint must be provided as a byte array when creating the binding using the IISAdministration module, but the thumbprint returned using the function above is in hexadecimal format. I can convert it to a byte array using the following function:
Now I have a way to get the SSL certificate thumbprint in the format that I need it I can add the binding. The following snippet assumes that you are adding the binding after creating a new Website, but you can add a binding to an existing website:
The PowerShell IISAdministration module is a good option for scripting and automating the creation of Websites in IIS, and this article shows how it can be used to add HTTPS bindings to new or existing sites.
PowerShell Bind Certificate to IIS Site
IIS (Internet Information Services) web server in Windows OS is used to host static or dynamic websites. To get the trust of users of your website, it’s very important that the website has an SSL certificate. In PowerShell, binding a certificate to the IIS site is a straightforward process .
In PowerShell, the New-WebBinding cmdlet is used to create an SSL binding to the IIS website.
In this article, we will discuss how to install the SSL certificate on the IIS website.
Create an SSL Binding Certificate for the IIS Site
Use the task-based cmdlets called New-WebBinding to add the SSL binding to the IIS website.
Run the following PowerShell script to deploy the SSL binding to the website.
In the above PowerShell script, the New-WebBinding cmdlet uses the Name parameter to specify the site name as “HMITest”, IP address, and Port as 443 with protocol as HTTPS to create SSL binding to the site.
The output of the above PowerShell script creates an SSL binding, to get the SSL binding run the following command.
In the above PowerShell script, the Get-WebBinding cmdlet uses the site name to retrieve the SSL binding collection for the specified website.
The output of the above PowerShell script is:

HMITest website in IIS has HTTP and HTTPS binding collections.
Bind SSL Certificate to IIS Site in PowerShell
To bind the SSL certificate to the IIS site, CD into the IIS:\SslBindings directory and retrieve existing SSL bindings.
Refer to the article on how to create a self-signed certificate in PowerShell where we have created an SSL certificate and stored it in the LocalMachine\My store .
Use the certificate thumbprint to get the certificate details and bind the SSL certificate to the IP address 0.0.0.0 and SSL port 443.
In the above PowerShell script, the Get-Item cmdlet uses the Cert:\ store to get a certificate by certificate hash and passes the certificate details to the New-Item cmdlet. The New-Item cmdlet binds the SSL certificate to the IP address and SSL port number 443.
The output of the above PowerShell script to associate a certificate with the IIS site is:
SSL certificate is successfully associated with the IIS website. Run the website with https://localhost
Cool Tip: How to get IIS certificates and SSL bindings in PowerShell!
I hope the above article on how to bind an SSL certificate to the IIS site in PowerShell is helpful to you.
You can find more topics about PowerShell Active Directory commands and PowerShell basics on the ShellGeek home page.
Related Links
Get All IIS Site Bindings
Create a New Website in IIS
Windows OS Hub / Windows Server 2019 / Installing a Free Let’s Encrypt TLS/SSL Certificate on IIS Web Server and RDS
Installing a Free Let’s Encrypt TLS/SSL Certificate on IIS Web Server and RDS
Let’s encrypt and acme clients for windows, wacs clint to install let’s encrypt tls certificate in iis on windows server, redirect from http to https using the iis url rewrite, using let’s encrypt certificates with rds gateway & web access.
An TLS/SSL certificate of a website allows to protect user data transferred over the public network against man-in-the-middle ( MITM ) attacks and provides data integrity. Nonprofit certification center Let’s Encrypt allows you to automatically issue free X.509 encryption TLS certificates for HTTPS encryption using the API. Only certificates for domain validation that expire in 90 days are issued (there is a limit of 50 certificates for one domain per week). But you can automatically renew the SSL certificate for your website using simple scheduling.
The Let’s Encrypt API interface to automatically issue the certificates is called Automated Certificate Management Environment ( ACME ) API. There are 3 most popular ACME API client implementations for Windows systems:
- Windows ACME Simple (WACS) is the command prompt tool for the interactive issue an SSL certificate and bind it to a specific site on your IIS web server;
- Powershell ACMESharp module – is the PowerShell library with a number of cmdlets to interact with Let’s Encrypt servers over ACME API;
- Certify is a Windows graphics tool to manage SSL certificates interactively using ACME API.
The easiest way to get an SSL certificate from Let’s Encrypt is to use the console tool Windows ACME Simple ( WACS ) (previously this project called LetsEncrypt-Win-Simple ). It is a simple wizard that allows you to select one of the websites running on the IIS, and automatically issue and bind an SSL certificate to it.
Download the latest release of the WACS client from GitHub https://github.com/PKISharp/win-acme/releases (in my case, this is version v2.0.10 – the file name is win-acme.v2.0.10.444.zip ).

Extract the zip archive to the following directory on the server where IIS is installed: c:\inetpub\letsencrypt

Open the elevated command prompt, go to c:\inetpub\letsencrypt directory, and run wacs.exe . This will launch an interactive Let’s Encrypt certificate generation and binding to the IIS site wizard. To quickly create a new certificate, select N: – Create new certificates (simple for IIS) .

Then the utility displays the list of websites running on IIS and prompts you to select a site to issue the certificate for.

Specify the email address to which notifications about certificate renewing problems and other critical messages and abuses will be sent (you can specify multiple email addresses separated by commas). It remains to agree to the terms of use and Windows ACME Simple will connect to Let’s Encrypt servers and try to automatically generate a new SSL certificate for your website.

The process of generating and installing SSL Let’s Encrypt certificate for IIS is fully automated.
By default, domain validation is performed in the http-01 validation (SelfHosting) mode. To do this, you must have a domain DNS record pointing to your web server. When running WACS in manual mode (full options), you can select the validation type – 4 [http-01] Create temporary application in IIS (recommended) . In this case, a small application will be created on the IIS web server through which Let’s Encrypt servers will be able to perform domain validation.
In IIS Manager, open the Site Binding settings for your website and verify that it uses the certificate issued by Let’s Encrypt Authority X3 .

You can find the Let’s Encrypt IIS certificate in the computer certificate store under Web Hosting -> Certificates .

Windows ACME Simple creates a new job in the Windows Task Scheduler ( win-acme-renew (acme-v02.api.letsencrypt.org) ) to automatically renew the certificate. The task starts every day, and the renewal of the certificate is performed after 60 days. This task runs the command:
C:\inetpub\letsencrypt\wacs.exe --renew --baseuri "https://acme-v02.api.letsencrypt.org"

To redirect all incoming HTTP traffic to the HTTPS website URL, install the Microsoft URL Rewrite Module (https://www.iis.net/downloads/microsoft/url-rewrite), and make sure that the option Require SSL is disabled in the site settings. Now configure the redirect in web.config with rewrite rules:
You can also configure traffic redirect using the URL Rewrite extension through the IIS Manager GUI. Select Sites -> yoursitename -> URL Rewrite .

Create a new rule Add Rule -> Blank rule .
Specify a rule name and change the following parameter values:
- Requested URL : Matches the Pattern
- Using : Regular Expressions
- Pattern : (.*)

In the Conditions section, change the Logical Grouping : Match All and click Add . Specify the following settings:
- Condition input: {HTTPS}
- Check if input string: Matches the Pattern
- Pattern: ^OFF$

Now in the Action block select:
- Action Type: Redirect
- Redirect URL : https://{HTTP_HOST}/{R:1}
- Redirect type : Permanent (301)
Open a browser and try to open your site with an HTTP address; you should be automatically redirected to the HTTPS URL.
If you use RDS Gateway or RDS Web Access to connect external users to the corporate network, you can use the trusted SSL certificate from Let’s Encrypt instead of the self-signed certificate. Consider how to correctly install the Let’s Encrypt certificate to secure Remote Desktop Services on Windows Server.
Then, run wacs.exe on the RD Gateway server, as described above. Select the desired IIS site (usually it is the Default Web Site . Let’s Encrypt will issue you a new certificate and bind it to the IIS website, and the automatic certificate renewal task will appear in the Task Scheduler.
You can manually export this certificate and bind it to the required RDS services through the SSL binding. But you will have to perform these steps manually every 60 days when the Let’s Encrypt certificate is renewed.
We can use the PowerShell script to automatically bind the SSL certificate to the RDS Gateway after updating the Let’s Encrypt certificate.
There is a ready PowerShell script in the win-acme project – ImportRDGateway.ps1 ( https://github.com/PKISharp/win-acme/tree/master/dist/Scripts ), which allows you to install the selected SSL certificate for Remote Desktop Services. The main drawback of this script is that you have to manually specify the thumbprint of the new certificate:
ImportRDGateway.ps1 <certThumbprint>
To automatically get the certificate thumbprint from the specified IIS site, use the modified script ImportRDGateway_Cert_From_IIS.ps1 (based on the ImportRDGateway.ps1).
You can run this script manually:
powershell -File ImportRDGateway_Cert_From_IIS.ps1
If your RDS Gateway runs on the IIS “Default Web Site” with index 0, you can use the script without changes.
Import-Module WebAdministration Get-ChildItem IIS:Sites|ft -AutoSize

Now open the win-acme-renew scheduler task, and on the Actions tab add a new task that runs the ImportRDGateway_Cert_From_IIS.ps1 script after updating the SSL certificate.
In order not to change the PowerShell execution policy, you can run the script with the command:
PowerShell.exe -ExecutionPolicy Bypass -File c:\inetpub\letsencrypt\ImportRDGateway_Cert_From_IIS.ps1

Now the script for binding the SSL certificate to the RDS will be executed immediately after the Let’s Encrypt certificate is renewed. In this case, the RD Gateway service is automatically restarted with the command:
Restart-Service TSGateway
[aler] When the TSGateway service restarts, all current user sessions are disconnected, so it is recommended to change the frequency of launching the certificate renewal task once every 60 days.[/alert]
Fix: Photos App in Windows 10 Opens Extremely Slow
Outlook not showing embedded images in emails, related reading, configure dns scavenging to clean up stale dns..., prevent server manager from starting at logon on..., fix: remote desktop (rdp) session freezes (disconnects) on..., deploying third party software updates with wsus, how to find windows version and build number..., 10 comments.

Where would web.config be located? I know I can search for it, I just think it should be mentioned (it’s default location anyway) Thanks great little tutorial.

Default is in the root of the web directory. Anywhere else is done by design.

I am hoping you can help me out. Please email me.
Scenario: The issue we are facing is that clients would setup domains in an A record or CNAME like app.customerdomain.com pointed to our domain. That’s on our server like custom.elevatie.com which is binded.
We generate a certificate but where do we bind it because the certificate generated is for client domain which isn’t binded on our system because they have their CNAME/A Record pointed to our custom.elevatie.com to handle all the requests.
But if we were to physically bind the domain on the server and apply the certificate then yes we are able to obtain SSL. But this isn’t the case.

Is there any way to renew the SSL automatic, 30 days before and not 60 days?

Thanks for the guide, Do you know if the URL Rewrite will break the ACME automated renewal?

I have not encountered such cases. Check your IIS and ACME log files.

Great post most of free SSLs are 3 months

At Windows Server 2016 Essentials $NewCertThumbprint = (Get-ChildItem IIS:SSLBindings\0.0.0.0!443)[0].Thumbprint and $RdsSslCertThumbprint = (Get-Item -Path RDS:\GatewayServer\SSLCertificate\Thumbprint).CurrentValue if ($RdsSslCertThumbprint -ne $CertInStore.Thumbprint) { Set-Item -Path RDS:\GatewayServer\SSLCertificate\Thumbprint -Value $CertInStore.Thumbprint -ErrorAction Stop Restart-Service TSGateway -Force -ErrorAction Stop "Cert thumbprint set to RD Gateway listener and service restarted" }

I have been getting a error now with the renewals.
Cert thumbprint was not set successfully Error: Access to the object at RDS:\GatewayServer\SSLCertificate\Thumbprint is denied for the cmdlet Set-Item.The certificate is not valid or you do not have sufficient permissions to perform this operation.
Any ideas what can be causing it?
[…] un certificat émis par une autorité de confiance. On peut obtenir un certificat gratuit avec Let’s Encrypt ou bien le faire soi-même en PowerShell. C’est la voie que je vais […]
Leave a Comment Cancel Reply
Notify me of followup comments via e-mail. You can also subscribe without commenting.
Current ye@r *
Leave this field empty

Rick Strahl's Weblog
Use Powershell to bind SSL Certificates to an IIS Host Header Site

Certificate management on Windows has always been a pain in the ass. I've been dealing with certificates a bit in the last few months as I've moved all of my sites over to Lets Encrypt , so here are a few notes on how to use command line tools, or more specifically Powershell to manage certificates in relation to IIS installations.
Things got a little more complicated with Windows Server 2012 and support for SNI which lets you bind multiple Certificates to a single IP address which means that certificates have to be bound that way as well. In researching this there have been solutions for some time for binding to IP addresses, but when binding to host headered sites with SNI, things work a little differently and finding the right solution took a bit of fiddling.

Getting Started
For these examples I'll use Powershell and the IIS WebAdministration Powershell snap-in . If you have IIS installed this snap-in should be registered, if not you may have to install it .
The process to register an SSL certificate in an IIS site is:
- Create or import a certificate
- Find its certificate hash
- Bind the host header/IP address to the certificate in http.sys
- Bind the IP/Hostheader binding to IIS
Getting Setup
Let's start by opening a Powershell Administrator window, and then creating a couple of variables in Powershell that we'll re-use with various commands:
Cutin' and Pastin' Note most of the following Powershell commands below include line breaks for readability but they need to be on a single line to execute. I've copied all the commands at the bottom into a parameterized script that you can either run directly or cut and paste from more easily.
Creating a Test Certificate
I'll start by creating a test certificate to bind. If you already have a certificate and that certificate is installed you can skip this step and go directly to retrieving the certificate's thumbprint/certhash.
To create a local client side certificate:
Once created you need to also make add this certificate to your trusted root certificates so that your local machiune will trust it - without this step the certificate will show as secure but untrusted. From the start menu run Manage Certificates | Personal to find your certificate and then copy it over into the Trusted Root Certificates :

Once you've created the certificate you can check to see whether it was created with:
From the display there you can also copy the thumbprint, which we'll need later to bind the certificate in IIS.
We'll want to capture the certificate hash (shown as the thumbprint) into a variable, so we can use to store that to a $cert variable:
This should all look something like this:

Existing Certificates
If you have an existing certificate you can import it with CertUtil :
From a PFX:
From a CER:
Get the Certificate Hash or 'Thumbprint'
Once a certificate exists you need to find the certificate hash which is used to bind the certificate to an IP address and to an IIS site.
As before browse your certs and find the thumbprint, copy it from the Powershell window and paste it to the $cert variable:
Bind the certificate to an IP Address and Port
Once you have a certificate hash in the $cert variable I can bind the certificate to a port.
For host header support you need to use the hostnameport parameter netsh sslcert command to specify a combination for hostname and port. This is required so you can use SNI (Server Name Indication) with the IIS Site, which allows you to bind multiple certificates to a single IP address in IIS.
To bind hostname and IP to your certificate you can now do:
Note that here we're binding an hostname and IP Address combination using the hostnameport option which is what's required for SNI. The hostname:port combo doesn't yet exist, but it works regardless as this just creates an entry in a mapping table.
Bind the Web Site to the Host Header IP
Finally we need to also bind Web site to the IP/Hostheader/Port combination.
Notice the -SslFlag=1 setting, which enables SNI on this binding.
If for whatever reason you need to remove the binding you can use:

When it's all said and done we should now have a completed binding in IIS:

Note that we have the SNI setting flagged and the certificate pointing at our newly created certificate.
You should now be able to browse to your site under SSL and get the secure lock icon:

Powershell Code Snippets
As mentioned here are all the pastable Powershell commands. It's actually a runnable script which you can run.
First make sure you find your cert hash:
Then you can run the script to pass in the hostname, the IIS site name, machine name and the cert hash as parameters:
Here's the full script. Note if you don't pass a cert hash to it it will create a new local certificate with the name of the hostname.
Related Content
- Using Lets Encrypt with Windows and IIS
- Getting Motivated to move to SSL
Other Posts you might also like
- Implementing Two-Factor Auth using an Authenticator App in ASP.NET
- Role based JWT Tokens in ASP.NET Core APIs
- Automating IIS Feature Installation with Powershell
- Combining Bearer Token and Cookie Authentication in ASP.NET

The Voices of Reason
# re: Use Powershell to bind SSL Certificates to an IIS Host Header Site
Given that you've done this in PowerShell, a better option than MakeCert which needs to be installed is the cmdlet New-SelfSignedCertificate:
This can be combined with retrieving the existing certificate to make your script generate a cert if needed...
What if I don't want Hostname support? Like the default IIS behaviour?
So to replicate through the UI, I would click on my Site, click "Bindings" and Hostname would be greyed out but I'm able to select my cert from the drop down. I would like to do this via powershell but can't seem to figure it out.
Here's a link to a solution that doesn't involve calling netsh. I'm adding SSL on a site that has 5 domains with a cert that has Alternative subject names. Note that the * for IP address and passing -Thumbprint seem to be key to getting it just right.
https://social.technet.microsoft.com/Forums/office/en-US/c83d72eb-4215-40ab-aa53-56f75ee52250/newwebbinding-syntax-to-add-ssl-binding-to-specific-iis-web-site?forum=winserverpowershell
just a note on selecting a certificate once you start using let's encrypt and will have a few certs with the same hostname. also pipe sort
and you will always get the latest and correct thumprint
Late to the party here in 2018, but on a new Win Server 2016, I was able to bind the certificate by grabbing a handle on the Web-binding which was just created and calling AddSslCertificate on it (certificate already imported into WebHosting store).
Thanks Rick!
Following up to Dave's answer, this can be one-lined and not require any variables at all:
The last parameter "my" will resolve to the certificate store for the local computer for the Personal\Certificates folder [typical webserver SSL installation location]. You can grab the thumbprint value by inspecting the certificate in a browser, certmanager snapin, or alternatively you can use other commands on this post/comments to get the cert via powershell and access the thumbprint as a property of it.
Very helpful, thank you.
Although a couple of typos threw me for a while:
dir certs:\localmachine\my
dir cert:\localmachine\my
I have issues installing and binding a certificate with powershell. The certificate installs correctly and the binding is correct as well but on binding, the SSL certificate is not selected. I get the below error:
SSL Certificate add failed, Error: 1312 A specified logon session does not exist. It may already have been terminated.
Anyone knows what could be causing this issue?
Updating IIS certificates with powershell
Let’s say you were in a situation where you had to update a certificate that was installed on a lot of servers. Do you want to do it all manually? Heck no. Let’s hack together some powershell to make it work. This code is very loosely based on this one except the typos have been fixed and there’s no magic IP addresses :)
Importing the certificate locally
Let’s get it working locally first. Within a powershell window, let’s try a few commands. First off, let’s load in our new certificate that we want to install. Assuming that we have a certificate in pfx format that is ready to be imported, let’s install it into our certificate store:
Your new certificate should be installed and viewiable in IIS by clicking on your computer name (not on one of the sites!) and then choosing “Server Certificates”, and you should see something like this:

Updating IIS to use the new certificate
Now how about we update one particular binding to use this new certificate:
You might want to check that your $site variable has the right web site before you proceed. Just run echo $site and it should be pretty obvious.
Now let’s fetch the first SSL binding that is mapped to port 443:
and let’s do the magic:
BTW, this AddSslCertificate command doesn’t seem to be documented anywhere, and in my opinion it’s confusingly named - if there’s already an SSL certificate assigned to the binding then it will update it to use the new one. But hey, it works:

Now this is all well and good, but how do we do this across multiple servers, remotely?
Installing certs on multiple servers
Let’s copy the cert to a few servers:
This will copy the cert into the c:\ drive on the desired servers. Note the extra confusing use of the tilde character which you have to use in powershell to escape a dollar sign in a string!
Now let’s connect to all of these servers and import the certificate:
There’s a bunch of magic here. New-PsSession creates a new connection to a remote server, for the supplied list of server names. Invoke-Command executes the desired command against all of the servers that we’ve opened a connection to, and then we are adding the $using prefix to any variables that we wish to access outside of this command.
Once that’s done, we can delete the certificate off the servers:
Things are starting to look good! We have the cert imported, shall we update IIS to use this new certificate across all our servers, if they are using an older certificate that we know is about to expire? Let’s update our command:
With a bit of luck, you should see something like this:

- ← Previous Post
- Next Post →
Create a Self-Signed Certificate for IIS with Powershell
by Matthew Hart on June 07, 2020
This post will describe how to create a self-signed certificate to be used for a local website hosted in IIS. It is assumed you are running Windows 10 with Administrator privileges and have .NET Framework installed. These commands may not work for prior versions of Windows. If you are looking for a more complete script to setup a local IIS site with multiple domains all configured with self-signed SSL. You can find my IIS Builder Powershell script here: https://github.com/mattou07/iis-builder .
Prerequisite
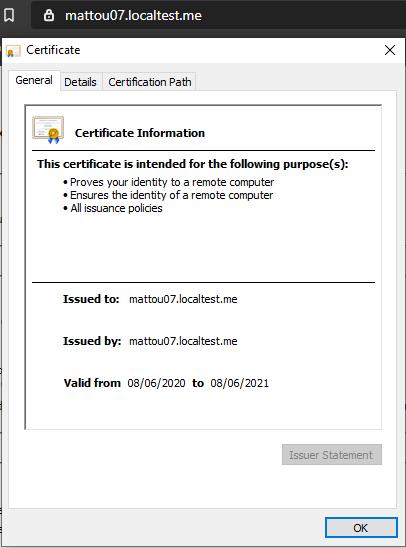
Before we start, we need to know what our binding (hostname) will be for the IIS site. For my example we will have the binding mattou07.localtest.me (The localtest.me domain was kindly provided as a wildcard DNS where any subdomain points to 127.0.0.1, you can read more here https://readme.localtest.me/ ). If you want to use a different domain, you will need to make sure its pointing to 127.0.0.1 in your hosts file.
Before running any of the IIS commands please ensure you open Powershell as Admin and import the WebAdministration module first (You may run into issues with Powershell 7):
Creating a self-signed certificate
The following powershell command will create our self-signed certificate for our binding and store it in the Personal Store (Note how I also store a reference to the certificate in a variable called $cert this will be needed further on):
However, this is not enough to make the certificate work for HTTPS in our browser. We need to add our newly created certificate to the Trusted Root Certificate store . To do this we take our $cert variable which references our created certificate and add it to our Trusted Root Certificate store like so:
In terms of creating the self-signed certificate that’s it! You now have a valid self-signed certificate for your binding, created and trusted on your local machine. You can now manually add this certificate to your binding in IIS. I will continue to discuss how to add the certificate to IIS using Powershell commands below.
Creating our IIS site with HTTPS bindings
Create app pool.
First, we will create the App Pool, if you already have an app pool created you can skip this. The $runtimeVersion is the .NET Framework runtime you want the pool to run, you could use a later version if you wanted. However, it needs to be installed on the machine before it can be used.
The above code will create our app pool named mattou07-pool running version 4.0 of the .NET Framework.
Create IIS Site
We now need to create our IIS site, to do so we need to assign a normal HTTP binding first. The Powershell below will take our previous variables and use the New-Website commandlet to create our IIS site.
Adding multiple bindings
To add additional bindings, you need to use a separate commandlet to do this called New-WebBinding . The below Powershell will add an additional HTTP binding called mattou07-second.localtest.me to the site we created previously:
Assigning HTTPS bindings to our IIS site
To get the binding to work under HTTPS we need to add a separate HTTPS binding and then assign our certificate to that binding. The Powershell below will create our HTTPS binding and add our self-signed certificate we created earlier:
I no longer have the certificate referenced
If you no longer have the $cert variable you can easily get the thumbprint using this Powershell to get the certificate by its Subject name (the binding) and then obtain the Thumbprint.
One thing to watch out for is if there are multiple certificates with that subject name. Powershell will return multiple certificates as an array. You will need to target a specific one in the array like so or delete the duplicate certificates:
The end result should be your domain now working with SSL pointing at your local IIS site.
Again if you are looking for a script that is more complete and is actively being used by others then check out my IIS Builder script here: https://github.com/mattou07/iis-builder Give it a star if you like it!
Feel free to tweet me if you found this post useful or if you notice an issue in the post. Thanks for reading!
This browser is no longer supported.
Upgrade to Microsoft Edge to take advantage of the latest features, security updates, and technical support.
How to Set Up SSL on IIS 7 or later
- 7 contributors
by Saad Ladki
Introduction
The steps for configuring Secure Sockets Layer (SSL) for a site are the same in IIS 7 and above and IIS 6.0, and include the following:
- Get an appropriate certificate.
- Create an HTTPS binding on a site.
- Test by making a request to the site.
- Optionally configure SSL options, that is, by making SSL a requirement.
This document provides some basic information on SSL, then shows how to enable SSL in the following ways:
- Using IIS Manager.
- Using the AppCmd.exe command line tool.
- Programmatically through Microsoft.Web.Administration.
- Using WMI scripts.
This article contains the following sections:
SSL Configuration
Using appcmd.
- Using IIS Manager
Whether you are running your web site on your own server, or in the cloud , using SSL to secure your site is probably extremely important to you, as many websites are turning to it to protect user's privacy. If you need to configure SSL on your server, it's important to realize that the implementation of SSL changed from IIS 6.0 to IIS 7 and above. In IIS 6.0 on Windows Server 2003, all SSL configuration was stored in the IIS metabase, and encryption/decryption occurred in User mode (requiring a lot of kernel/user mode transitions). In IIS 7 and above, HTTP.sys handles SSL encryption/decryption in kernel mode, resulting in up to 20% better performance for secure connections in IIS 7 and above than that experienced in IIS 6.0.
Using SSL in kernel mode requires storing SSL binding information in two places. First, the binding is stored in % windir %\System32\inetsrv\config\applicationHost.config for your site. When the site starts, IIS sends the binding to HTTP.sys, and HTTP.sys starts listening for requests on the specified IP:Port (this works for all bindings). Second, the SSL configuration associated with the binding is stored in the HTTP.sys configuration. Use the netsh command at a command prompt to view SSL binding configuration stored in HTTP.sys as in the following example:
When a client connects and initiates an SSL negotiation, HTTP.sys looks in its SSL configuration for the IP:Port pair to which the client connected. The HTTP.sys SSL configuration must include a certificate hash and the name of the certificate store before the SSL negotiation will succeed.
Troubleshooting Tip: If you're having trouble with an SSL binding, verify that the binding is configured in ApplicationHost.config, and that the HTTP.sys store contains a valid certificate hash and store name for the binding.
Choosing a Certificate
When choosing a certificate, consider the following: Do you want end users to be able to verify your server's identity with your certificate? If yes, then either create a certificate request and send that request to a known certificate authority (CA) such as VeriSign or GeoTrust, or obtain a certificate from an online CA in your intranet domain. There are three things that a browser usually verifies in a server certificate:
- That the current date and time is within the "Valid from" and "Valid to" date range on the certificate.
- That the certificate's "Common Name" (CN) matches the host header in the request. For example, if the client is making a request to https://www.contoso.com/ , then the CN must be www.contoso.com .
- That the issuer of the certificate is a known and trusted CA.
If one or more of these checks fails, the browser prompts the user with warnings. If you have an Internet site or an intranet site where your end users are not people you know personally, then you should always ensure that these three parameters are valid.
Self-signed certificates are certificates created on your computer. They're useful in environments where it's not important for an end user to trust your server, such as a test environment.
You cannot request or create a certificate by using AppCmd.exe. You also cannot use AppCmd.exe to create an SSL binding.
Configure SSL Settings
You can use AppCmd.exe to configure a site to accept only server HTTPS connections by modifying the sslFlags attribute in the Access section. For example, you can configure this setting for the "Default Web Site" in the ApplicationHost.config file (for example, commitPath:APPHOST) by using the following command:
If successful, the following message is displayed:
To require 128-bit SSL, change the sslFlags value to Ssl128 .
The following example demonstrates how to view the <access/> section settings for the Default Web Site. The sslFlags attribute has been set successfully.
Executing the command results in the following entry in the ApplicationHost.config file:
You cannot request or create a certificate by using the WebAdministration WMI namespace.
Create an SSL Binding
The following script demonstrates how to create a new SSL binding and how to add the appropriate configuration for both HTTP.sys and IIS:
The certificate hash and store must reference a real, functional certificate on your server. If the certificate hash and/or store name are bogus, an error is returned.
The following script demonstrates how to set SSL settings by using the IIS WMI provider. You can find this value in the IIS_Schema.xml file.
IIS Manager
Obtain a certificate.

Enter a friendly name for the new certificate and click OK .
Now you have a self-signed certificate. The certificate is marked for "Server Authentication" use; that is, it uses as a server-side certificate for HTTP SSL encryption and for authenticating the identity of the server.
Select a site in the tree view and click Bindings... in the Actions pane. This brings up the bindings editor that lets you create, edit, and delete bindings for your Web site. Click Add... to add your new SSL binding to the site.

The default settings for a new binding are set to HTTP on port 80. Select https in the Type drop-down list. Select the self-signed certificate you created in the previous section from the SSL Certificate drop-down list and then click OK .

Verify the SSL Binding

Configure SSL settings if you want your site to require SSL, or to interact in a specific way with client certificates. Click the site node in the tree view to go back to the site's home page. Double-click the SSL Settings feature in the middle pane.

In this walkthrough, we successfully used the command-line tool AppCmd.exe, the scripting provider WMI, and IIS Manager to set up SSL on IIS.
Was this page helpful?
Coming soon: Throughout 2024 we will be phasing out GitHub Issues as the feedback mechanism for content and replacing it with a new feedback system. For more information see: https://aka.ms/ContentUserFeedback .
Submit and view feedback for
Additional resources
How-To Geek
How to configure ssl certificates in iis for windows server.
SSL certificates are a crucial component of the modern web, as they are required for secure HTTPS traffic, protecting your users from attackers in the middle sniffing packets.
Quick Links
What is an ssl certificate and what does it do, begin by generating a certificate signing request, ordering the ssl and submitting your csr to the certificate authority, installing your ssl certificate on your web server, binding your ssl certificate to your website, testing your certificates and making sure you're secure.
SSL certificates are a crucial component of the modern web, as they are required for secure HTTPS traffic, protecting your users from attackers in the middle sniffing packets. We'll show how to request and configure them for Microsoft's IIS web server.
SSL certificates, which stands for Secure Socket Layer, protect and secure websites all over the world. You can tell when a website has an SSL certificate configured because the URL in the browser shows https:// instead of just http://.
When a website has SSL configured properly, it encrypts the data between the web server that hosts the website and your computer or mobile device. This prevents 3rd parties and hackers from intercepting the data and being able to steal your passwords and credit card information. If a website is taking credit cards or passwords from you, most of the time it will have a secure SSL connection, protecting you and your data.
This guide is for intermediate users who have a medium to strong grasp on technology but need help specifically installing a certificate in IIS (Internet Information Services) on Windows Server. This guide will walk you through the basic steps needed to get your URL secured with SSL and ready to encrypt connections.
The first thing you will need to do is generate a certificate signing request from your web server for your website. To do this, open IIS Manager (Internet Information Services) on your web server and navigate to Server Certificates.
On the right-hand side of IIS, select Create Certificate Request and enter in your company information. Anyone can get SSL for their website, so if you do not have a company name, you can just use your legal name or entity. This information is needed to register the website with the SSL authority to try and prevent fraud and false SSL registration.
Please be aware that Common Name should be www.yourdomain.com instead of just yourdomain.com. If the www is not included in this section, you will only be able to secure yourdomain.com and not www.yourdomain.com. If the www is included, you are able to secure both.
Once you have filled out this section, click Next to move on.
On the following page, select your Bit Length for encryption, usually 2048, click Next and save your CSR on your desktop as yourdomain.csr.txt as we will be providing this data to a certificate issuer at the next step, so keep it handy!
Navigate to your desired certificate authority's website and begin your SSL order. Many organizations use services like DigiCert, Global Sign, Namecheap, or Verisign to order their certificates and secure their domains. There is also LetsEncrypt , which offers free certificates.
At this point, you will need to provide the contents of the CSR we generated in the last step. You can open this .csr.txt file in Notepad and copy out the CSR data. It will look something like this:
-----BEGIN CERTIFICATE REQUEST----- MIICvDCCAaQCAQAwdzELMAkGA1UEBhMCVVMxDTALBgNVBAgMBFV0YWgxDzANBgNV BAcMBkxpbmRvbjEWMBQGA1UECgwNRGlnaUNlcnQgSW5jLjERMA8GA1UECwwIRGln aUNlcnQxHTAbBgNVBAMMFGV4YW1wbGUuZGlnaWNlcnQuY29tMIIBIjANBgkqhkiG 9w0BAQEFAAOCAQ8AMIIBCgKCAQEA8+To7d+2kPWeBv/orU3LVbJwDrSQbeKamCmo wp5bqDxIwV20zqRb7APUOKYoVEFFOEQs6T6gImnIolhbiH6m4zgZ/CPvWBOkZc+c 1Po2EmvBz+AD5sBdT5kzGQA6NbWyZGldxRthNLOs1efOhdnWFuhI162qmcflgpiI WDuwq4C9f+YkeJhNn9dF5+owm8cOQmDrV8NNdiTqin8q3qYAHHJRW28glJUCZkTZ wIaSR6crBQ8TbYNE0dc+Caa3DOIkz1EOsHWzTx+n0zKfqcbgXi4DJx+C1bjptYPR BPZL8DAeWuA8ebudVT44yEp82G96/Ggcf7F33xMxe0yc+Xa6owIDAQABoAAwDQYJ KoZIhvcNAQEFBQADggEBAB0kcrFccSmFDmxox0Ne01UIqSsDqHgL+XmHTXJwre6D hJSZwbvEtOK0G3+dr4Fs11WuUNt5qcLsx5a8uk4G6AKHMzuhLsJ7XZjgmQXGECpY Q4mC3yT3ZoCGpIXbw+iP3lmEEXgaQL0Tx5LFl/okKbKYwIqNiyKWOMj7ZR/wxWg/ ZDGRs55xuoeLDJ/ZRFf9bI+IaCUd1YrfYcHIl3G87Av+r49YVwqRDT0VDV7uLgqn 29XI1PpVUNCPQGn9p/eX6Qo7vpDaPybRtA2R7XLKjQaF9oXWeCUqy1hvJac9QFO2 97Ob1alpHPoZ7mWiEuJwjBPii6a9M9G30nUo39lBi1w= -----END CERTIFICATE REQUEST-----
Copy the contents of your CSR to your order form as requested and follow the instructions on your SSL registrar's form. Once you complete your orde, download the .cer they provide to you and save it to your web server.
You are nearly ready to provide secure connections between visitors and your website!
On your server, go back to IIS and Server Certificates and select 'Complete Certificate Request' on the right hand side of IIS Manager.
Upload the new certificate file you just downloaded from the SSL issuer and keep the friendly name the same as your domain or yourdomain.com-01 for simplicity. You can leave the selected ceritficate store as the Personal store.
Now that you have you installed your SSL certificate to your sever, you must bind it to your website in order for it to take effect.
To bind it to a website, navigate to your website in IIS and select bindings on the right hand side.
You will need to add a new binding for Type: https, select your SSL certificate from the drop down which you labeled yourdomain.com or yourdomain.com-01. '
For hostname you will want to make it yourdomain.com. After you create this binding you will want to create a second binding for www.yourdomain.com as well so that both versions www and non-www versions of the URL are encrypted.
Select OK and your binding should take effect. Now if you want to access your website securely you can go to https://yourdomain.com to see if the SSL is installed correctly.
To make sure SSL is loading correctly for all users, go to an SSL Checker website like https://www.sslshopper.com/ssl-checker.html and enter your domain in the form field as https://yourdomain.com. If it works correctly, it will show you all green checks, otherwise it will tell you exactly what is wrong.
If only some of the content is appearing encrypted, you will need to update the URLs for things like images and scripts in your website's code to have the htttps:// URL instead of http://.
Try testing both www and non-www versions of your site for errors.
To force your website to load the secure URL (https) instead of http, you will need to create a redirect rule forcing http to redirect to https for this website.
You are now encrypting sensitive data between your users and your website! This makes your website more credible and safer for everyone on the internet. Thanks for doing your part!
Stack Exchange Network
Stack Exchange network consists of 183 Q&A communities including Stack Overflow , the largest, most trusted online community for developers to learn, share their knowledge, and build their careers.
Q&A for work
Connect and share knowledge within a single location that is structured and easy to search.
How do I bulk change the SSL certificate on multiple sites in IIS using powershell?
I have a server with a dozen or so sites that each have HTTP and HTTPS bindings, with a couple of these sites sharing the same root domain, like so:
Now, the SSL certificate I use, * .contoso.com , is expiring next week, so I got a new one, imported it and it is now available to IIS. To replace the certificate for each binding using the old one I now have to go to each site, go to bindings, select the :443 binding and set it to use the new certificate. Not a big issue with just one site, but I have dozens of sites all running on this certificate!
How can I easily switch all the * .contoso.com sites from the old certificate to the new one using Powershell?
I have already looked into the documentation of the IISAdministration module but I haven't been successful in finding a method that allows me to change a binding so that it uses a different certificate, and google mostly gives me solutions that include the renewal of an certificate, something I've already handled using my certificate provider's website.
Contoso is a placeholder name and not a real company.
- windows-server-2019
2 Answers 2
The above script failed to work for me, is more complex, and requires installing additional server components to use. Instead, we can directly update the existing binding.
The below, modified, code is much more concise and reduces the chance of interruptions to live sites caused by attempting to remove bindings and re-add them.
This should do what you're looking for using the WebAdministration module instead. I'm not able to test it out at the moment, so definitely try it out on one binding first in case I typo'd something:
First, make sure you can get the new certificate. You can filter by FriendlyName/SubjectName/Thumbprint etc. Basically, make sure that this command only returns one certificate for you:
Then this script will recreate your SSL bindings using the new certificate. Try running each step manually first:
I originally based this on Terri Donahue's post here , which has a lot more detail and explanations about the process.
You must log in to answer this question.
Not the answer you're looking for browse other questions tagged powershell ssl iis windows-server-2019 ..
- The Overflow Blog
- Spreading the gospel of Python
- OverflowAI and the holy grail of search
- Featured on Meta
- Our Partnership with OpenAI
- What deliverables would you like to see out of a working group?
Hot Network Questions
- How effective are statues and other monuments in changing people's political beliefs?
- What would military spies in 17th century Europe be looking for inside a city, before a siege?
- printf in Zsh does not shell escape exclamation mark
- Looking for a book I read in the '70s, post-apocalypse/underground bunker
- Is a dome really the most efficient way to contain gas in a vacuum?
- How will hitting the gym trigger the effect of the drug?
- Story about someone selling his soul to the Devil and losing...with a twist
- Five integers are paired in all possible ways. The integers in each pair are added. The ten sums are 1,4,5,7,8,8,11,11,14,15. What are the integers
- Potential PhD advisor may lack qualifications
- What species would make good flying livestock?
- Jesus doesn't accuse & releases the adulterous woman, yet Matthew 5:27-28 seems to say otherwise, regarding, "whoever looks at a woman lustfully..."
- Partition of unity without AC
- Why are search problems assumed to have the structure of "find a path in a graph"?
- Asking employer to relocate me back to origin city after moving internationally
- Multiple certificate chains on a single server for TLS
- dir command: force output to one filename per line, full path included, but nothing else
- Python - Text-based game about an escape room
- Problem with logarithm of tensor product of matrices
- Arranging Letters in a string
- Do tenants need consent to sublease?
- Would it count as a story if nothing bad happens to the character anywhere in the story?
- Do native speakers say "I'm [keen on/fond of] cloudy days"?
- What is the translation of deadheading in French?
- Why do some Proto-Germanic nouns end with *-az?
IMAGES
VIDEO
COMMENTS
Now lets use the IIS PowerShell Snap-in to create an SSL binding and associate it with the certificate we just created. Creating an SSL Binding. We are adding the SSL binding to the Default Web Site using one of the task-based cmdlets called New-WebBinding: PS IIS:\> New-WebBinding -Name "Default Web Site" -IP "*" -Port 443 -Protocol https
Locate your website in the IIS console, and select Edit Bindings. Click Add and fill in the following info: Type: https. IP Address: select All Unassigned or a specific IP address to bind the SSL certificate to (you can run multiple websites on the same port and IP address of the IIS web server) Port number: 443.
The SSL certificate needs to be in the certificate store before binding to adding to an IIS website binding. This can be done in powershell using the following command: Import-PfxCertificate -FilePath "C:\path to certificate file\certificate.pfx" -CertStoreLocation "Cert:\LocalMachine\My"
To set up the encryption component, you must install a certificate for SSL on IIS and force the binding to use that certificate. Create a self-signed certificate on the server using the -SelfSignedCertificate command. Provide the folder for the certificate store location and the domain name system (DNS) name.
After assigning the new SSL certificate to the IIS website, you can open the IIS Management console ( inetmgr.exe) to verify the cmdlet set the SSL certificate correctly. We can see the SSL certificate is the newly generated self-signed certificate and the port is properly configured to 443.
Get the SSL certificate thumbprint. Convert the thumbprint from hexadecimal to a byte array. Add the HTTPS binding. Get the SSL certificate thumbprint. To be able to add an HTTPS binding I needed to associate it with an SSL certificate, and to do that via the IISAdministration module I needed the thumbprint of the certificate. This can be ...
Let me tell you a story about automating getting a certificate installed on an IIS server with PowerShell. The Mission From a client, request a new public Digicert certificate, get it installed on a remote Windows Server 2012 R2 Core Server running IIS 8.5 in a workgroup, set a SSL binding to a website and use the installed certificate for the ...
Create an SSL Binding Certificate for the IIS Site. Use the task-based cmdlets called New-WebBinding to add the SSL binding to the IIS website. Run the following PowerShell script to deploy the SSL binding to the website. New-WebBinding -Name "HMITest" -IP "*" -Port 443 -Protocol https. In the above PowerShell script, the New-WebBinding cmdlet ...
This powershell script example shows how to create a self-signed certificate on Personal store. Export the certificate to ROOT store to make the certificate considered as a trusted certificate in the local machine and add a new HTTPS binding on a website named TestSite for testing purposes. Parameters-BindingInformation
Install IIS using PowerShell. To install the Web-Server role, you should use the** Install-WindowsFeature** cmdlet with the following syntax. The -IncludeManagementTools parameter installs the management tools needed to manage IIS. Install-WindowsFeature -Name Web-Server -IncludeManagementTools. I do not recommend using -IncludeAllSubFeature ...
Open the elevated command prompt, go to c:\inetpub\letsencrypt directory, and run wacs.exe. This will launch an interactive Let's Encrypt certificate generation and binding to the IIS site wizard. To quickly create a new certificate, select N: - Create new certificates (simple for IIS). Next, you need to select the certificate type.
Introduction. The IIS PowerShell Provider is a PowerShell Snap-In that allows you to manage IIS configuration and run-time data. It gives easy access to Web-Sites, Application Pools, Web Applications, Virtual Directories, request in flight, Worker Processes and .NET Application Domains within Worker Processes. Follow the subsequent walkthroughs.
Managing SSL certificates on Windows has always been a pain in the ass and recently with the introduction of SNI to support multiple SSL certificates per site things have changed slightly in order to register certificates with IIS programmatically. In this post I show how to use PowerShell and the IIS WebAdministration snap in commands to create or import and register an SSL Certificate via ...
Importing the certificate locally. Let's get it working locally first. Within a powershell window, let's try a few commands. First off, let's load in our new certificate that we want to install. Assuming that we have a certificate in pfx format that is ready to be imported, let's install it into our certificate store:
This command allows you to specify the website name using the Name parameter, the binding information, and the binding property you'd like to change. In the example below, I'm changing the binding attribute for my Default Web Site from port 80 to port 81. Set-WebBinding -Name 'Default Web Site' -BindingInformation "*:80:" ‑PropertyName Port ...
In terms of creating the self-signed certificate that's it! You now have a valid self-signed certificate for your binding, created and trusted on your local machine. You can now manually add this certificate to your binding in IIS. I will continue to discuss how to add the certificate to IIS using Powershell commands below.
Pre-Requisites for running the below script: 1. We need IIS 8.X version installed on the WebServer along with the Centralized Certificate Store feature. 2. We need the Powershell to run the script. 3. Make sure that the Server Administrator has access to store and read the certificates from the Certificate Store location mentioned in the script ...
The steps for configuring Secure Sockets Layer (SSL) for a site are the same in IIS 7 and above and IIS 6.0, and include the following: Get an appropriate certificate. Create an HTTPS binding on a site. Test by making a request to the site. Optionally configure SSL options, that is, by making SSL a requirement.
There's actually a method on the binding object to add an SSL which seems to work better than both of the above options ... Issue when setting IIS binding certificate in Powershell. 0. How to add created certificate to an IIS https binding using PowerShell. 3. Powershell's AddSslCertificate() not working on IIS 10 (non-server) binding ...
To bind it to a website, navigate to your website in IIS and select bindings on the right hand side. You will need to add a new binding for Type: https, select your SSL certificate from the drop down which you labeled yourdomain.com or yourdomain.com-01. For hostname you will want to make it yourdomain.com.
Now, the SSL certificate I use, *.contoso.com, is expiring next week, so I got a new one, imported it and it is now available to IIS. To replace the certificate for each binding using the old one I now have to go to each site, go to bindings, select the :443 binding and set it to use the new certificate. Not a big issue with just one site, but ...
Open the IIS Manager. Select the server node, and in the middle pane, double-click on "Server Certificates.". In the Actions pane, click on "Create Certificate Request.". Complete the wizard, providing necessary details such as the common name, organization, and country. Choose a Cryptographic Service Provider and Bit Length.