
Free Online Microsoft Training
Free tips and tricks for using Microsoft Office and Windows

Add a SmartArt graphic in Word
- By Belinda Anderson
- 28 March 2023
- Updated: 22 January 2024
- No Comments

Being able to represent content in a graphical way can add immense meaning and visual appeal to any document. All the Microsoft 365 apps provide the ability to easily create a SmartArt graphic to provide a visual representation of information rather than the traditional numbered or bulleted list or other display options.
The SmartArt feature is not to be confused with the Charts feature as they do offer separate functions.
If you are interested in using SmartArt in PowerPoint , be sure to check out the post for that.
To insert a SmartArt graphic in a Word document, follow these steps:
- Open Microsoft Word and create a new blank document:
- Now let’s insert a SmartArt graphic
- Select the Insert tab and click the SmartArt button

- The Choose a SmartArt Graphic window will appear:

- You will see the various categories shown on the left side of the dialog box
- Scroll through the options to see what is possible, then select the List category and choose the Horizontal Picture List option then click OK .
- An empty SmartArt graphic will now be added to the page.
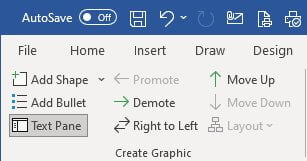
- You will now see you have two new tabs appearing on the Ribbon, the SmartArt Design and Format tabs. These are contextual tabs, so are only visible when you have the SmartArt graphic selected. Once you deselect or click off the SmartArt graphic, these tabs will disappear.
- Beside the SmartArt graphic you will see the Text Pane which allows you to add text into each shape:
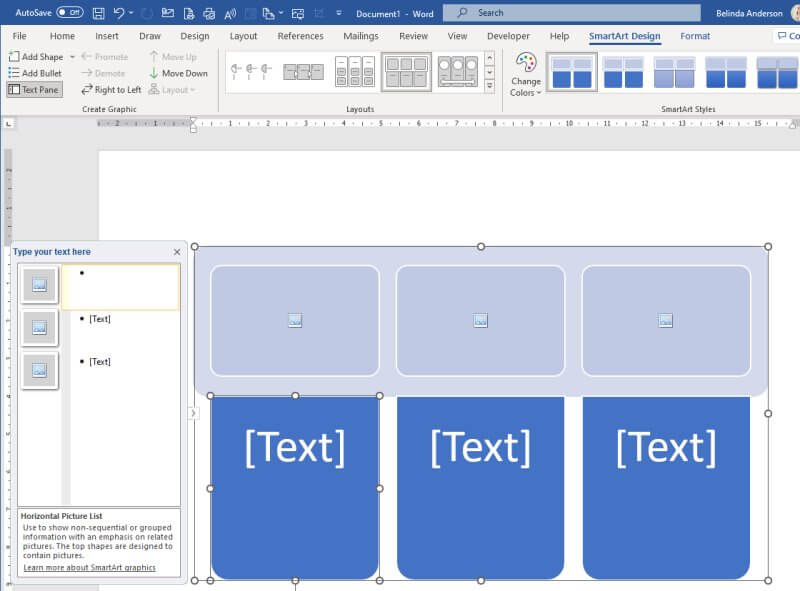
- Alternatively, you can type directly into the shapes rather than using the Text Pane
- Now click on the first bullet point in the Text Pane, this represents the first shape in the graphic
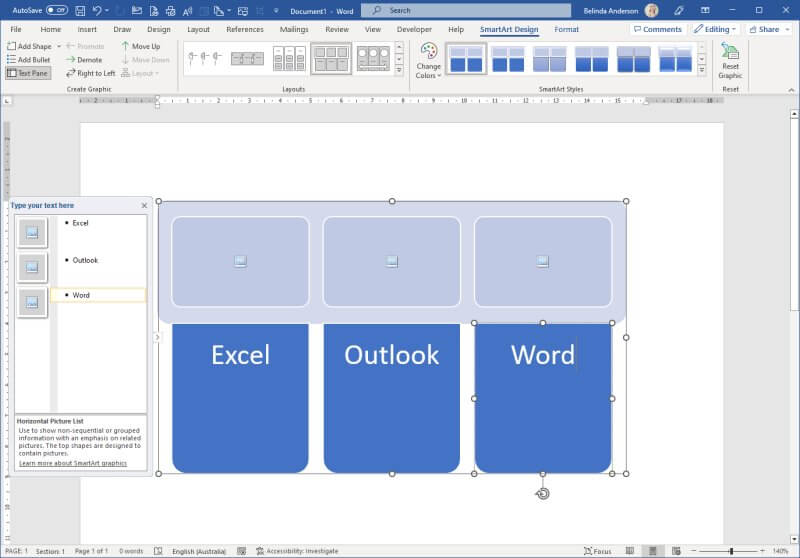
- Enter the text you wish to display, for my example, I am going to list some of the Microsoft apps
- Now click in the next bullet point and enter text for the next shape
- Repeat this process to add text for each shape displayed:
- Let’s say you want to add an extra shape, a 4th option:
- To add a new shape ensure that the bullet point for the last shape is selected in the Text Pane
- Press the Enter key to add a new shape.
- You will now see a new shape appear allowing you to add another option:

- Just like it creates a new bullet point in other Office products, here it will insert a new shape and allow you to add another item
Moving shapes around within the SmartArt graphic
Follow these steps f you need to change the position of the shapes within your graphic.
- Select the shape from the SmartArt graphic or select the item in the Task Pane list
- Select the SmartArt Design tab
- From the Create Graphic group, you will see buttons to Move Up and Move Down . Use these to change the position of the shape
- The shape will move as needed
Add sub items to a shape in SmartArt
A few of the different SmartArt graphics allow you to have sub items listed within the shapes. You can then add a main heading or title and have bullet points then displayed within the shape with additional information.
- Select a shape within the graphic
- Press the Enter key to add a new shape
- Now with the new shape still selected go to the SmartArt Design tab and click the Demote button

- This will demote the new shape back to be a sub item of the previous shape.
- Type in the text for the sub-item.
- Repeat the process for the other shapes to create sub-items.
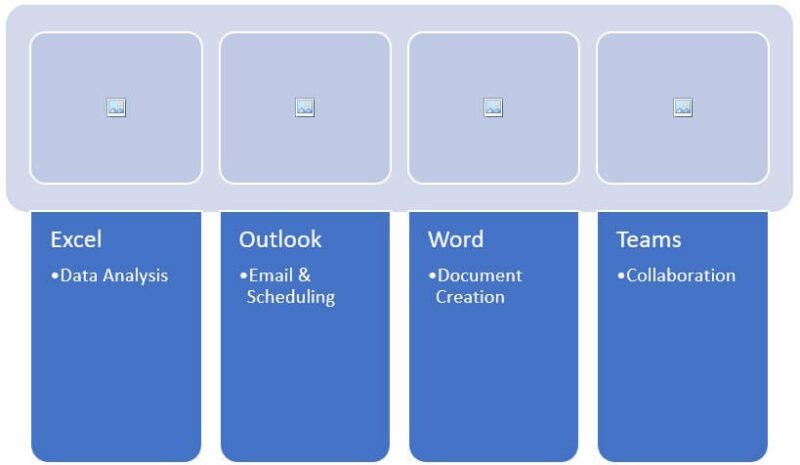
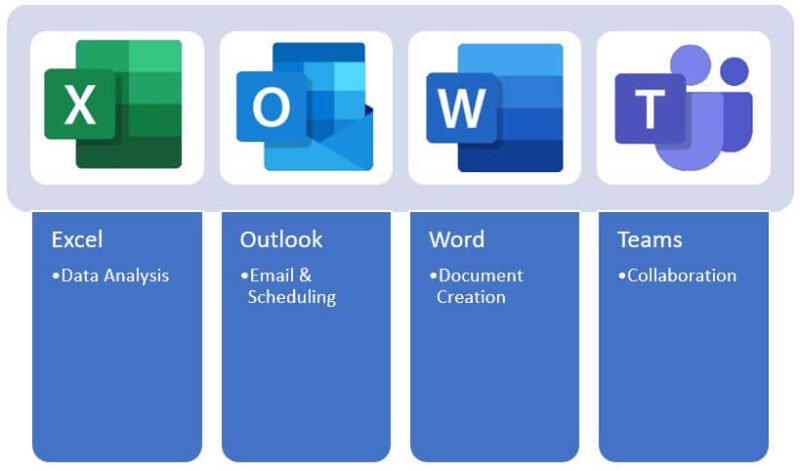
Add pictures to each shape in SmartArt
There are many SmartArt graphics available which allow you to easily incorporate a picture.
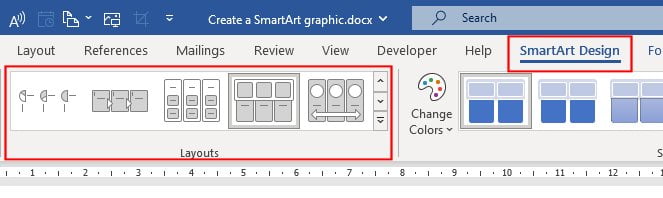
- Make sure the SmartArt layout you have chosen includes an option to add pictures.
- If not, change the layout through the SmartArt Design tab and select a new option from the Layouts gallery.
- Once you have a layout which incorporates pictures, click the first shape allowing a picture to be added, you will see the Picture icon displayed within the shape.

- The Insert Pictures window will appear allowing you to choose where you want to source the picture. I’m going to use an image I have saved to my computer, so I will use From a File .
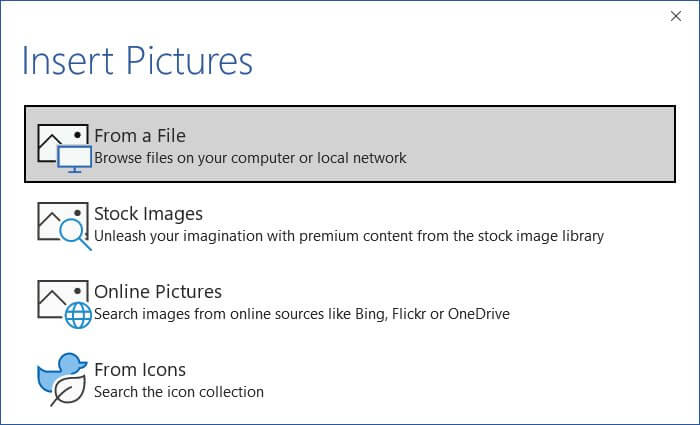
- Select the image from your computer, or from another source.
- The image will be displayed inside the shape.
- Repeat the process for any remaining shapes allowing pictures.
Change colour of shapes in SmartArt
When you add any SmartArt graphic to your document, it will use the theme from your document for the colour scheme, most likely to be blue for the default Office template. You will likely want to change the colour scheme to match your document or styling.
- Make sure the SmartArt graphic is selected
- Click the SmartArt Design tab
- Click the Change Colors button
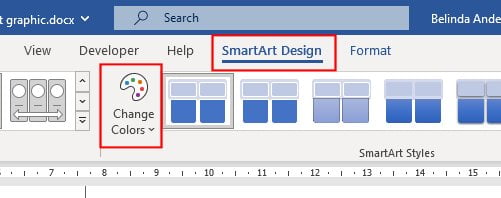
- Choose a different colour scheme from the preset options.
- Alternatively you may choose to change the colours to your own customised colour scheme.
- Select an individual shape so that you can see the white dots around the outside border
- Select the SmartArt Format tab
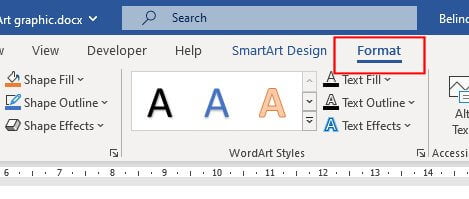
- Now use the Shape Fill button and choose a custom colour for the shape.

- Repeat the process for each remaining shape.
That’s a wrap
I hope this has helped you to start working with SmartArt graphics in Word. They are a really great way to provide a visual representation of your data rather than the standard bullet or numbered lists we see day to day. Be sure to check out my other articles covered more features of Microsoft Word .
- Chart , display , graphic , org chart , Smartart
- Microsoft Word
Leave a Reply Cancel reply
Your email address will not be published. Required fields are marked *
Please enter an answer in digits: two × 3 =
This site uses Akismet to reduce spam. Learn how your comment data is processed .
Recent Posts

- Microsoft Excel (37)
- Microsoft Forms (9)
- Microsoft OneNote (10)
- Microsoft Outlook (33)
- Microsoft PowerPoint (31)
- Microsoft Sway (8)
- Microsoft Teams (10)
- Microsoft Windows (23)
- Microsoft Word (31)

- Get started with computers
- Learn Microsoft Office
- Apply for a job
- Improve my work skills
- Design nice-looking docs
- Getting Started
- Smartphones & Tablets
- Typing Tutorial
- Online Learning
- Basic Internet Skills
- Online Safety
- Social Media
- Zoom Basics
- Google Docs
- Google Sheets
- Career Planning
- Resume Writing
- Cover Letters
- Job Search and Networking
- Business Communication
- Entrepreneurship 101
- Careers without College
- Job Hunt for Today
- 3D Printing
- Freelancing 101
- Personal Finance
- Sharing Economy
- Decision-Making
- Graphic Design
- Photography
- Image Editing
- Learning WordPress
- Language Learning
- Critical Thinking
- For Educators
- Translations
- Staff Picks
- English expand_more expand_less
Word 2013 - SmartArt Graphics
Word 2013 -, smartart graphics, word 2013 smartart graphics.

Word 2013: SmartArt Graphics
Lesson 28: smartart graphics.
/en/word2013/finalizing-and-protecting-documents/content/
Introduction
SmartArt allows you to communicate information with graphics instead of just using text. There are a variety of styles to choose from, which you can use to illustrate many different types of ideas.
To insert a SmartArt graphic:
- Place the insertion point in the document where you want the SmartArt graphic to appear.

To add text to a SmartArt graphic:

You can also add text by clicking on the desired shape and then typing. This works well if you only need to add text to a few shapes . However, for more complex SmartArt graphics, working in the task pane is often faster.
Changing the SmartArt organization
To add a shape:.

- Click the Add Shape command in the Graphics group. A drop-down menu will appear.

To promote or demote shapes:

You can also demote and promote shapes from within the task pane . With the insertion point in the task pane, press the Tab key to demote a shape. Press the Backspace key (or Shift+Tab ) to promote a shape. It's a lot like creating an outline with a multilevel list . For more information, you may want to review our Lists lesson.
To rearrange shapes on the same level:
- Select the SmartArt graphic, then click the Design tab.

Customizing SmartArt
After inserting SmartArt, there are several things you might want to change about its appearance. Whenever you select a SmartArt graphic, the Design and Format tabs will appear on the right side of the Ribbon. From there, it's easy to edit the style and layout of a SmartArt graphic.
To customize SmartArt

To change the SmartArt layout:
If you don't like the way your information is organized within a SmartArt graphic, you can always change its layout to better fit your content.
- Select the SmartArt graphic, then select the Design tab.

If the new layout is too different from the original, some of your text may not show up. Before deciding on a new layout, check carefully to make sure no important information will be lost.
- Create a new document.
- Insert a SmartArt graphic .
- Enter text into the graphic.
- Try promoting and demoting shapes between levels.
- Try moving shapes up and down on the same level .
- Change the color scheme .
- Change the SmartArt style .
/en/word2013/styles/content/
- Trending Now
- Foundational Courses
- Data Science
- Practice Problem
- Machine Learning
- System Design
- DevOps Tutorial
How to Insert SmartArt in Microsoft Word?
- How to Insert Page Breaks in Microsoft Word?
- How to Insert a Picture in Microsoft Word Document?
- How to Insert Shapes in MS Word?
- Insert WordArt in Microsoft Powerpoint
- How to Insert a Blank Page in MS Word?
- How to Insert Symbols and Special Characters in Microsoft Word?
- Insert Text in MS Word
- How to Add a Watermark in Microsoft Word?
- Change Text Font in Microsoft Word
- Introduction to Microsoft Word
- Save a Document in Microsoft Word
- How to Add a Page Border in Microsoft Word?
- Change Text Case in Microsoft Word
- Moving Text in Microsoft Word
- How to Double Underline a Text in Microsoft Word?
- Delete Text in Microsoft Word
- How to Make a Newspaper in Microsoft Word
- How To Use Speech To Text In Microsoft Word?
- How to Remove a Watermark in Microsoft Word?
Microsoft Word is a software tool that allows us to create document files like articles, office letters, project files, and many more in a very simplest and easy manner. MS Word makes our document more attractive as compared to paper or file work by providing different features like it has different sizes of pages, fonts, colors, design, bullets, tables, charts, page border/number, and many more.
It also provides various features like editing, texting, formatting, graphics designs, fonts color, and styles, inserting images, videos, printing documents, etc.
This MS Word software saves our article/letters in a form of a document and saves it on the computer forever. Whenever it is required it can be shared or can access the document.

Features of MS Word
- Images- MS Word provides the inserting of various images in our document.
- Videos- We can insert videos in our document
- Fonts Styles- It has a wide range of font styles for our text.
- Colors- It also has different types of colors to make our document more attractive.
- Page number and size- You can set the size of the page of your document
- WordArt- It provides various writing styles for our documents.
- Tables- Tables in MS Word are used to represent data in Tabular form
- Graph and Charts- These are used to represent statistical data
- Animations and Designs- MS Word allows the creation of Animations and designs as per user needs
- Page border/color- MS Word allows adding borders and colors to pages.
What is SmartArt in MS Word?
Microsoft Word has a special feature called SmartArt in which you can use different types of SmartArt graphics to convey your ideas and information to others. In simple words, SmartArt is a visual representation of your thoughts, communications, and ideas. SmartArt creates a virtual image in our minds so that we can correlate the topic very easily.
With the help of SmartArt graphics, you can create diagrams that can say so much more than words alone. You can choose different types of layouts such as lists, circles, blocks, pyramids, cycles, matrices, charts, Venn diagrams , etc.
Some examples of SmartArt are:

Steps to Add SmartArt to your document
Step 1: On the navigation menu select the insert option.

Step 2: Now click on the SmartArt option as shown in the figure:

Step 3: A SmartArt dialog box will open where you can choose different types of SmartArt graphics.

As you see on the left-hand side there is a list of topics for SmartArt.
Step 4: Select the SmartArt of your choice from the left side menu bar as shown in the figure:

Note: You can also select more SmartArt graphic structures from office.com.

There are 9 types of SmartArt:
- Relationship
Some SmartArt designs are:

Step 5: Now choose the structure of your SmartArt according to your requirement as shown in the figure:

Step 6: Next click on the OK option.

Step 7: A rough SmartArt structure is added to your current page. You have to modify or edit it with the help of text, designs, color, size, etc.

Step 8: Under the design section, select the change color option to change the color format of your SmartArt as shown in the figure(You can also change the color manually).

Step 9: Now click on the drop-down arrow to give the style to SmartArt.

Step 10: A menu will open where you can select the style.

Step 11: Now set the size of the SmartArt by simply just drag the button as shown in the figure:

Step 12: Select the left arrow to enter the text.

Step 13: A type your text here dialog box will open.

Step 14: Enter the text in the textbox.

Step 15: Now close the text box.

Step 16: On the navigation menu select the format option to change the background color of the SmartArt blocks.

Step 17: Click on the drop-down arrow and select the color from the color panel.

To make it more beautiful you can change the font style of the text, color, and many more.
Finally, SmartArt is added to the document.

These are some of the steps to insert or create SmartArt graphics in our document.
Please Login to comment...
Similar reads.

- School Learning
- School Programming
Improve your Coding Skills with Practice
What kind of Experience do you want to share?
laurenlaird.com
Learn How to Use SmartArt in MS Word
Are you looking for a way to make your Word documents more visual? Try adding SmartArt graphics for the perfect visual touch.

Use SmartArt in Word to communicate your idea with graphics. SmartArt comes with Microsoft Word. SmartArt can save you time when adding high-quality graphics and diagrams.
In this tutorial, I’ll show you how to add Word SmartArt to a template for some added visual interest.
What Is SmartArt in Word?
Microsoft Word SmartArt refers to the graphics that come with Microsoft Word. The SmartArt graphics can be used to represent information and ideas visually.
SmartArt in Word includes graphics like organization charts and Venn diagrams to show specific information. Other graphics can enhance information or lists. Besides MS Word, SmartArt graphics can be used in:

The template used in this tutorial will be the Company Profile Word Template . This template is a company profile that comes with 24 pages. It can be used in Adobe InDesign, Photoshop, and Microsoft Word. This template is A4 international paper size. It comes with picture placeholders, so you can easily add an image of your choice.
How to Use SmartArt in Word
In this tutorial, I’ll use Microsoft Word version 16.82 on macOS. If you’ve got a different operating system or a different version of the software, your results may be different.
Here’s how to use SmartArt in Word:
First, we’ll be editing page 11. I’ll edit this page to talk about the process of the services provided to the client. Graphics can draw the reader’s attention to your main point. Let’s get started:

Let’s get started on our Microsoft SmartArt changes:
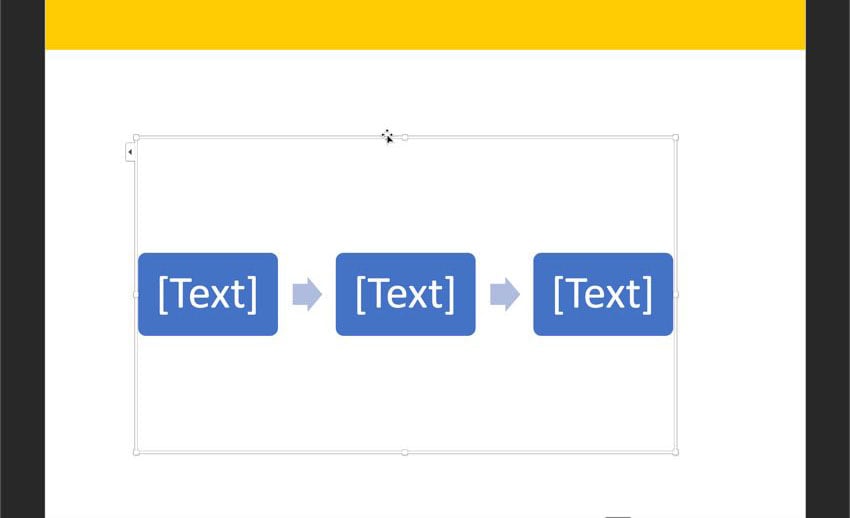
1. Insert a Graphic

First, make edits so that you can fit your SmartArt. The page above was cleared so that the SmartArt graphic could be added. Later, I’ll add more text.
Next, click on the Insert tab above the ribbon. Next, click the SmartArt button on the ribbon in the Illustration group.
2. Select a Category

When you click on the SmartArt button, you’ll see eight categories. Each category has many different graphics you’ll have access to once you select a category. The categories are:
- Relationship

For this tutorial, we’ll choose the Process option. Let’s choose the first Process option, Basic Process , from the Process menu.
3. Adjust the Graphic

Use the white box around the graphic to adjust or move the graphic. You can move the whole graphic when your mouse turns into the cross arrows. If you move the handles in the corner, you’ll adjust the size of the SmartArt graphic.
How To Add Text to the SmartArt Graphic
After adding a SmartArt graphic, you may want to add text to it. Text can help you explain or label what is going on in the graphic. Here’s what to do:
1. Use the Text Pane

Around your Microsoft Word SmartArt is a white box. Click on the arrow to the left. This opens the SmartArt Text panel.
In the panel, you see bullet points with text next to it. Each bullet point aligns with the SmartArt graphic box. So, the first bullet is the text for the first box in the graphic, the second bullet is the text for the second box, and so on.
2. Enter Text

To change the text in Word SmartArt, click the text in the first bullet point. Start typing your text, and it’ll appear in the first box of your SmartArt graphic. Repeat this step for all of the boxes.
How to Add or Delete Shapes
You can add or delete a shape once you’ve added your SmartArt graphic. Here’s how:
1. SmartArt Tools
Open the SmartArt Text box panel. Open this menu by clicking inside a box in your SmartArt graphic. At the top, you’ll see six icons. They are:
Click on an icon to change the order of your steps, remove a step, or add a step.
You can also add or delete a shape from the ribbon. First, click on your graphic. Then click on the SmartArt Design tab above the ribbon. You’ll see some new options to the left on the ribbon.
2. Add or Delete a Text Box

To add a new box to your graphic, press the green plus icon in the SmartArt Text panel. Or press the add shape icon on the ribbon (to the left) to add a shape to your SmartArt graphic in Word.
To delete a shape, click on the red minus button in the SmartArt Text panel.
How to Change the Colors
If you want to change the SmartArt Word graphic colors to match your document, you can. Here’s how:
1. Use the Design Tab

Click on your Microsoft Word SmartArt graphic so that the SmartArt Design tab shows. In the ribbon, you’ll see a Change Colors icon. Click on this icon.
When you click on the Change Colors icon, you’ll see a popup with several color options. Choose the color option that you want.
Final Product
Here’s what the template page looks like with the modified Microsoft SmartArt graphic on the page.

The Microsoft SmartArt graphic above was used to explain a process in this final product. But there are many SmartArt graphics that you could have used. Here’s another type of SmartArt graphic I created for a process showing Venn Diagrams:

Learn More About Microsoft Word
Do you want to learn more about Microsoft Word? If you do, then read these helpful articles:
Plus, don’t miss this article that’s full of Microsoft Word tips .
Microsoft Word Frequently Asked Questions (FAQ)
Want to learn more about Microsoft Word? Here are some common questions and answers:
1. How Do I Create an Outline in Microsoft Word?
Outlines are a great tool to help you sort your thoughts before you start writing. Microsoft Word has Outline View, which helps the user create an outline easily. For more information, read this article:
2. Can You Quickly Insert a Video in Word?
Yes, it’s easy to add a video into Word. Video can help you enhance your document by adding entertainment. You can add a video by adding the link or embedding the video into the document. To learn how to add a video to your Word document, read this tutorial:
3. How Do I Change the Language In Word?
If you want to change the language of Microsoft Word, you can. It can be helpful to use the software in your native language. There are a couple of ways you can change the language. To learn how, read this tutorial:
4. Is It Possible to Change the Default Font?
If you frequently use a font, it might be easier to set it as your default font. Fonts are important and can set the tone of your document. Here’s how to change the default font:
5. How Do I Check the Word Count on My Document?
If you have a word limit that you’re aiming for or want your document to be a certain number of words, then you need to check the word count. You can check the word count of your Word document in multiple ways. For a tutorial on how to check your word count, read this:
Envato Elements Is the Best Source for Microsoft Word Templates (With Unlimited Use)
Do you work in Microsoft Word often? If you create many Word documents, you could benefit from premium templates. Premium templates save you time because you start with a well-designed base. Then, all you need to do is add any text or images in the placeholders. a
If you’d like to add a personal touch to your template, you still can. A good premium template is easily customizable.
Find MS Word Templates

To gain unlimited access to premium templates, you need to pay a low monthly fee and become an Envato Elements subscriber. Once you become a subscriber, you can access tons of premium content, such as Microsoft Word templates , fonts, audio, stock images, and much more.

If you aren’t sure what digital assets would work for your project, then try the new AI search feature . It’s easy to use. All you have to do is add your project details in the search box and click search. Then, you’ll be directed to digital assets that will work for your project!
Download a Premium Microsoft Word Template Today!
In this tutorial, we’ve discussed “ What is SmartArt ” and explained how to use it to enhance a Word template.
If you use Microsoft Word for your projects, then try downloading a premium template today! Using a template will help you save time and make creating a professional final product easier.
So, take advantage of the great deal that is an Envato Elements subscription, where you get unlimited digital elements. Download a premium Microsoft Word template and sign up today!
Leave a Comment Cancel reply
Recent posts.
- How to Add Sun Rays in Photoshop
- 50+ Dog Logo Designs For Your Inspiration Graphic Design Junction
- How to Quickly Increase the Volume in Audacity to Make Your Audio Louder
- Inspiring Hand Lettering Typography Graphic Design Junction
- How to Create a Layered Text Effect in Affinity Designer
Recent Comments
- February 2024
- January 2024
- December 2023
- November 2023
- October 2023
- September 2023
- August 2023
- February 2023
- January 2023
- November 2022
- October 2022
- Entries feed
- Comments feed
- WordPress.org

Hansen's Link to Tech
Smart Art in Microsoft Word
Here is a great short instructional video by Microsoft on how to use Smart Art graphics to represent your ideas and illustrations.

- Create graphic organizers for your class.
- Have students create organizers for their classroom work.
- Create visual diagrams for the room.
- Create a flowchart for an in class discussion to solve a problem.
- Create a process chart for daily routines.
- Make a diagram for classroom rules and expectations.
Share this:

Published by
Eric hansen.
View all posts by Eric Hansen

- Already have a WordPress.com account? Log in now.
- Subscribe Subscribed
- Copy shortlink
- Report this content
- View post in Reader
- Manage subscriptions
- Collapse this bar

Teams Forum Top Contributors: EmilyS_726 ✅
May 10, 2024
Teams Forum Top Contributors:
EmilyS_726 ✅
Contribute to the Teams forum! Click here to learn more 💡
April 9, 2024
Contribute to the Teams forum!
Click here to learn more 💡
- Search the community and support articles
- Microsoft Teams
- Teams for education
- Search Community member
Ask a new question
Can you see edited changes made to an assignment after its handed in
I handed in the word document assignment before the due date but edited it without needed to unsubmit it. When my teacher goes to mark my assignment will she be able to see the changes I have made or will she only be able to see the what i wrote when i handed it in or can she see continuous changes i make to it.
- Subscribe to RSS feed
Report abuse
Reported content has been submitted
Replies (1)
- Microsoft Agent |
Dear Julia CE,
Thank you for reaching out to the Microsoft community. We are delighted to offer our assistance.
If you have made changes to your assignment after submitting it, your teacher will not be able to see those changes unless you resubmit the assignment. Once you resubmit the assignment, your teacher will be able to see the latest version of your assignment. However, if you did not resubmit the assignment, your teacher will only be able to see the version of the assignment that you submitted before the due date.
Have a nice day and keep safe.
Sean | Microsoft Community Moderator
Was this reply helpful? Yes No
Sorry this didn't help.
Great! Thanks for your feedback.
How satisfied are you with this reply?
Thanks for your feedback, it helps us improve the site.
Thanks for your feedback.
Question Info
- Assignments
- Edit or delete assignments
- Norsk Bokmål
- Ελληνικά
- Русский
- עברית
- العربية
- ไทย
- 한국어
- 中文(简体)
- 中文(繁體)
- 日本語
Choose a SmartArt graphic
Each SmartArt layout provides a different way to express your content and enhance your message. Some layouts simply add visual polish to a bulleted list, and other layouts (such as organization charts and Venn diagrams ) are designed to portray specific kinds of information.
Tip: Click the following headings for more information about each topic.
Things to consider when you choose a layout for your SmartArt graphic
Before you choose a layout for your SmartArt graphic, ask yourself what you want to convey and whether you want your information to appear a certain way. Since you can quickly and easily switch layouts, try different layouts (across types) until you find the one that best illustrates your message. A type is similar to a category that can help you quickly choose the appropriate layout for your information. Experiment with different types. The table below is not an exhaustive list, but can help you as a starting point.
Also consider the amount of text that you have, because the amount of text affects the look and the number of shapes that you need in a layout. Are there several main points with subpoints underneath them? Do the details carry more weight than the summary points, or vice versa? In general, SmartArt graphics are most effective when the number of shapes and the amount of text are limited to key points. Larger amounts of text can distract from the visual appeal of your SmartArt graphic and make it harder to convey your message visually. However, some layouts, such as the Trapezoid List layout in the List type, work well with larger amounts of text.
For each type of SmartArt graphic, many unique layouts are available. Some have picture placeholders. Some layouts are made up of separate shapes for each item of information, including subpoints. Other layouts combine subpoints with their summary points. Looking at the positioning of the summary information in relation to the details helps you get a sense of which pieces of information will draw the most attention from your audience. Make sure that the most important data is in the position of greatest attention.
Some layouts for SmartArt graphics contain a limited number of shapes. For example, the Counterbalance Arrows layout in the Relationship type is designed to show two opposing ideas or concepts. Only two shapes can contain text, and the layout cannot be changed to display more ideas or concepts. If you choose a layout with a limited number of shapes, you can tell what content will not appear in your SmartArt graphic because a red X (rather than a bullet point) will appear next to these items in the Text pane.
If you need to convey more than two ideas, switch to another SmartArt graphic layout that has more than two shapes for text, such as the Basic Pyramid layout in the Pyramid type. Keep in mind that changing layouts or types can alter the meaning of your information. For example, a layout with arrows pointing to the right, such as Basic Process in the Process type, has a different meaning from a SmartArt graphic with arrows going in a circle, such as Continuous Cycle in the Cycle type.
When you switch to a different SmartArt graphic layout, most of your text and other content, colors, styles, effects, and text formatting are automatically carried over to the new layout.
Or you can reevaluate your content to see if any of the information is less vital to your message. SmartArt graphics with fewer concepts and fewer words are often most effective.
If you cannot find the exact layout that you want, you can add and remove shapes in your SmartArt graphic to adjust the structure of the layout. For example, the Basic Process layout in the Process type appears with three shapes, but your process may need only two shapes, or it may need five shapes. As you add or remove shapes and edit your text, the arrangement of the shapes and the amount of text within those shapes is updated automatically — maintaining the original design and border of the layout for your SmartArt graphic.
When you select a new layout, placeholder text (such as [Text] ) appears. Placeholder text is not printed and does not appear during a PowerPoint presentation. You can replace the placeholder text with your own content. If you switch layouts with placeholder text appearing, you will see the placeholder text in the new layout. Note that the shapes always appear and are printed unless you delete them.
Also, consider the size of the space where you will place the SmartArt graphic. For example, if you have a tall, skinny space, choose a vertical layout like Staggered Process in the Process type, rather than a horizontal layout like Process Arrows in the Process type.
Some layouts have a fixed aspect ratio, so they might not take up the entire space. Aspect ratio refers to the ratio between width and height. For example, if you place the Grid Matrix layout in the Matrix type into a space that is wider than it is tall, the SmartArt graphic will not use all of the width blank space. To change the aspect ratio, you can change the layout of your slide or document, change the size of the space where you are placing the SmartArt graphic (thereby changing the look of the SmartArt graphic), or switch to a different SmartArt graphic layout with a different aspect ratio.
Layout types
The Choose a SmartArt Graphic gallery displays all available layouts broken into eleven different types — All , List , Process , Cycle , Hierarchy , Relationship , Matrix , Pyramid , Picture , Office.com , and Other . (The Office.com type shows additional layouts available on Office.com. The Other type appears only if you add custom SmartArt graphics and do not add them to one of the other types.) Descriptions that suggest what type of information is appropriate for a given layout appear under the larger image to one side of the Choose a SmartArt Graphic gallery.
Select a layout
- Which layout do you want to use?
- Relationship
All available layouts for SmartArt graphics appear in the All type.
When you choose a layout, keep the following in mind:
Layouts that contain arrows imply flow or progression in a certain direction.
Layouts that contain connecting lines instead of arrows imply connections, but not necessarily flow or progression.
Layouts that do not contain connecting lines or arrows show a collection of objects or ideas with no strong relationship to one another.
If you want bulleted text to stand out, you can easily transfer text to shapes that you can color, give dimension to, and emphasize with visual effects or animation. By using a layout in the List type, your main points gain visibility and impact in colorful shapes that emphasize their importance. List layouts group information that does not follow a step-by-step or sequential process. Unlike Process layouts, List layouts usually do not have arrows or a directional flow.
As the example below illustrates, a bulleted list can be much more dramatic when you convert it to a SmartArt graphic.
Some List layouts include picture shapes so that you can accent your text with a small picture or drawing. Although picture placeholder shapes are designed to display pictures, you can add a picture as fill to any shape.
Tip: Instead of putting large amounts of text into a SmartArt graphic, put only the main points into the SmartArt graphic, and then have another slide or document that expounds on your main points.
Unlike List layouts, layouts in the Process type usually have a directional flow and are used to illustrate steps or stages in a process or workflow, such as sequential steps for completing a task, general phases in the development of a product, or a timeline or schedule. Use Process layouts when you want to show how steps or phases follow one another to produce a result. Process layouts are available showing a process in vertical steps, horizontal steps, or a bending combination.
You can also use Process layouts to show major dates in a production schedule or a timeline with milestone markers.
Another layout that works well for showing dates or numbered steps is the Process Arrows layout. You can place numbers or dates in the primary shapes (circles) and text for the steps in the accompanying arrow shapes.
Note: To create a flow chart, use a layout such as Vertical Bending Process , and then substitute different shapes for the flow chart shapes.
Although you can use a Process layout to communicate step-by-step information, a layout in the Cycle type usually illustrates a circular or repetitive process. You can use Cycle layouts to show product or animal life cycles, teaching cycles, repeated or ongoing processes (such as a continuous writing and publishing cycle for a Web site), or an employee's annual goal-setting and performance review cycle.
Learn more: Cycle type SmartArt graphic descriptions
Perhaps the most common usage for layouts in the Hierarchy type is a company organization chart. But Hierarchy layouts can also be used to show decision trees, family trees, or a family of products.
Note: If you want to create an organization chart, use the Organization Chart layout, the Name and Title Organization layout, or Picture Organization Chart layout. When you use these layouts, additional functionality, such as the assistant shape and the hanging layouts, becomes available. You can learn more about creating organization charts by reading Create an organization chart .

Learn more: Hierarchy type SmartArt graphic descriptions
Layouts in the Relationship type show nonprogressive, nonhierarchical relationships between parts (such as interlocking or overlapping concepts) and typically depict conceptual relationships or connections between two or more sets of things. Good examples of Relationship layouts are Venn diagrams, which show how areas or concepts overlap and come together at a center intersection; target layouts, which show containment; and radial layouts, which show relationships to a central core or concept. You can learn more about creating Venn diagrams by reading Create a Venn diagram .
Radial layouts can also be used to show parts coming together to form one main or central idea.
Learn more: Relationship type SmartArt graphic descriptions
Layouts in the Matrix type usually classify information and are two-dimensional. They are used to show the relationship of parts to a whole or to a central concept. Matrix layouts are a good choice if you have four or fewer key points and large amounts of text.
Learn more: Matrix type SmartArt graphic descriptions
Layouts in the Pyramid type show proportional or hierarchical relationships that typically build upward. They work best with information that you want to show from top to bottom or from bottom up. If you want to show a horizontal hierarchy, you should choose a Hierarchy layout.
You can also use Pyramid layouts to convey conceptual information, such as the Pyramid List layout that allows you to type text in shapes outside of the pyramid.
Learn more: Pyramid type SmartArt graphic descriptions
Layouts in the Picture type are used when you want a picture to convey your message with or without explanatory text or you want to use pictures to complement a list or process.
Learn more: Picture type SmartArt graphic descriptions
Additional layouts available from Office.com are shown in the Office.com type. This type will be periodically updated with new layouts.
Learn more: Office.com type SmartArt graphic descriptions
This type can be used for custom SmartArt graphics that do not fit into any of the types described above.
Working with SmartArt
After you've chosen the SmartArt graphic that's right for you, you can edit and customize it to further meet your needs. See the following articles to learn more about working with the SmartArt graphics that you create:
Animate a SmartArt graphic
Add alternative text to a shape, picture, chart, SmartArt graphic, or other object

Need more help?
Want more options.
Explore subscription benefits, browse training courses, learn how to secure your device, and more.

Microsoft 365 subscription benefits

Microsoft 365 training

Microsoft security

Accessibility center
Communities help you ask and answer questions, give feedback, and hear from experts with rich knowledge.

Ask the Microsoft Community

Microsoft Tech Community

Windows Insiders
Microsoft 365 Insiders
Was this information helpful?
Thank you for your feedback.
IMAGES
VIDEO
COMMENTS
On the Insert tab, in the Illustrations group, click SmartArt. In the Choose a SmartArt Graphic dialog box, click the type and layout that you want. Enter your text by doing one of the following: Click [Text] in the Text pane, and then type your text. Copy text from another location or program, click [Text] in the Text pane, and then paste your ...
To insert a SmartArt graphic: Place the insertion point in the document where you want the SmartArt graphic to appear. From the Insert tab, select the SmartArt command in the Illustrations group. A dialog box will appear. Select a category on the left, choose the desired SmartArt graphic, then click OK. The SmartArt graphic will appear in your ...
Select the SmartArt. Select the SmartArt Tools > Design tab. Hover over the Layouts to preview them, and select the one you want. Select Change Colors, hover over the options to preview them, and select the one you want. Hover over the SmartArt Styles to preview them, and select the one you want.
To insert a SmartArt graphic in a Word document, follow these steps: Open Microsoft Word and create a new blank document: Now let's insert a SmartArt graphic. Select the Insert tab and click the SmartArt button. The Choose a SmartArt Graphic window will appear: You will see the various categories shown on the left side of the dialog box.
This Microsoft Word 2016 tutorial shows you how to insert and format a SmartArt Graphic. I also cover how to insert a YouTube video in your Word documents. F...
Learn EVERYTHING about Microsoft Word SmartArt in this advanced tutorial deep dive. From SmartArt setup to full control of each element. We cover it all!Po...
Place the insertion point in the document where you want the SmartArt graphic to appear. From the Insert tab, select the SmartArt command in the Illustrations group. Clicking the SmartArt command. A dialog box will appear. Select a category on the left, choose the desired SmartArt graphic, then click OK.
If you want to change the SmartArt Word graphic colors to match your document, you can. Here's how: 1. Use the Design Tab. To change the colors, click on the Design tab. Click on your Microsoft Word SmartArt graphic so that the SmartArt Design tab shows. In the ribbon, you'll see a Change Colors icon.
Steps to Add SmartArt to your document. Step 1: On the navigation menu select the insert option. Step 2: Now click on the SmartArt option as shown in the figure: Step 3: A SmartArt dialog box will open where you can choose different types of SmartArt graphics. As you see on the left-hand side there is a list of topics for SmartArt.
1. Use the Design Tab. To change the colors, click on the Design tab. Click on your Microsoft Word SmartArt graphic so that the SmartArt Design tab shows. In the ribbon, you'll see a Change Colors icon. Click on this icon. When you click on the Change Colors icon, you'll see a popup with several color options.
Click on the first option provided. Step 2: Click on "Insert" tab located at the top left corner of the "Word" window. After clicking, a ribbon toolbar will appear providing numerous options like paging options, tables, illustrations, symbols etc. In the "illustrations" section, click on "Smart Art". Step 3:
This video will help you to make SmartArt/ diagrams and graphics to make your assignment more impressive. The diagrams in the assignment will no longer be a ...
SMARTART. SmartArt refers to the range of graphics available in Word that you can use to create diagrams, such as flow charts, process charts, organisation charts, and the like. Select a SmartArt graphic from the gallery and then customise it to suit your needs. SmartArt helps you to create professional-looking diagrams in minutes.
Using Smart Art can offer a simple but yet visual way to convey this information. Here are a few ideas. Create graphic organizers for your class. Have students create organizers for their classroom work. Create visual diagrams for the room. Create a flowchart for an in class discussion to solve a problem. Create a process chart for daily routines.
PRACTICAL- Type this paragraph &checks the spelling &grammer using spelling &grammar tool. Microsoft Word is a word processor developed by Microsoft. It was first released in 1983 under the name Multi-Tool Word for Xenix systems. MS Word is a popular word-processing program used primarily for creating documents such as letters ...
As a test, press ESC. If a shape within the smart art is selected, ESC releases that and selects the smart art object itself (and the the align features should now be enabled). If pressing ESC leaves nothing selected (ie, the gray selection rectangle around the smart art goes away) then you had the smart art correctly selected in the first ...
A beginner tutorial for Word SmartArt. Bring visual style to your documents and email by learning how to build SmartArt from the ground up. Learn the concep...
A SmartArt graphic is a visual representation of your information and ideas. You create one by choosing a layout that fits your message. Some layouts (such as organization charts and Venn diagrams) portray specific kinds of information, while others simply enhance the appearance of a bulleted list. Combined with other features such as themes ...
We are delighted to offer our assistance. If you have made changes to your assignment after submitting it, your teacher will not be able to see those changes unless you resubmit the assignment. Once you resubmit the assignment, your teacher will be able to see the latest version of your assignment. However, if you did not resubmit the ...
There are 7 modules in this course. This course is intended for learners with some experience using Microsoft Windows, who are seeking to build presentation skills with Microsoft Word. To be successful in this course you should have an understanding of the basics of using a Windows-based computer. Experience with printing and using a web ...
Welcome to Computer Gyan,Smart Art is one of the important toolbar of Microsoft word, which gives you many options related to graphical designs. In SmartArt ...
Join us at 6 PM (WAT) this Thursday May 9, 2024, as our distinguish guest will be discussing the topic: GEN-Z ACCOUNTANTS: Redefining Traditional...
Use to show sequential steps in a process. Works best with small amounts of Level 1 text and medium amounts of Level 2 text. Picture Frame. Use to show pictures and the corresponding Level 1 text, both displayed in an offset frame. Works best with Level 1 text only. Radial Picture List.
Each SmartArt layout provides a different way to express your content and enhance your message. Some layouts simply add visual polish to a bulleted list, and other layouts (such as organization charts and Venn diagrams) are designed to portray specific kinds of information. Tip: Click the following headings for more information about each topic.